Adorable Thanksgiving Salad with Butternut Squash “Turkey”
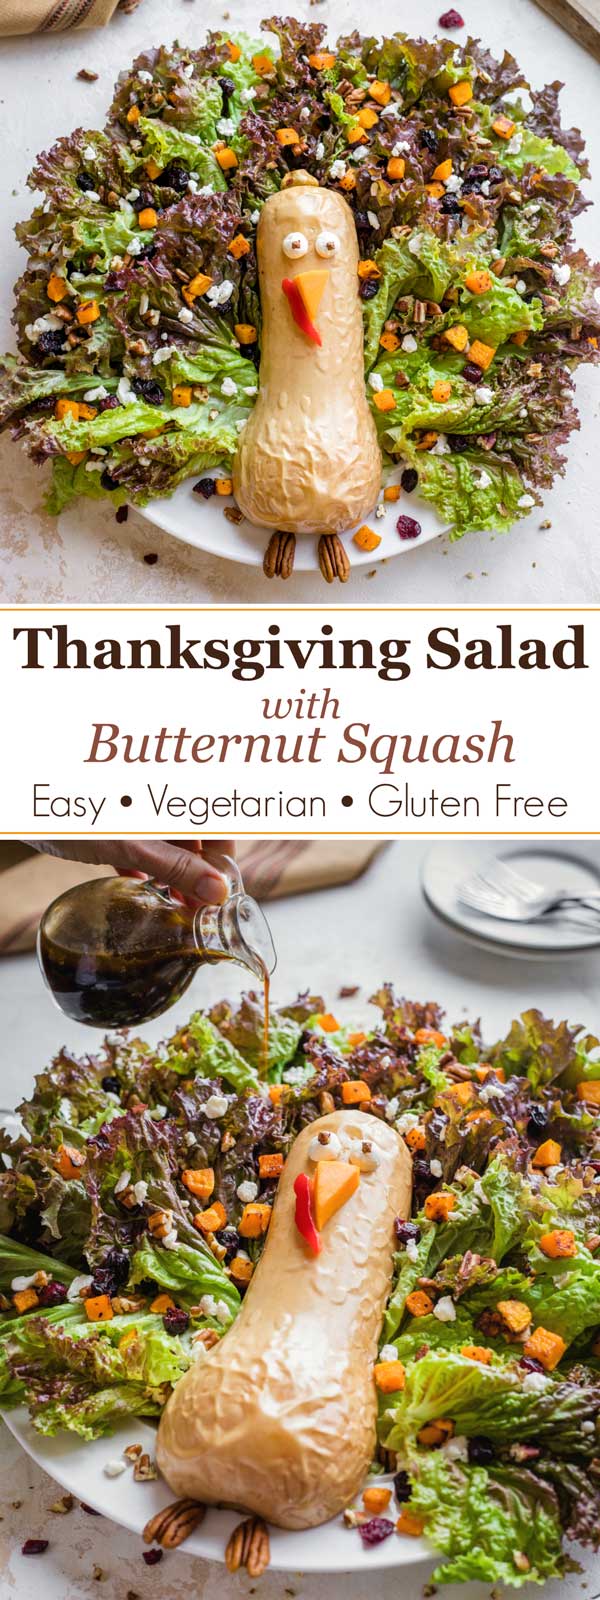
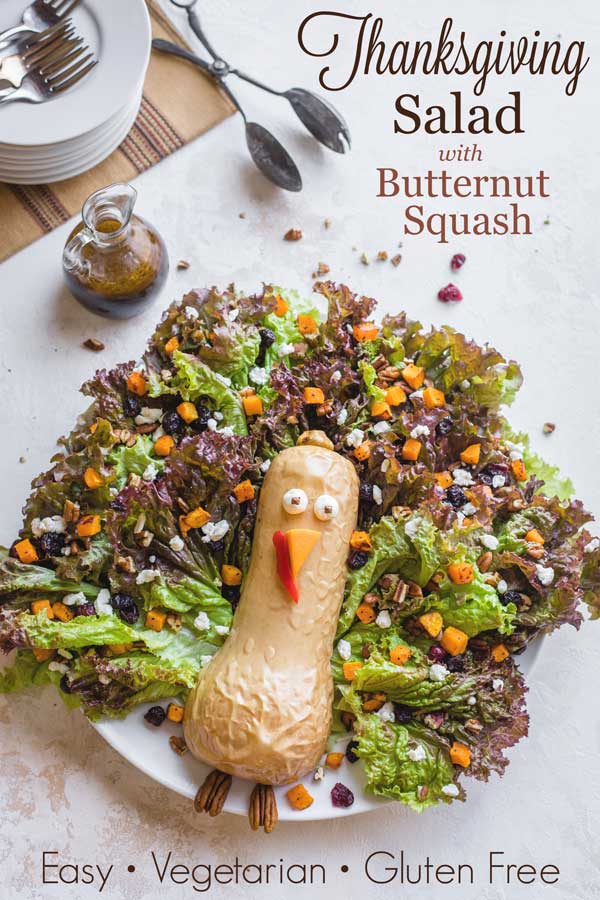
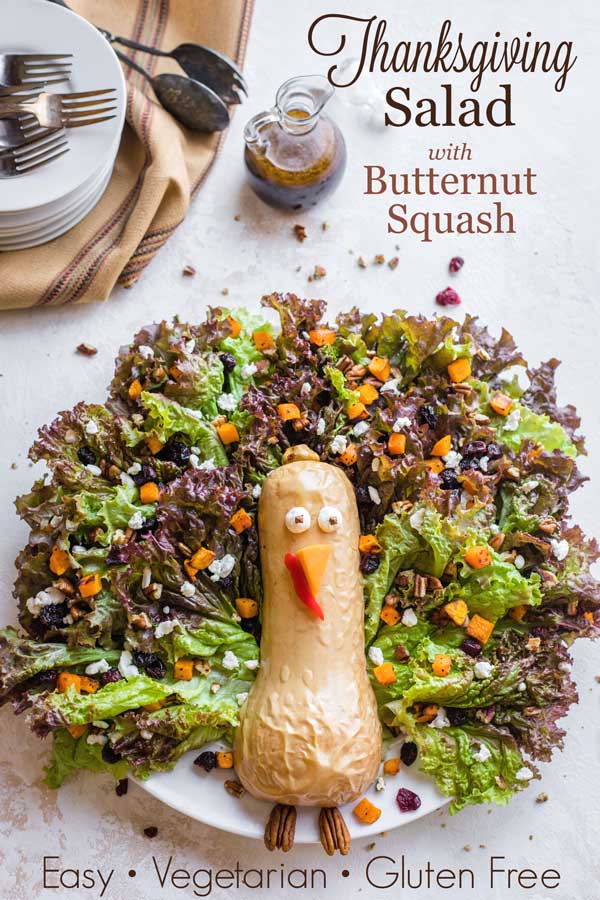
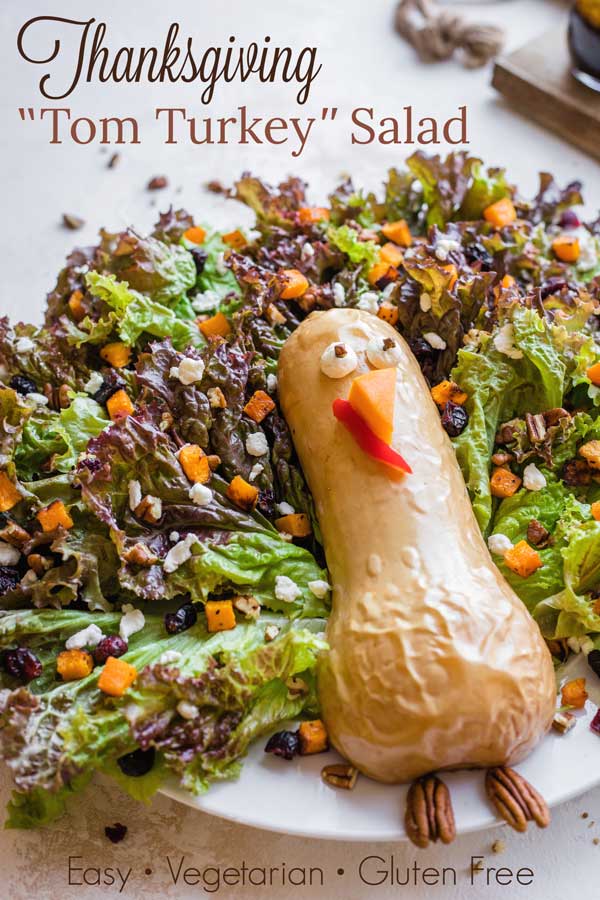
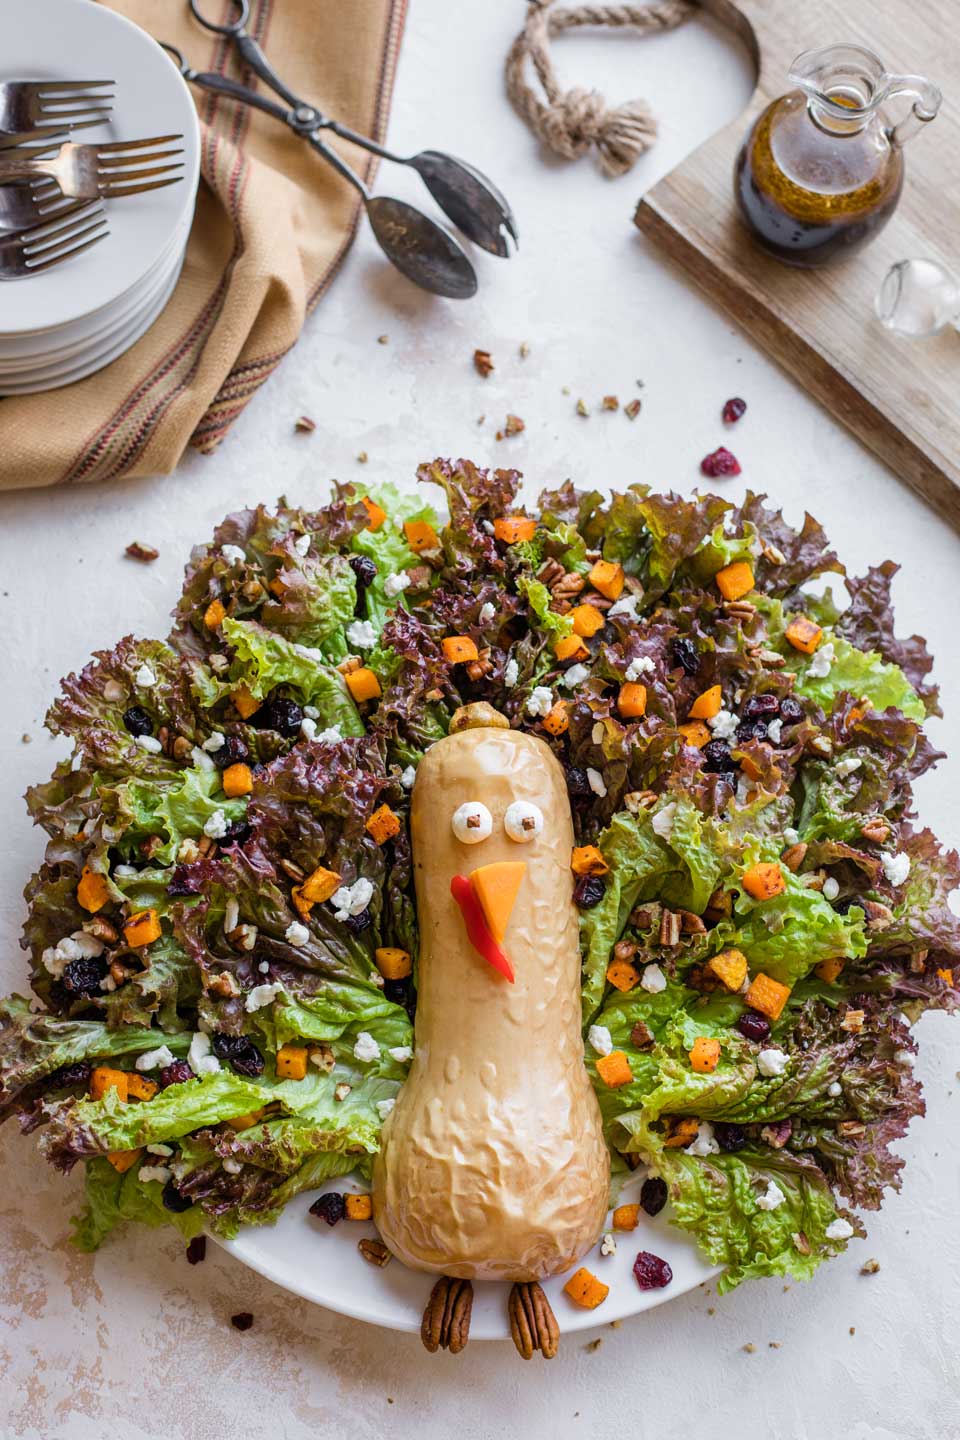
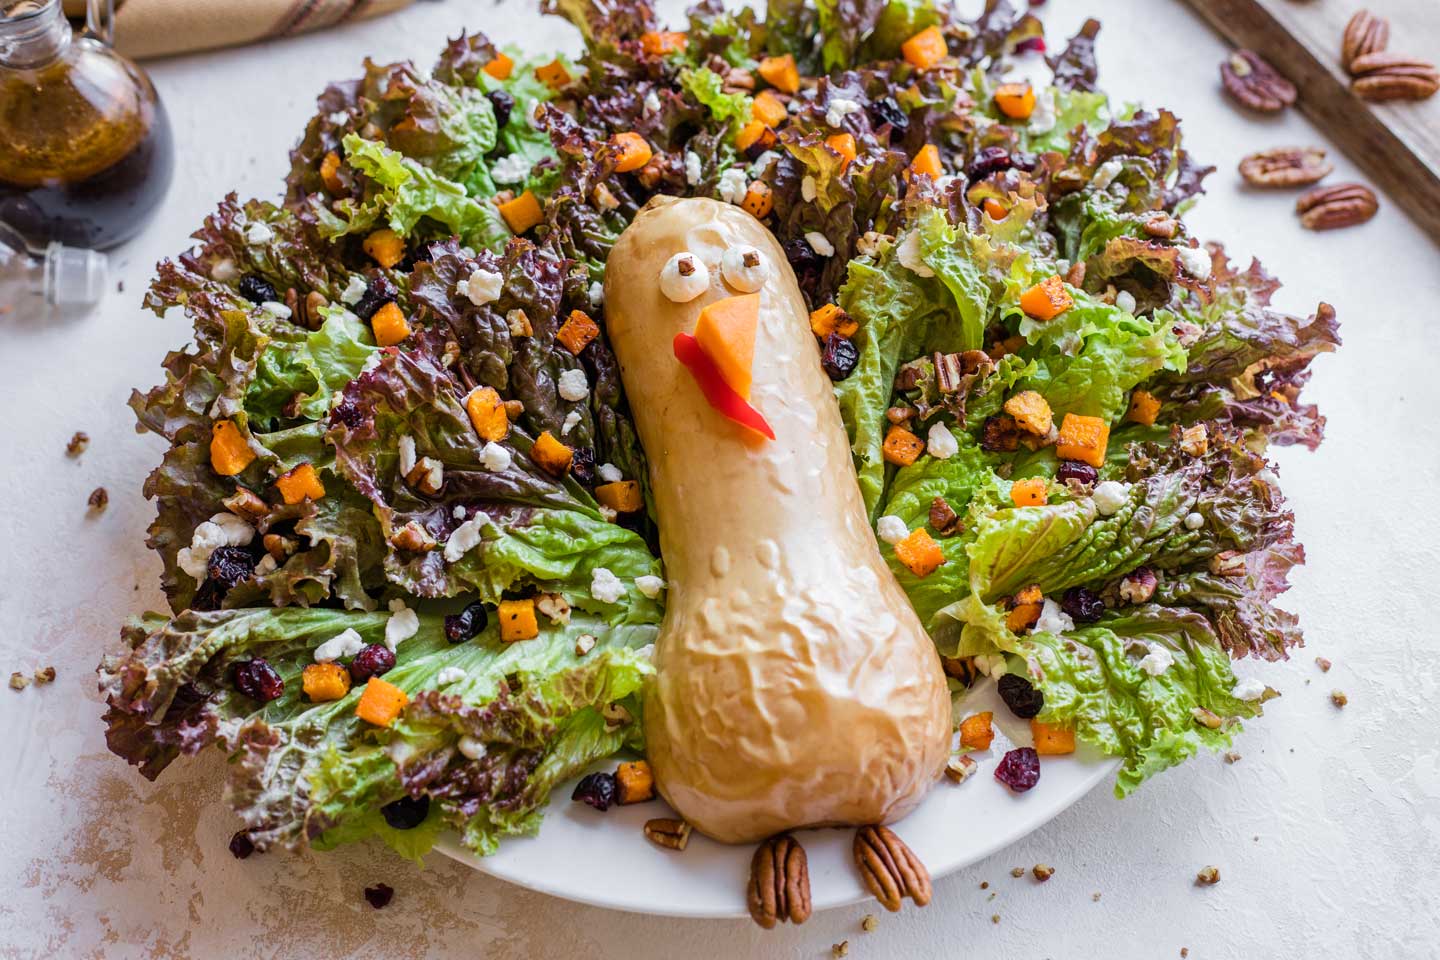
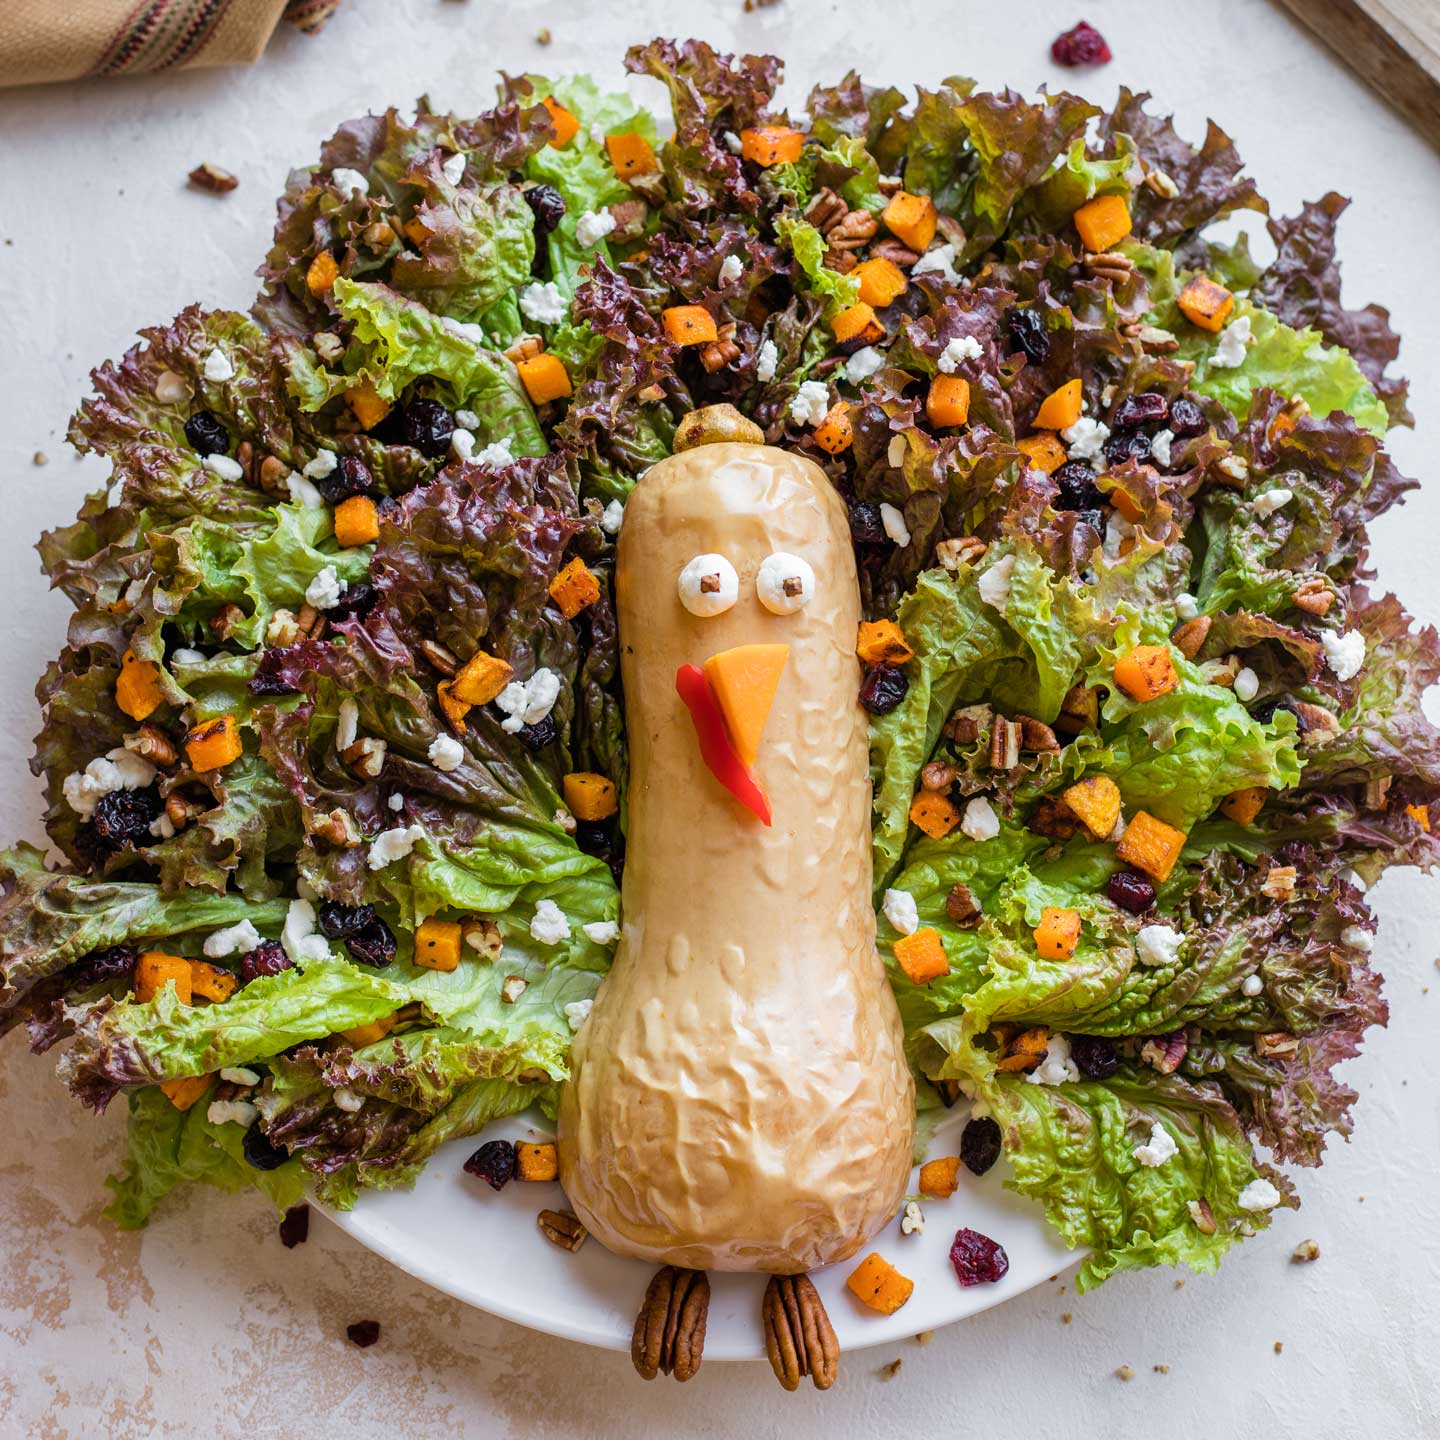
~ This “Tom Turkey” Thanksgiving Salad with Butternut Squash is adorable, delicious, and surprisingly easy! It features classic Thanksgiving flavors like roasted butternut squash, goat cheese, cranberries and pecans … all drizzled in an amazing Maple-Balsamic Dressing! Make this showstopper as an edible centerpiece for your Thanksgiving dinner celebration! ~
This Recipe: • Includes Make-Ahead Steps • Vegetarian • Gluten Free (see note) •
When it comes to holiday meals, I always love having at least one dish that is absolutely, unmistakably festive. One that screams HOLIDAY! (In capital letters, no doubt.) One that is so darned cute that it does double-duty as a centerpiece and is almost (almost) too pretty to eat.
For Thanksgiving, this is the one.
When your guests arrive, this will be the showstopper of the day. (Apologies to the real turkey, roasting away in the oven – this ain’t your year, friend).
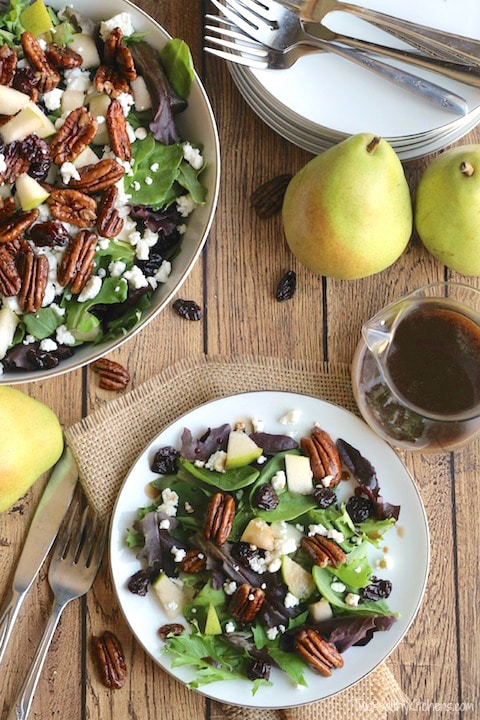
Honestly, I actually already have several terrific salads here on my site with scrumptious autumn flavors that are 100% spot-on for Thanksgiving. (Like my Salad with Goat Cheese and Pears, and my Spinach Salad with Apple, and even my Superfoods Brussels Sprout Salad.) But none of them was this cute. Or this fun. This full-on HOLIDAY!
So, a turkey-shaped Thanksgiving Salad eventually had to happen.
It’s not just a looker, though! It’s still loaded with Thanksgiving-appropriate, autumn flavors:
- Roasty-toasty butternut squash
- Sweet-tart dried cranberries
- Crunchy pecans
- Tangy goat cheese
- A lick-your-plate-delicious Maple-Balsamic Dressing
Sounds soooo good, right?!?! (Trust me: It IS!)
And that butternut squash just begged to be made into a cute turkey body. So obvious … why hand’t I thought of it before?!?!
Boom! The perfect creation: an incredibly delicious Thanksgiving salad recipe full of autumn flavors, that’s also adorable enough to be a table decoration. (Until … you know … it’s time to eat that adorable fellow, at which point you’ll be too busy making mmmmmmm yummy noises to worry about the fact that you and your guests just ate your centerpiece!)
Oh – and you might be thinking it looks tricky to make. Spoiler alert: It’s definitely NOT. Yeah, at first glance, you see a lot of steps and instructions. But that’s because I tried to totally break it all down for you, like an art project, so you can see 100% step-by-step how to make this. No kidding … this is truly easy-peasy!
Let’s get started!
Picking the Right Butternut Squash to Become an Adorable Turkey
I’ve shopped for enough butternut squashes in my day to know that they come in a surprisingly huge array of shapes and sizes. And, you just can’t always count on exactly what shapes or what sizes your store will happen to have the day you need one that looks precisely like a Thanksgiving turkey.
But this is an edible art project, right? So you can get a little creative with your squash-turkey-body. No problem!
Basically, you ideally want a butternut squash that’s got that typical bulbous base, and then a skinnier, long neck. And, for this butternut squash salad, you’re preferably shooting for a squash that’s about 2 1/2 pounds (give or take).
Pick whichever squash seems to most closely fit your idealized turkey, and work with what you’ve got.
The roasting steps can be easily adjusted for a smaller or larger squash. You’re simply roasting the butternut squash with a little extra virgin olive oil, salt and pepper – so you can easily scale those ingredients up or down slightly as needed. And you can roast that squash-turkey-body for a little more or less time depending on its size. Just check on your squash early and often as it’s roasting merrily along, to get it to just the doneness you want.
Oh! And if your squash is a big boy that yields way more cubes that you want on your salad – just serve them on the side or save them as a little snack for yourself the next day.
This is art! No two squash-turkeys will be quite alike, but they’ll all be yummy and adorable!
Once you get your lovingly selected turkey-perfect squash home, here’s what you do …
How to Roast Butternut Squash
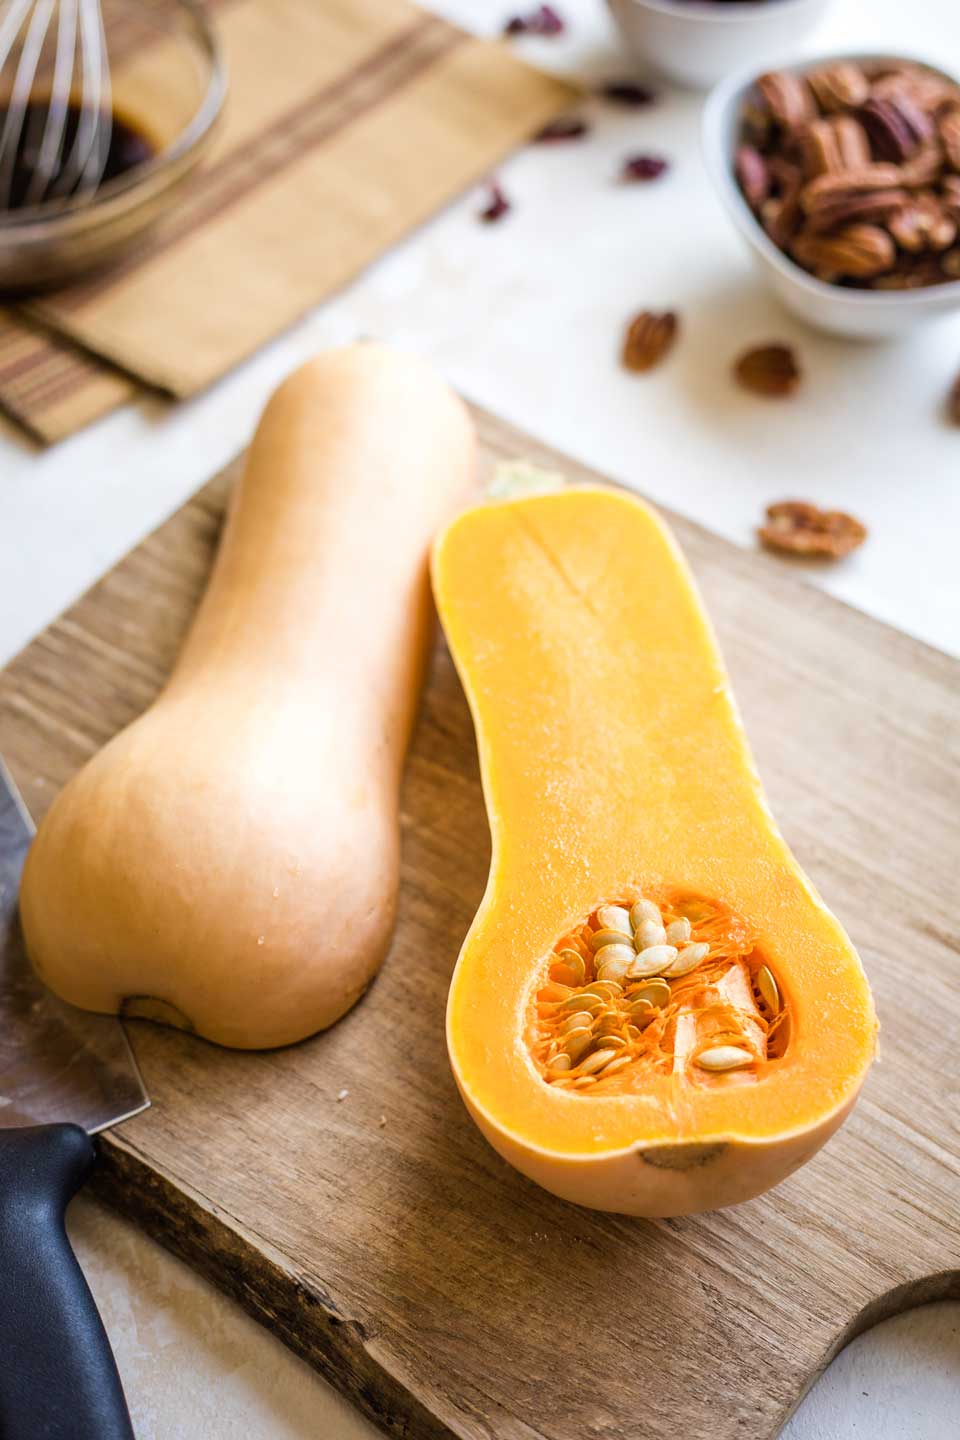
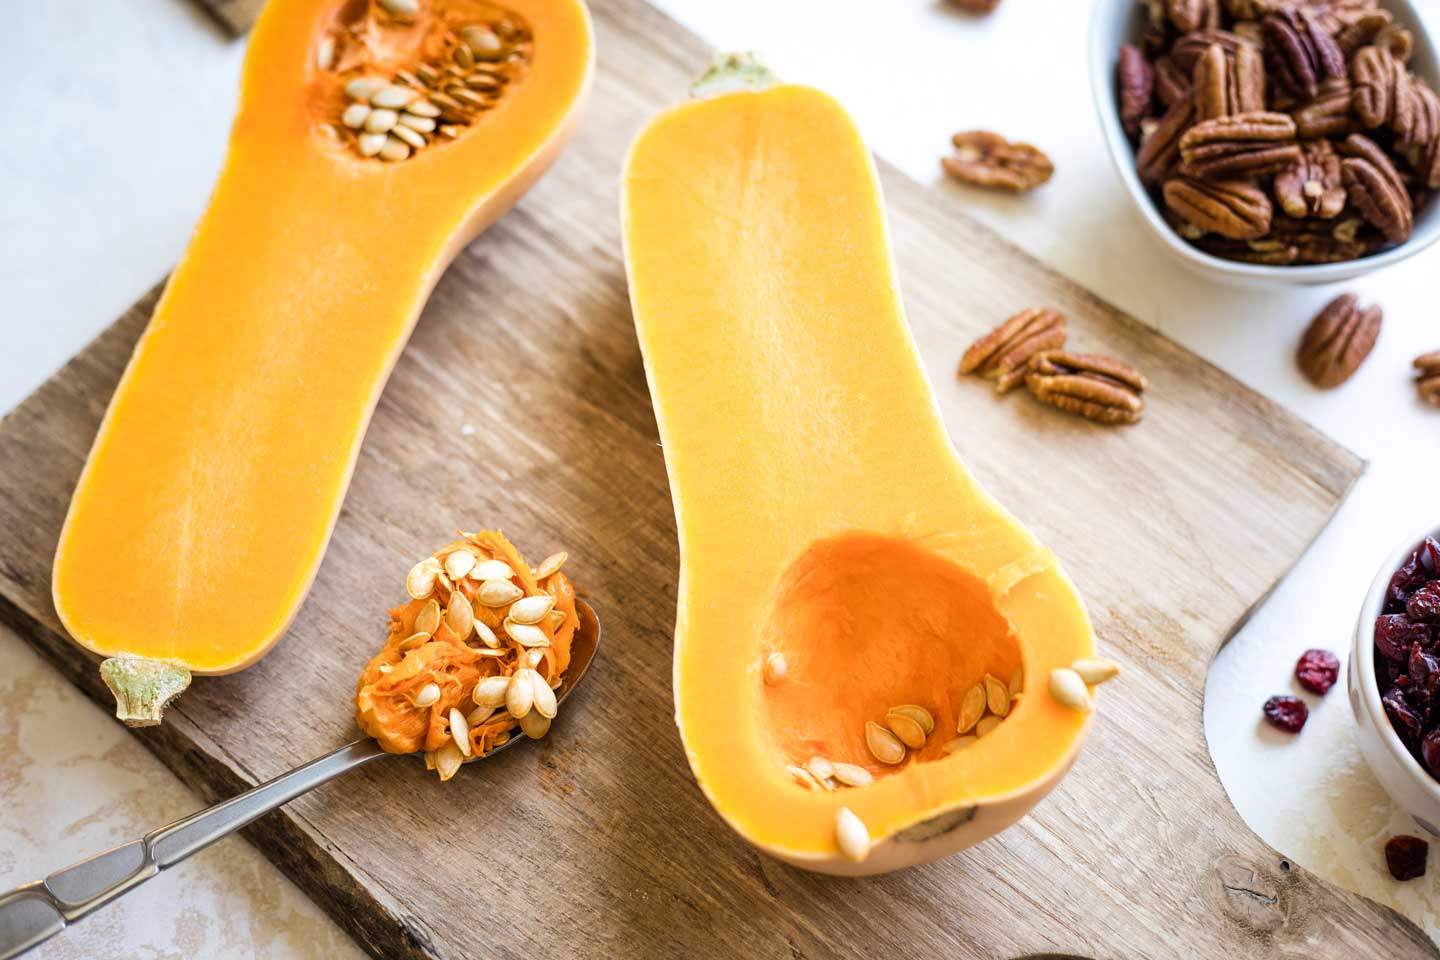
Step 1 – Slice your squash in half vertically, from the stem to the bottom. And be careful with that giant knife! (Psssst … this 8″ chef’s knife is my all-time favorite knife, but a 10″ can be a good bet for really big jobs like slicing a large squash.)
Step 2 – Scoop the seeds out of both squash halves and discard them (or better yet … roast them!)
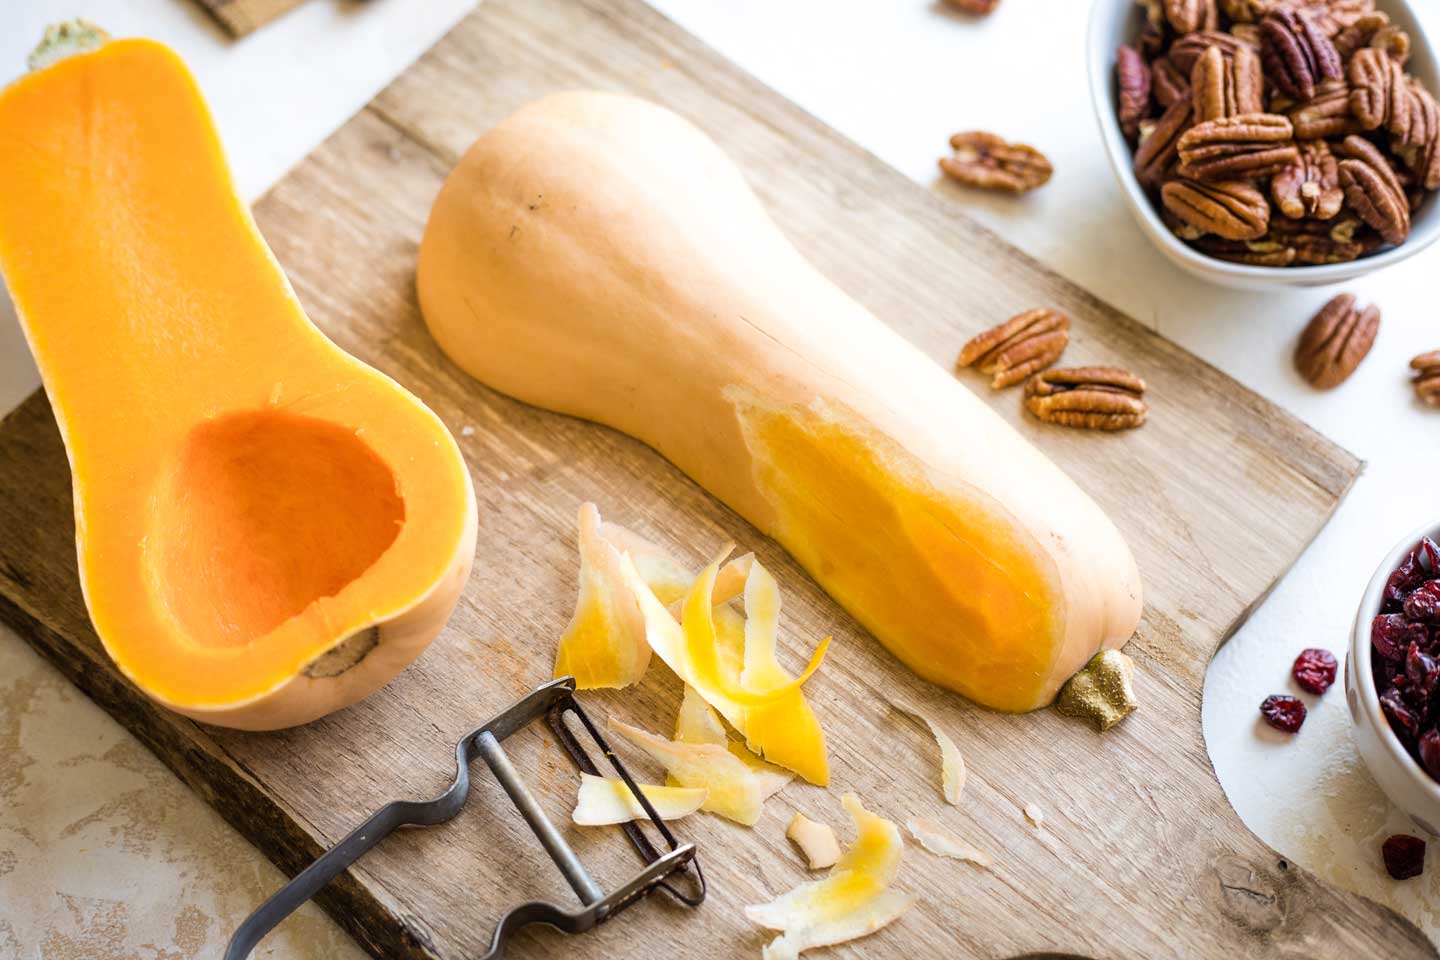
Step 3 – Peel ONLY 1 of the halves. Don’t peel the other half – the unpeeled half will become your turkey’s body.
It’s totally up to you if you want to use the stem as part of your turkey (like we did in our photos), or not. Snap or carefully cut it off if you would prefer not to use it.
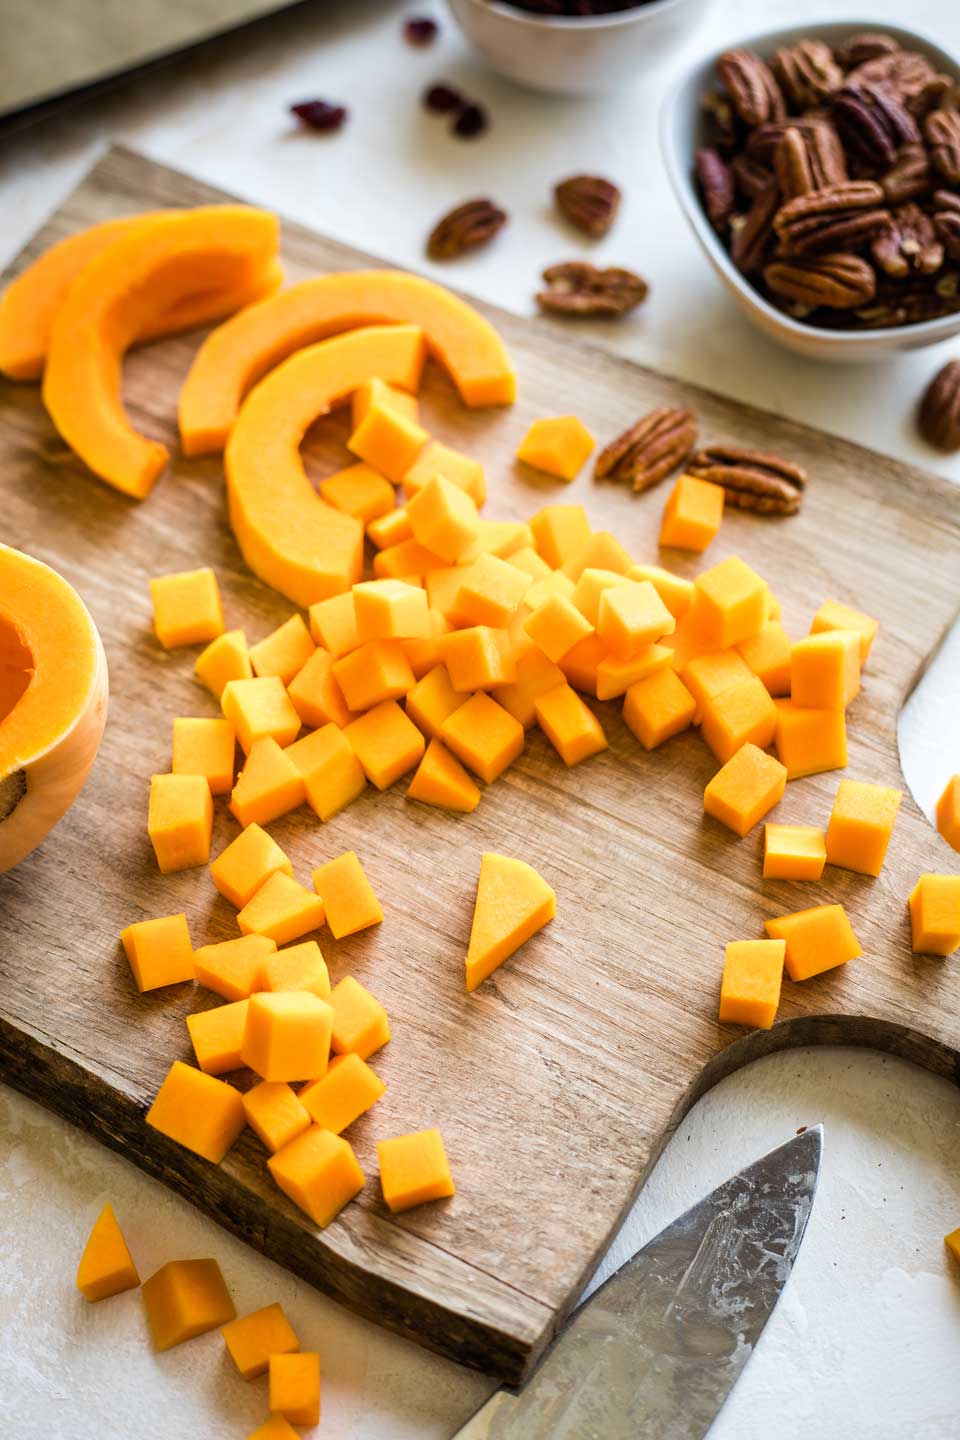
Step 4 – Cut the peeled half of your butternut squash into 1/2″ cubes, to equal roughly 2 1/2 – 3 cups.
Super Important: Be sure to also cut one triangluar-shaped piece of squash to save aside for your turkey’s beak (gobble, gobble).
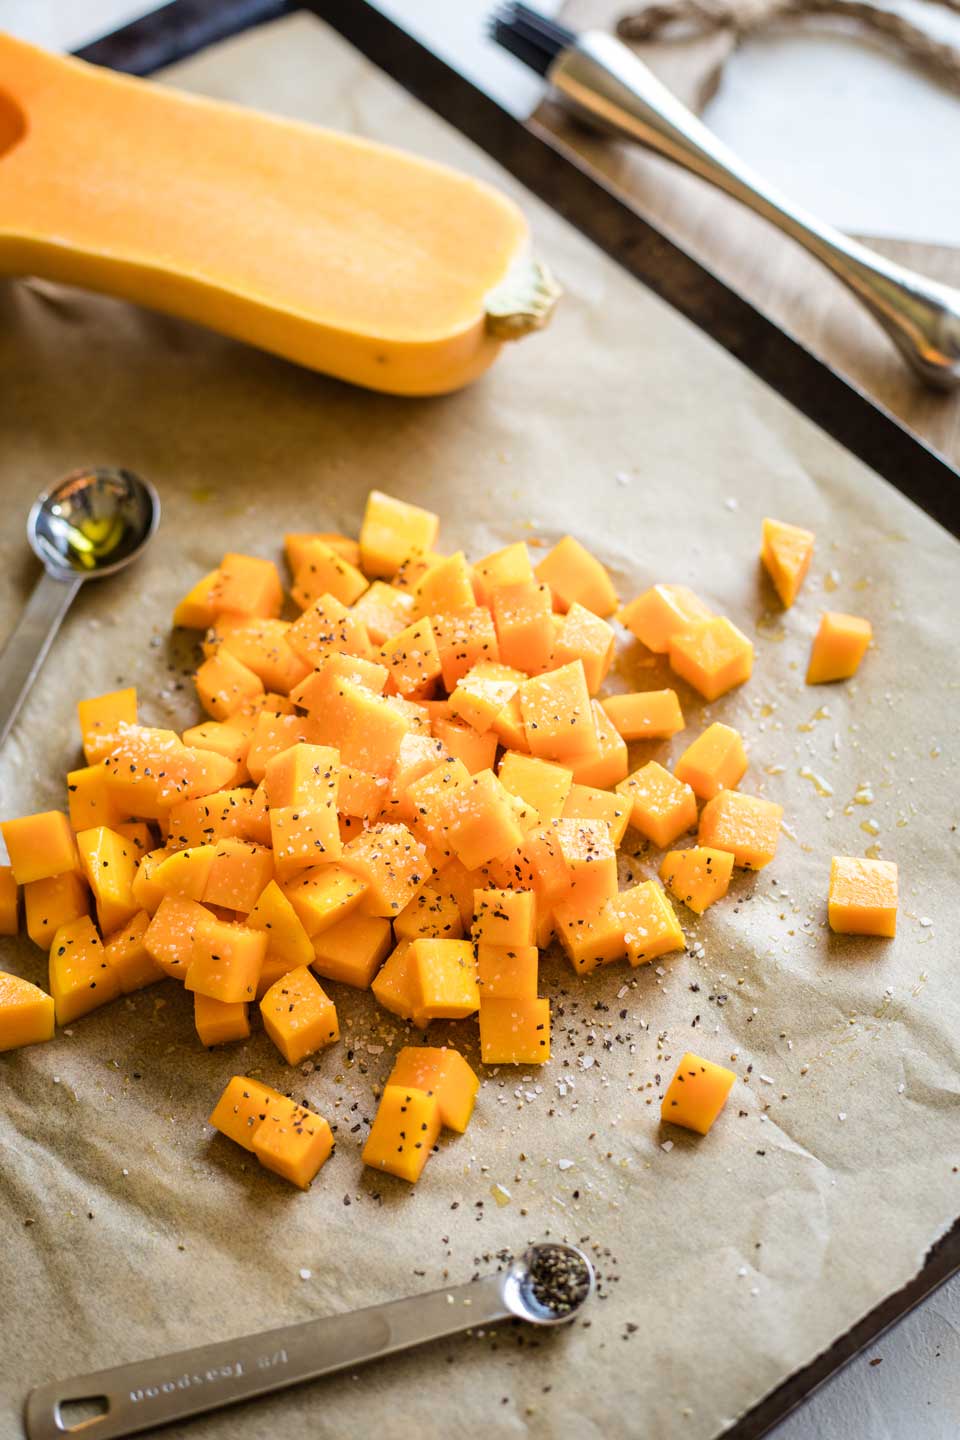
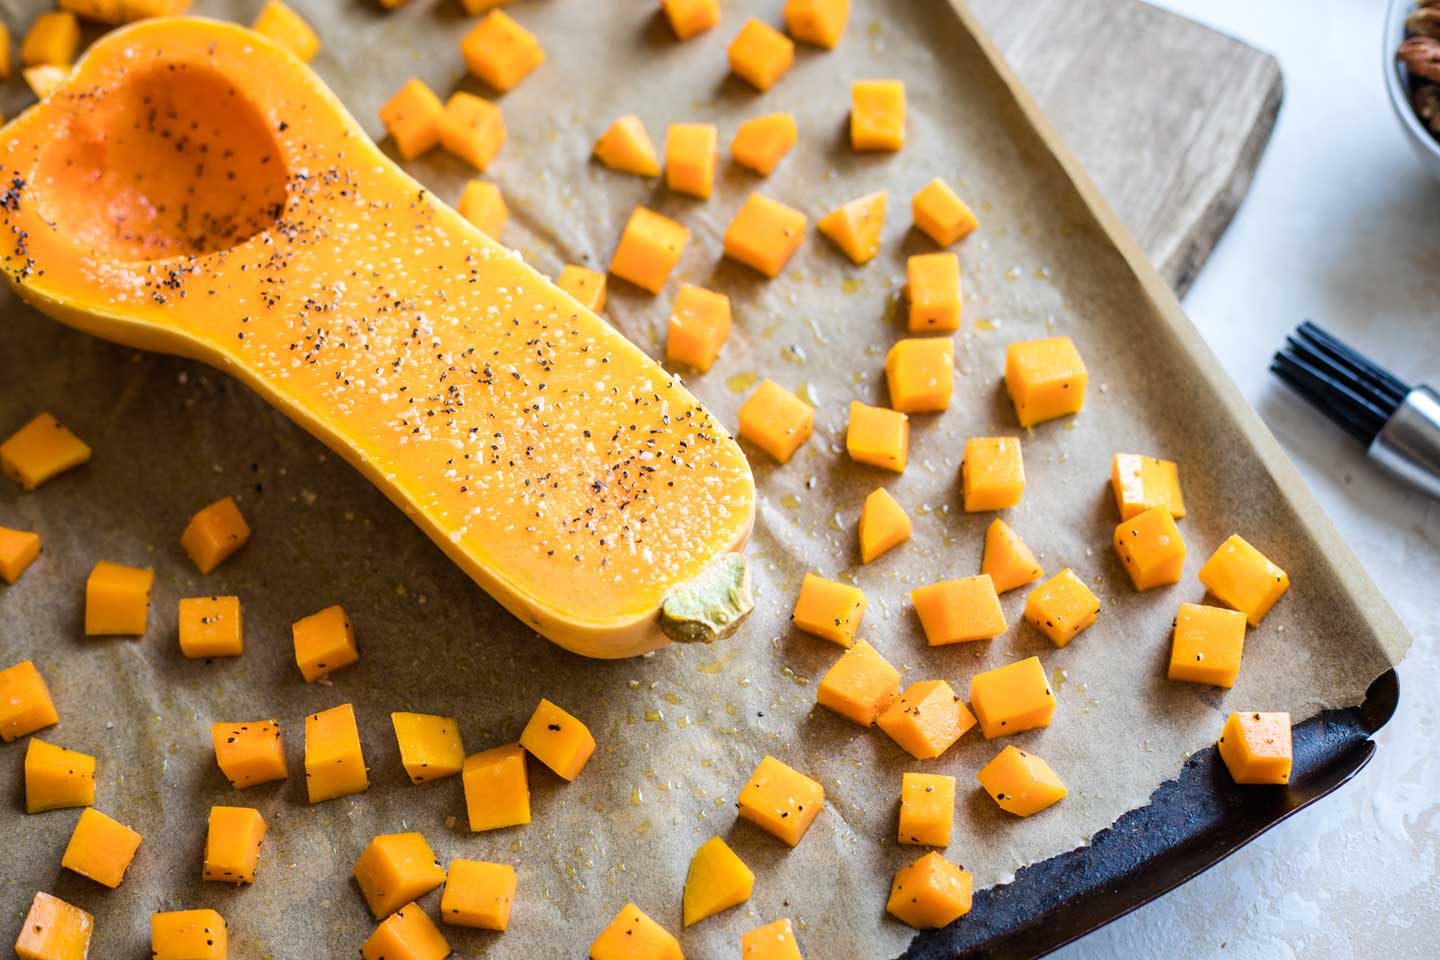
Step 5 – Toss the cubed squash with olive oil, salt and pepper. You can do this in a bowl, or save yourself some dishwashing duty by simply tossing it all together on a parchment-lined baking sheet. Either way, the important thing is to be sure that all of your squash cubes are evenly coated with oil, and that the salt and pepper is also evenly distributed throughout.
Step 6 – Brush both sides of the unpeeled half of your squash with olive oil, and sprinkle the cut side with salt and pepper. Make a little room amongst your cubes of squash (in the center of your baking sheet) for your “turkey body.”
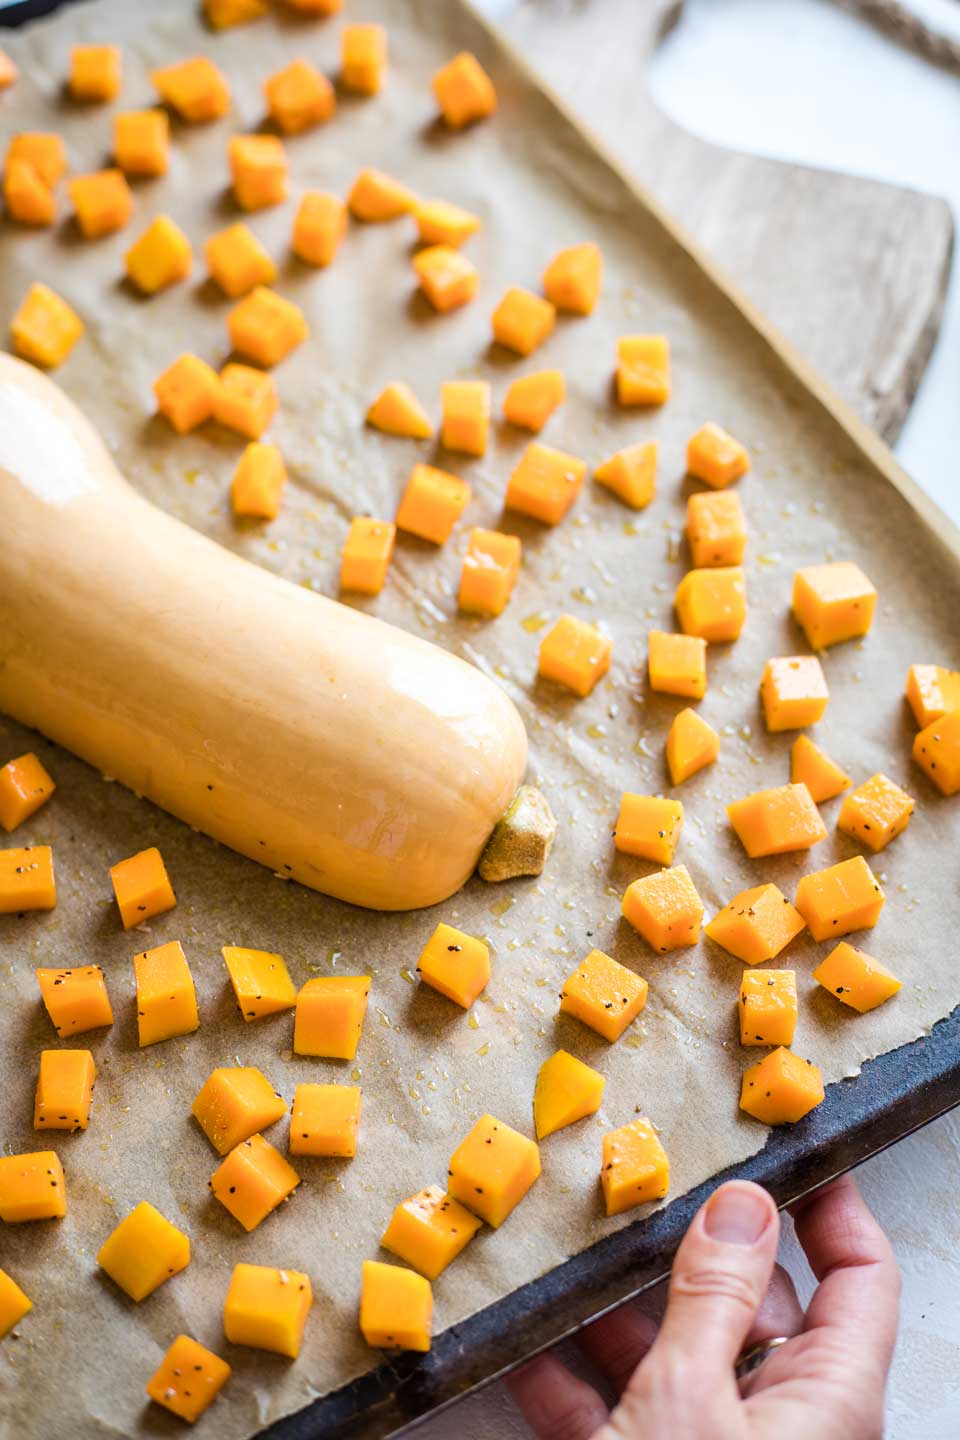
Step 7 – Before it all heads to the oven, turn your “turkey body” butternut squash half so that it’s cut-side down (so the skin is up). And now … you’re ready to roast! It all goes into the oven together (at 475°F).
You’ll stir the cubed squash once, partway through roasting. But leave the turkey body alone – just let it keep roasting merrily away, cut-side down (no stirring or flipping).
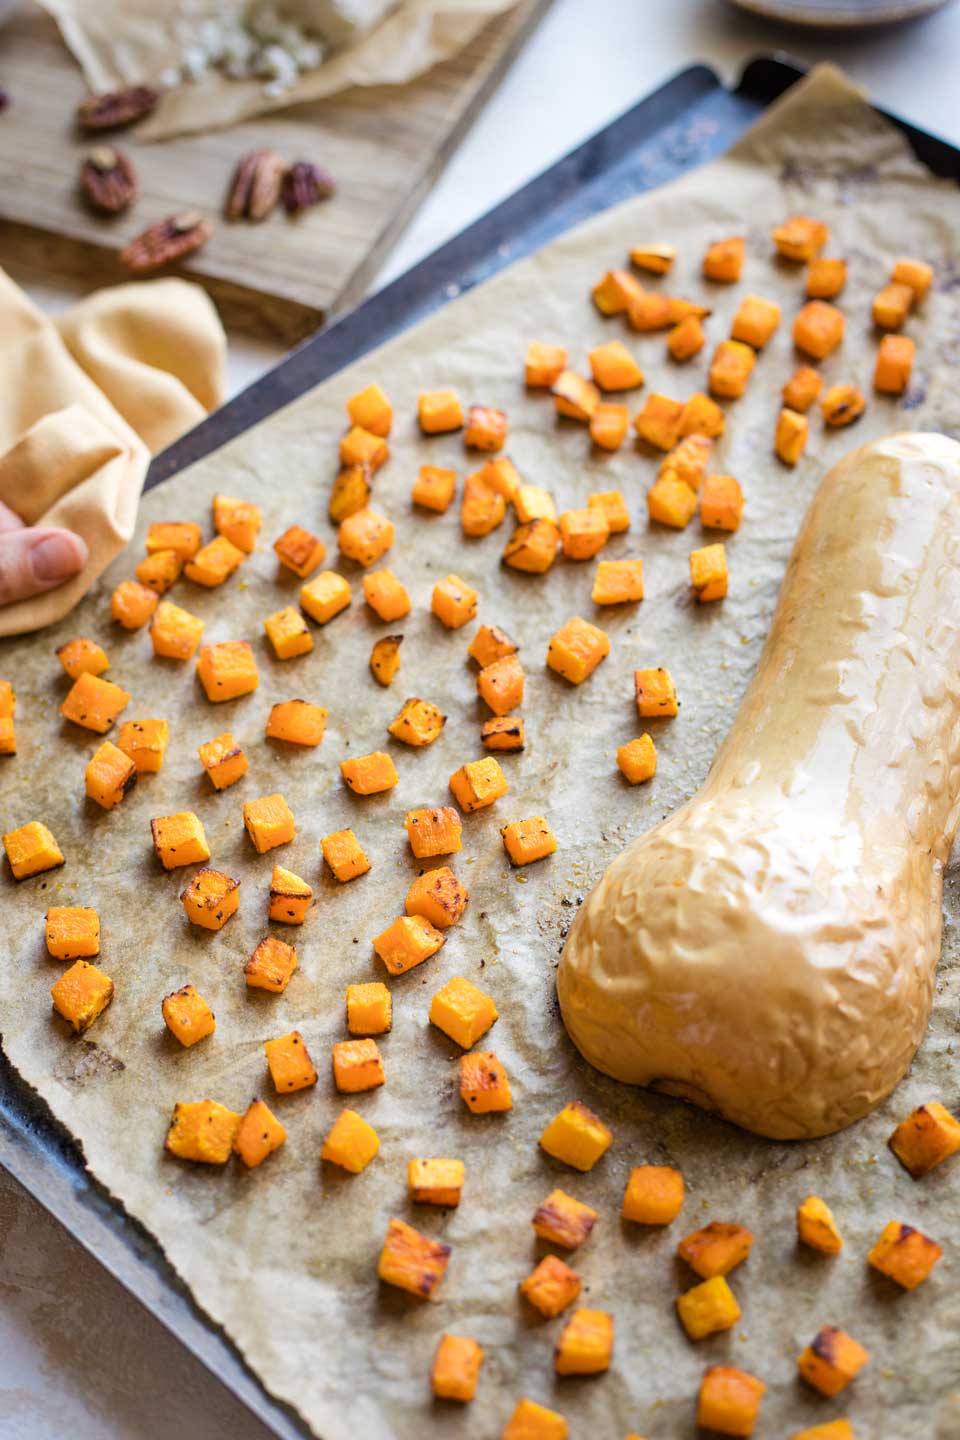
After a total of about 19-22 minutes, your cubed squash should be perfectly roasted – tender inside with some nice, toasty-brown spots outside. Gorgeous and yummy – they’re done!
This is the time to check to see how your squash-body is doing. Flip it over and gently poke the inner flesh with a fork to see if it’s tender. If it isn’t (which may be the case if your squash is on the larger side), you can turn it back over (back to cut-side down), and return it to the oven for a few more minutes, until it’s fork-tender to your liking.
Check it often, though, because as it continues to roast, it will begin to develop roasty spots on the squash skin. I personally don’t like too many of those on my turkey’s “body.” (That’s totally a judgment call, though – your turkey is artistically free to express himself in whatever roasty-toasty glory you think is most beautiful!)
How to Complete Your Thanksgiving Salad
While your squash is roasting away, it’s actually super quick and easy to assemble the rest of the salad.
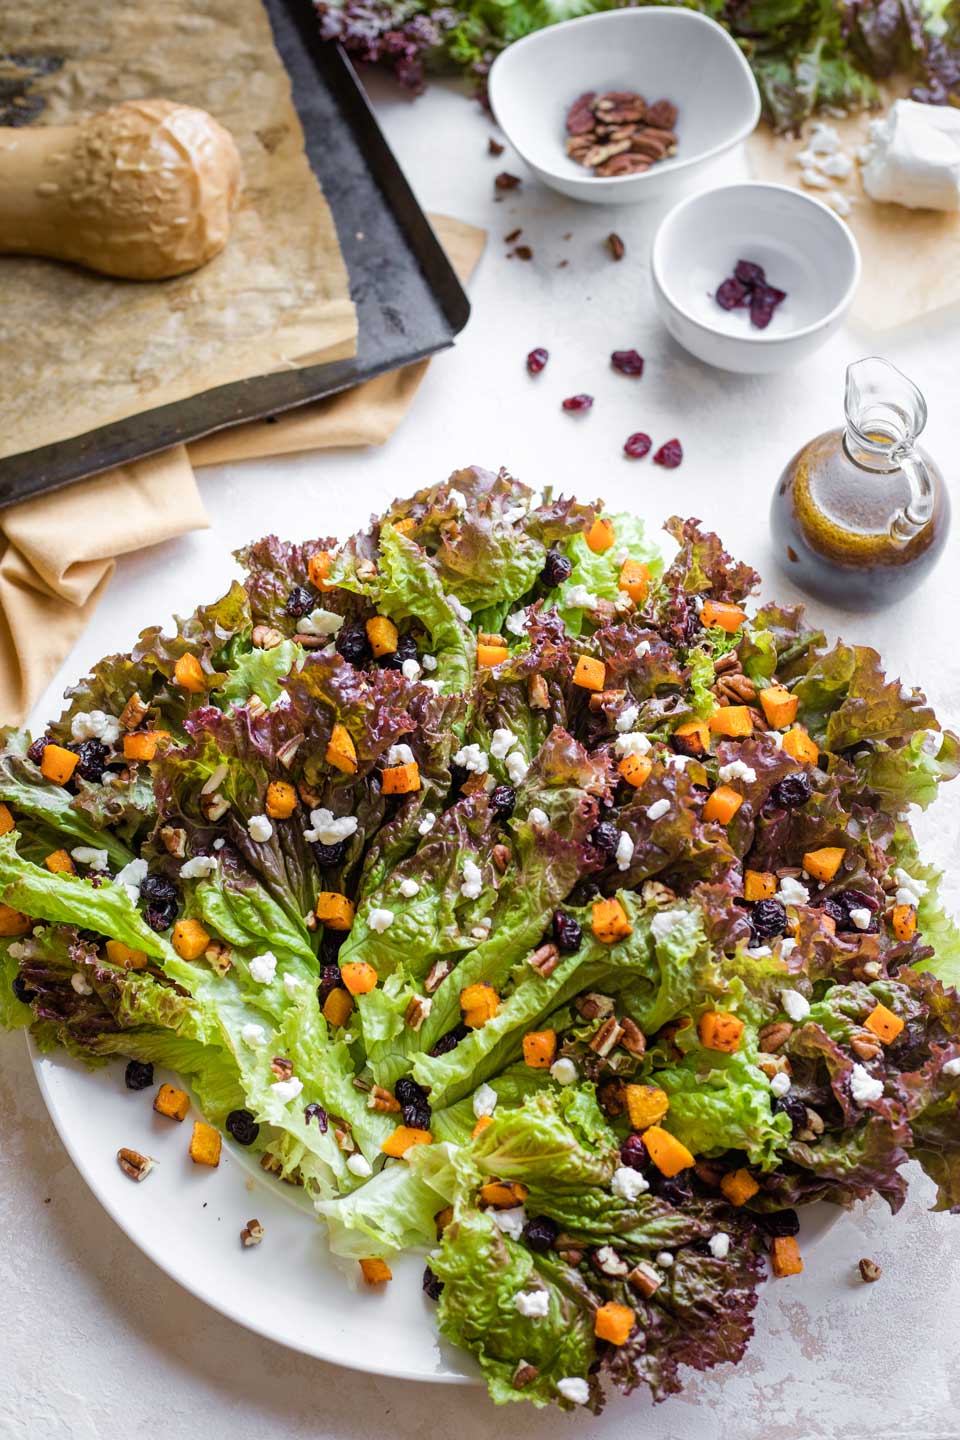
Step 8 – Fan out your rinsed and dried red leaf lettuce on a large platter to look like Tom Turkey’s pretty tail feathers. (The round platter I used in the photos is about 13″ in diameter.)
This is another place where you can use a little creative improvisation to make your turkey just the way you like. Although I love the way red leaf lettuce looks here (so Thanksgiving-y!), I’ve also made this salad with spears from romaine lettuce hearts. Green leaf lettuce could work, too, if you can’t find red. This is your turkey – make him your way!
As you layer your lettuce, sprinkle some of the pecans, goat cheese and cranberries throughout the layers – but make sure you save plenty to sprinkle on top, too.
Once your cubed butternut squash is out of the oven and cooled enough to handle, sprinkle the squash on top, as well.
So pretty already!
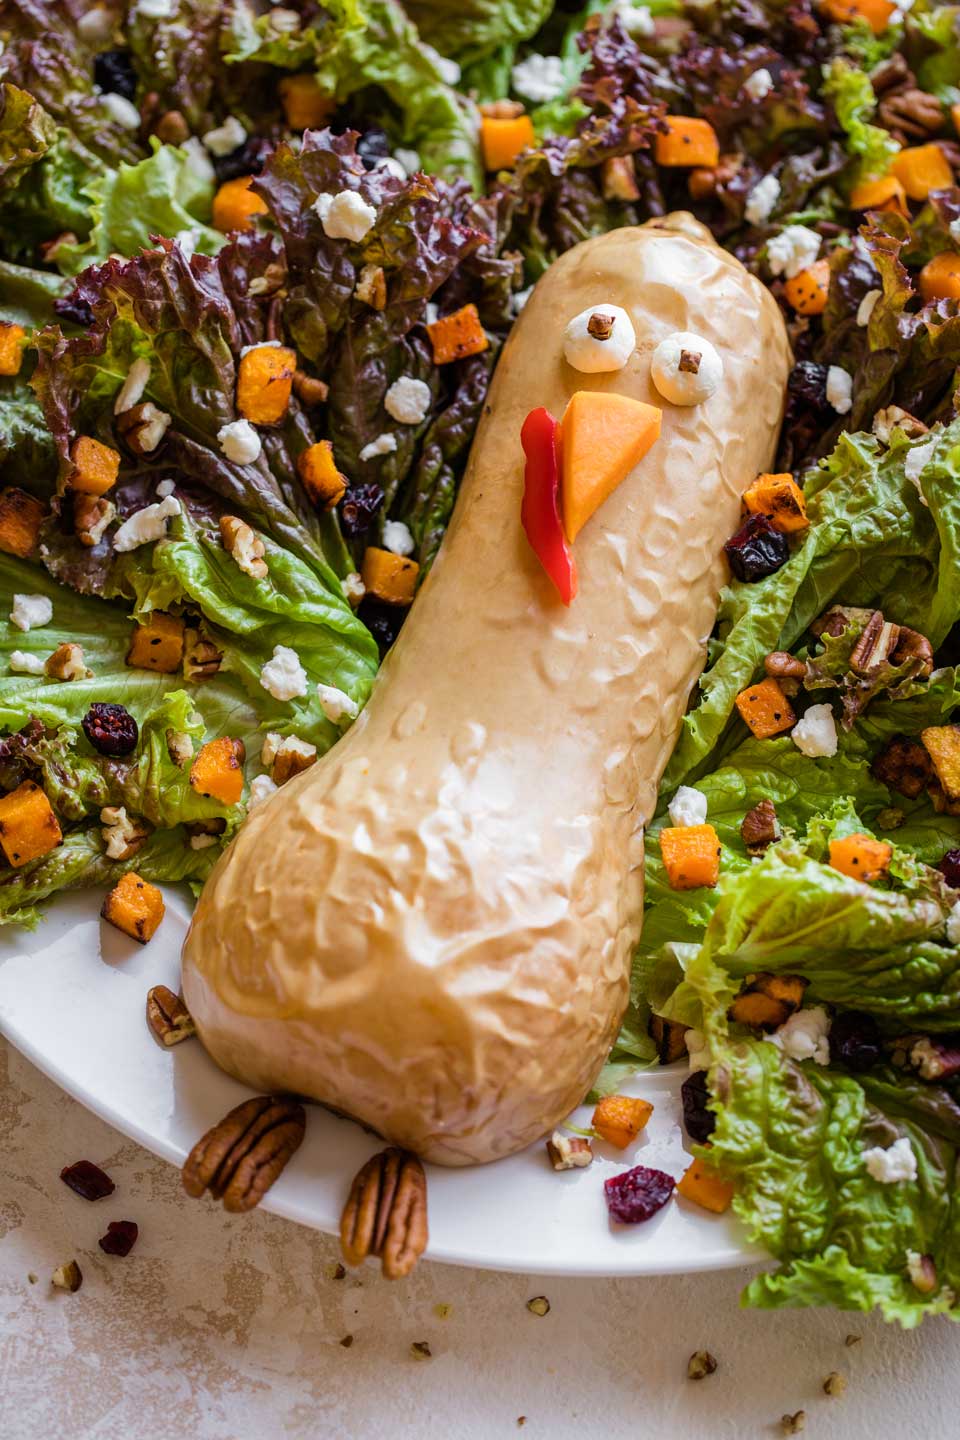
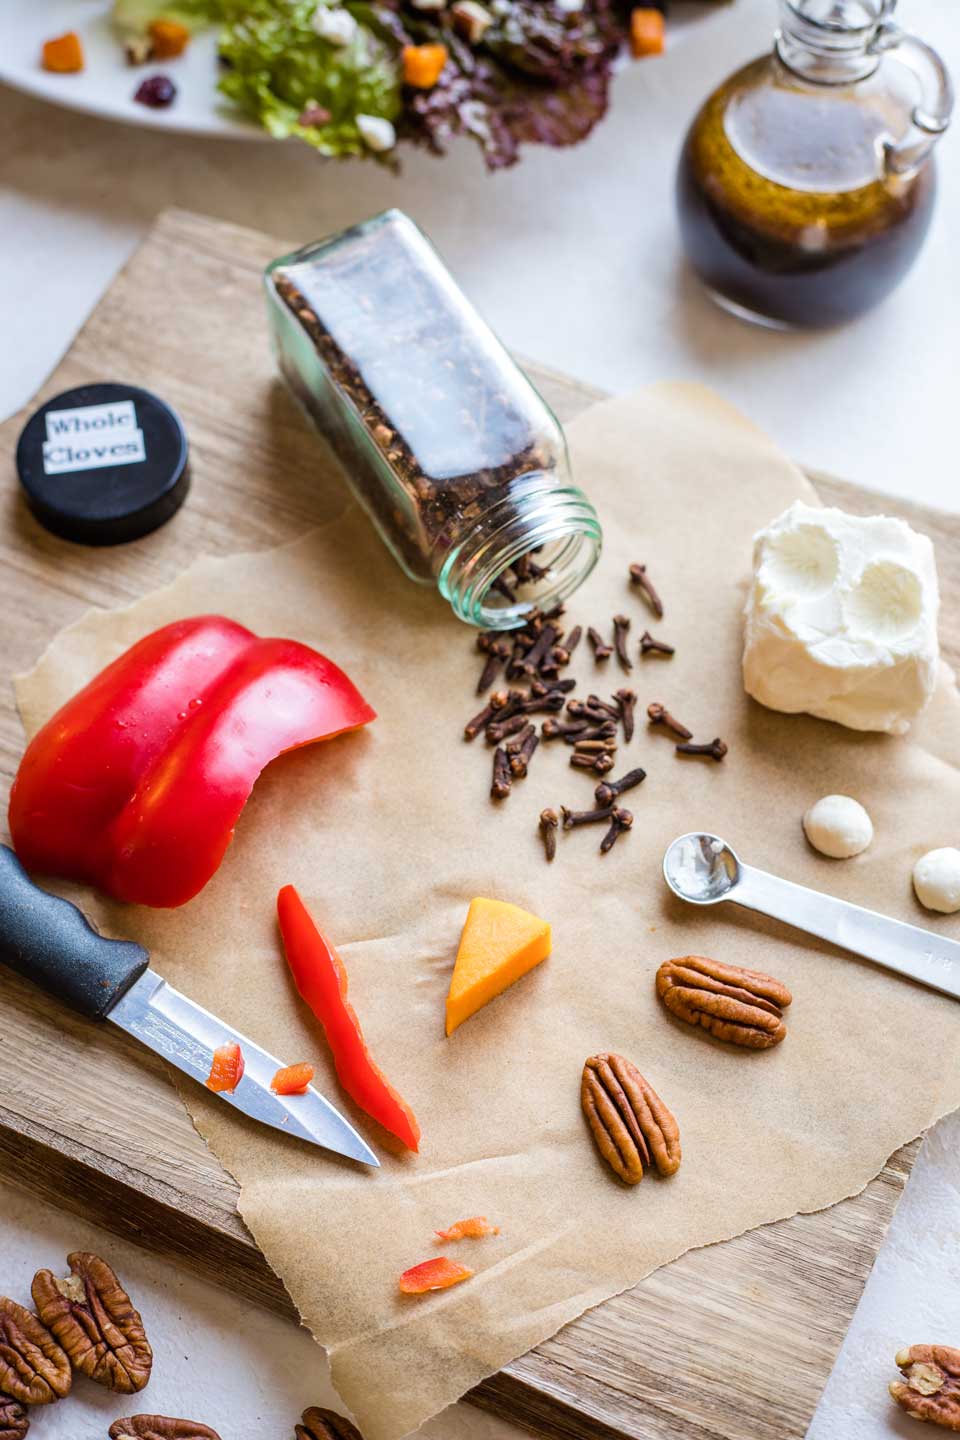
Step 9 – To make your turkey’s face, start by cutting a squiggle of red pepper to make the turkey’s “snood.” (No really – did you know that the red squiggly bit that hangs over a turkey’s beak is actually called a snood??? Because I didn’t until moments ago! The wattle is the red part under the turkey’s throat. Well huh.) Anyway … make a red beak squiggle (and feel free to call it a wattle or a gobbler or whatever you like …)
Step 10 – For your turkey’s eyes, use a small, round measuring spoon (about an 1/8 – 1/4 teaspoon size works well) to scoop out little, half-spheres from the un-crumbled, remaining portion of your goat cheese log. You can lightly shape and smooth them with your fingers if needed. Then, gently push the stem of 1 clove into the curved, domed side of each eyeball.
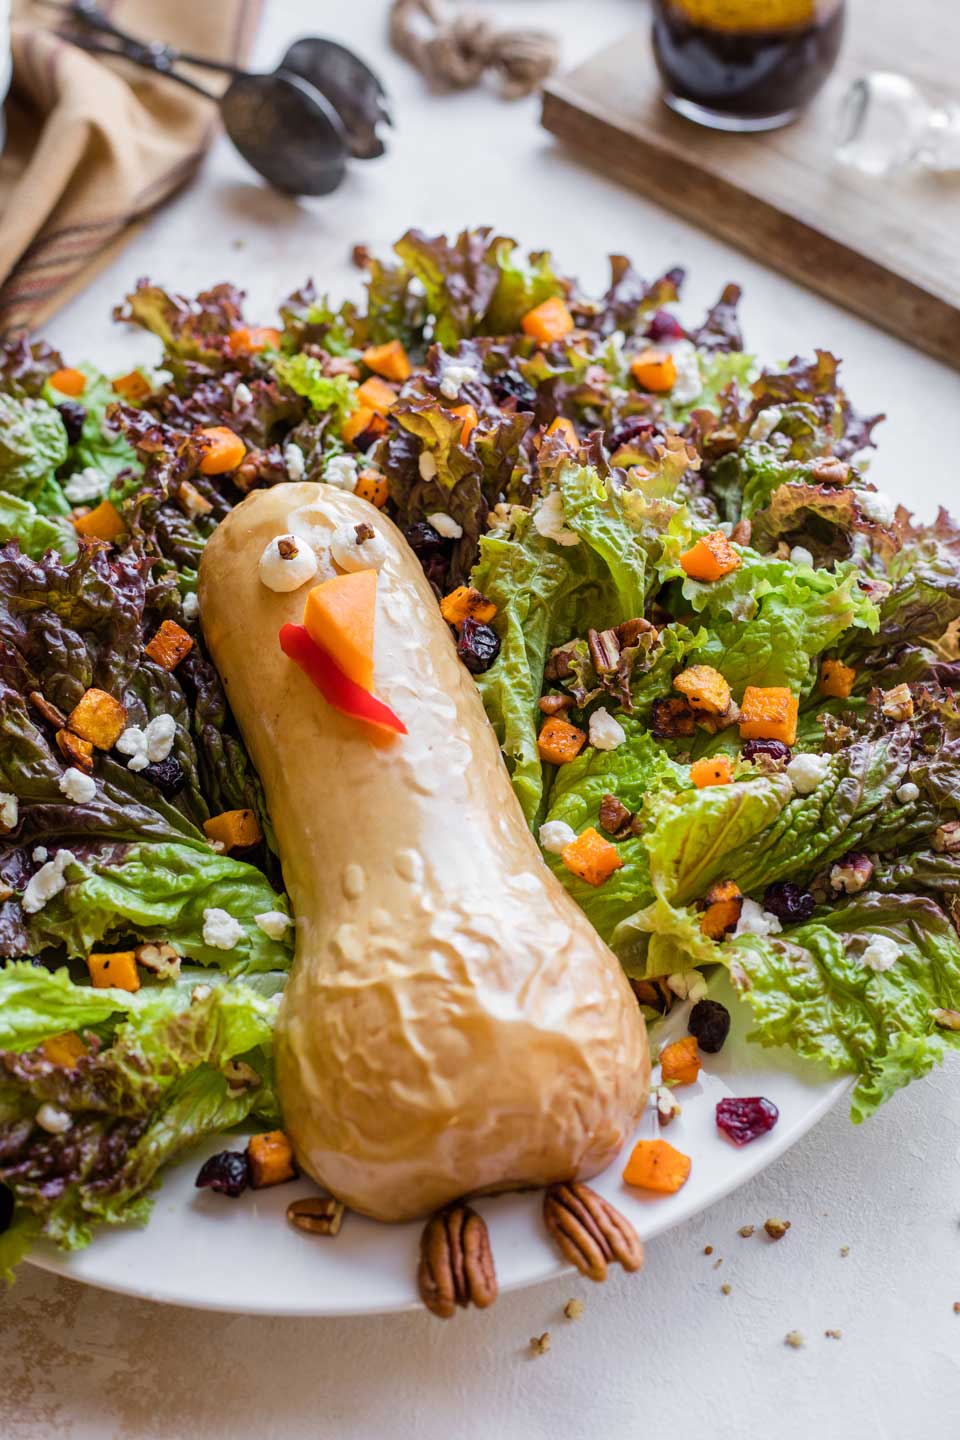
Step 11 – To finish your adorable Thanksgiving Salad: Once your turkey’s squash-body is cool enough to handle, gently lay the “body” in the middle of the salad. Place the clove-and-goat-cheese eyes on the turkey’s “head,” and position the triangular piece of squash and the squiggle of red pepper as the beak and “snood.”
At the bottom of the body, place two pecan halves as feet.
Pro tip: If any of the body parts aren’t staying in place, just use a tiny dab of extra goat cheese to affix them in place. (Delicious, edible glue!)
Maple-Balsamic Salad Dressing
Oh, and you didn’t think I’d forget about the Maple-Balsamic Dressing, did you?!?
This is the same Maple-Balsamic Vinaigrette dressing that people have raved about for years, as part of our recipe for our Salad with Goat Cheese, Pears and Candied Pecans (and also my daughter’s favorite Pecan Chicken Salad and our Superfoods Brussels Sprout Salad). It’s the perfect thing to drizzle over this salad recipe, too!
And, you can make it days in advance … or whip it up at the last minute, as you put together the rest of your salad.
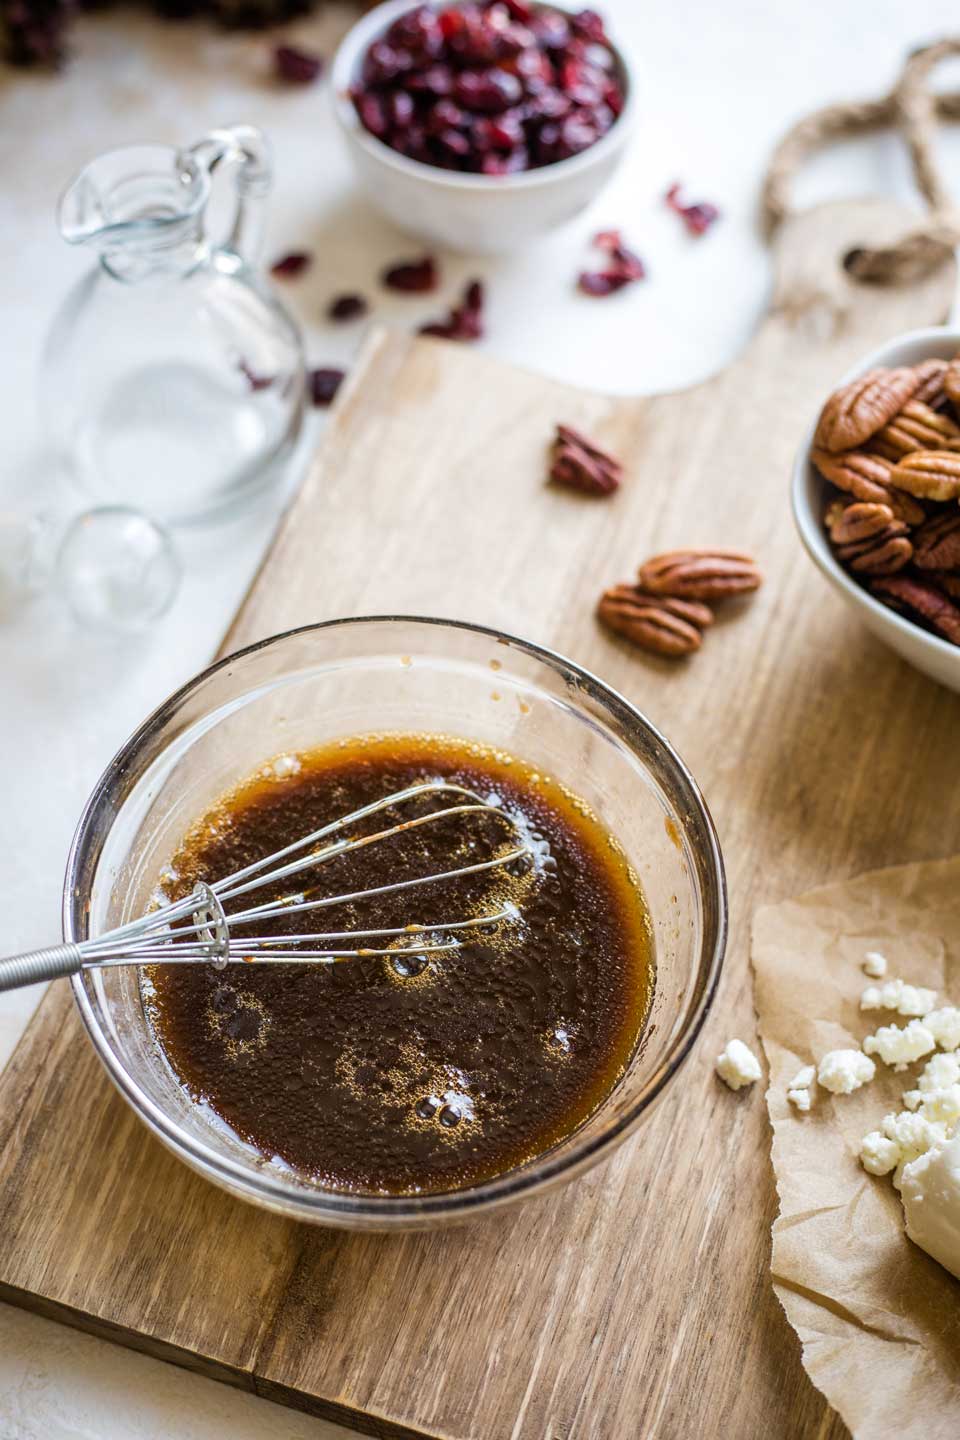
Simply whisk together all the dressing ingredients, and serve that addictively delicious concoction with your gorgeous turkey salad!
Make-Ahead Steps (for a Stress-Free Thanksgiving!)
One of my absolute best hostess tips is to do as much cooking and prep work ahead of time as you possibly can. This is especially true for major food holidays like Thanksgiving! It’ll help you stay so much more sane on the actual day, so you can enjoy the holiday with loved ones, instead of slaving away in the kitchen.
Luckily, if you’re like me and you try to prep ahead, this salad has plenty of options for you!
• You can cut, peel, and chop the squash a day or so ahead and stash it (wrapped) in the fridge. Honestly, you can even roast your squash a day or two before, and rewarm it a little so you don’t have stone-cold chunks of butternut squash in your salad. The butternut squash cubes may not have quite the same toasty exterior texture when you rewarm them if they’re made ahead. But, overall, I really don’t think it’s very noticeable, and it can be a worth-it shortcut if you’re desperately trying to cook things ahead of time. Just an option to keep in mind.
• You can also cut the turkey’s red-squiggle “snood” (I’m still shaking my head in disbelief, over the fact that it’s actually called a snood!), and very carefully make his eyes ahead of time, too.
• In fact, if you’re super careful about how you wrap him up, you can pretty much completely pre-roast and fully assemble your turkey ahead of time. Wrap and refrigerate him, but make sure his cute goat cheese eyes don’t get smashed by the plastic wrap.
• You can lay your lettuce leaves out on the platter earlier in the day, or the night before. And, you can sprinkle the cranberries, goat cheese, and pecans on the salad, too. Wrap it lightly in plastic wrap and put it somewhere in the fridge that it won’t get smashed.
• As I mentioned above, you can also make the Maple-Balsamic Dressing ahead of time – even several days ahead. Just re-whisk it a little if needed. (The biggest risk you run here is that someone will have already used it all up before Thanksgiving Day – it’s so seriously amazing and addictive!)
Serving Options for This Thanksgiving Salad with Butternut Squash
Might seem tricky to serve up edible art like this, but it’s not. You’ve got options here, too!
- Easiest of all: You can simply have people scoop up individual salad spears and cut them on their plates as they eat (like a classic wedge salad).
- Another option: Let everyone finish ooooohing and aaaaaahing over your turkey (and exclaiming about how creative and clever you are!). Then, right before you eat, you can grab a knife or (waaaay easier!) some kitchen shears, and quickly cut the salad up, like a chopped, tossed salad.
I’ve served this Thanksgiving Salad both ways, and either works great!
Now, about the dressing:
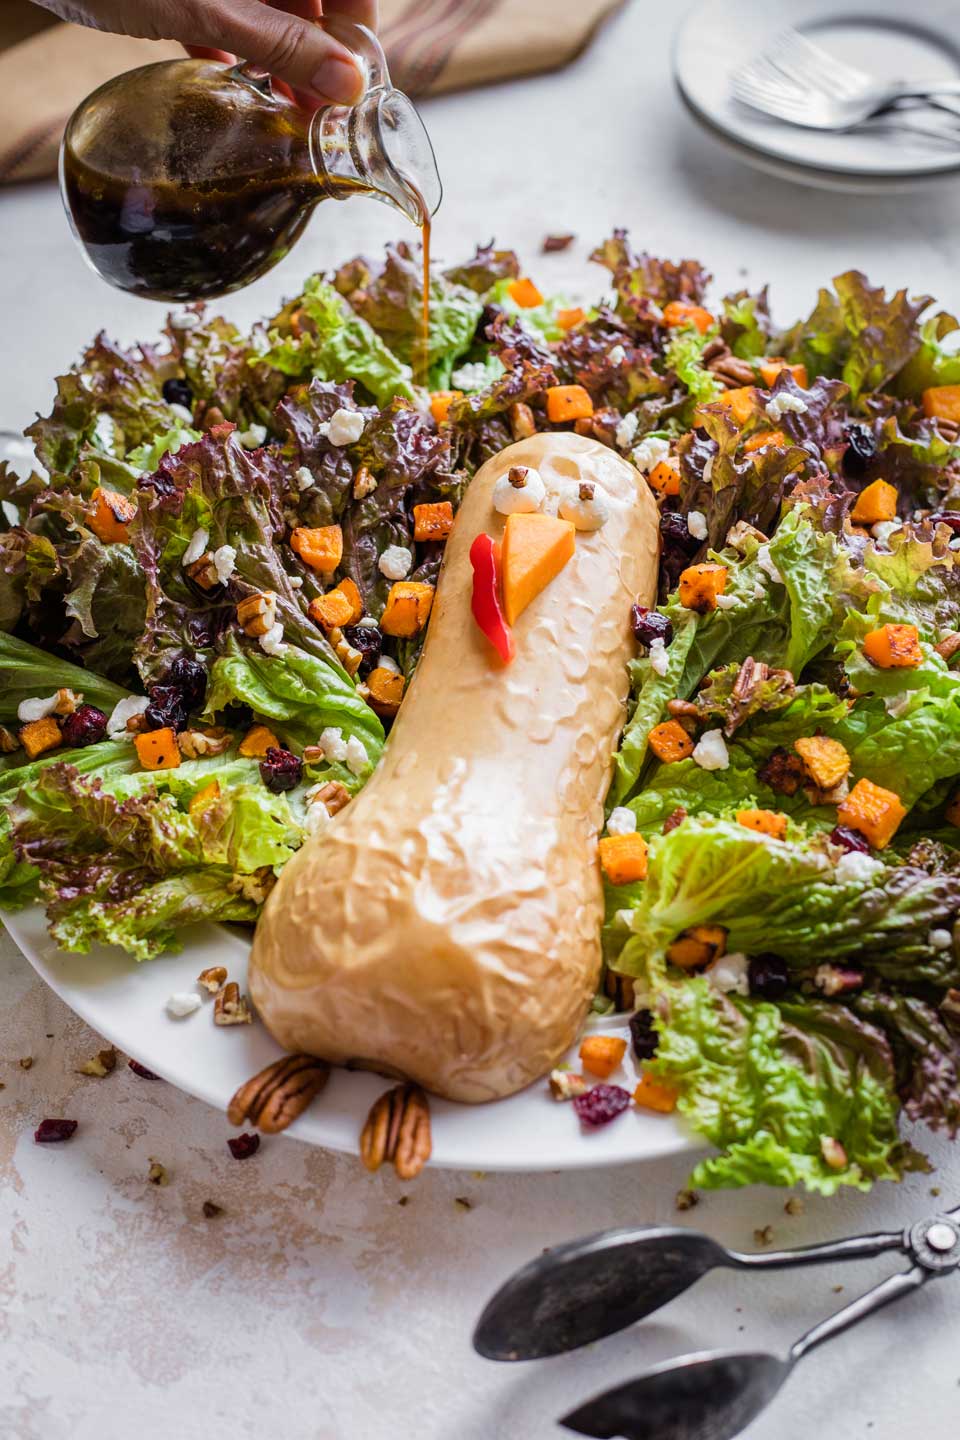
- You can certainly dress the entire salad just before serving, if you like.
- But I usually opt to let my guests each dress their own portions as they prefer.
Ahhhhhh … and what about that darling turkey body? How do you serve that? Well:
- You can scoop it out of the squash skin at the last minute, rewarm it, and slice, cube, or mash it as an additional side dish. It’s simple and yummy straight-up, since it’s already been roasted in olive oil and seasoned with salt and pepper. But, feel free to add some seasonal flair with things like cinnamon and brown sugar, too.
- Or, you can just set the body aside, and enjoy it later, with the rest of the Thanksgiving leftovers.
The bottom line: from the shape of your turkey’s body to precisely how you serve him up … you’ve got options here, friends! This is edible art at its absolute most festive.
So have fun – embrace the creativity!
Because this Thanksgiving salad isn’t just delicious – it’s actually really fun to make, and surprisingly easy, too!
It’s so rewarding to see how adorable your turkey looks, as you put the finishing touches on the salad! And you’ll be so proud to serve him up at your holiday feast (while your guests ooooh and aaaaah and maybe even clap a little or begin chanting your name …)
Give it a try this Thanksgiving, and I bet you’ll end up making this salad year after year.
Your Thanksgiving feast won’t be complete without it!
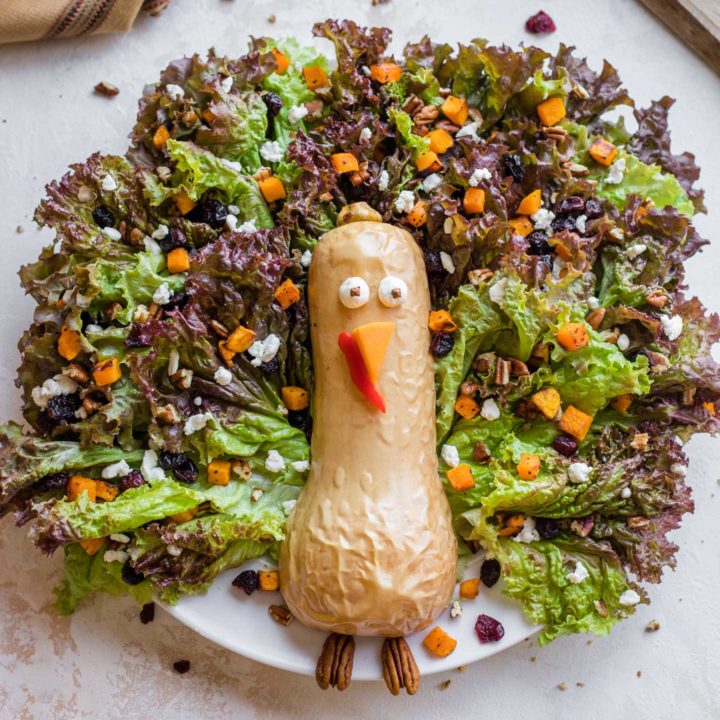
Adorable Thanksgiving Salad with Butternut Squash "Turkey"
This “Tom Turkey” Thanksgiving Salad with Butternut Squash is so adorable and delicious! And, it's surprisingly easy, too! Try it as an edible centerpiece for your Thanksgiving dinner celebration!
• Includes Make-Ahead Steps • Vegetarian • Gluten Free (see note) •
Ingredients
Salad
- 1 butternut squash (ideally, approx. 2 - 2 1/2 pounds and 8-10 inches tall)
- 2 1/2 teaspoons extra virgin olive oil (divided)
- 1/2 teaspoon kosher salt (divided)
- 1/4 teaspoon black pepper (divided)
- 1 large head of red leaf lettuce (about 9 ounces), rinsed and dried
- 1/2 cup coarsely chopped pecans (toasted if desired)
- 1/3 cup dried cranberries
- 2 ounces crumbled goat cheese (about a heaping 1/3 cup) from a 4-ounce log of cheese
Turkey Decorations
- two pecan halves (for turkey's feet)
- goat cheese (for eyeballs)
- two cloves (for eyes)
- red pepper (to make snood)
- triangular piece of raw butternut squash (for beak)
Maple-Balsamic Dressing
- 1/4 cup balsamic vinegar
- 3 tablespoons pure maple syrup
- 2 tablespoons extra virgin olive oil
- 1 teaspoon smooth dijon mustard (see gluten free note if needed)
- 1/8 teaspoon kosher salt
Instructions
To roast the squash:
- Preheat oven to 475°F. Line a large baking sheet with parchment paper.
- Carefully slice the squash in half vertically, from stem to bottom. Scoop out and discard the seeds.
- Peel only one of the halves and dice it into 1/2" cubes to equal about 2 1/2 - 3 cups (the exact amount will depend on the size of your squash). While you are cutting the cubes, also be sure to cut a triangle that you will save to be the turkey's beak. (You will not roast the triangular beak – set it aside until you assemble your turkey.)
- Toss the cubed butternut squash with 2 teaspoons oil, 1/4 teaspoon salt, and 1/8 teaspoon black pepper. Make sure that the cubes are evenly coated with oil, and that the seasonings are distributed throughout. (You can do this in a bowl, or directly on the parchment-lined baking sheet.)
- Spread the squash cubes out on the baking sheet so they aren't piled on top of each other, leaving room at the center of the sheet (this is where you will place the unpeeled half of the squash that will be the turkey's body).
- Brush both sides of the remaining unpeeled half of the butternut squash with 1/2 teaspoon oil, and sprinkle the cut side with 1/4 teaspoon salt, and 1/8 teaspoon black pepper. Place, cut-side down, in the center of the baking sheet (with the cubed butternut squash surrounding it).
- Place baking sheet in the oven and roast for 12 minutes. Stir the cubed squash (do not move or flip the half squash), and continue roasting for 7-10 minutes more, until cubed squash is tender and has toasty, browned, roasted spots but isn't burned. Remove the cubes from the baking sheet and set aside.
- Flip your halved butternut squash over and test it gently with a fork to make sure it is done, too. If it isn't quite done to your liking, you can return it to the oven, cut-side down, for a few minutes more. Watch it closely so it doesn't start to brown too much, though, and will still look nice when used as your turkey's body.
While the squash is roasting, you can prep the rest of the salad:
- Fan your lettuce leaves out on a large, round platter. (The platter I used in the photos is 13" in diameter.)
- As you layer on your lettuce, sprinkle a little of the pecans, cranberries, and crumbled goat cheese throughout the layers, making sure you have plenty left to sprinkle on top.
- Cut a squiggle of red pepper to make the turkey's "snood" (refer to photo in post to see how we made ours).
- Scoop out little semi-rounds from the un-crumbled, remaining log of goat cheese, and gently push 1 clove into the domed, curved side of each round (again, refer to photos as needed).
- In a medium bowl, whisk together all dressing ingredients.
- Once the roasted squash is cool enough to handle, sprinkle the squash cubes on top of the salad. Gently lay the half-squash "turkey body" in the middle of the salad.
- Place the goat cheese "eyes" on the turkey's "head," and position the triangular piece of squash and the squiggle of red pepper as the "beak" and "snood." At the bottom of the body, place the two pecan halves as "feet."
- Serve salad with Maple-Balsamic Dressing.
Notes
Butternut squash size: If you have trouble finding the size of butternut squash specified, you can adjust the oil, salt, and pepper, and also the roasting time, as needed.
Gluten free mustard: While many (but not all) mustards are inherently gluten free, if you're watching your gluten intake, be sure to look for a brand that is specifically labeled as gluten free.
Ingredient amounts: Besides using slightly different sizes of squash, you can vary the amounts of lettuce, pecans, cranberries, and goat cheese that you use, to suit your tastes and your number of guests. The amount of dressing in the recipe can also be scaled accordingly.
Make-ahead steps: As described in greater detail in the post, you can cut, peel, and chop the squash a day or two ahead, and also cut the turkey's red-pepper "snood" and make his eyes ahead of time. You can also make the Maple-Balsamic Dressing up to several days ahead (re-whisking if needed before serving). Wrap/cover each element separately and refrigerate.
To work even further ahead, you can actually complete nearly the entire salad earlier in the day or the day before. You can roast the squash in advance, and rewarm it a little before serving, so you don't have cold pieces of butternut squash in your salad. (Just be aware that the squash cubes may not have quite the same toasty exterior texture when you rewarm them if they're made ahead.) You can also pre-roast, cool, and assemble your turkey's body and face ahead of time. Wrap and refrigerate him, making sure his goat cheese "eyes" aren't getting smashed by the plastic wrap. You can also lay your lettuce leaves out on the platter, and sprinkle on the cranberries, goat cheese, and pecans. Wrap it lightly in plastic wrap and put it somewhere in the fridge that it won't get smashed.
Nutrition Information:
Yield: 6 servings Serving Size: 1 cupAmount Per Serving: Calories: 229Total Fat: 15gSaturated Fat: 3gTrans Fat: 0gUnsaturated Fat: 12gCholesterol: 4mgSodium: 303mgCarbohydrates: 22gFiber: 3gSugar: 15gProtein: 4g
Nutrition information should be considered an estimate only, and may vary depending on your choice of ingredients or preparation. No guarantees are made regarding allergies or dietary needs. Always consult a physician or dietician for specific advice and questions.




I love this SO much! What an incredibly creative idea to get everyone interested and excited about eating the salad!
Oh, thank you, Ann! What a lovely comment – I truly appreciate it! And I absolutely agree … this cute little Thanksgiving turkey will definitely capture people’s attention! And trust me … one bite, and they just might actually ask for seconds of the SALAD this year! 😉 ~Shelley
Wow. How wonderfully creative! This is such a cute Thanksgiving salad. The kids are going to love this!
It’s so fun to make, too – I’ll bet your kids will even have a blast helping you make the cute little turkey … and they just might “gobble” up a bunch of salad, as well! 😉 ~Shelley