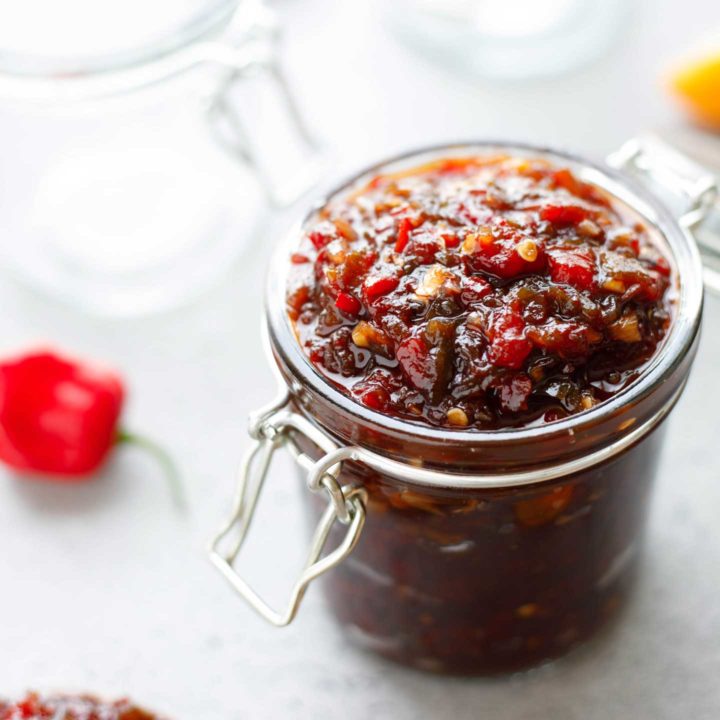
Sweet and Spicy Pepper Relish
~ This Sweet and Spicy Pepper Relish recipe has become legendary around our house – it’s definitely our current obsession! No fear, friends … the deeply flavorful combination includes some seriously spicy peppers, but don’t let that scare you away! Even taste-testers who say they don’t like spicy foods love this recipe, and we’ve got plenty of ideas for customizing the recipe and toning down the heat. Trust me … you’ll be eating this Sweet and Hot Pepper Relish on practically EVERYTHING! ~
This Recipe Is: • Freezable • Make Ahead • Vegan (and Vegetarian) • Gluten Free •

I’m only sort of kidding when I say that we’ve been putting this pepper relish on EVERYTHING!
It’s just that awesome.
It’s not one of those gratuitously spicy condiments that’s spicy just for the sake of being spicy, without great flavor to back up the heat. Oh no – this hot pepper relish has flavor galore!
It somehow manages to be both tangy-savory and fruity-sweet, with a rich, full heat that you can scale up or down depending on how spicy you like things.
So far, we’ve tried it on:
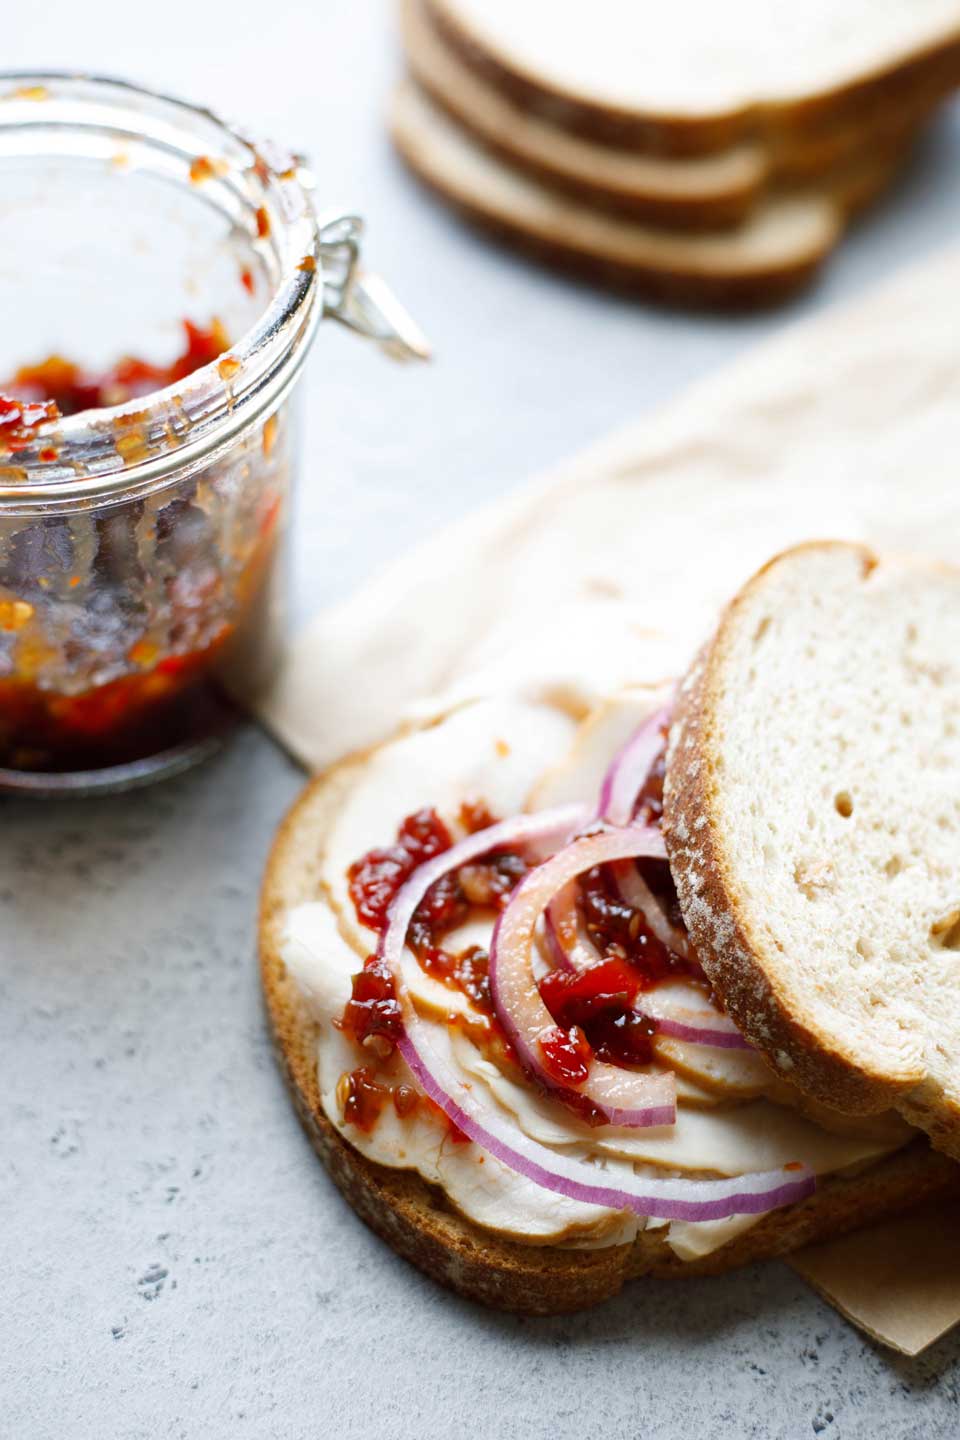
- hamburgers, chicken sausages, and salmon
- turkey sandwiches, BBQ, and subs
- hummus dip and cream cheese spread
- veggie side dishes and mashed potatoes
- macaroni and cheese
- scrambled eggs
… pretty much everything but breakfast cereal!
A Perfect Coincidence
This new heartthrob condiment in our lives is all thanks to a happy coincidence.
You see, last summer, I tried growing some tiny little ghost pepper plants from seeds my mom had given me as part of a gimmicky little garden set she stuffed in my Christmas stocking. I didn’t have much hope for those little plants, but hey … why not? The seeds came with cute, miniature planters to grow the seeds in, and just generally seemed like a fun and low-risk gamble. Maybe they’d even grow???
By fall, only a few unimpressive plants had soldiered through the summer – they basically amounted to sticks with sparse, tatty leaves. But they were alive, so I tossed them in my greenhouse as the frosts set in, and figured they’d need a lot of luck to see springtime.
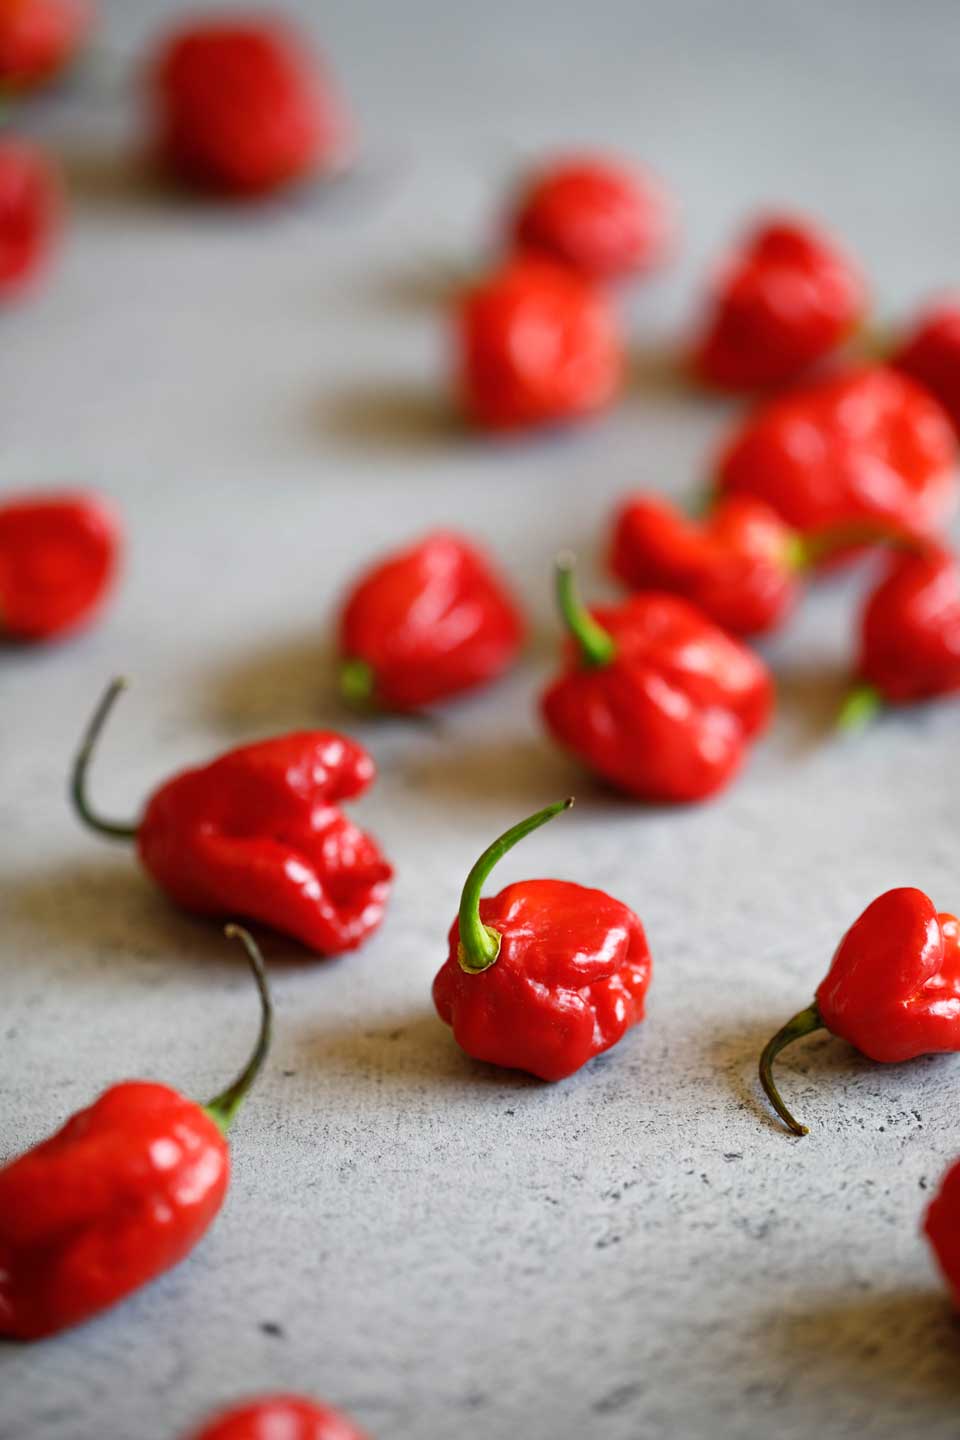
But hey hey … over the winter, one of those tatty plants turned into an absolute monster, emerging from my greenhouse to become a glorious little beast of a plant. FULL of ghost peppers!
I am totally in love with the crazy variety of shapes these darling hot peppers develop into!
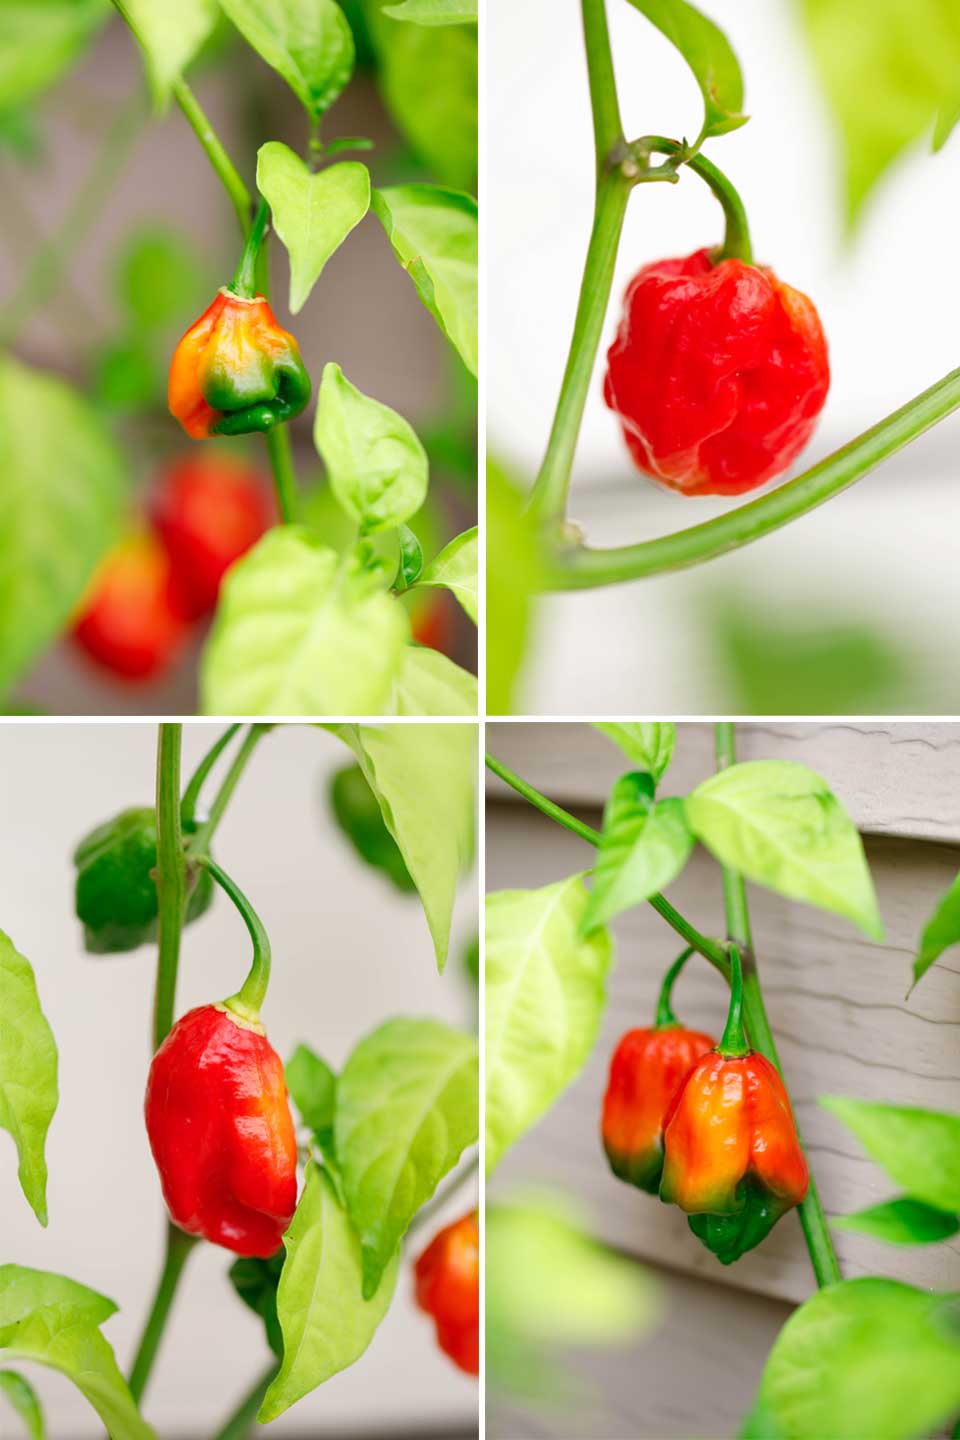
They’re so pretty, like tiny bright-red lanterns strung along my deck.
But …
Oh right.
My agricultural experiment was all about ghost peppers. Now that I had them (and a lot of them!), what on earth would I do with them?!? I mean … ghost peppers … one of the hottest varieties in the world. How could I possibly cook with them in a way that would turn out to be actually edible?
I couldn’t even imagine.
And here, of course, comes the perfect coincidence …
Hurray for our Two Healthy Kitchens readers and fans, and specifically the guy who saved the day and solved my ghost pepper dilemma! He also happens to be an incredible inspiration.
Your Daily Dose of Healthy Inspiration
Don Dagnall is one of Scott’s co-workers, and is definitely one of THK’s earliest and most devoted fans. He’s also a terrific, health-minded cook who loves to share his fave creations with me. (Yes … lucky me!)
I’ve gotta give him a huge shout-out, both for sharing this pepper relish recipe with me, and also because his dedication to healthy eating and to permanently changing his life are truly an inspiring success story.

After bariatric surgery 5 years ago, Don’s lost an amazing 165 pounds. But he realized that he had to make changes to the way he ate, or he’d “be sick all the time from eating the wrong things.” He explains, “I had surgery to help me lose the weight I needed, but that was the easy part of the whole journey. I fight every day to eat the right things and not fail the process I put myself through.”
For Don, that meant starting to read labels (which was sometimes disappointingly shocking), and learning how to create healthier, homemade versions of the old foods he liked.
And … ok … I was pretty much knocked off my feet and so very touched that he also credits THK for “Giving me a tool to help with the healthier aspects of eating.” After he attended a healthy eating class we presented a few years ago, Don says he began to realize that, “You could eat healthy and still have good flavor, to boot.”
Oh Don, thank you!
For being a devoted fan, for being an inspiration … and for sharing this recipe with my family, and even allowing us to share it with all our other readers.
It was exactly the perfect thing to do with all the hot peppers sunning themselves out on my deck. And truly, it’s become our newest obsession!
Don says he saw this recipe featured on a Food Network show about a North Carolina restaurant that makes an epic pepper relish, and he just had to try making a version at home. (I apologize that I can’t find any reference to the show or the recipe on Food Network’s site to give you a link to the original.) Don’s been raving for months about how amazing his pepper relish is, just waiting for the ghost peppers to ripen enough that he could make me a batch.
And oh.my.goodness.
When my family finally got a taste … it was every bit as amazing as he’d promised!
So, let’s get specific about how this recipe can become the newest obsession in your house, too!
How to Make Pepper Relish: A Visual Step-By-Step
About 10 minutes of prep is all you need to have this merrily simmering away on the stove. Basically, you just:
Step #1
Roughly chop the peppers and toss them, along with the garlic, into your food processor (we typically just grab the largest of our three Ninja containers).
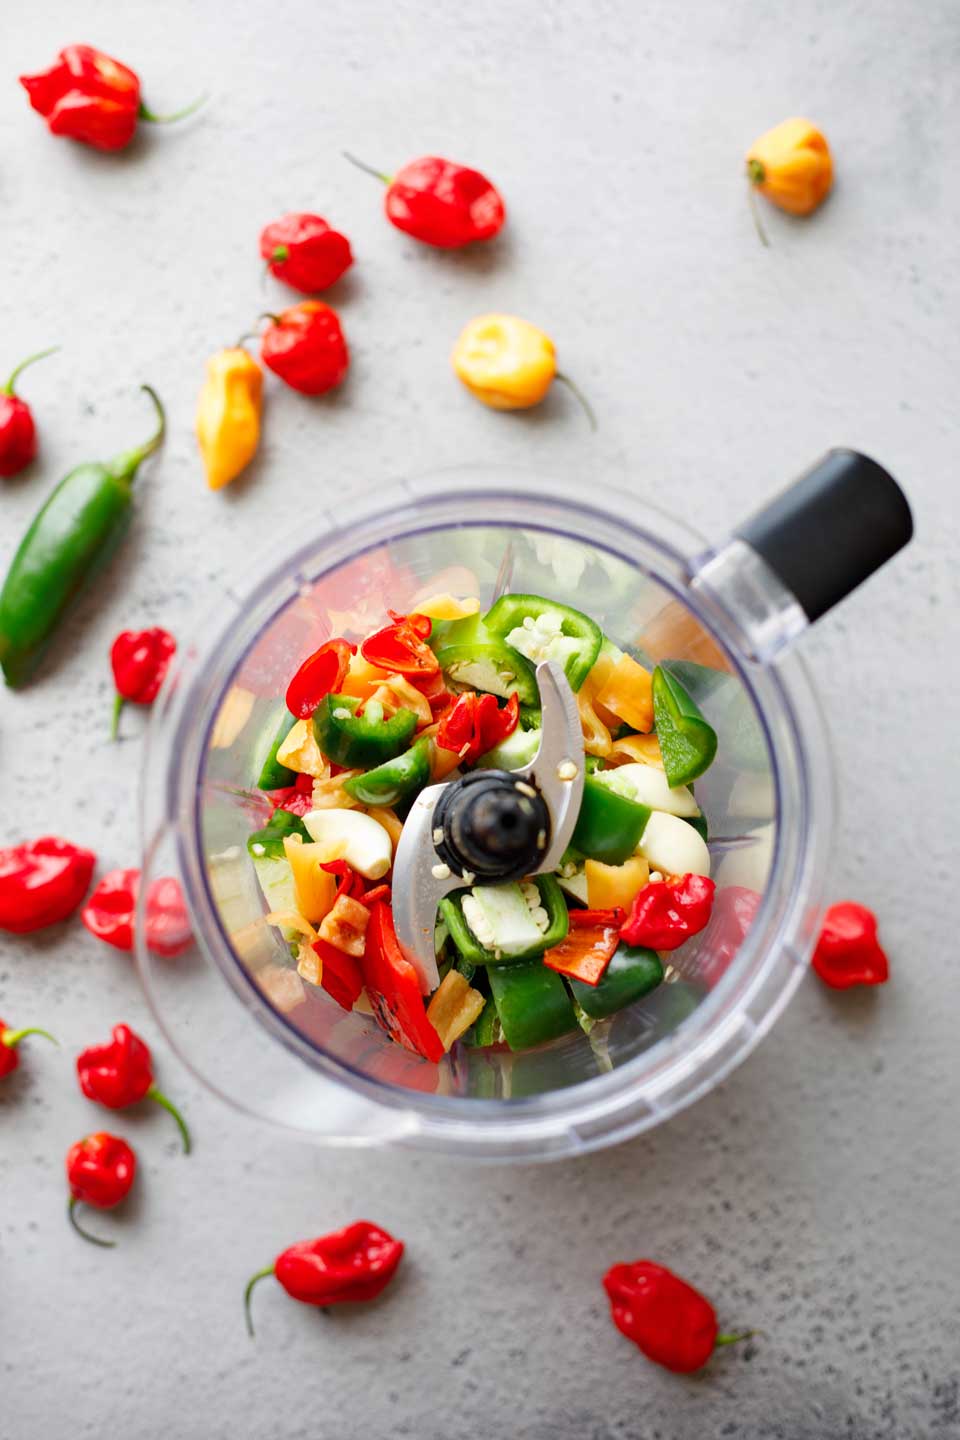
Step #2
Give them a quick blitz – just a few pulses. You want them to be in recognizable bits, not pureed.

Safety Note!
The oils in uncooked hot peppers can cause an unpleasant burning if they get on your skin. As we mention on the recipe card, whenever you’re working with hot peppers, you should wear gloves to protect your skin, and be very careful that you don’t touch your eyes, nose or face while you’re working. Also, carefully wash your hands and cutting surfaces thoroughly after you’re done.
Step #3
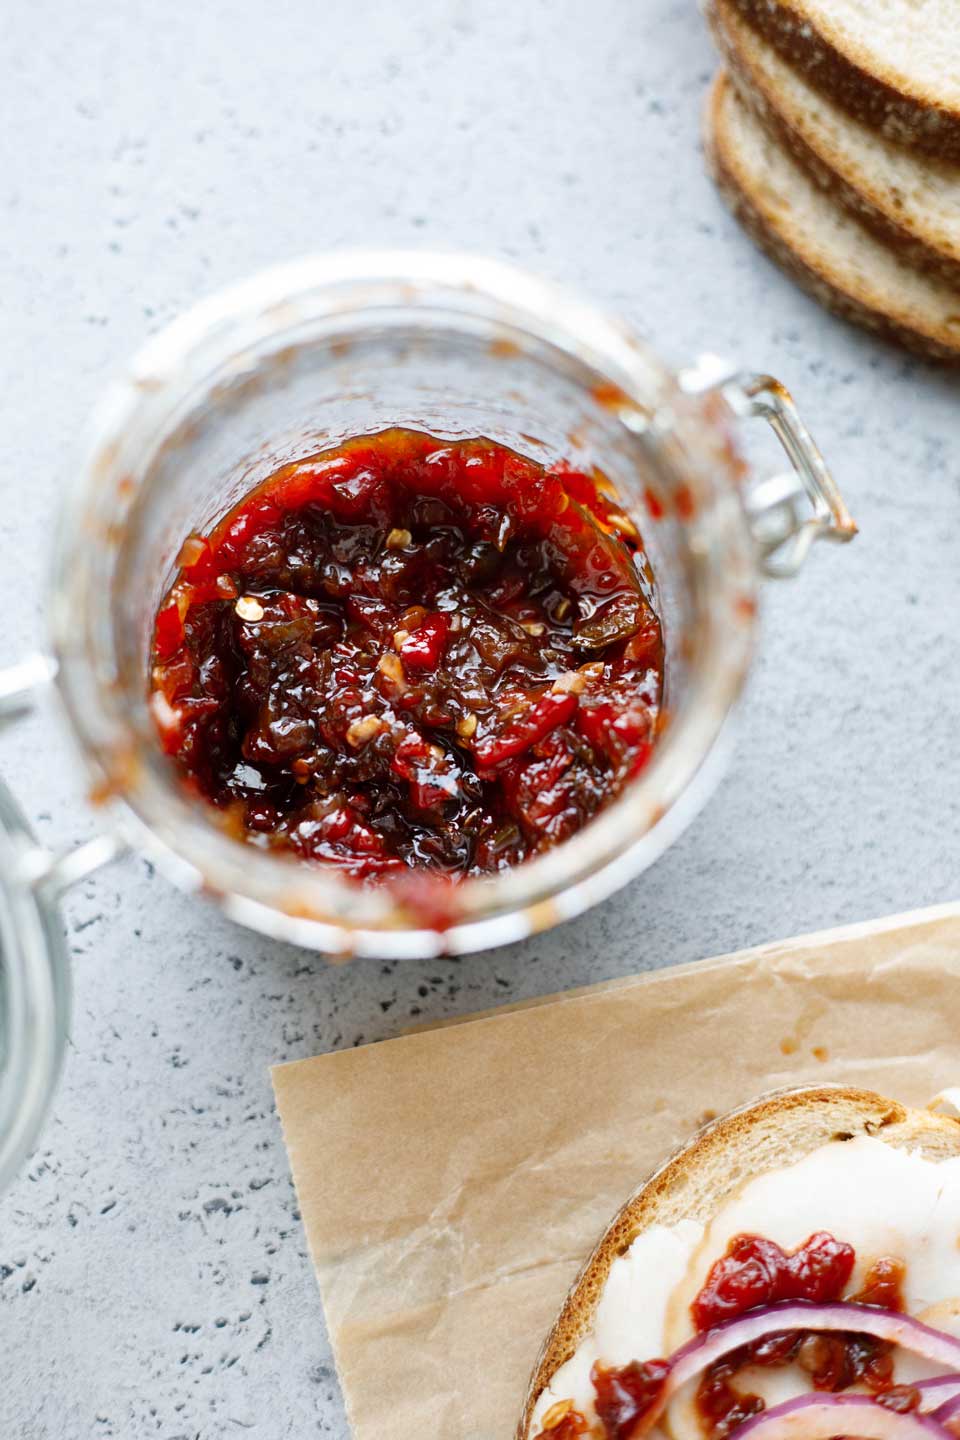
Combine the pepper mixture with some pineapple juice, cider vinegar, jelly, sugar and sriracha.
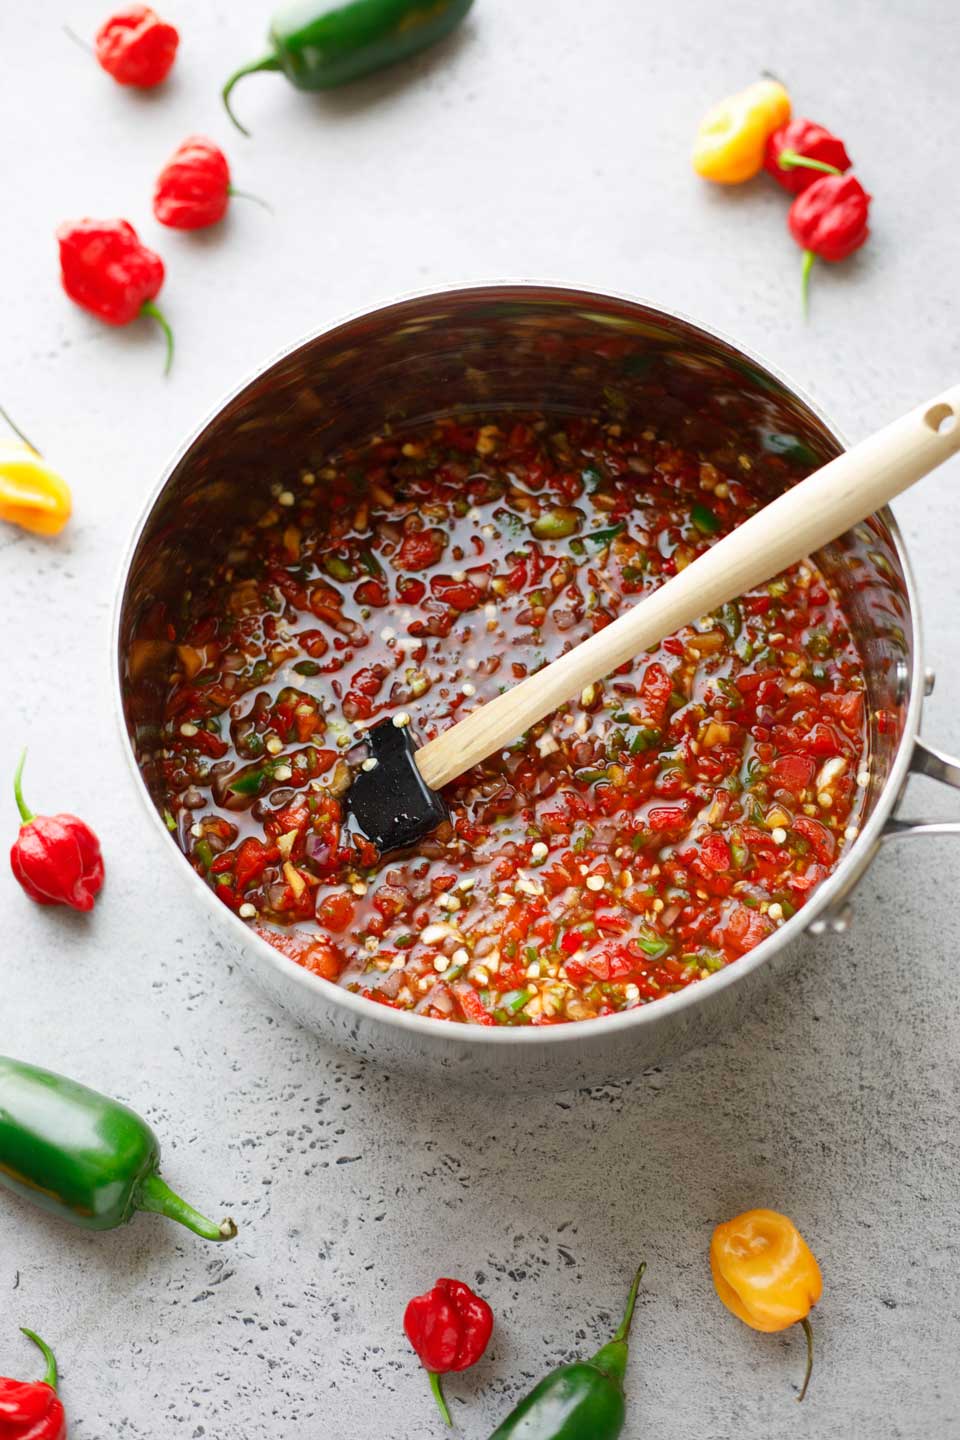
Step #4
Simmer until it’s thickened to your liking and … enjoy!
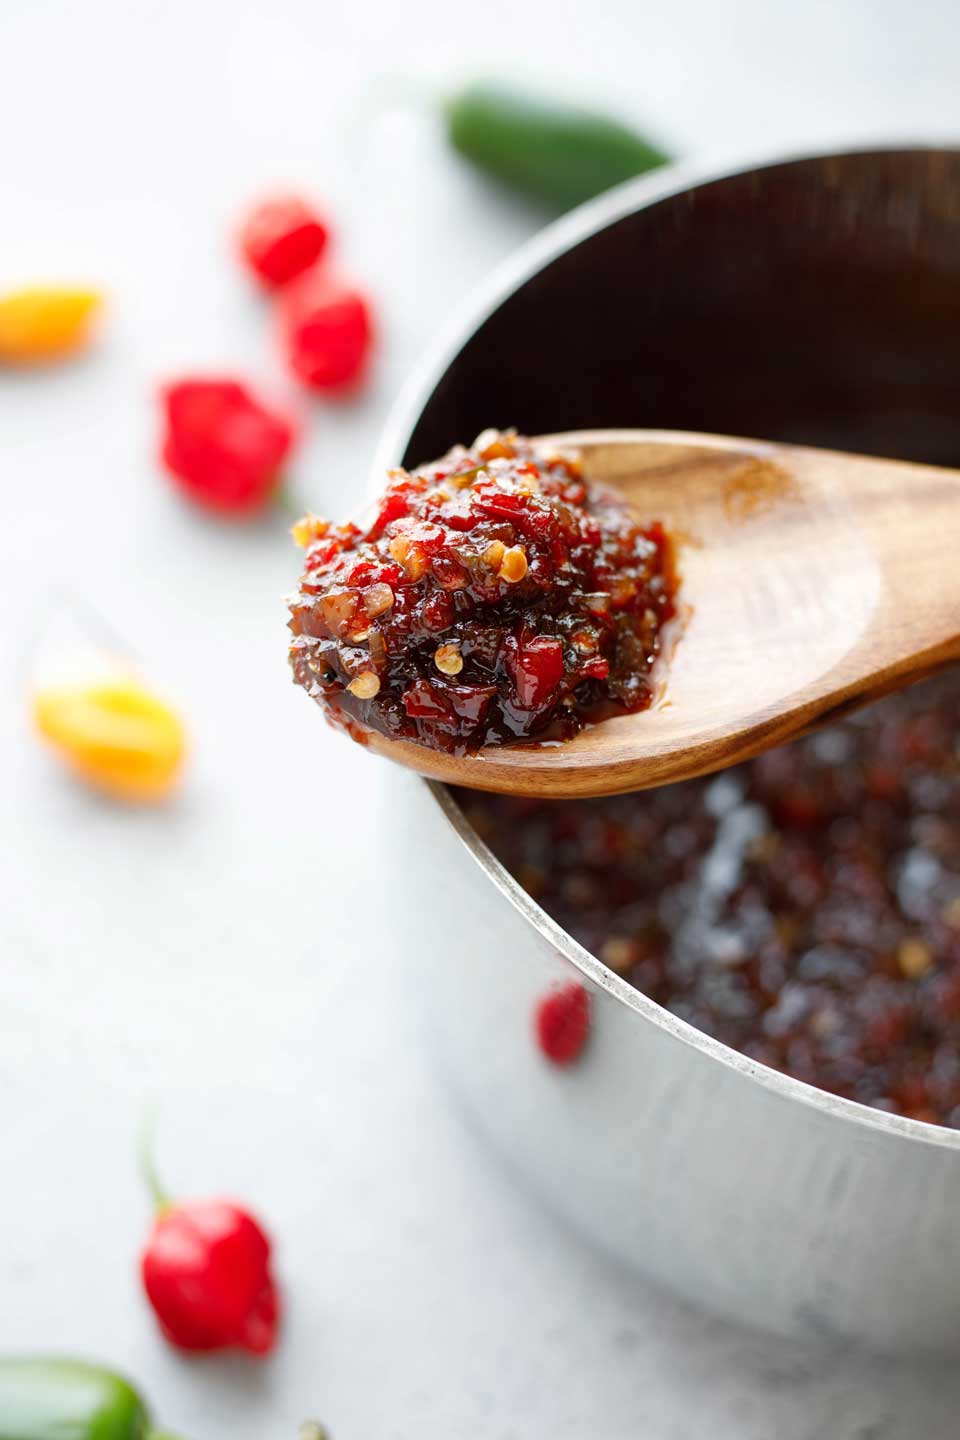
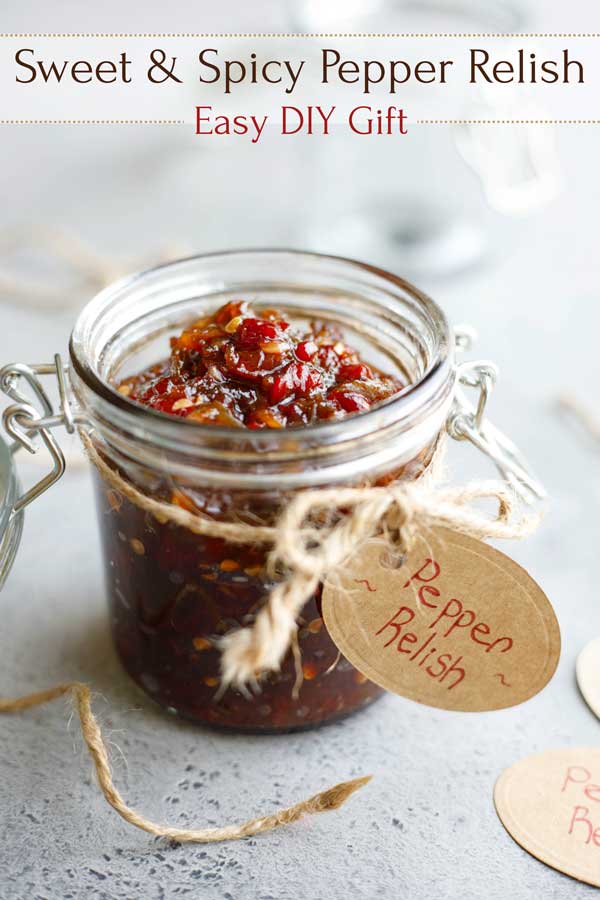
You can also freeze this – it’s a great make-ahead recipe and a lovely little DIY homemade gift for the holidays, or for a hostess or teacher gift!
Taming the Heat in This Hot Pepper Relish
Right off the bat, I worried that you’d see ingredients like “ghost pepper” and even “jalapeño pepper” … and you’d run for the hills.
Don’t!
Trust me on this.
I’ve shared this recipe with quite a few taste-testers (thanks to a couple huge family gatherings this summer), and even people who claim they don’t normally like spicy foods have really enjoyed it. There are so many layers of flavors and so many sweet and tangy components that help to offset the heat. This pepper relish isn’t just about heat … it’s about flavor!
Here are a three keys to remember:
Key #1 – A Little Goes a LONG Way
Remember that (unless you’re my heat-loving son), you’re not going to eat this straight-up by the spoonful. You’ll use just a tiny bit to accent other flavors in the recipes where you use it. That tiny bit goes a long way toward big flavor, though – and actually, I often find that we end up spooning on even more than we’d expected, because it’s just so darn good!
Key #2 – Make It Milder
Don’s original version of the recipe called for leaving the seeds and inner membranes in the hot peppers. But, even Don was head-over-heels for the milder version I tried making, WITHOUT the seeds and ribs!
Oh sure, my milder version still has some feistiness, but much of the heat in a hot pepper hangs out in the membranes and seeds, so removing those also removes a lot of the fiery burn … leaving behind layers of terrific pepper flavor!
As directed on the recipe card, to make my milder version, simply remove the ribs and seeds from the ghost peppers, habaneros and jalapeños before tossing them into the food processor.
Key #3 – Pepper Heat Levels Vary
Also, remember that hot peppers can vary in their heat level from one batch or crop to the next.
So even if you make different batches of this pepper relish in exactly the same way, you may find that the heat levels are still a bit different each time you make this.
Red Peppers: Jarred vs. Roasting Them Yourself
Whenever I look at a new recipe, I automatically scan for shortcuts. So, I knew I’d have to try adjusting Don’s original recipe, with the time-saving shortcut of purchasing jarred, roasted red peppers (instead of roasting them myself).
I honestly didn’t think it would be as good. But I was wrong. (Yay!) Don even thought my shortcut was a terrific idea and still tasted great, too!
If you’re looking to save yourself some prep work (I always am), then grab a jar of roasted red peppers at the store.
If you’re up for a bit of adventure, though, and you’ve never tried blistering your own red peppers – it’s kinda fun and worth trying at least once when you have the time.
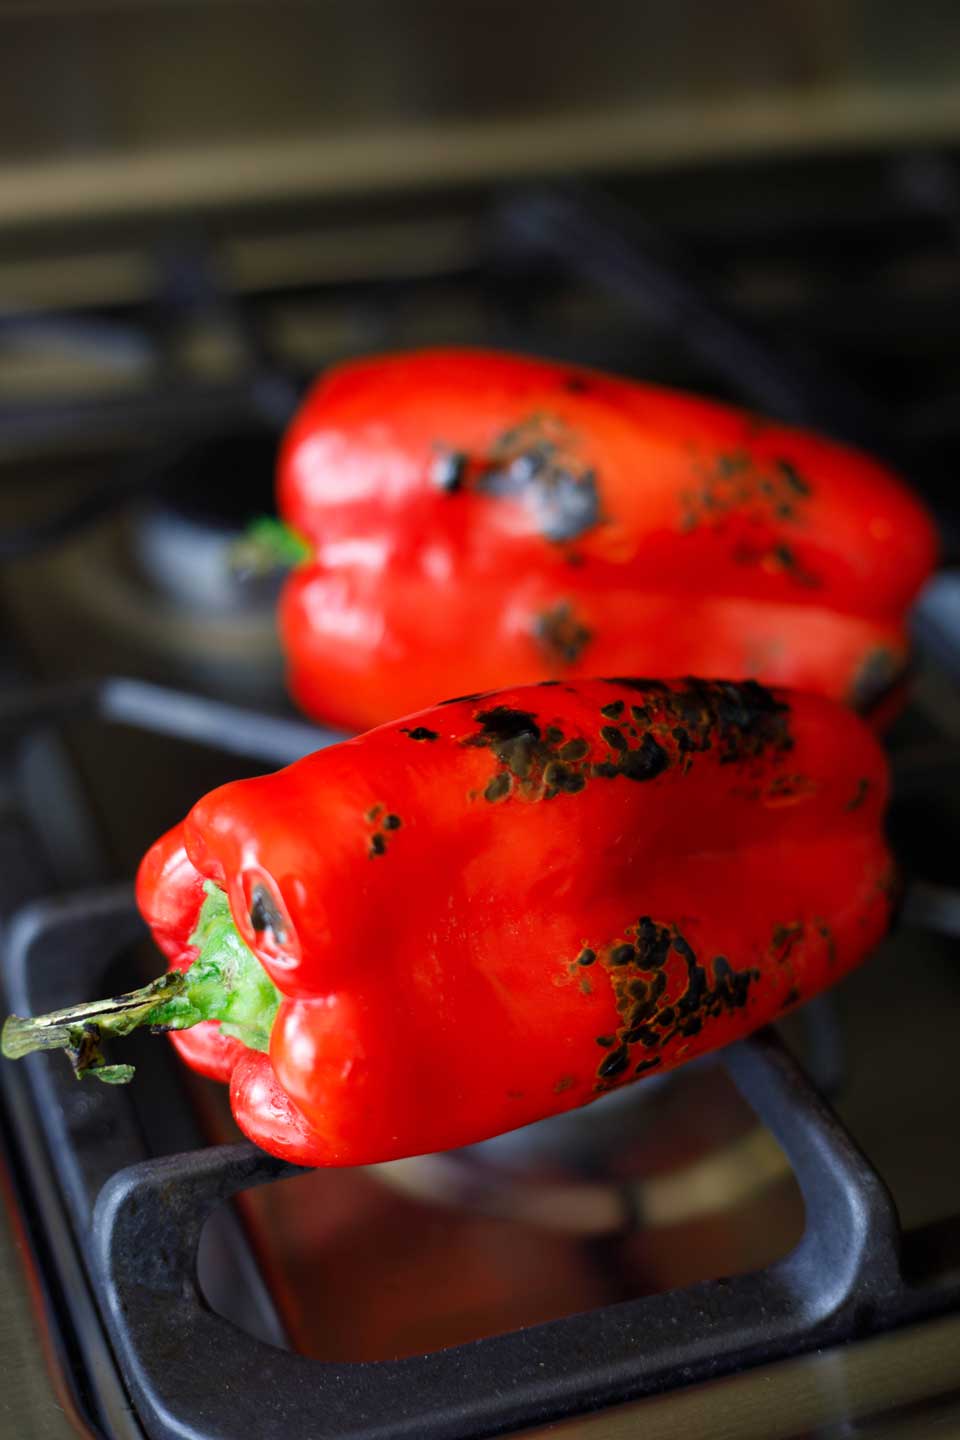
And, since Don’s original recipe called for roasting your own, let’s talk quickly about how to do that:
- You can roast your red peppers over a grill or indoors on a gas stove. Turn your stove to about medium-high and plunk your bell peppers on the grates.
- Allow them to blister on all sides, turning them frequently. It’ll take maybe 5-10 minutes.
- Then, place the peppers in a glass bowl and cover it with plastic wrap for about 10 minutes or until the peppers are cool enough to handle.
- The peppers will “steam” in the bowl, and their blistered skins will release a bit so you can easily peel it away.
- After peeling the peppers, remove the stem, core and seeds … and you’re good to go!
Switching Up the Flavors in Your Pepper Relish
Don tells me that every time he makes this pepper relish, it tastes just a little different.
The exact heat and specific flavors of each batch of peppers can vary, for one thing.
And, the exact amount you reduce each batch will affect how concentrated the flavors are. But don’t worry – it’s always delicious, despite the variations.
I’ve personally tested this hot pepper relish with several different variations, and I can vouch for the fact that it’s super-adaptable. It’s turned out to be fantastic, no matter what I change up. I absolutely encourage you to try your own variations (and to tell me all about your successes so I can try your variations, too)!
This already has me dreaming of ways to switch out the jellies (and maybe even the peppers) to create other specific flavors. Maybe mango-habanero? Chipotle-strawberry??
Ohhhhhh … the possibilities!
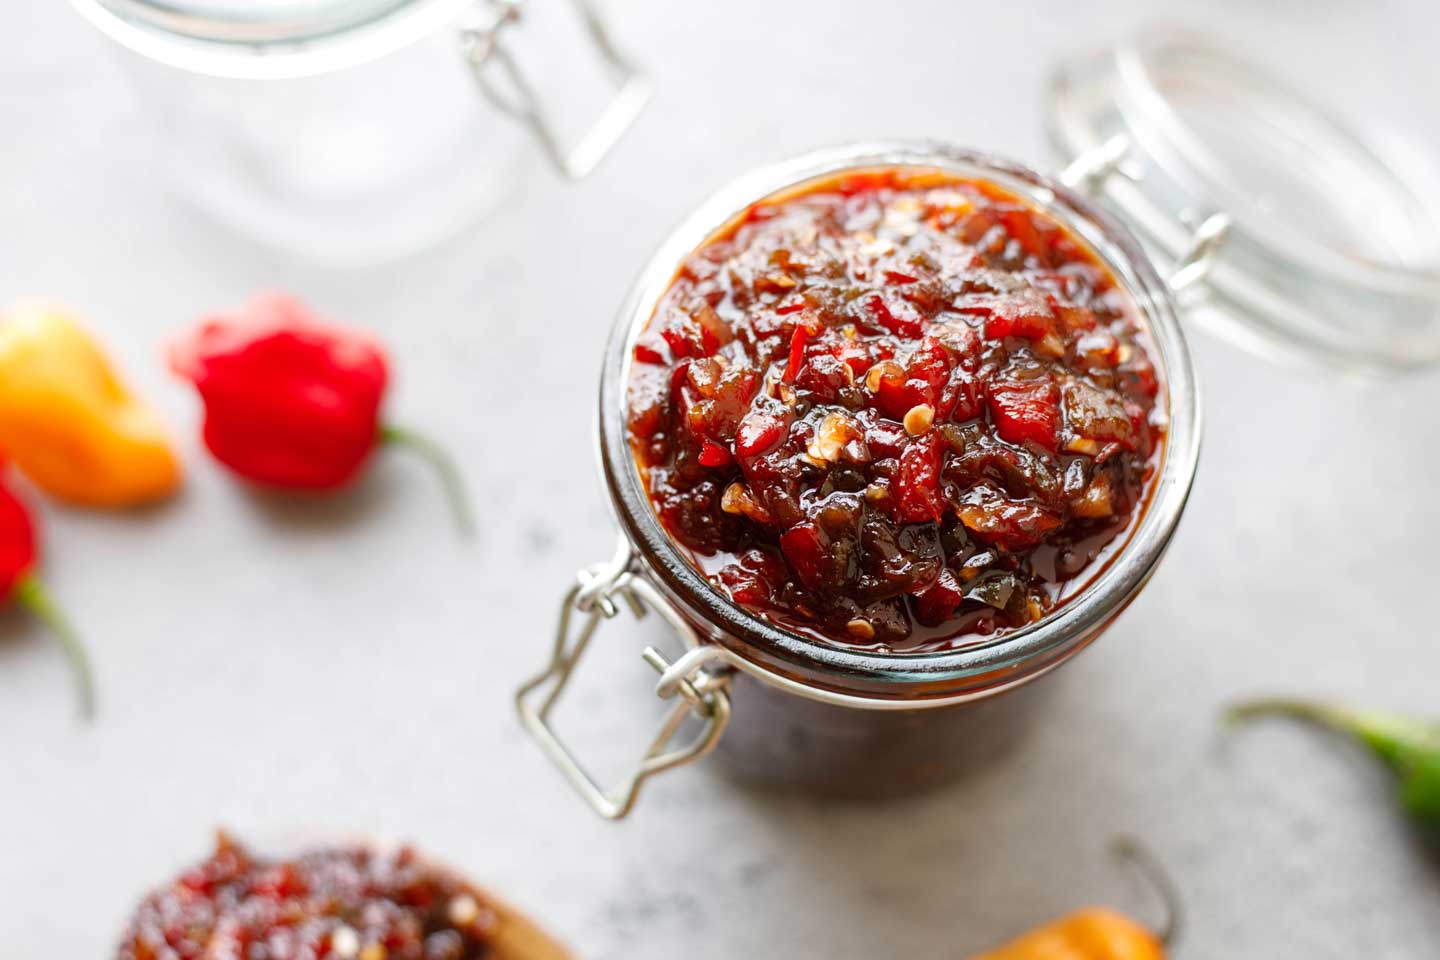
A Great Make-Ahead for the Freezer … or DIY Gifts!
If you find yourself with your own beast of a ghost pepper plant, staking claim to large parts of your porch or backyard garden … well, you’ll know just what to do. Make pepper relish (obvs). But once you’ve stockpiled gallons of pepper relish … ummmmm … then what? Exactly how much of this can you eat at once?!?!
Good news!
This freezes great!
So, go ahead and make ginormous batches and squirrel them away to get you through until the next bumper crop arrives. For real – once you have this in your life, you’ll be sad if it’s not around!
Pro Tip: Freezing Smaller Quantities
I personally like to freeze mine in small quantities – usually, spooning about 1/2 cup into little zipper bags that I freeze flat before putting them all together in a larger zipper bag. The pepper relish thaws really quickly, so I can pull out just a little, any time I need it.
Because it’s such a terrific make-ahead, it’s also a perfect idea for DIY gifting.
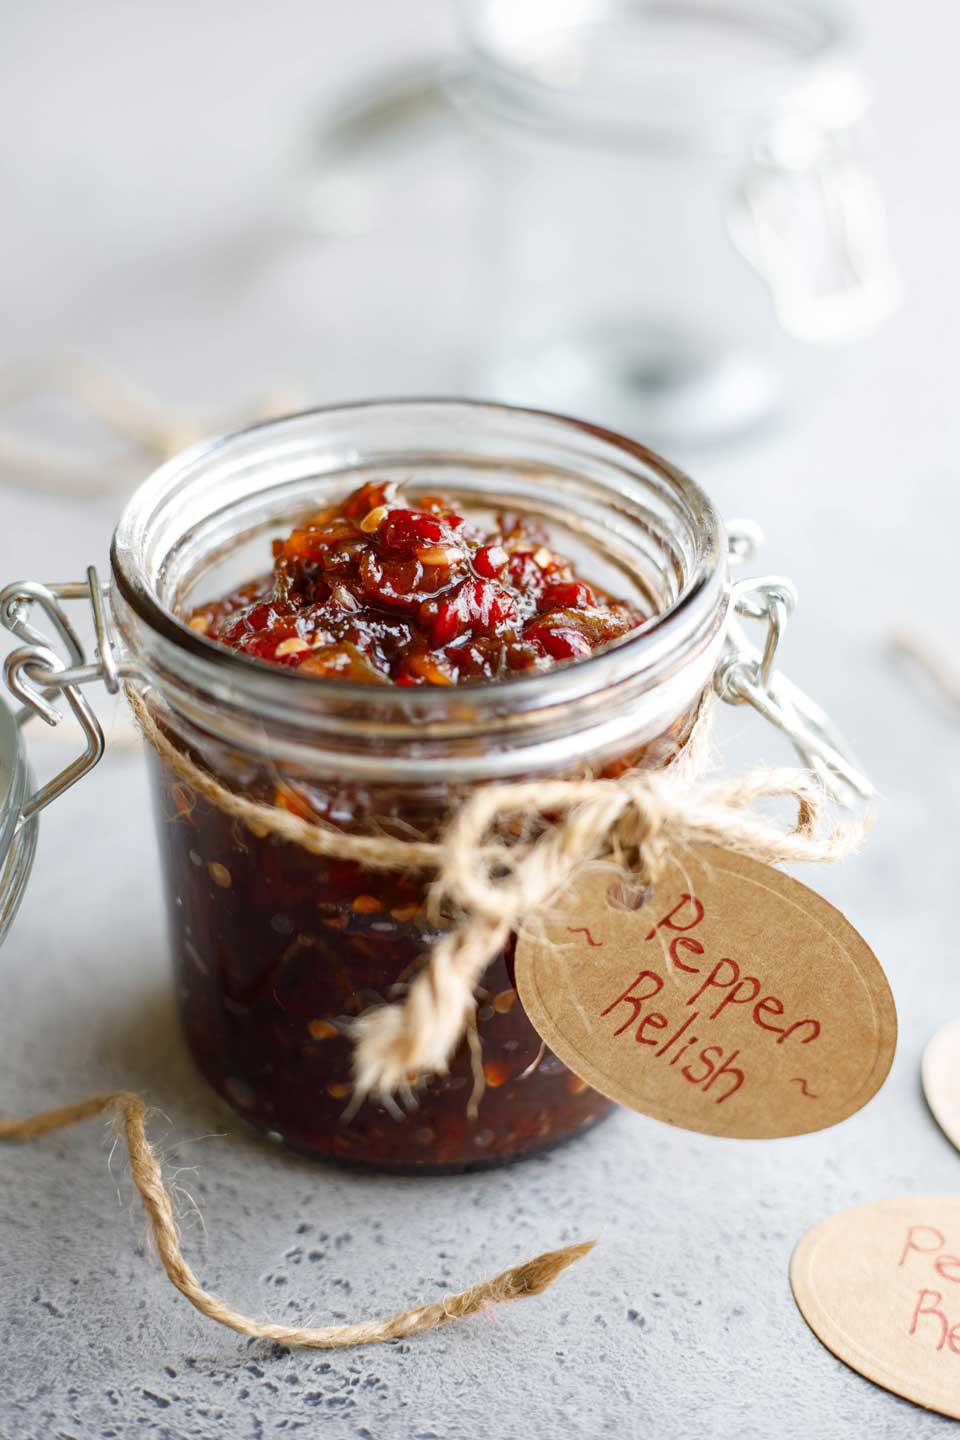
Tie a little tag around it, and it’s all ready to present as a hostess or teacher gift, and would be such a pretty addition to a gift basket for the holidays.
A Note on Exact Quantity
If you’re thinking of making this for gift-giving, though, it’s important to note that the exact quantity you’ll get from each batch can vary quite a bit. Every single batch I’ve made has ended up with a different yield, from 1 1/2 cups to just over 2 cups each.
This variation can be due to a couple of factors, including exactly how large your peppers are (particularly if you roast your own red peppers), and to how far down you reduce the pepper relish as it simmers.
The thicker you prefer your relish (and the more you reduce it to thicken it), the lower the yield of each batch.
So, if you’re calculating the amount you want to make, I recommend over-estimating, just to be sure you have enough.
In fact … you pretty much want to over-estimate, anyway! As in, you basically can’t have enough.
And psssssst … I just might already have a couple more recipes up my sleeve that use this magical stuff. 😉 Stay tuned … and definitely make some extra batches …
FAQs At-a-Glance
You homemade pepper relish should be refrigerated after it’s cooled. For longer storage, it can also be frozen.
An easy way to make Hot Pepper Relish less hot is to remove the seeds and membranes from hot pepper varieties like ghost peppers, habaneros, and jalapeño peppers. Remember, too, that individual peppers can vary in exact heat level from one pepper to the next.
Love the Recipe? • Were My Tips Helpful?
__________
Please leave a star-rating in the recipe card below – I truly appreciate all your wonderful feedback!
Sweet and Spicy Pepper Relish
This Sweet and Spicy Pepper Relish recipe is legendary! Deeply flavorful: even people who don't like spicy foods love it! Try it on almost EVERYTHING!
• Freezable • Make Ahead • Vegan (and Vegetarian) • Gluten Free •
Ingredients
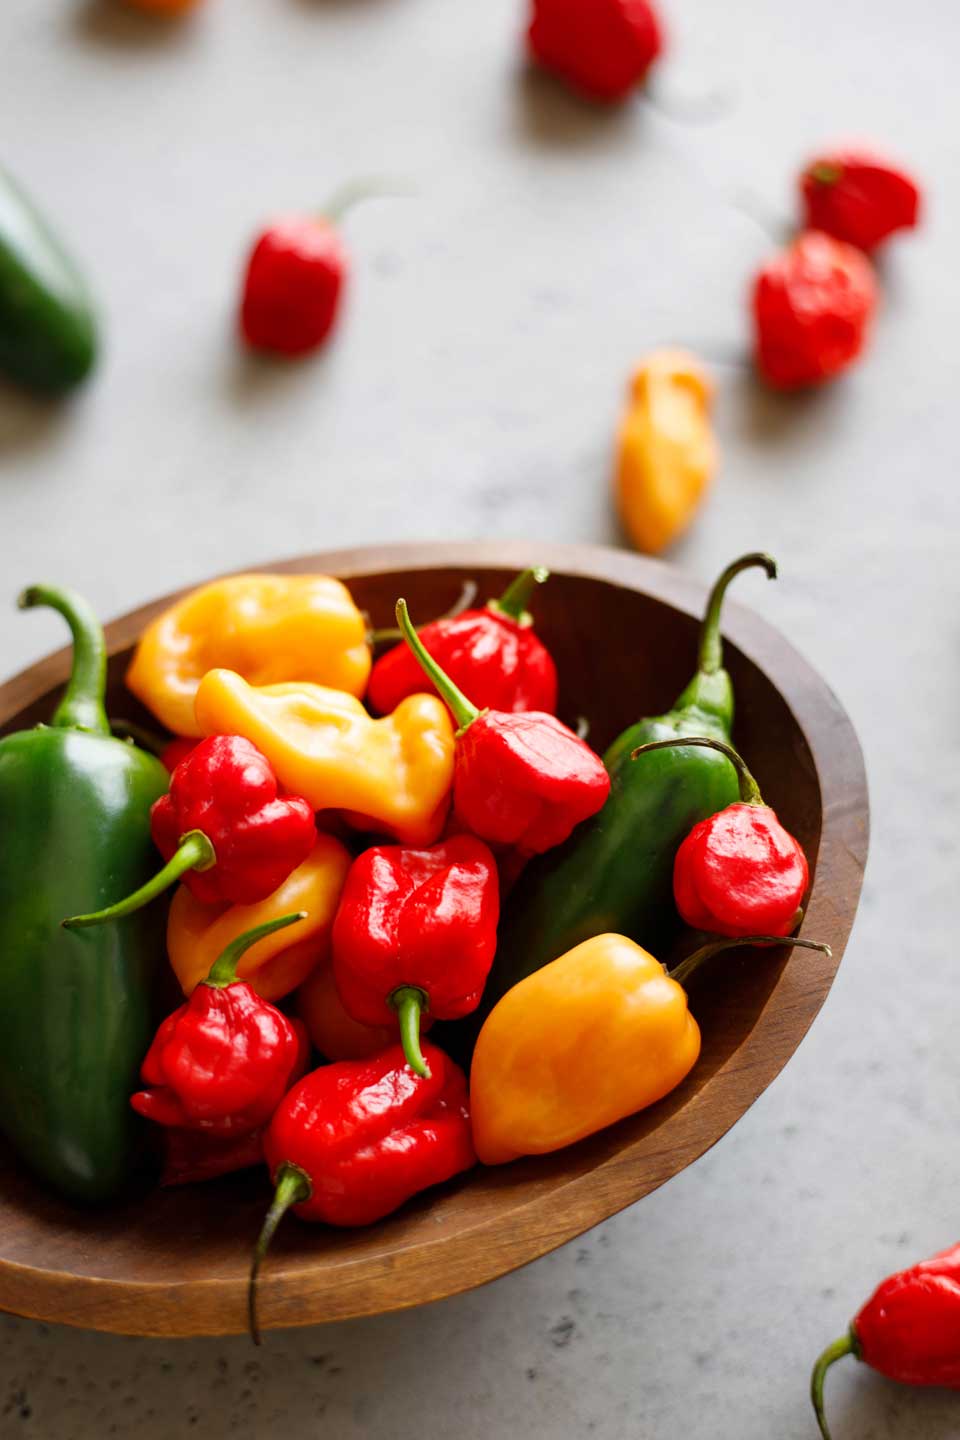
- 4 habanero peppers
- 4 jalapeño peppers
- 2 ghost peppers
- 1 1/2 cups drained and coarsely chopped, jarred roasted red bell peppers (from about a 12-ounce jar – see note below and tips in post for roasting your own, if you prefer)
- 4 medium garlic cloves
- 1/2 cup finely diced red onion (from about 1/4 of a medium onion)
- 1/2 cup sugar
- 6 tablespoons apple cider vinegar
- 6 tablespoons pineapple juice
- 1/4 cup all-natural grape jelly (we use Welch's Natural)
- 1/4 cup 100% pure fruit seedless red raspberry jelly (we use Smucker's Simply Fruit)
- 2 tablespoons sriracha
Instructions
* BE SURE TO WEAR GLOVES WHEN HANDLING HOT PEPPERS. Also, wash your hands very thoroughly afterwards and do not touch your eyes, nose or face until you've removed your gloves and very carefully washed up. *
- Remove the stems from the habanero, jalapeño, and ghost peppers. For a less spicy pepper relish, also remove the seeds and ribs (see note below on customizing the heat level). Coarsely chop the hot peppers.
- In a food processor (we usually use the largest of our Ninja containers), combine the habaneros, jalapeños, ghost peppers, roasted red peppers, and garlic. Pulse until evenly chopped but not finely minced or pureed (about 8 pulses, scraping the sides as needed between pulses – refer to the photo in our post).
- In a medium saucepan, combine the processed pepper mixture and all other ingredients.
- Bring to a gentle boil and reduce heat to about medium-low to maintain a simmer (adjusting heat setting as needed). Simmer, uncovered, until the pepper relish is reduced to your liking, keeping in mind that it will continue to thicken a little further as it cools. The exact time this will take can vary from one batch to the next, depending on the size of your pan and how closely you keep it to a simmer, but it will probably take about 45-65 minutes to achieve the consistency you see in my photographs. Also, if you choose to roast your own red peppers (see note below) instead of using jarred peppers, your pepper relish will probably thicken more quickly. (Note that how much you thicken your relish will affect the final yield of the recipe. I have a slightly different yield every time I make this hot pepper relish.)
- Remove from heat and cool completely before storing in the refrigerator or freezing. See serving suggestions in the post for lots of ideas on how to use this pepper relish.
Notes
Red peppers – using jarred or roasting your own: Don's original version of this recipe called for roasting your own red peppers. I tested the recipe using purchased, jarred roasted red peppers instead – to save time – and I was surprised how little difference it made in the final relish. If you have extra fresh red peppers on hand, feel free to roast your own according to the directions in our post above (you will need about two red peppers for this recipe). Otherwise, to save a step in recipe prep, simply purchase jarred peppers as directed in our ingredient list above.
Choosing jellies: When choosing your jellies, be sure to read ingredient labels to find the healthiest options possible, avoiding brands with lots of processed ingredients such as high-fructose corn syrup. Look for brands that use fruit juice as a sweetener or those that contain only all-natural ingredients. In the ingredient list above, we've linked to the jellies we use, so you can see what the labels look like when you head to the store - but your store may have different brands, so take a moment to read the labels.
Customize your heat: Hot peppers can vary a lot in their heat levels, so every batch of pepper relish you make will likely have a slightly different flavor and heat profile. However, a sure way to dial back the heat is to remove the seeds and internal ribs from the habanero, jalapeño and ghost peppers. Our test of this milder technique won huge raves from taste-testers and had noticeably less after-burn while still offering nice heat and great flavor.
Customize your flavors: As noted in the post, we've tested this recipe several ways to adjust the heat and also change up the flavors. It's very adaptable. For example, we tried swapping in peach preserves for the grape and red raspberry jellies, which resulted in a less intensely fruit-forward flavor, in which you could definitely taste a hint of peach. Feel free to try your own variations!
Freezing: This hot pepper relish freezes beautifully. I like to measure out 1/2-cup portions and spoon them into labeled, snack-size zipper bags, freezing each little baggie flat before placing them all together into a large freezer bag.
Vegan ingredient note: If it's important to you to be sure that this recipe is entirely vegan, be sure to use sugar that is processed in a vegan way (without using bone char). You can read more about that and find some brand recommendations HERE. Also, be sure that the jelly you purchase is made with fruit pectin (rather than the gelatin you may find used commonly in homemade jams and jellies). You can read more about that HERE.
Nutrition Information:
Yield: 32 servings Serving Size: 1 tablespoonAmount Per Serving: Calories: 36Total Fat: 0gSaturated Fat: 0gTrans Fat: 0gUnsaturated Fat: 0gCholesterol: 0mgSodium: 28mgCarbohydrates: 8gFiber: 0gSugar: 7gProtein: 0g
Nutrition information should be considered an estimate only, and may vary depending on your choice of ingredients or preparation. No guarantees are made regarding allergies or dietary needs. Always consult a physician or dietician for specific advice and questions.


What could I sub the ghost pepper with since I can’t seem to find those in my grocery store right now?
As I mention, this recipe is pretty flexible, and you can play around with different peppers to customize the heat and flavor (or – in this case – based on what you can find at the store). You could simply increase the amount of habaneros and jalapeños, to make up for the missing ghost peppers. Or, you could experiment with subbing other peppers like (spicy!) Scotch bonnets or (slightly less spicy) cayenne or serrano peppers, based on how much heat you want and what your store has in stock. These substitutions may affect the flavor and heat a bit, but the pepper relish should still be delicious – and you can have fun experimenting and changing it up a little each time you make it. I hope you love it as much as we do! ~Shelley
This is absolutely delicious! Thank you so much for sharing the recipe. I have made it twice. The first time I used my own raspberry preserves and blueberry jam. And I only added 1/2 the sugar. The second time I used cherry preserves for all and added no sugar. I find it very sweet already with the pineapple juice and preserves. What a fantastic way to use up all of my hot peppers from the garden.
Thank you for taking the time to leave such lovely feedback and offer suggestions of variations you loved. I’m so happy to hear that you love this just as much as we do, and your variations all sound so delicious (mmmmmm cherry preserves!). 🙂 ~Shelley
I have made this for several years and it is GOOOOOOD! It is not just hot, the flavours from the grape and raspberry make it sweet and delicious!
I’m delighted to hear you enjoy this so much that it’s become a go-to for you, year after year! That’s high praise, for sure – thank you so much for taking the time to leave such great feedback! ~Shelley
Could I water-bath can this recipe?
Hi, Emily! I haven’t tested this Pepper Relish with water-bath canning methods, so I can’t say for sure if there would be any issues, or slight changes needed. ~Shelley
How long does this last in the fridge please?
To be on the safe side, I’d recommend not keeping it in the fridge for more than about a week. Beyond that, go with my freezing suggestions (to make a big batch and/or store it for much longer). Hope you love this as much as we do, Louise – we find it absolutely ADDICTIVE! 😀 ~Shelley