Air Fried Green Beans Recipe
~ This Air Fried Green Beans recipe is ultra quick and easy! It produces virtually the same results as high-heat roasting in a traditional oven, but in even less time. So deeply flavorful with all those yummy golden brown spots! (Includes lots of delicious ideas for adapting it to any main dish you’re serving.) ~
This Recipe Is: • Ready in 30 Minutes or Less • Includes Make-Ahead Steps • Vegan (and Vegetarian) • Gluten Free • Paleo •
As if Roasted Green Beans couldn’t get any easier … along came the air fryer!
And now they actually ARE easier and faster than ever before!
You guys know that I’m a huge fan of roasted vegetables. “Old school” oven roasting creates deep, caramelized flavors without overcooking your veggies to unappetizing mush.
And … if you do it right, your handy, countertop air fryer can achieve virtually identical results to your big ol’ oven, in a fraction of the time. (Since there’s almost no preheating time with an air fryer – and with some air fryer models, actually ZERO preheating time at all!)
Mmmmmm … it’s a lot to love, for sure!
Why You’ll Love Air Fried Green Beans
Seriously, what’s not to love?
How to Make Your Easy Air Fryer Green Beans
Prep:
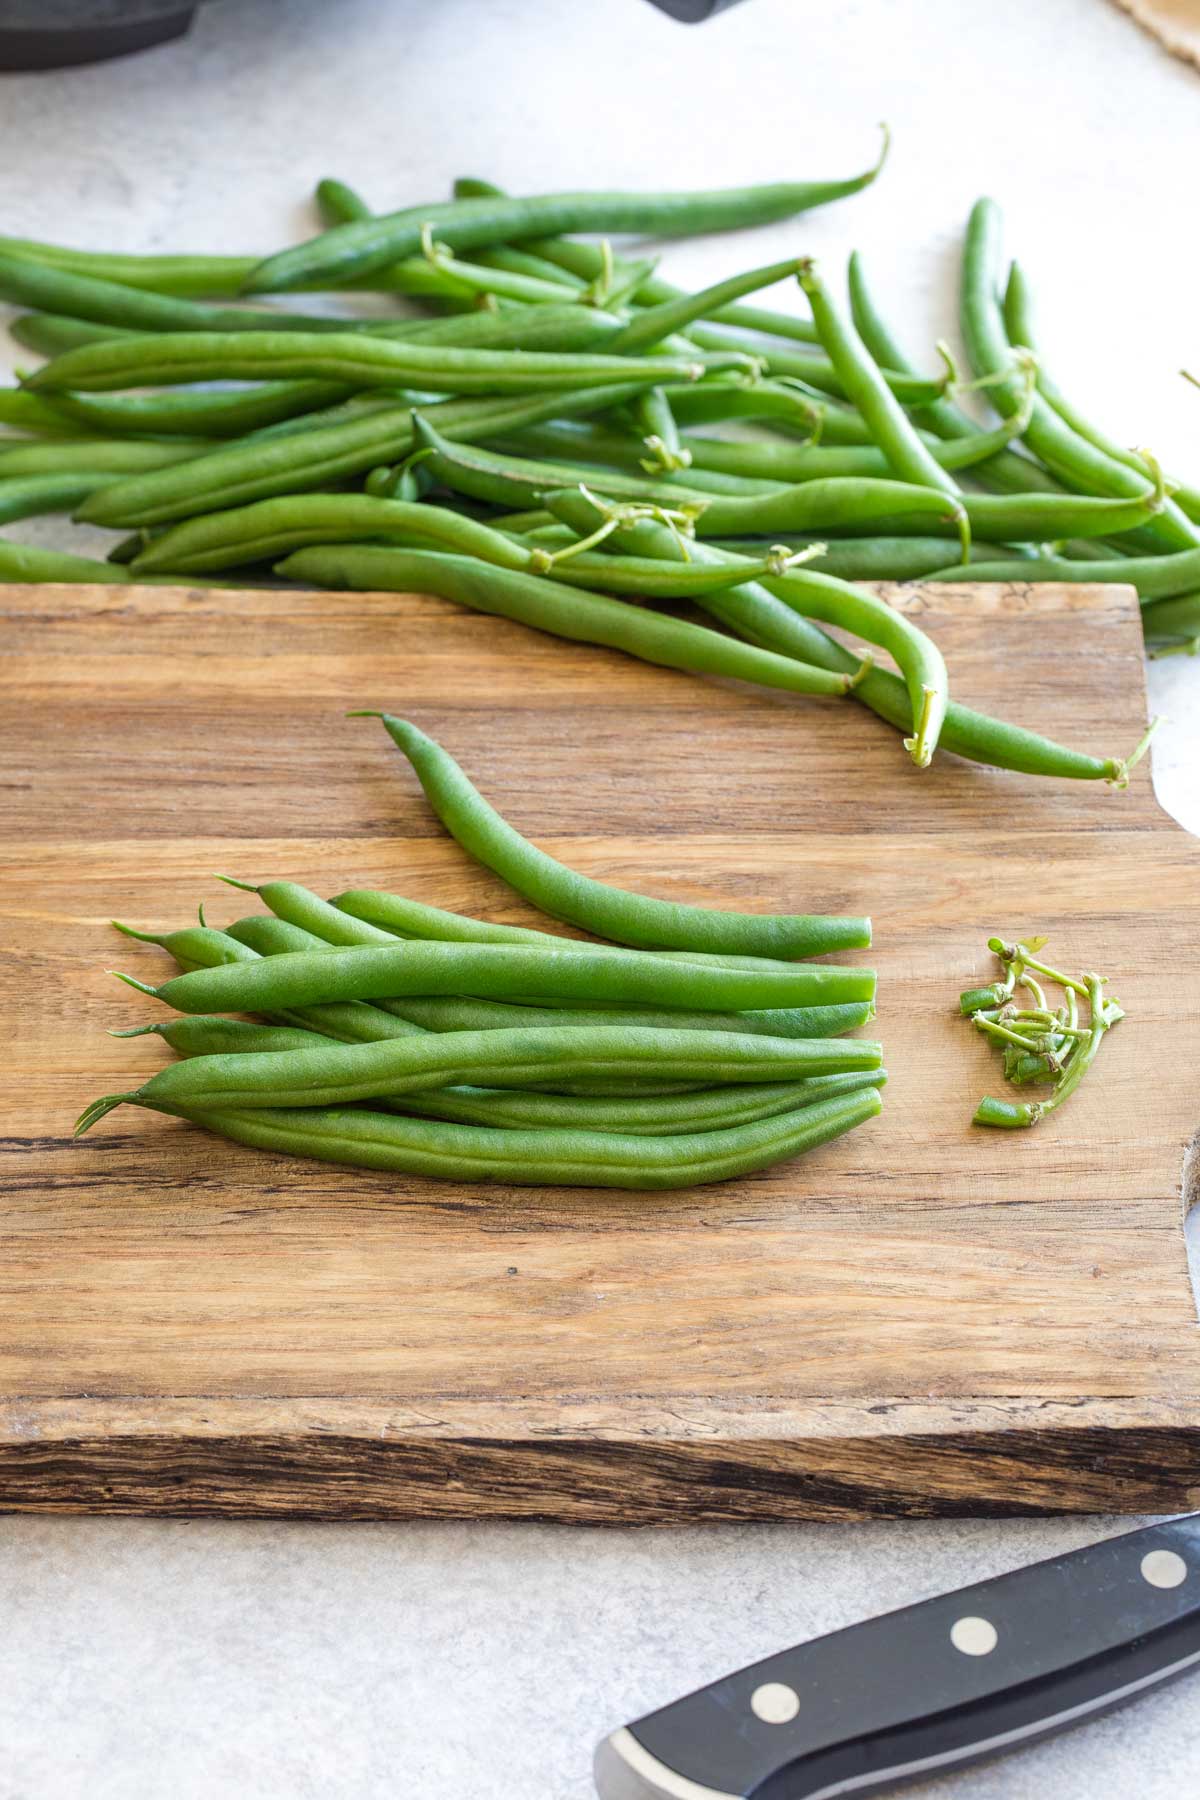
Grab a pound of fresh green beans.
Avoid older, woody or tough green beans. They’ll tend to stay tougher when you air fry them, instead of coming out nicely blistered yet tender inside.
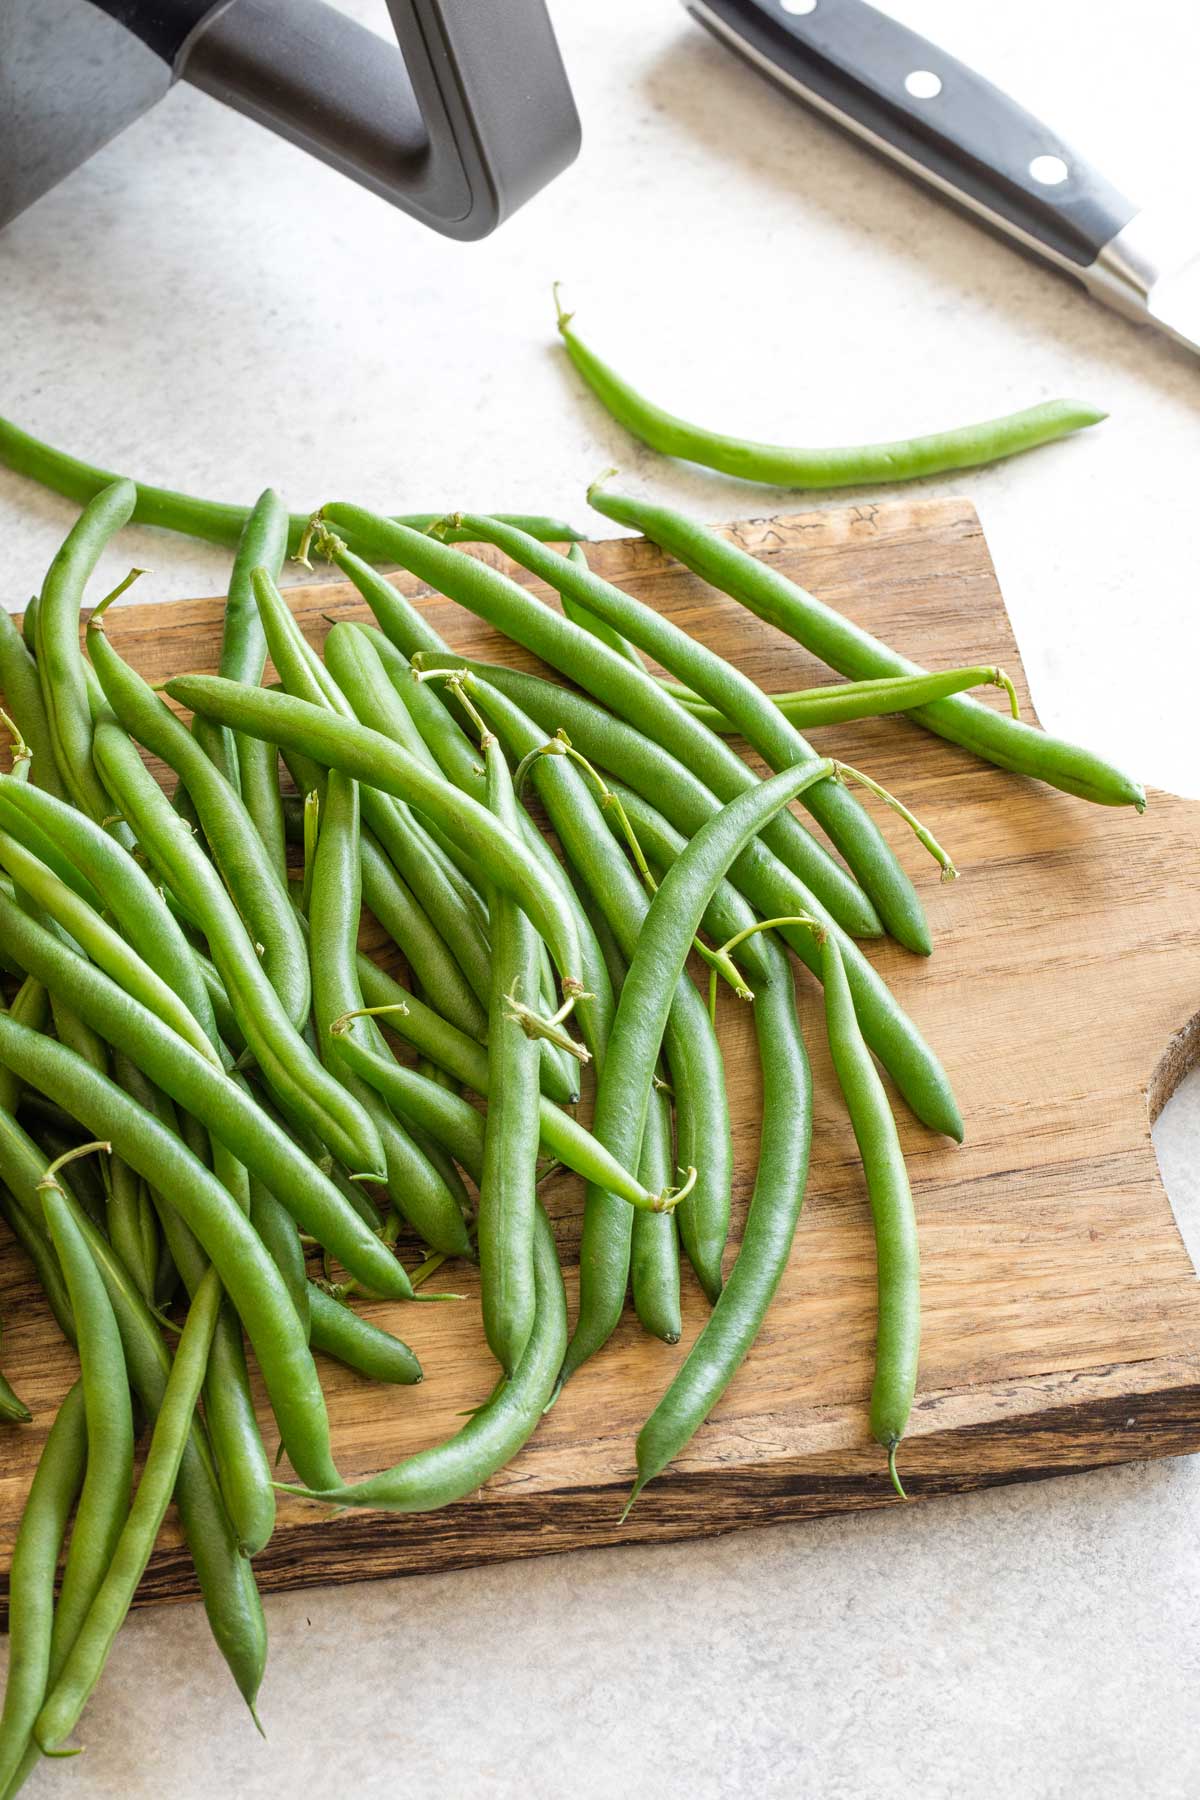
Give them a good rinse to get rid of any dirt.
Then, pat them dry with a paper towel.
If they’re wet, the olive oil you’re going to toss them with won’t adhere well. And the surface of wet green beans won’t roast as nicely.
Next, trim away the stem ends.
Quick Tip:
I find that the fastest way trim bean stems is to line several green beans up all together, and cut off the ends in batches.
Tails or No Tails?
As we mentioned way back in our beloved, long-ago recipe for Roasted Green Beans with Balsamic-Browned Butter, there’s certainly debate surrounding whether or not you should trim off the green bean “tails,” as well as the stems.
There’s no wrong answer here, but I personally prefer to leave the little tails on. It saves the time of trimming them off, and they get delightfully crispy in your air fryer. But the choice is yours!
*** Make-Ahead Tip: You can do this prep work ahead of time – earlier in the day or even the day before. Whenever you happen to have a free moment. Pop your prepped green beans (loosely wrapped) into the fridge until go-time!
Once you’ve got your green beans washed and trimmed, you’re ready to start cooking.
Step #1:
Set your air fryer to 375°F.
Note that some air fryer models have a built-in preheating cycle of a couple of minutes, and some don’t. (For example, my Instant Vortex Plus does have a preheating cycle, but my COSORI Pro III Dual Blaze does not.)
If your particular air fryer does have a brief preheating cycle, I recommend that you wait to add your raw green beans until after that preheating stage.
Pro Tip: The Right Temperature
In the same way that I typically prefer “high heat” roasting temperatures of 475°F when I roast fresh veggies in my “standard” oven, I also usually default to setting my air fryer to the highest setting. (On both my models, the highest setting is 400°F, which is fairly standard.) That’s what I do when I make my favorite Air Fryer Asparagus recipe.
So, I was surprised that, in test after test, 400°F wasn’t the best choice for air fried green beans. The green beans just weren’t quite done to our liking on the inside, by the time that the exteriors were perfectly browned.
Dropping the temperature slightly – to 375°F – allowed us to cook the green beans for a couple of extra minutes, so the insides were perfectly tender at the same moment that the outsides were gorgeously marked with roasty-toasty brown spots.
Step #2:
Right before adding them to your air fryer basket, drizzle your green beans with a smidge of extra virgin olive oil. Toss them to ensure that every bean is evenly, thinly coated with oil.
Then, sprinkle your beans with salt and pepper, and toss them again to get the seasonings evenly distributed.
I like to do this right on the cutting board where I trimmed my beans. I mean … you can use a large bowl if you prefer, but why dirty more dishes than you have to, right?
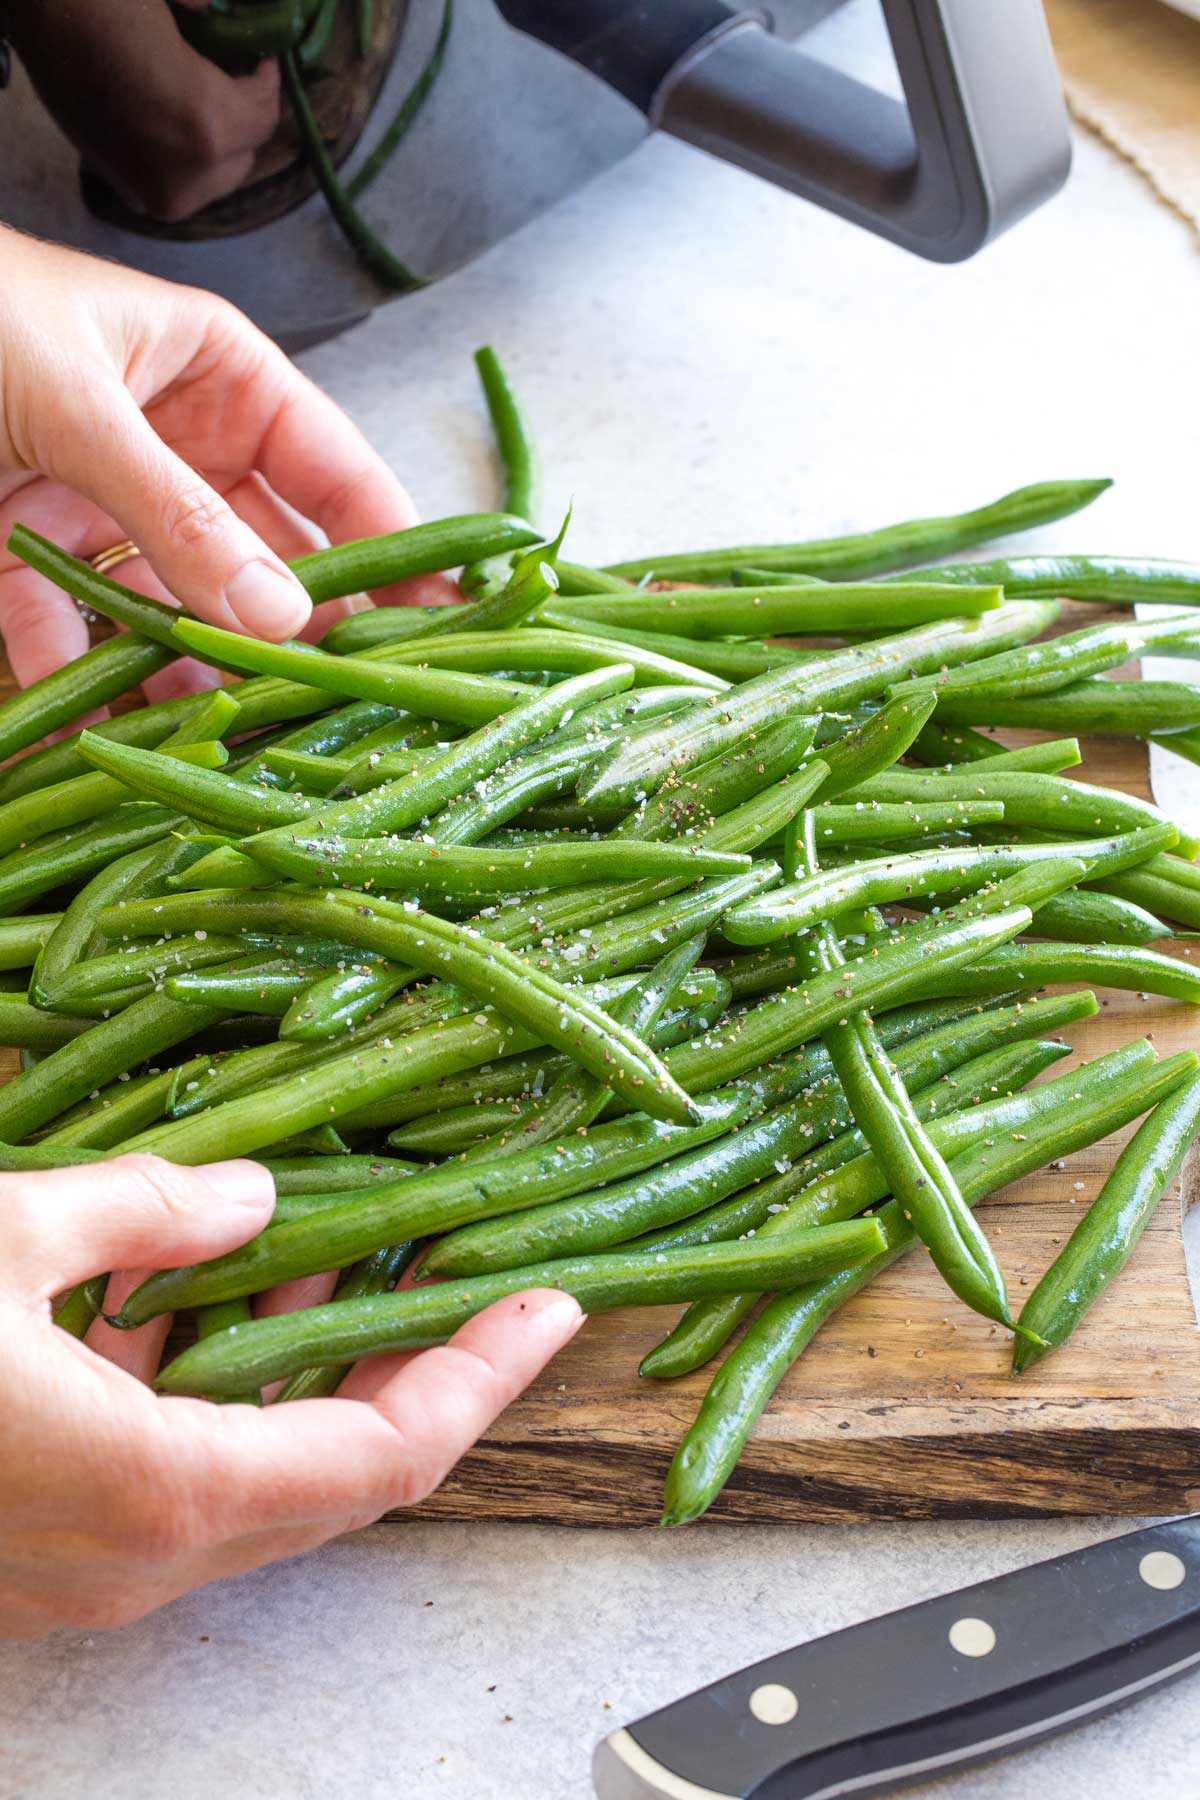
And I definitely recommend that you use your hands to do the tossing here.
Sure, it’s a tiny bit messy. But your hands truly are your very best tool for rubbing that oil lightly across your beans and making sure each bean gets its share. Roll up your sleeves and dive on in!
Do You Have to Use Oil for Air Frying Green Beans?
I know, I know. You might be thinking, “Hey! Isn’t one of the awesome things about air fryers the fact that you don’t have to use all the oil of regular frying?”
That’s totally true!
But just a smidge of oil makes a HUGE difference. You don’t need much oil – only 1 teaspoon of EVOO for an entire pound of green beans.
Believe it or not, that very small amount of oil actually helps to enhance browning in air fryer recipes, helping your green beans to develop those wonderful, tasty golden-brown spots. And, the oil simultaneously helps to prevent your beans from getting dried out. (If you wanna geek out over the details on this, check out Food Network’s article on Everything You Need to Know About Using Oil in an Air Fryer.)
Step #3:
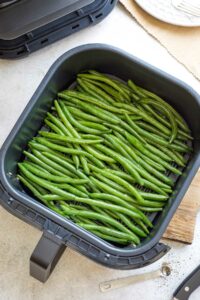
Spread your green beans out in your air fryer basket.
For the best green beans, it’s important not to just toss the beans in there, all heaped on top of themselves in a big pile. You’re trying to get as close to a single layer as possible. (If you have a smaller air fryer, you may need to cook this recipe in two batches.)
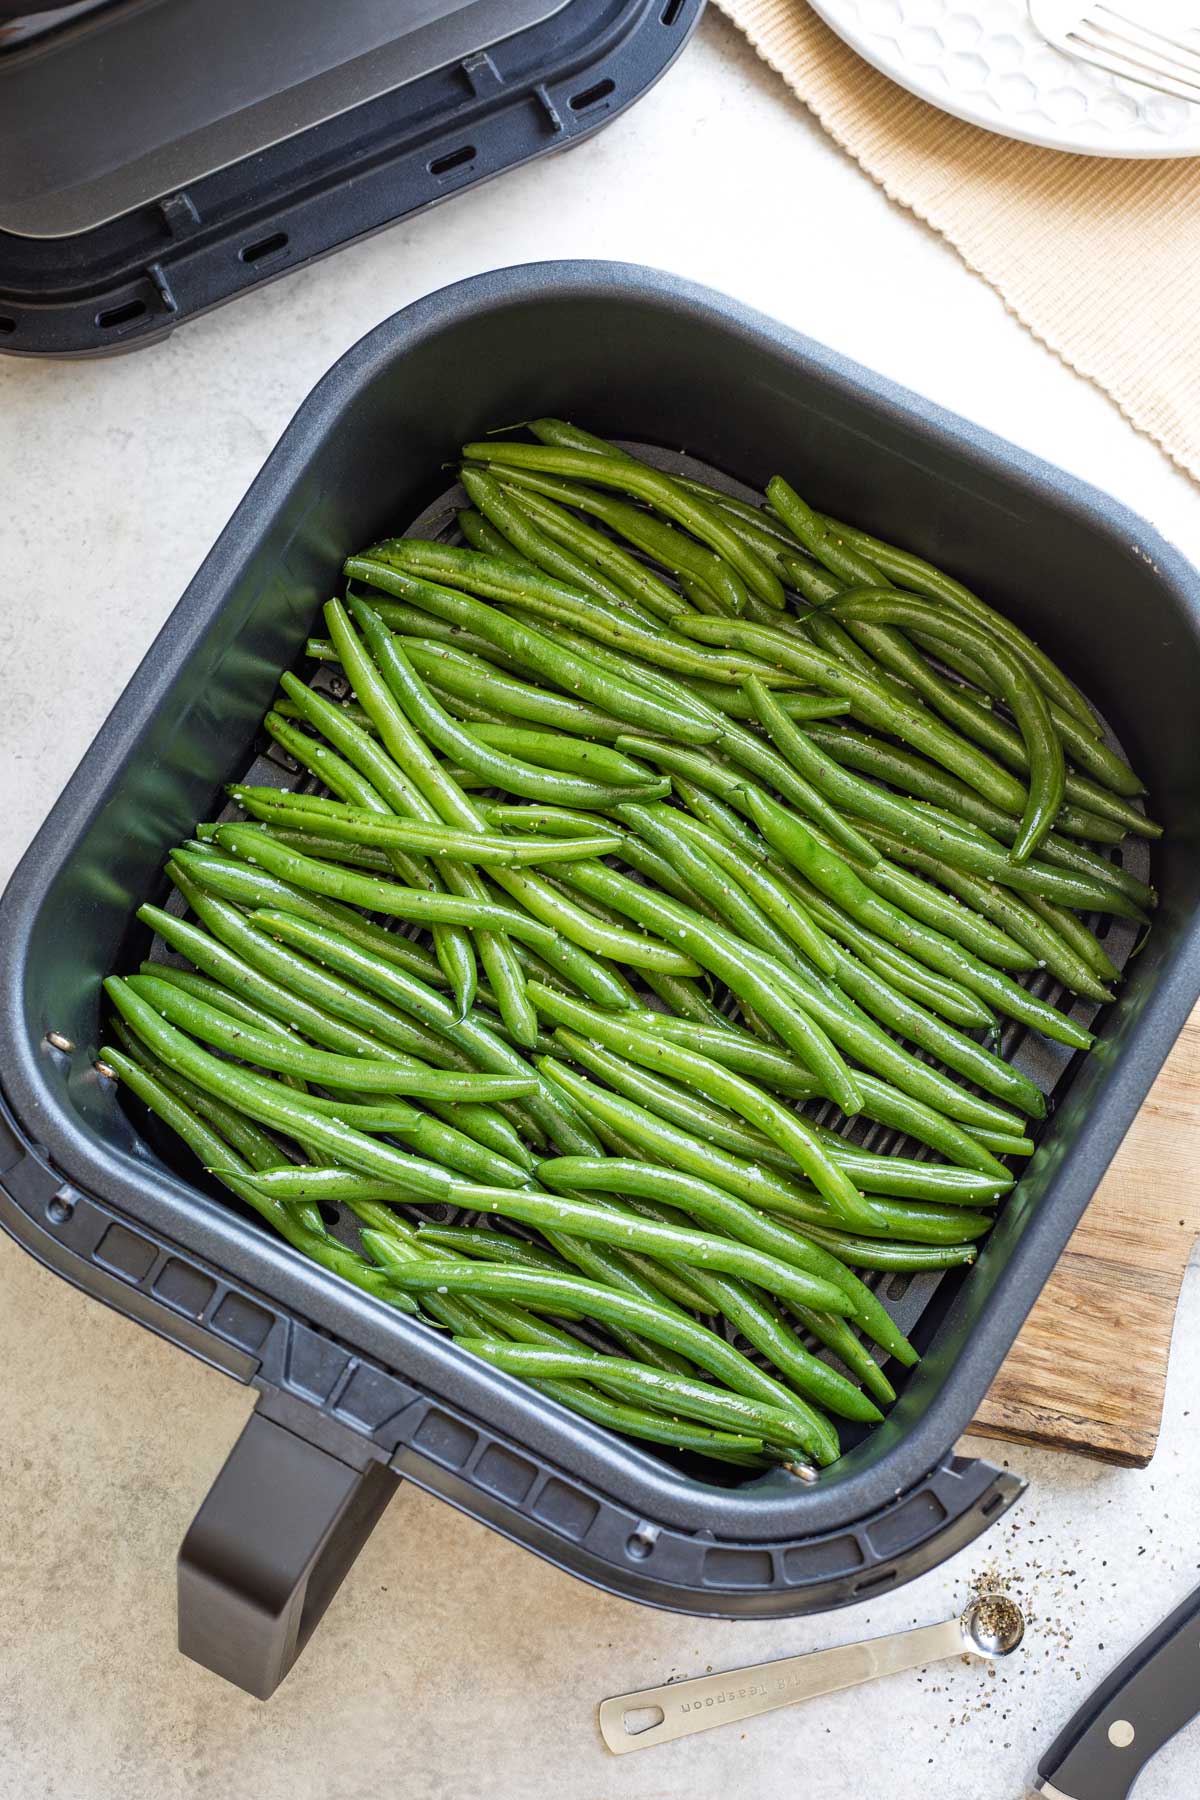
The reason for this is due to the fact that air frying is a dry heat cooking method (known as convection). Your air fryer uses hot air that’s circulated around your food in order to create the fabulous cooking results we’ve all come to love about air frying.
To work its magic, your air fryer’s hot air actually needs to be able to get to the surface of your beans, which it can’t do very effectively if they’re in a big pile.
But what if you want to cook up two or three pounds of green beans? No doubt, you could air fry them in several batches. But I’ve got a better idea …
Pro Tip: Need to Cook LOTS of Green Beans?
Hosting a big dinner party? Sounds fun!
But in that case, making this easy AIR FRYER recipe might actually not be your best bet.
If you’re staring down more than one pound of beans, I recommend that you try our “Blistered” Oven-Roasted Green Beans instead.
Of course, it’ll take a bit longer for your “regular” oven to preheat, but placing multiple sheet pans on different racks in your standard oven will allow you to finish cooking all your green beans at the same time. And using my high-heat, oven-roasting method, the results are nearly identical to air frying.
Step #4:
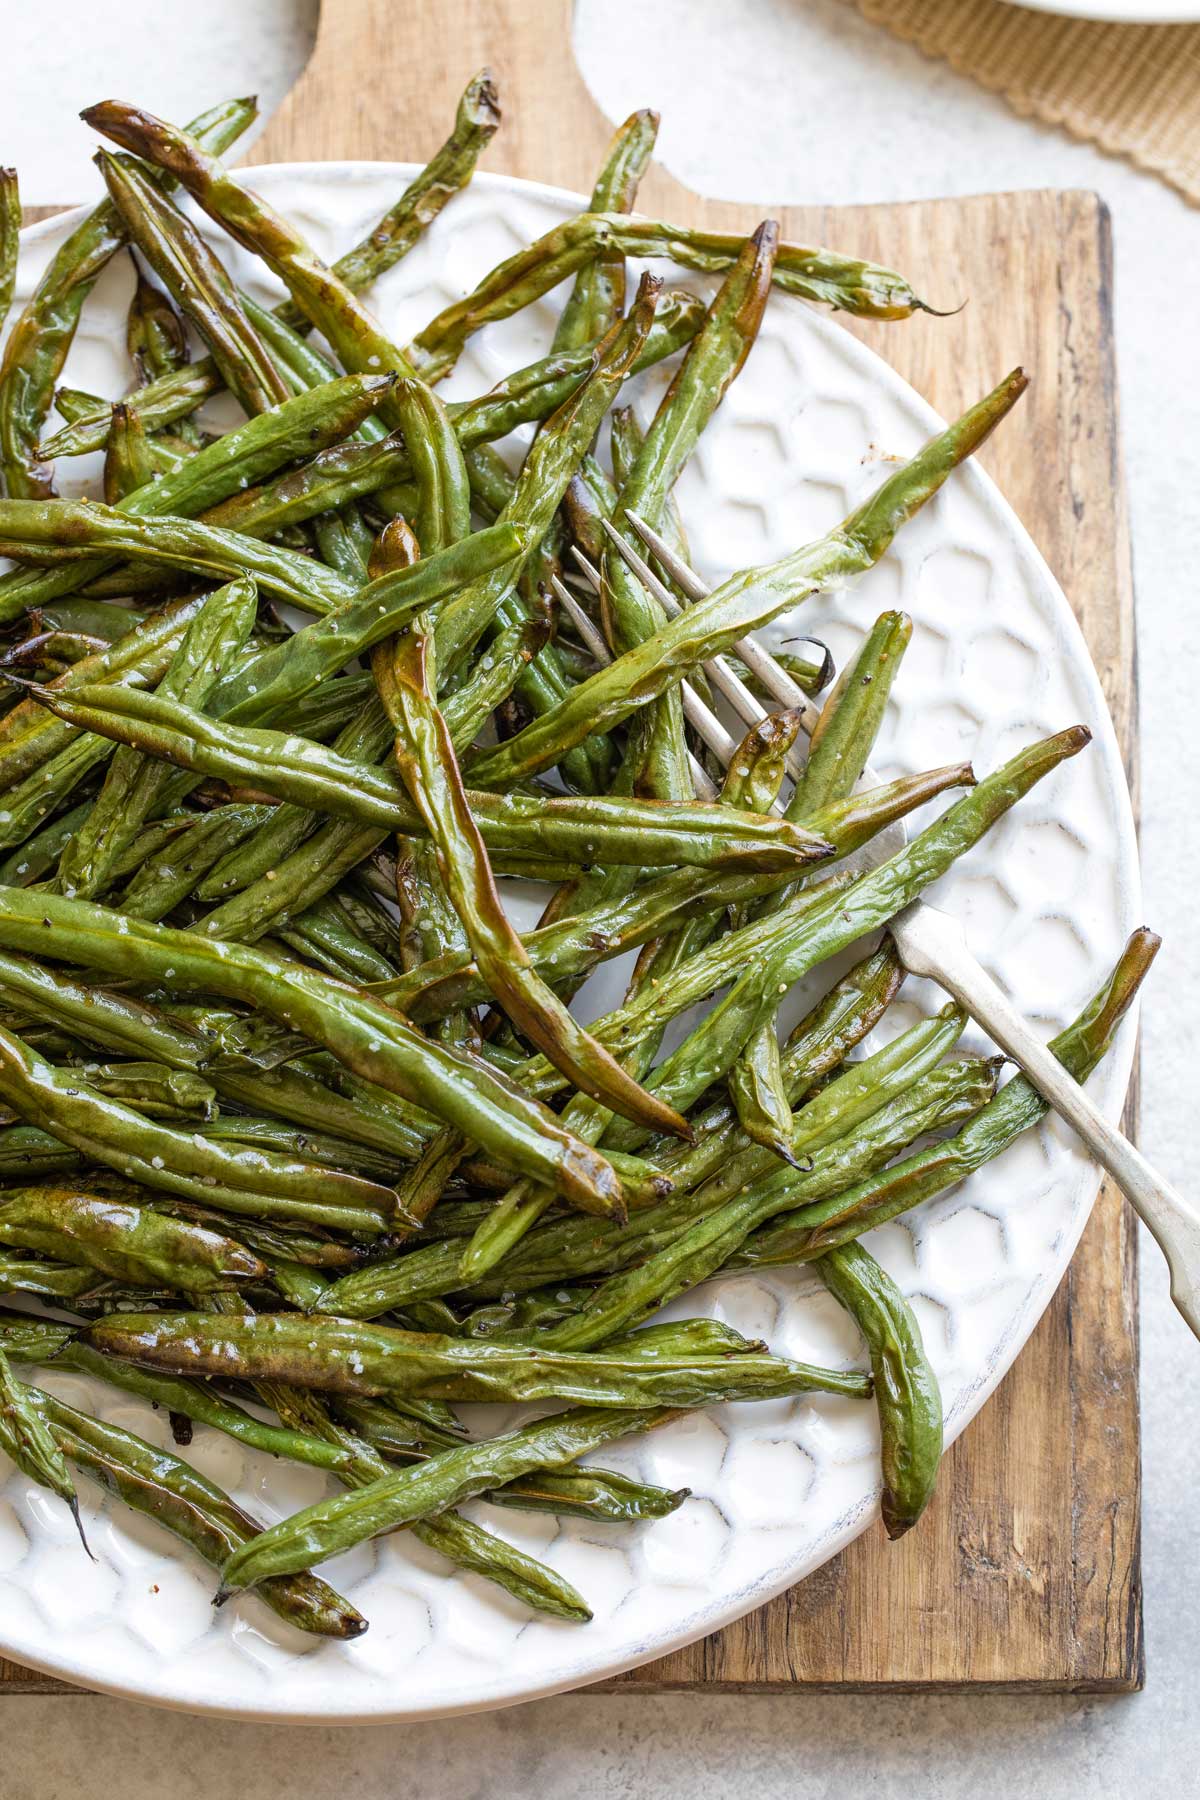
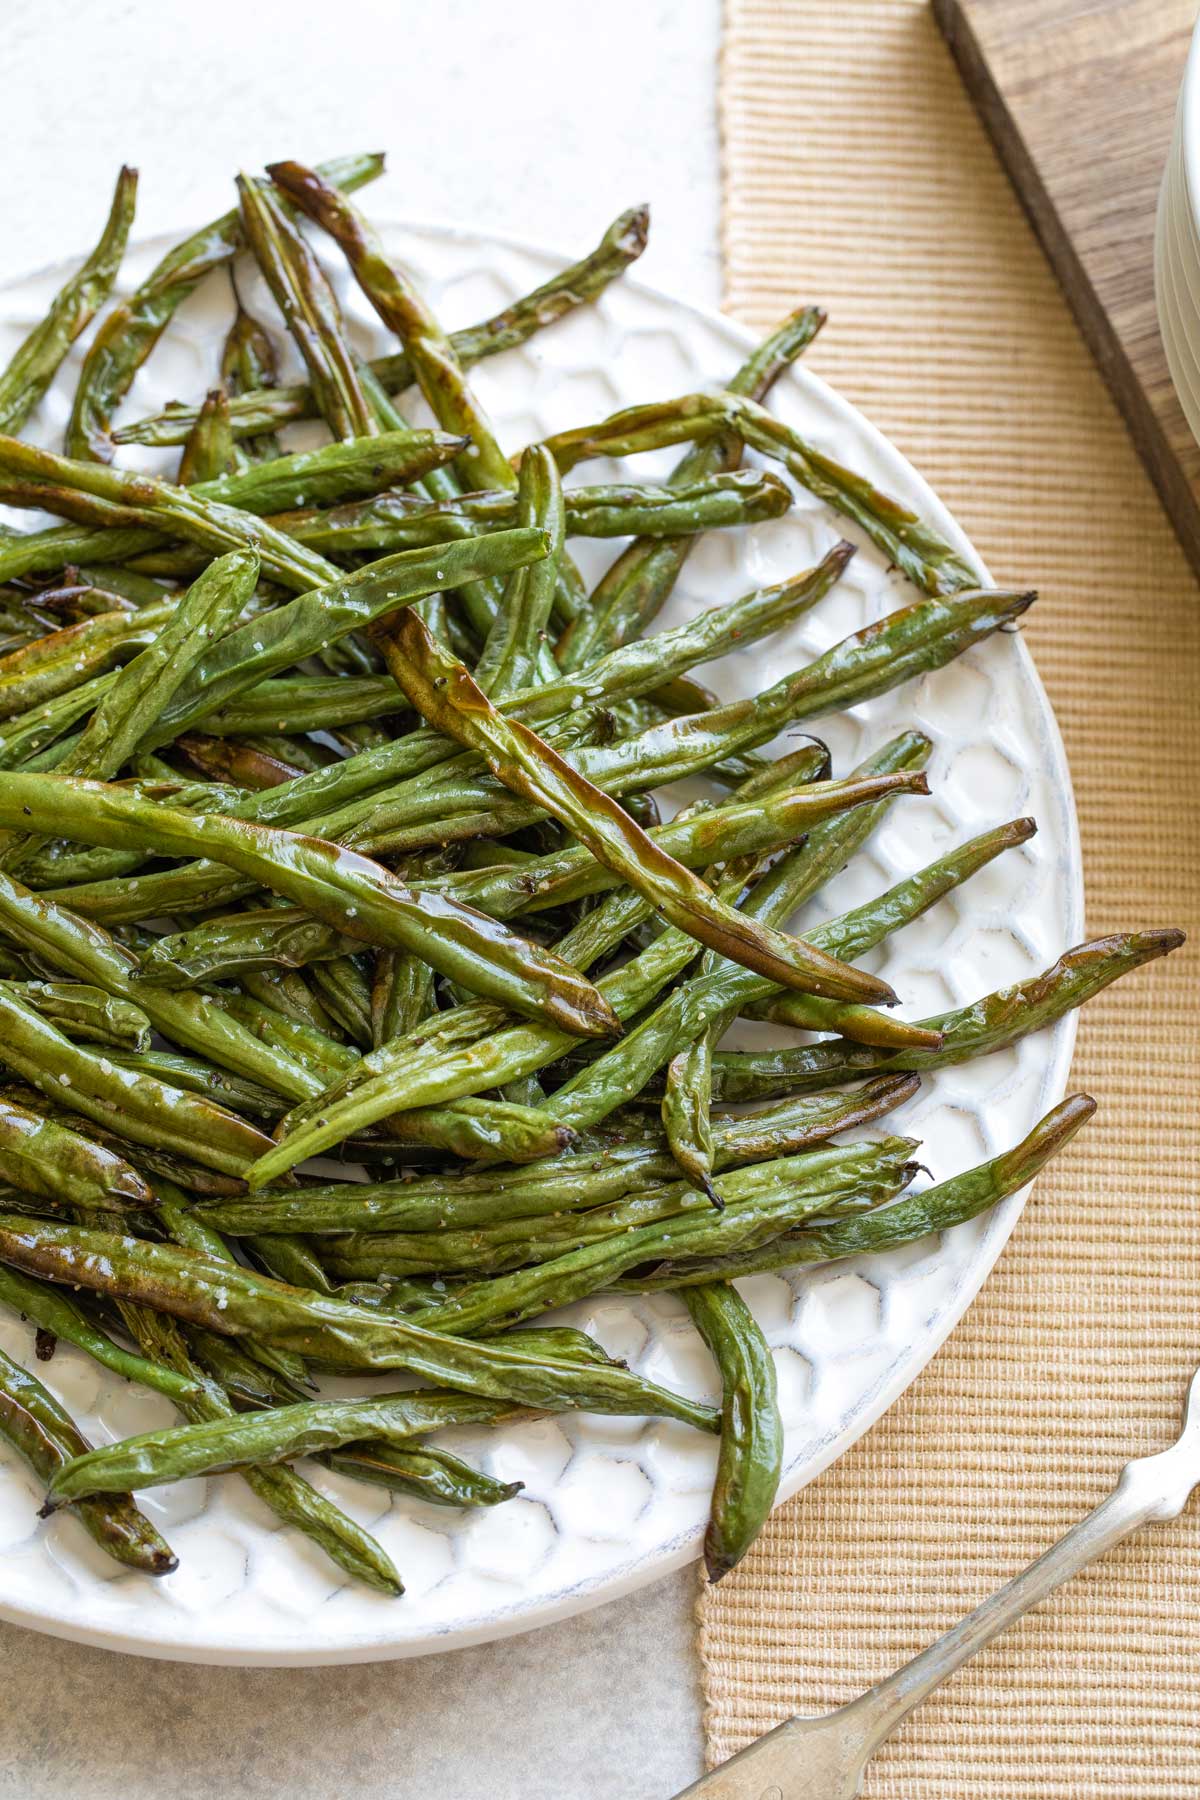
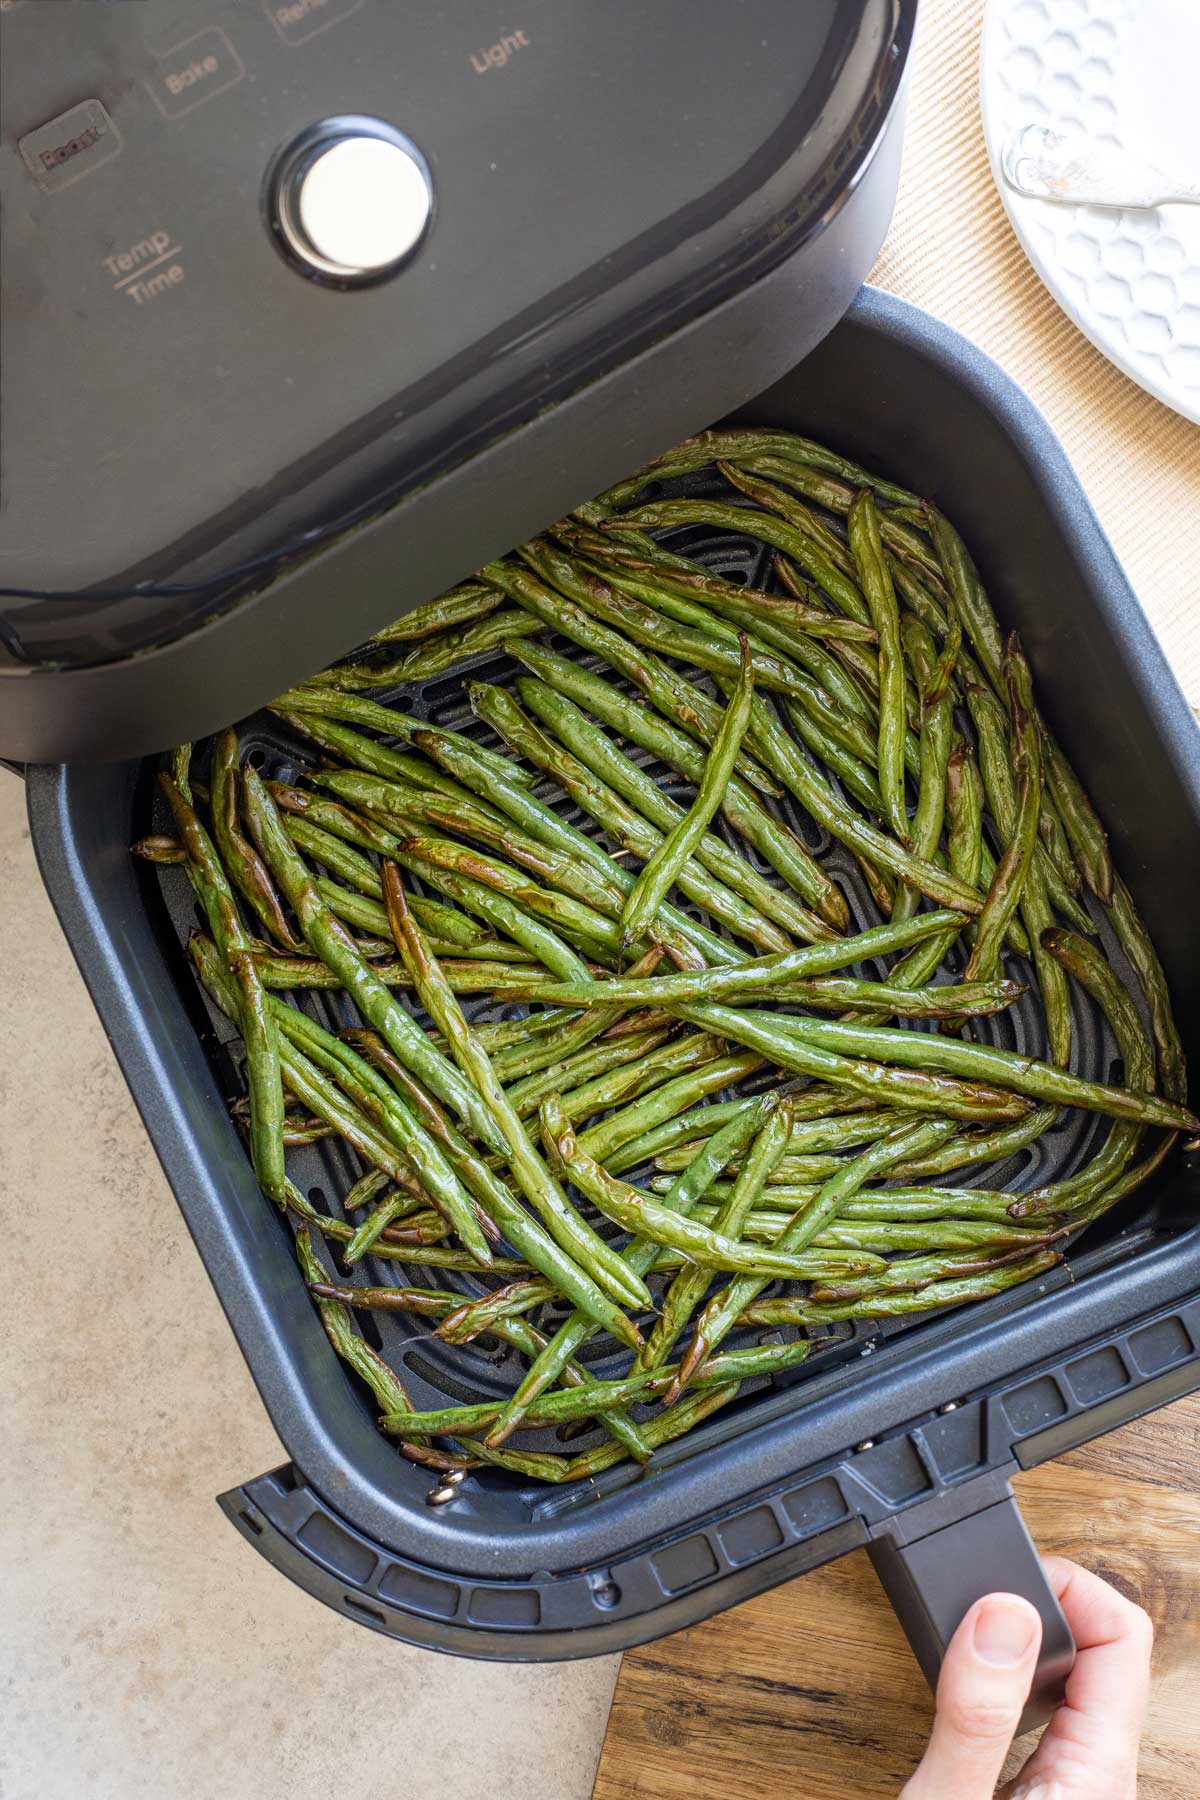
Air fry your beans for about 12-13 minutes. The exact timing will depend on factors like:
- How roasted and blistered you like your green beans. Be careful not to shoot for TOO blistered, though. Green beans that are air fried for too long can become dried out and tough.
- The size of your beans. Larger, thicker beans may need a little more cook time. However, if your beans are overly mature or woody with tough skins (or weren’t picked very recently), air frying them longer generally won’t help the situation. Fresher green beans air fry much better than tough, woody green beans (which just get tougher in the air fryer).
- The wattage of your air fryer. The wattage relates to the power of your air fryer. So, in general, a higher wattage model may cook slightly faster. You can read more about that HERE. A good rule of thumb is: when in doubt, the first time you make any air fryer recipe, start with less time than you think you need. It’s easy to add a couple extra minutes if you need to.
Most air fryers require that you shake and flip your food partway through cooking. (My Instant Vortex Plus Air Fryer prompts me to do this about two-thirds of the way through the cook time, but my COSORI does not require any shaking or flipping).
If your air fryer requires this step, be sure to spread the green beans out again, rather than allowing them to pile up.
Which Air Fryer Was Used in Testing This Recipe?
Air fryers vary widely when it comes to things like wattage, power, and interior cooking space.
This recipe was tested primarily in my 6-quart Instant Vortex Plus Air Fryer (as pictured in my photos). It was also cross-tested in my newer 6.8-quart COSORI Pro III Dual Blaze. I did a lot (like, hours) of research before selecting both of these air fryers, and I have to say that I do truly love them both.
The Instant Vortex is 1700 watts with an internal basket measurement of about 9.5″ x 9.5″.
The COSORI is 1750 watts. Its basket measures about 9.25″ x 9.25″.
But, regardless of your model, my recipe and timing should get you pretty darn close.
Just remember to start with slightly less time the first time you make Air Fryer Green Beans, if you’re not quite sure how your machine will perform. As I mentioned earlier, it’s easy to add more time if needed.
Step #5:
Mmmmmm … you’ll smell those beans start to get all hot and roasty. And you might even hear them sizzle and pop inside your air fryer. Yes … yum!
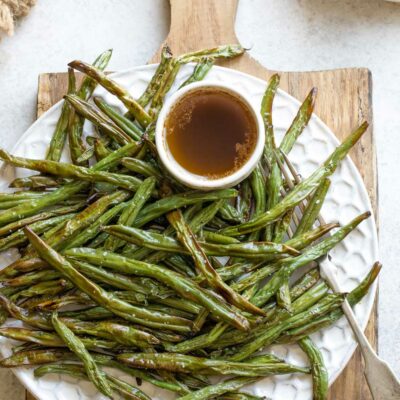
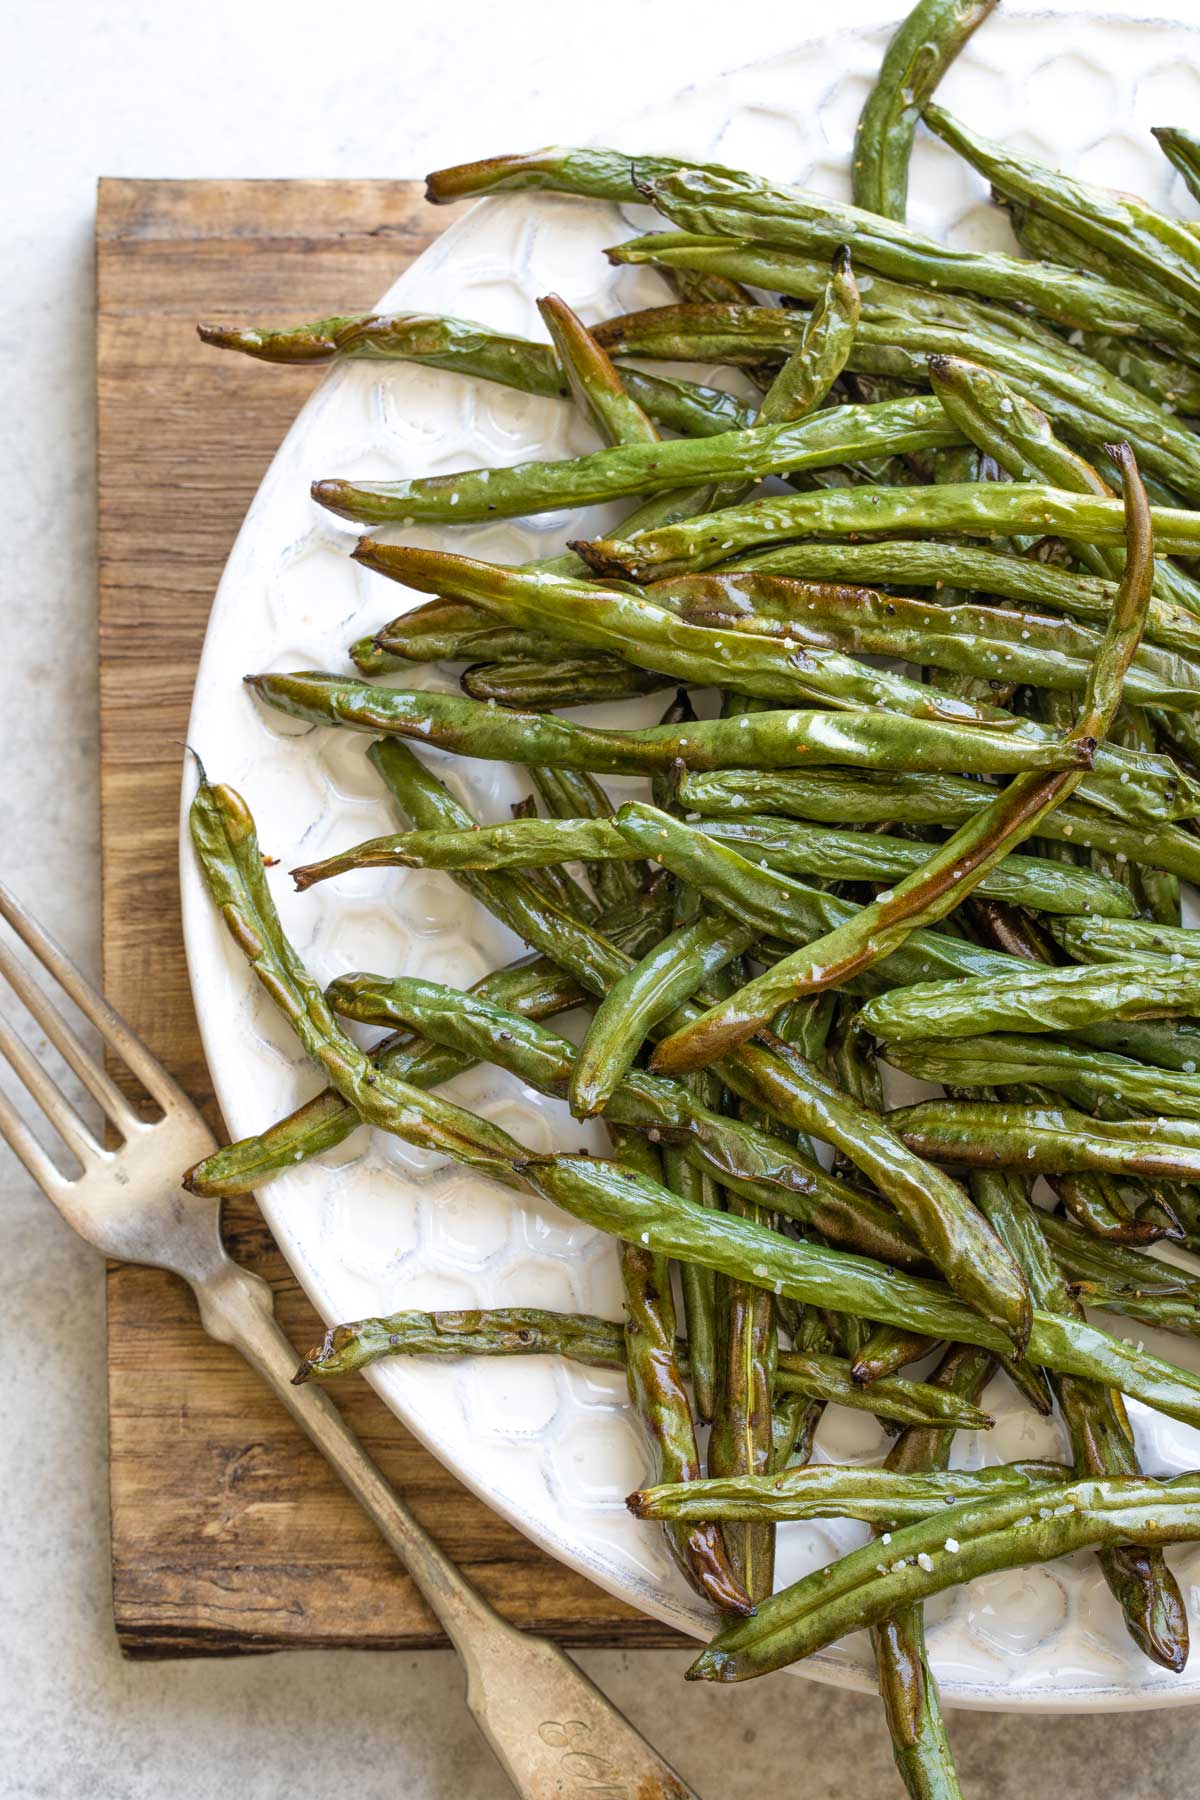
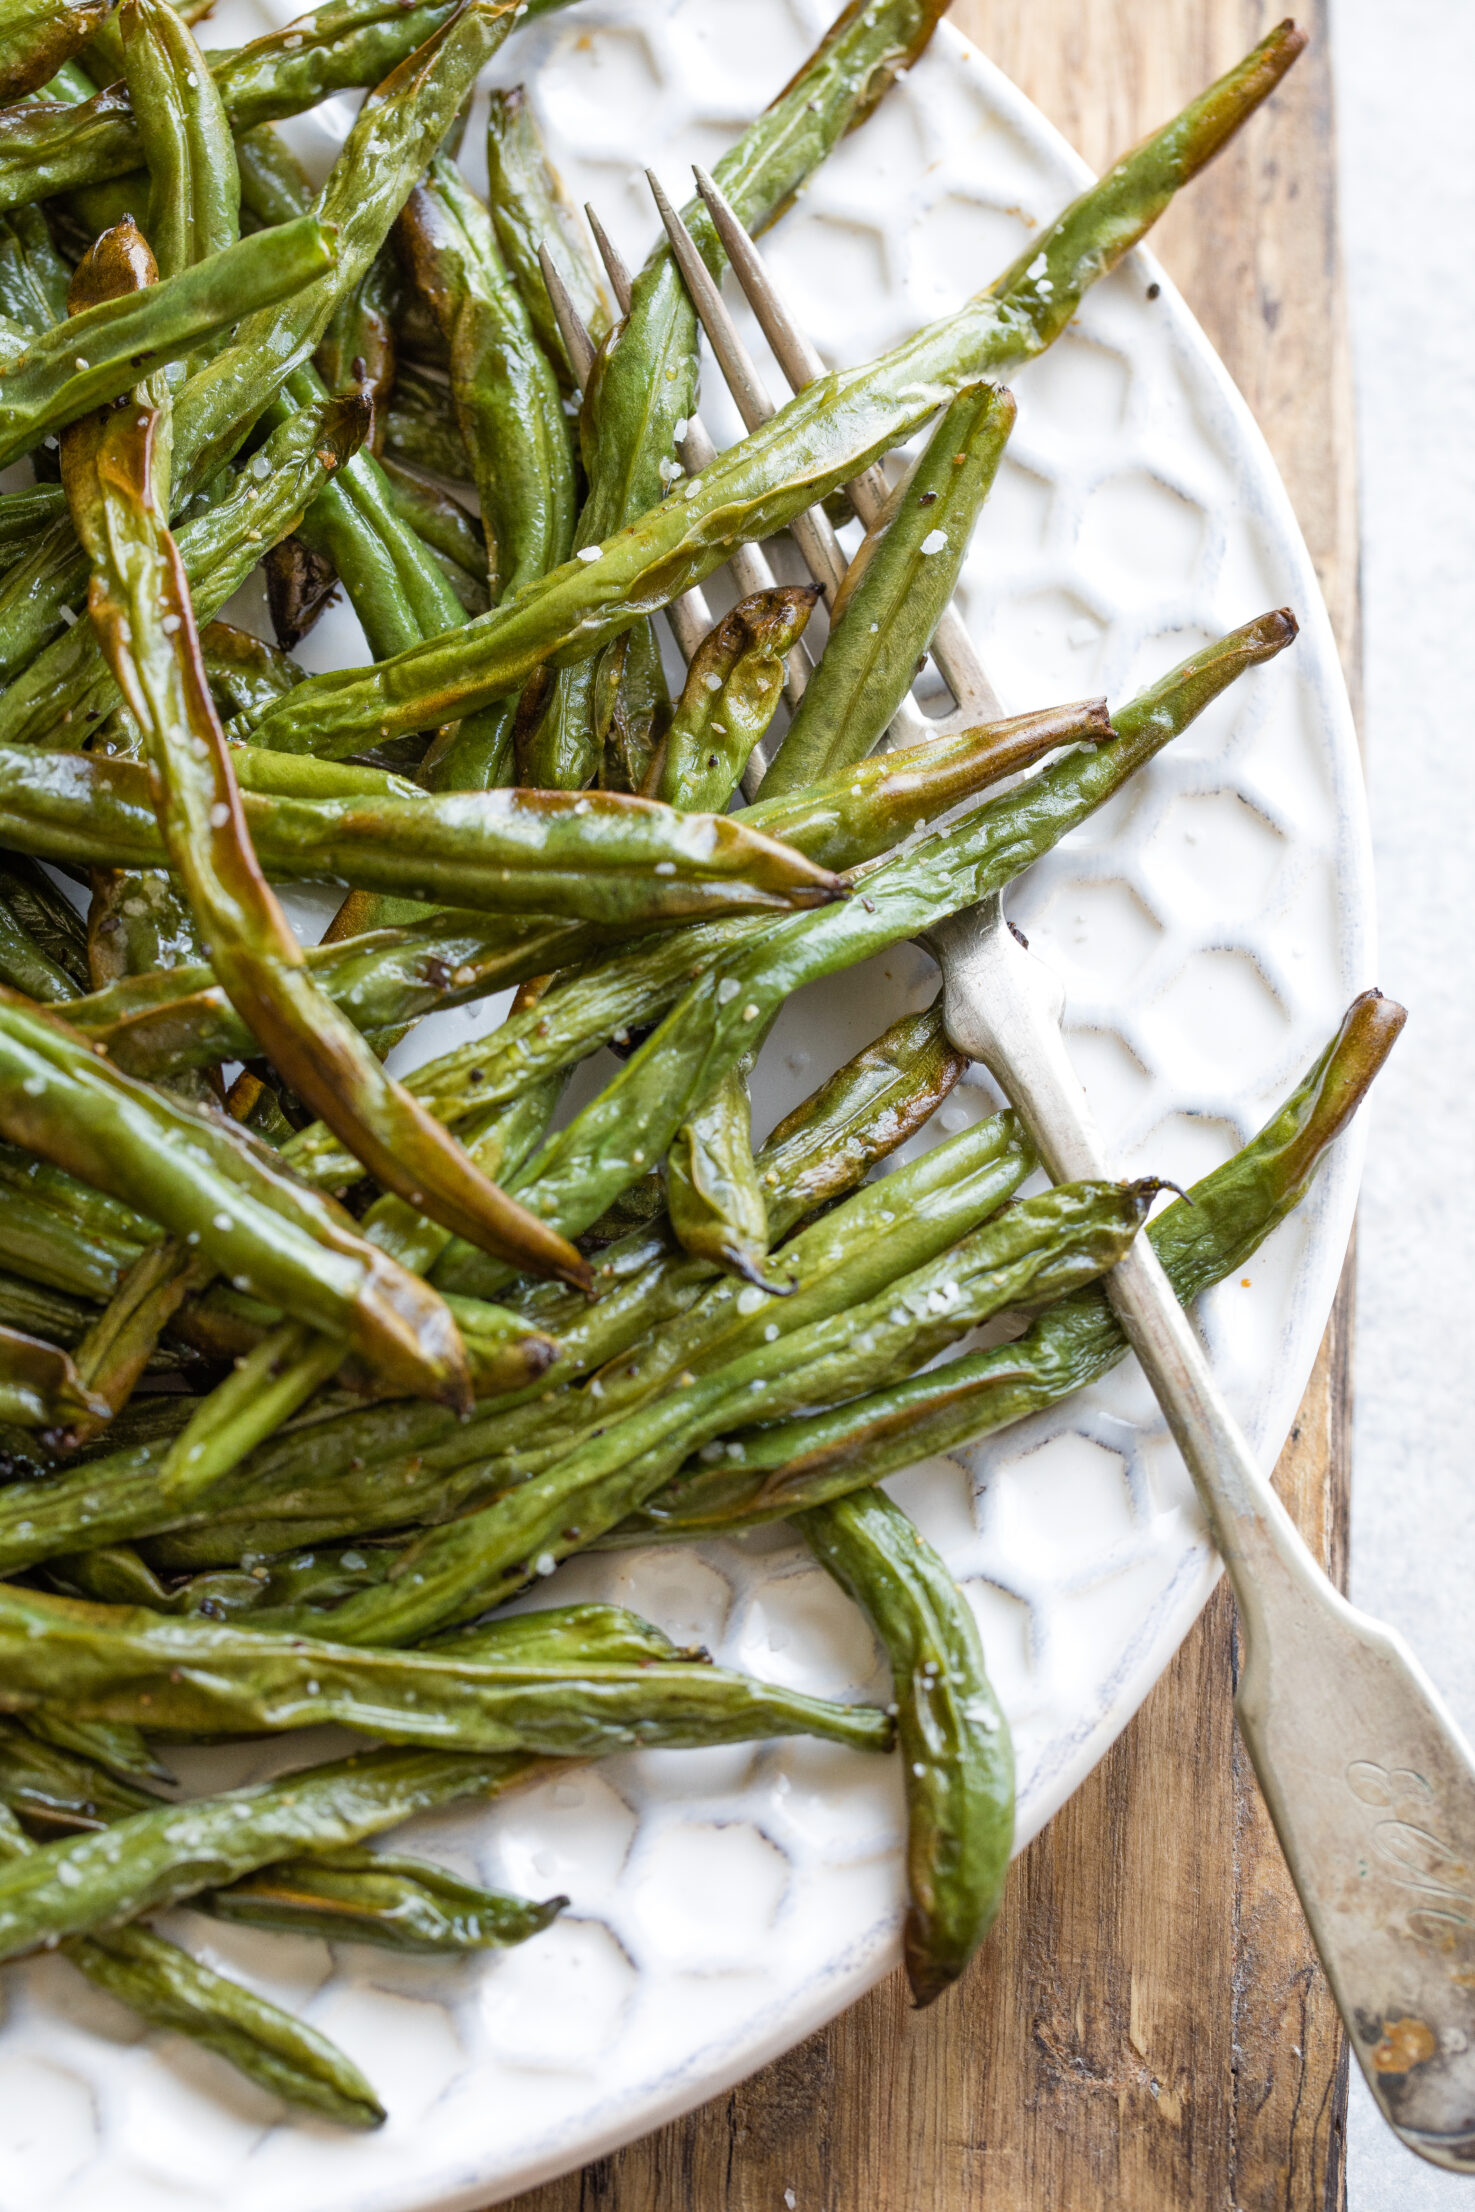
When your beans are finished cooking, transfer them to a serving platter. Give them a little taste, and adjust the seasoning if you need to.
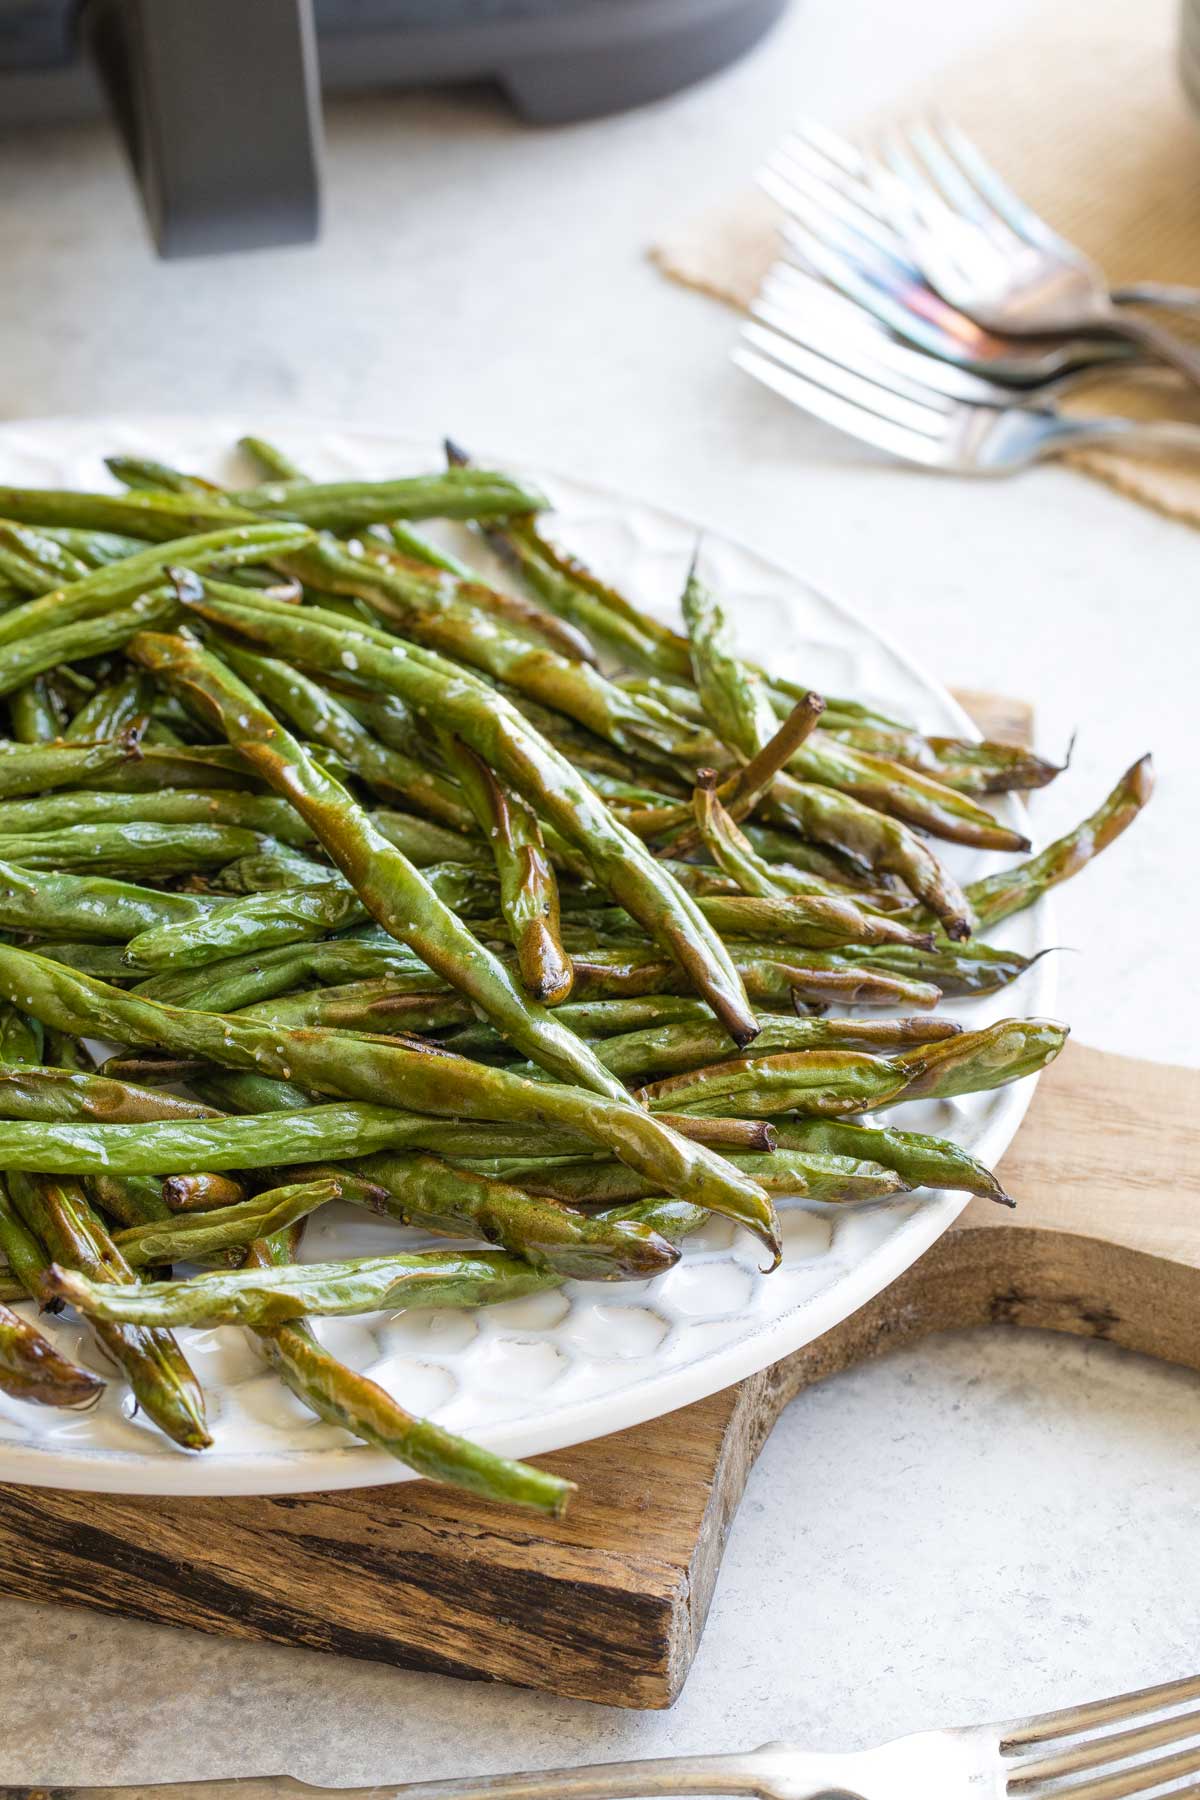
I often add about an extra 1/8 teaspoon of kosher salt before I serve them up. But that depends on how I’m serving them and whether I’m drizzling them with any sauces or seasonings to tie them into the main course.
Which brings us to the really fun, very best part …
How to Customize Your Green Beans
The options here are wonderfully, deliciously limitless!
While these tasty guys are absolutely fantastic without any other adornments at all, you can also get really creative and dress your beans up in all sorts of delectably different ways!
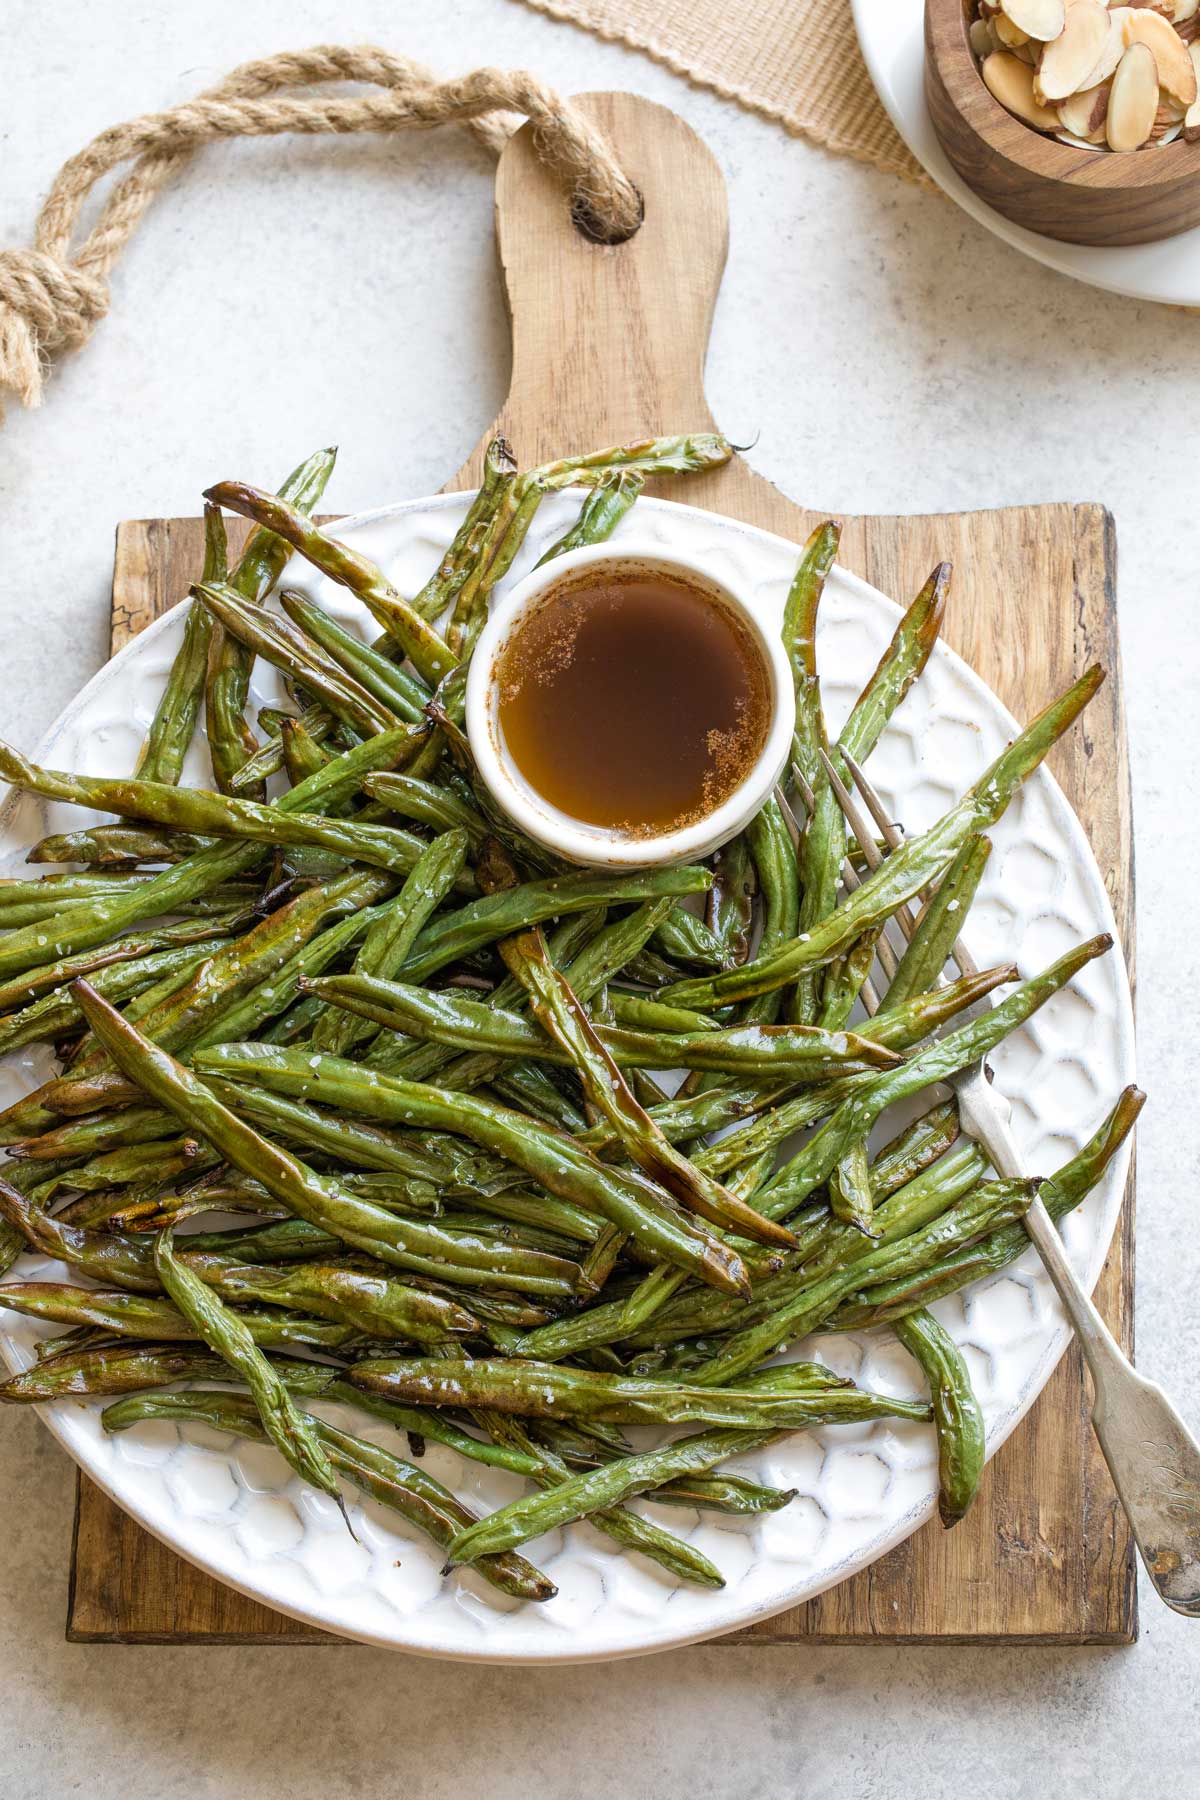
- One of my favorite ideas for an absolutely outstanding yet easy side dish is to steal the browned butter sauce from our Roasted Green Beans. Rich, nutty browned butter is laced with soy sauce and balsamic vinegar. It’s pure, blissful liquid gold! Lick-the-plate-AWESOME!
- Sprinkle on a few toasted nuts if you’d like some crunch.
- Or try a dusting of cheese. I’m a huge fan of cheddar with green beans, but parmesan cheese is great, too. Or try any other type of cheese that complements your main course (maybe feta for a Mediterranean vibe, or queso fresco for a Mexican meal).
- Drizzle ’em with some toasted sesame oil (after air frying) and sprinkle on some pretty sesame seeds for an Asian feel. (Like with my 5-Minute Asian Sugar Snap Peas, black sesame seeds look especially eye-catching on green vegetables.)
- Toss on some fresh herbs. Basil and green beans are outstanding together, maybe because they both are in their glory in the summer months. If you’re thinking basil, I’d maybe quarter some juicy grape tomatoes to add in. Mmmmmm and then maybe some goat cheese. Or mozzarella!
- You can also drizzle your delicious Air Fryer Green Beans with a bit of whatever sauce you might be serving with your main dish. It’s a simple trick that easily ties the whole meal together.
- These even make for a fantastic, quick and healthy snack, served up with your favorite dipping sauce. Beats the nutritional socks off french fries or potato chips, that’s for sure!
Ok ok … I think you get the idea.
With a smidge of creativity, your ultra-simple, quickly air fried green beans can evolve and morph in all sorts of interesting ways.
FAQs At-a-Glance
Store your fresh, unwashed green beans (aka string beans) loosely in a plastic bag in the fridge. Washing them before storage can create damp areas that are more likely to get mushy or moldy faster, so hold off on giving your beans a rinse until you’re ready to prep them for cooking.
As Allrecipes explains, properly stored, fresh green beans should last for about 7 days. (If you try my tip to prep your green beans ahead of time for this recipe, then I recommend that you cook them within about 1 day after they’ve been rinsed and the stems removed.)
Fresh green beans should feel firm and be uniformly green. If your green beans develop brown, soft spots, or start to look limp and withered, they’re past their prime. Definitely avoid any that are moldy or that have areas that are actually mushy.
After you’ve air fried green beans (or cooked them in some other way), you can refrigerate any leftover green beans in an airtight container for about 3-5 days. I don’t recommend freezing Air Fried Green Beans.
To be honest, I’ve exhaustively tested this Air Fryer Green Beans recipe only with fresh green beans. But I often cook all sorts of frozen veggies in my air fryer, and it works like a charm. If you want to experiment with it, I suggest this article on air frying frozen vegetables as a starting point.
So now there’s no need to fire up your big, “old school” oven to get great roasted green beans for a speedy weeknight dinner.
Your air fryer will get the job done beautifully, in even less time!
And in just minutes, you’ll have an endlessly adaptable, perfect side dish your whole family will love.
Thanks, little air fryer! No wonder everyone has gone air fryer-crazy these days!
~ by Shelley
Love the Recipe? • Were My Tips Helpful?
__________
Please leave a 5-star rating by clicking on the stars in the recipe card below. I truly appreciate all your wonderful feedback!

Air Fried Green Beans
Ingredients
- 1 pound fresh green beans, rinsed, trimmed and dried
- 1 teaspoon extra virgin olive oil
- ⅛ teaspoon kosher salt (plus optional ⅛ teaspoon more for serving)
- ⅛ teaspoon black pepper
Instructions
- Set your air fryer to 375 °F. See notes section below, regarding whether your air fryer requires preheating.)
- Drizzle the green beans with oil and toss (preferably with your hands) to be sure every bean is evenly coated with a thin slick of oil. Sprinkle with ⅛ teaspoon salt and ⅛ teaspoon pepper, and gently toss again to distribute the seasonings.

- Spread beans out in your air fryer basket, getting as close to a single layer as possible. (If you have a smaller air fryer, you may need to do this in two batches.)
- Air fry the beans for about 12-13 minutes (shaking them to flip them a bit, partway through, if required by your air fryer). The exact timing will depend on the wattage of your air fryer model and factors such as the size of your beans (see additional info in article above).
- Immediately transfer to a serving platter. Taste and adjust seasoning. I often add about an additional ⅛ teaspoon of kosher salt, depending on what I'm serving the green beans with in terms of sauces, etc. (See optional serving ideas in the article above, including suggestions for herbs, cheeses, sauces and nuts.)


Notes
Nutrition
* Nutrition information should be considered an estimate only, and may vary depending on your choice of ingredients or preparation. No guarantees are made regarding allergies or dietary needs. Always consult a physician or dietician for specific advice and questions.


")