Individual Beef Wellington Recipe
~ These incredibly delicious Individual Beef Wellingtons have been our family’s absolute favorite special-occasion meal for years. They’re the perfect individual portion size, and each one can be customized! Plus, they’re especially great for the cook, because they need to be made at least an hour (and up to a day) before baking … so you can prep them ahead, then relax and enjoy the celebration! ~
This Recipe: • Includes Make-Ahead Steps •
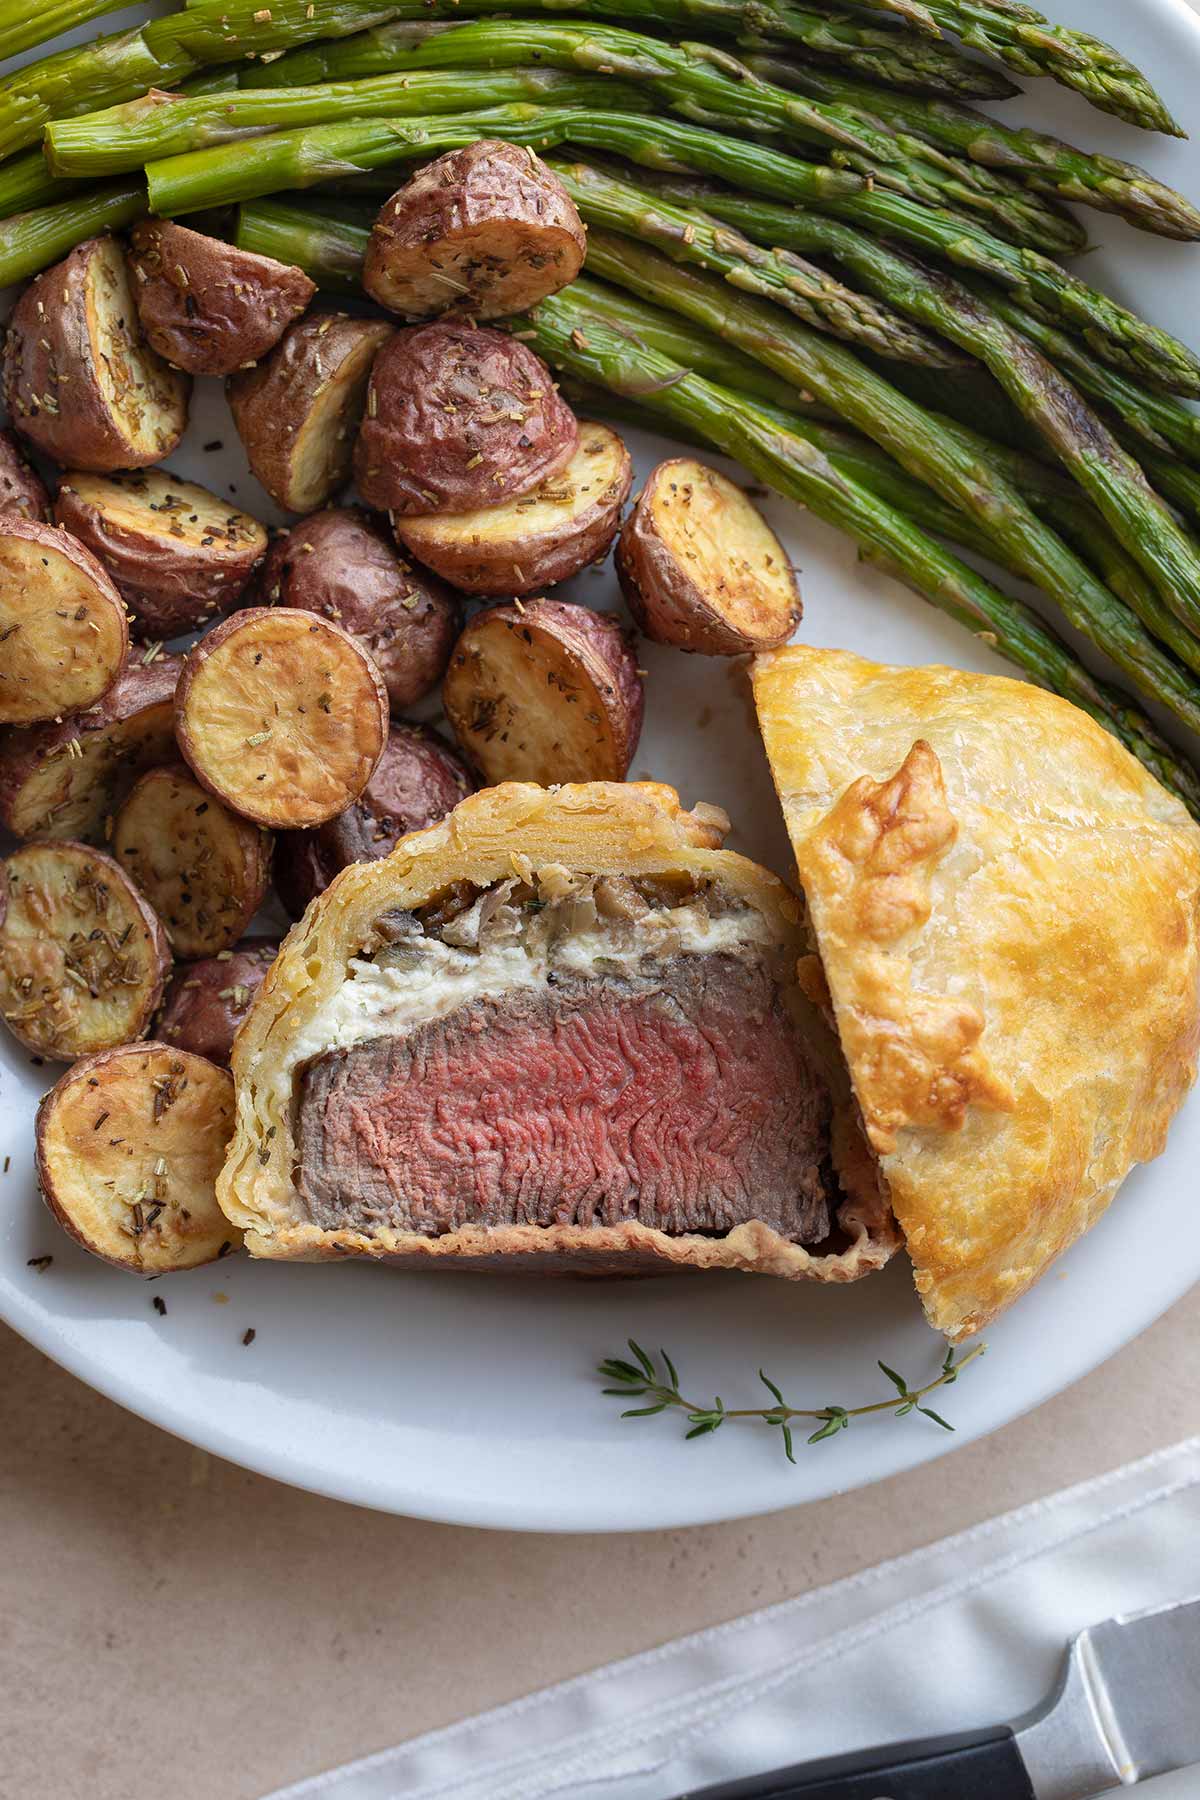
Ever since my kids were about five years old, this has been our family’s favorite celebration meal.
Valentine’s Day, birthdays, end-of-the-school-year … whenever we wanted something really special, this Individual Beef Wellington recipe was the one everybody looked forward to. With great excitement and anticipation, again and again and again.
And every single time, we basically still close our eyes on that first magical bite, and sort of just want to stop talking for a minute, and just …… mmmmmmmmm. Savor. OMG. Unparallelled.
It.is.SO.good.
Rich and savory. Loads of umami. Creamy cheese and perfectly cooked beef and buttery, flaky pastry.
To this day (and my kids are grown up now, moved away, and living their own, amazing adult lives) … this recipe is still THE ONE. It’s revered in our home. A fabled, always-outstanding, always-special recipe that means family, happiness, togetherness, celebration.
I want you to have all of that, too. Perfectly sized, individual packages of deliciousness and love and joy.
Here’s what we’re talkin’ …
Why You Can’t Help But Love These
These aren’t precisely “traditional” Beef Wellingtons (more on that in a sec).
But I’d propose that, in many ways, these are even better.
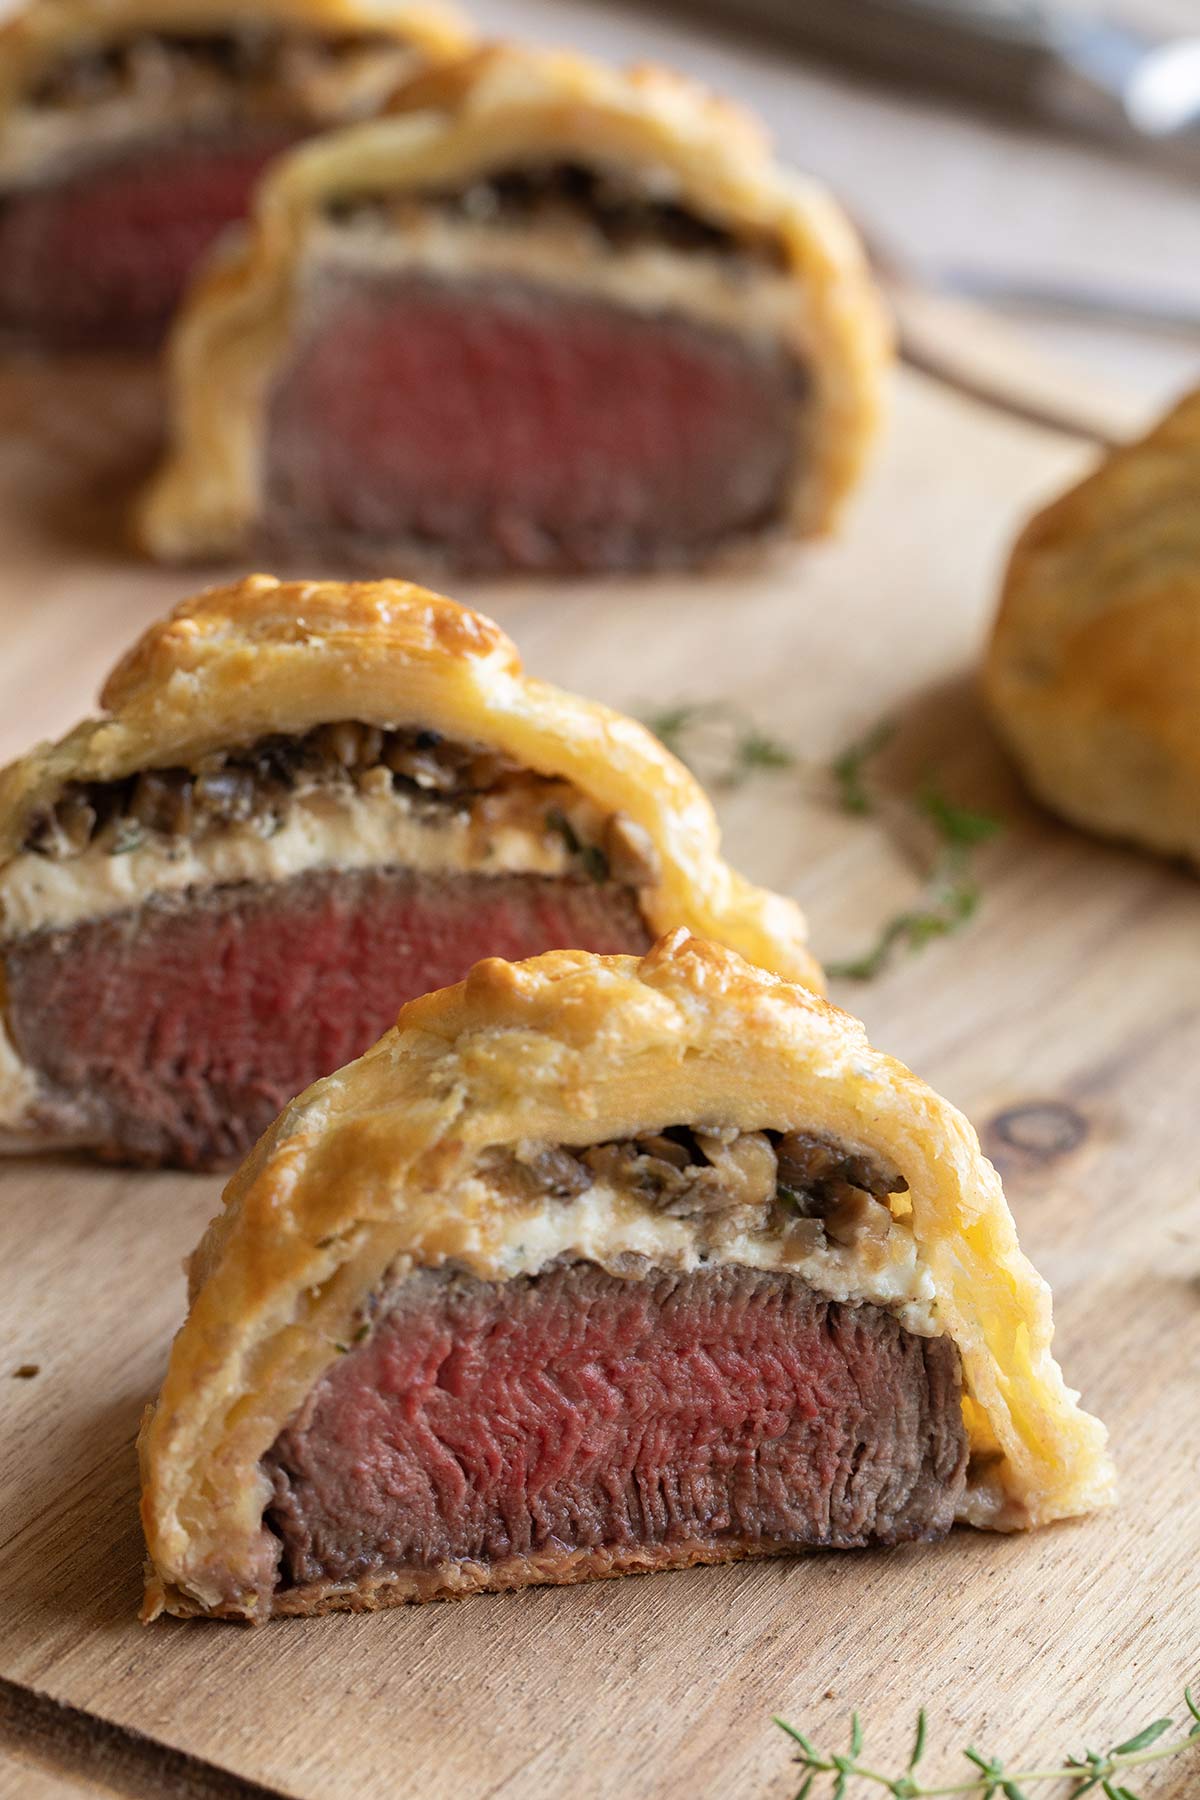
They’ve got:
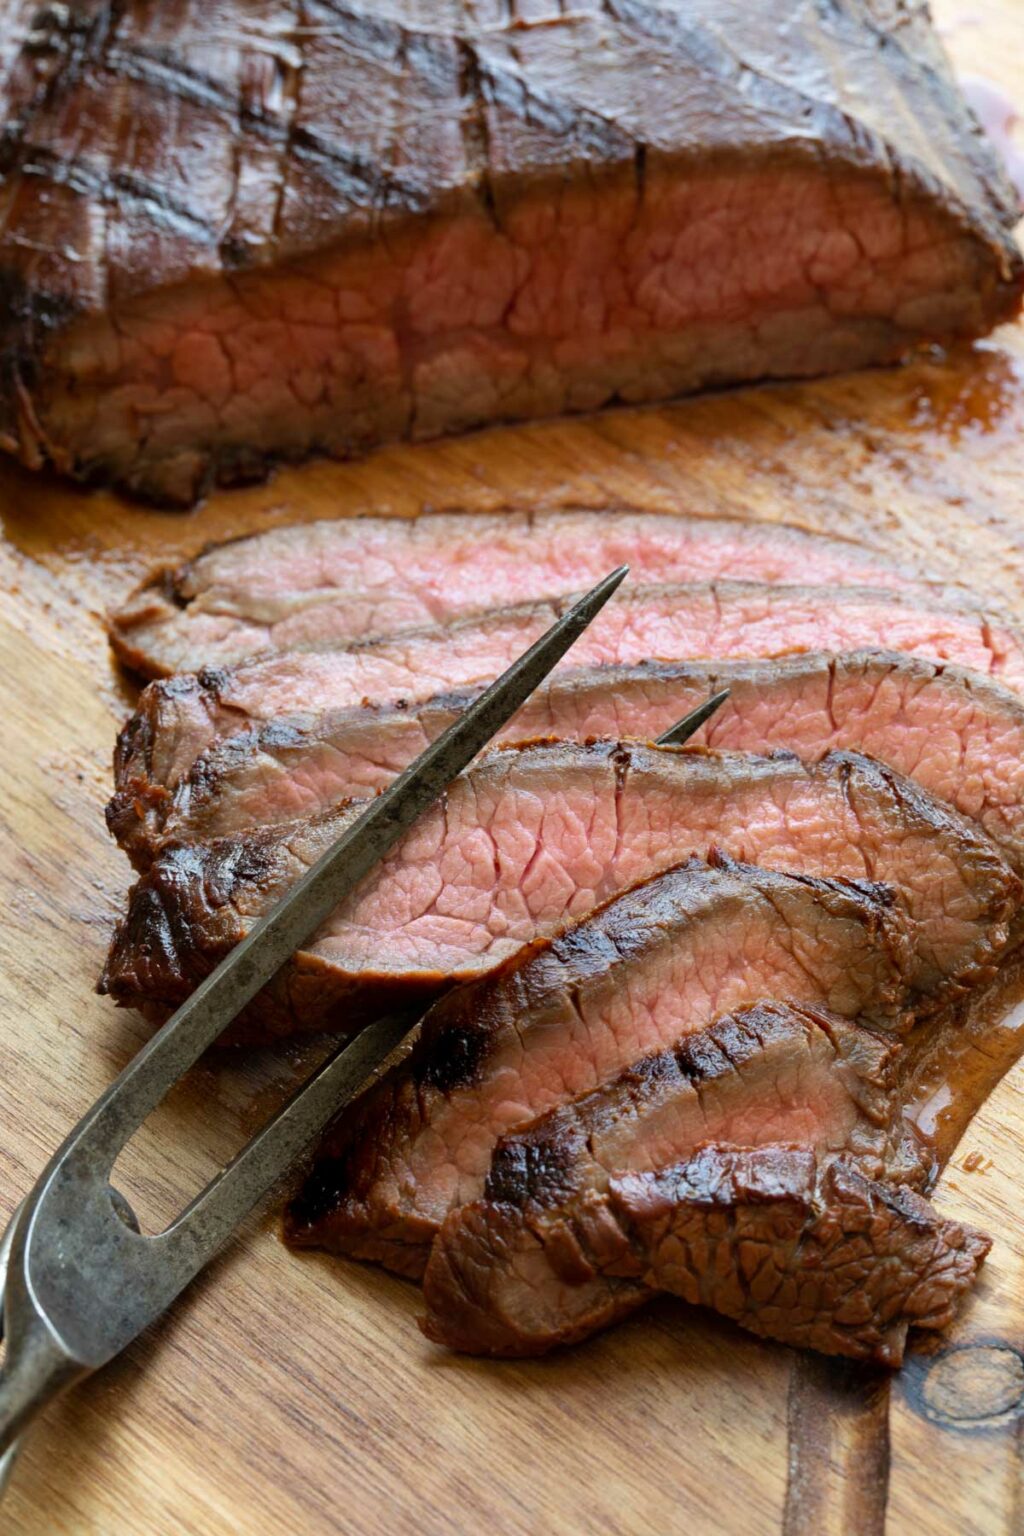
- Rich and tender filet mignon, perfectly cooked (to any doneness you prefer)
- Topped with creamy garlic and herb cheese, and then a flavorful sauté of chopped mushrooms, shallots, and thyme (which is also known as duxelles)
- All wrapped in flaky, buttery pastry and baked to golden perfection.
I swoon a little, just typing these words.
If love had a flavor, I think this would be it.
So great, on so many levels.
Not Your Old-School, Traditional Beef Wellington
Like I said, though, these Individual Beef Wellingtons are not a pure recreation of the most traditional types of Beef Wellington recipes.
For my fellow food geeks out there (let’s geek out together!) … you might be interested to know that there’s no definitive call on exactly where or how this dish originated. It’s generally believed to be named for Arthur Wellesley, the first Duke of Wellington, but apparently nobody can actually establish a connection between the recipe and the Duke. It might even have been some creative re-branding of a French dish.
At its most basic, though, I’d say that classic Beef Wellington involves a large beef tenderloin (we’re talking at least a pound or two – not the individual portions we’re using in our recipe), plus mushroom duxelles (a sauté of mushrooms with shallots and fresh herbs), often foie gras or liver pâté, and an outer shell of beautifully golden-brown puff pastry. Sometimes there’s a layer of prosciutto tucked inside, too.
The whole big, gorgeous thing is typically brought to the table in one giant serving, then cut into individual slices.
But, there are soooooo many unique variations and riffs, that it’s actually a little tough to strictly define “Beef Wellington” these days.
Many versions skip the foie gras and liver altogether (not everyone particularly likes them), and many don’t include the prosciutto. (Our less fussy version skips them all, and subs in creamy, flavorful Boursin cheese instead). Some versions leave out the mushrooms. Sometimes there’s mustard in the filling. And honestly, I’ve seen versions that don’t include beef at all. My family also makes a fantastic salmon version, and I’ve even noticed lots of vegetarian takes.
So, what I’m sharing with you here is the version that has become ours, after years upon years of making it and tweaking it and LOVING it.
I originally found the recipe way back in 2004, when my kiddos were just two years old, in a circular from our local Giant Eagle grocery chain. We ran with it from there, and after making it so many times, I’ve got loads of tips and tricks to help you along the way.
Ready? Let’s get started!
How to Make It
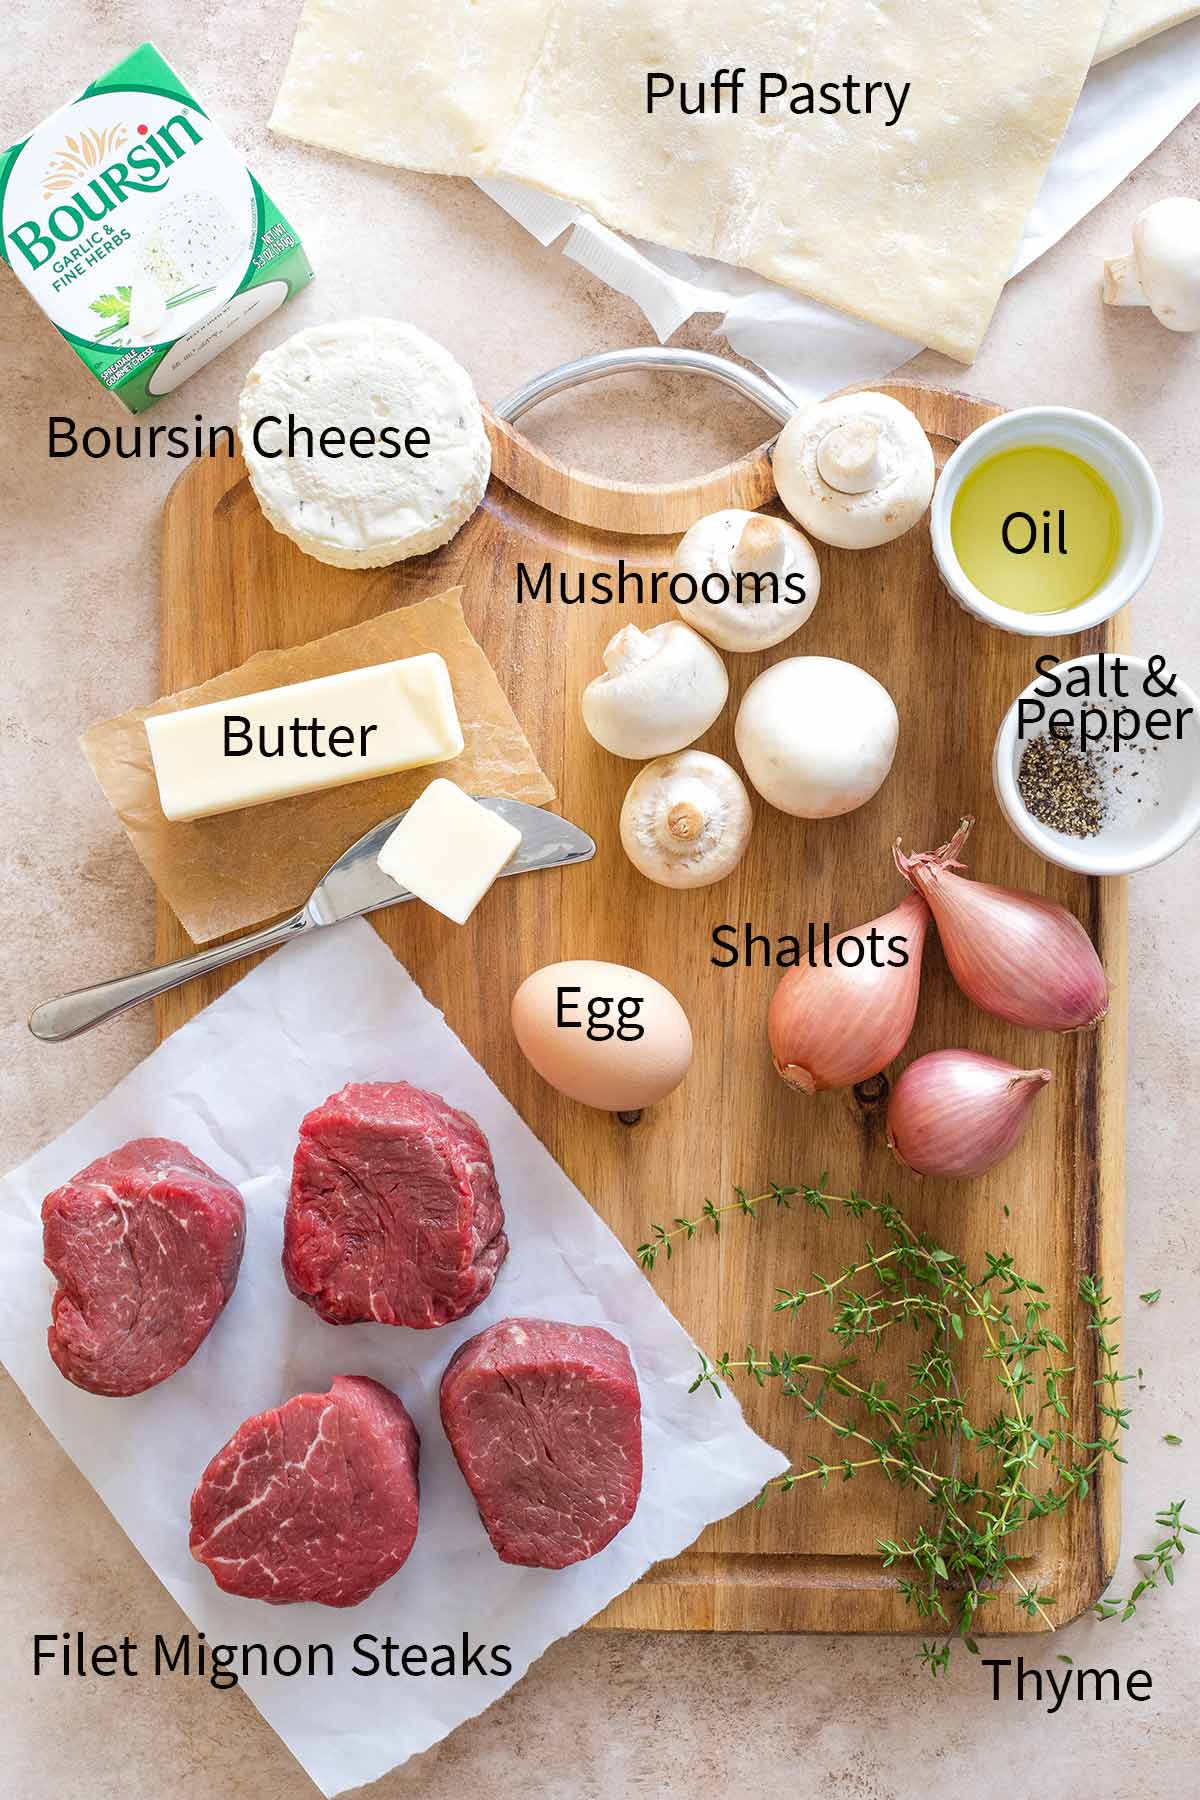
Step #1: Proper Steak Prep
Pat your steaks dry.
This may seem like a minor point, but patting meat dry before searing it eliminates surface moisture and helps you get a much better, gorgeously flavorful sear on the filets. As Epicurious explains, moisture on the surface of the meat will prevent all the tantalizing flavor development of the Maillard reaction, which happens when {dried} meat comes in contact with the blazing hot pan … but can’t start happening when your meat is wet.
Next, season both sides of each steak with a little kosher salt and pepper.
Step #2: Searing the Steaks
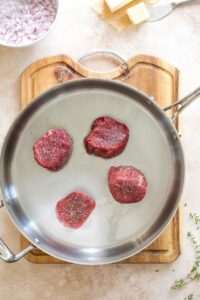
Grab a large, heavy skillet and get it preheating over high heat. (You’re not using a nonstick skillet here.)
You want it piping hot before either the oil or the steaks get in there … again, angling for a great sear on your beautiful filets.
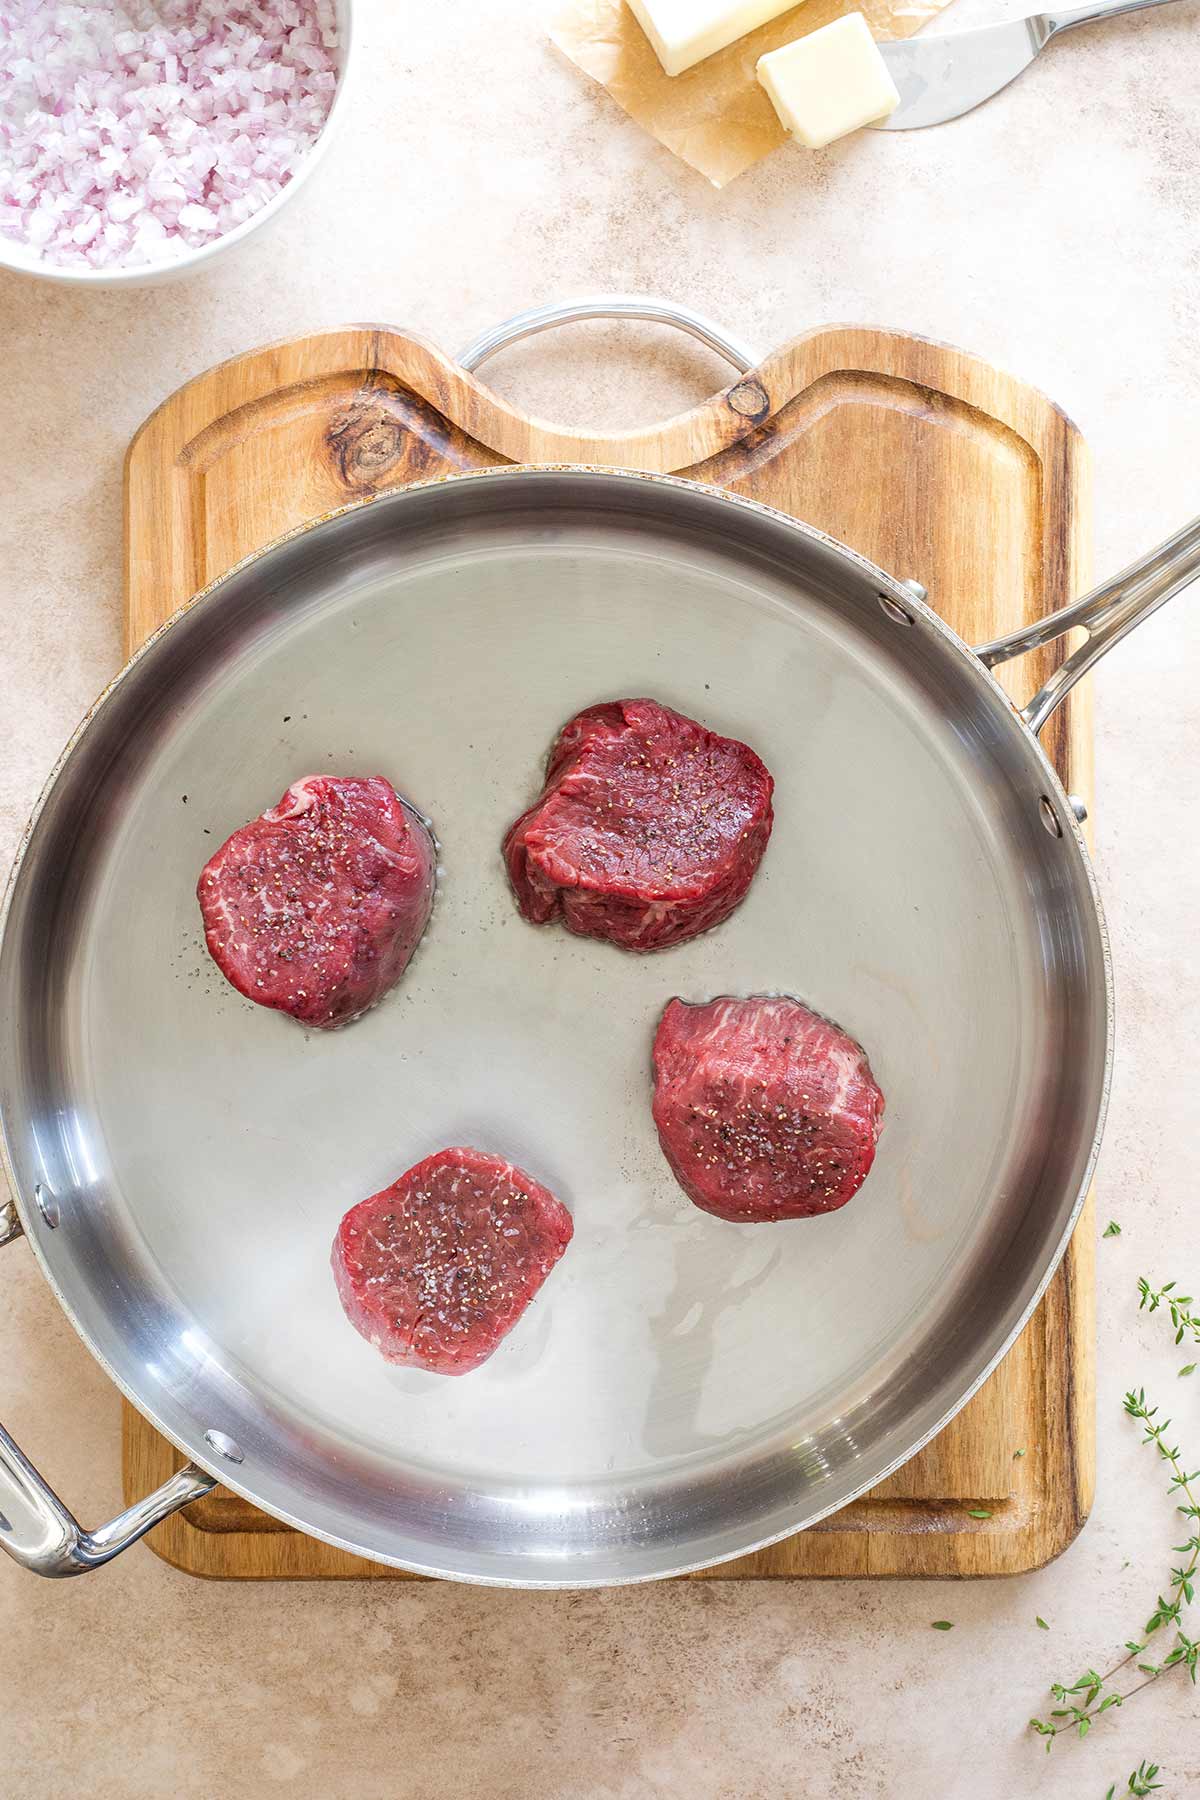
Once your skillet is HOT, add your oil and quickly swirl it around to evenly coat the bottom of the skillet.
Then add your steaks.
Yahhhhh … there should be a nice sizzle goin’ on in there! (You might want to flip on your overhead exhaust fan for this.)
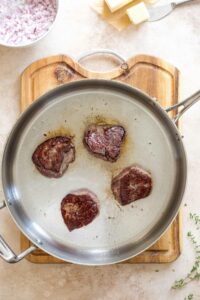
Sear your filets on each side for about 2 minutes (for medium-rare), or more like 3-5 minutes (for medium).
What you’re looking for here is for the steaks to be able to release from the bottom of the pan, without having to tear away the deee-licious crust that’s formed. It may take a little work to get your spatula under each filet, but if you can’t flip a filet without completely tearing the wonderful crust, that’s your hint that the steak isn’t quite ready to flip yet.
When each side is properly seared, you should be able to work a spatula underneath to flip each one, without tearing away the crust much at all.
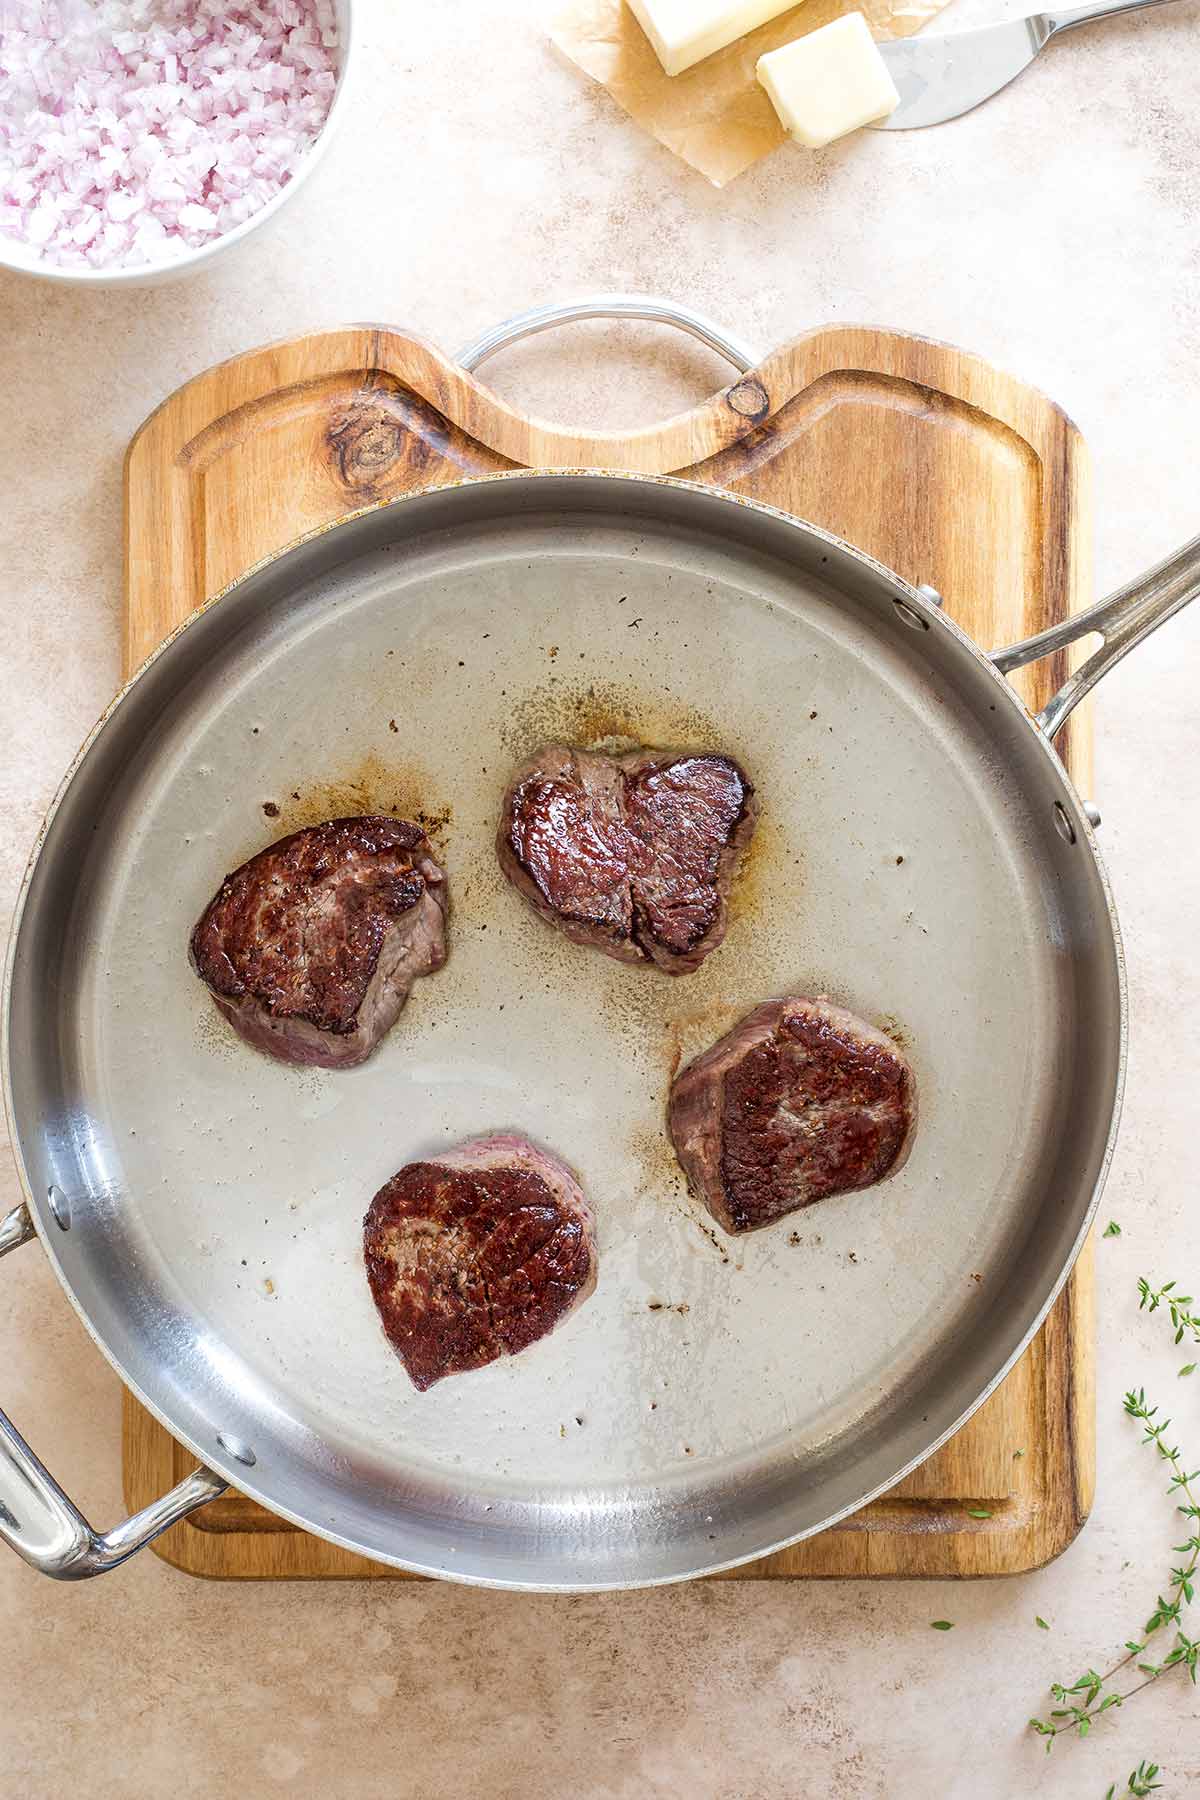
Once you’ve got the filets seared on both sides, move the steaks over to a plate to cool.
Step #3: Making the Duxelles
Next, you’re going to make a quick duxelles. (Ooooooooh … sounds so fancy, right?!?) Don’t worry – it’s easy!
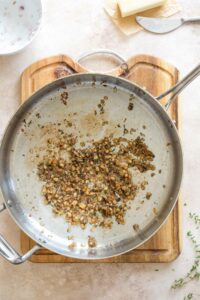
Turn your stove down to medium-high, and melt your butter in the same skillet where you just seared your steaks. Then add the mushrooms, shallots, and thyme.
Sauté them together for about 5 minutes, or until the mixture is very soft. Be sure to keep an eye on this and stir it frequently, so it doesn’t burn.
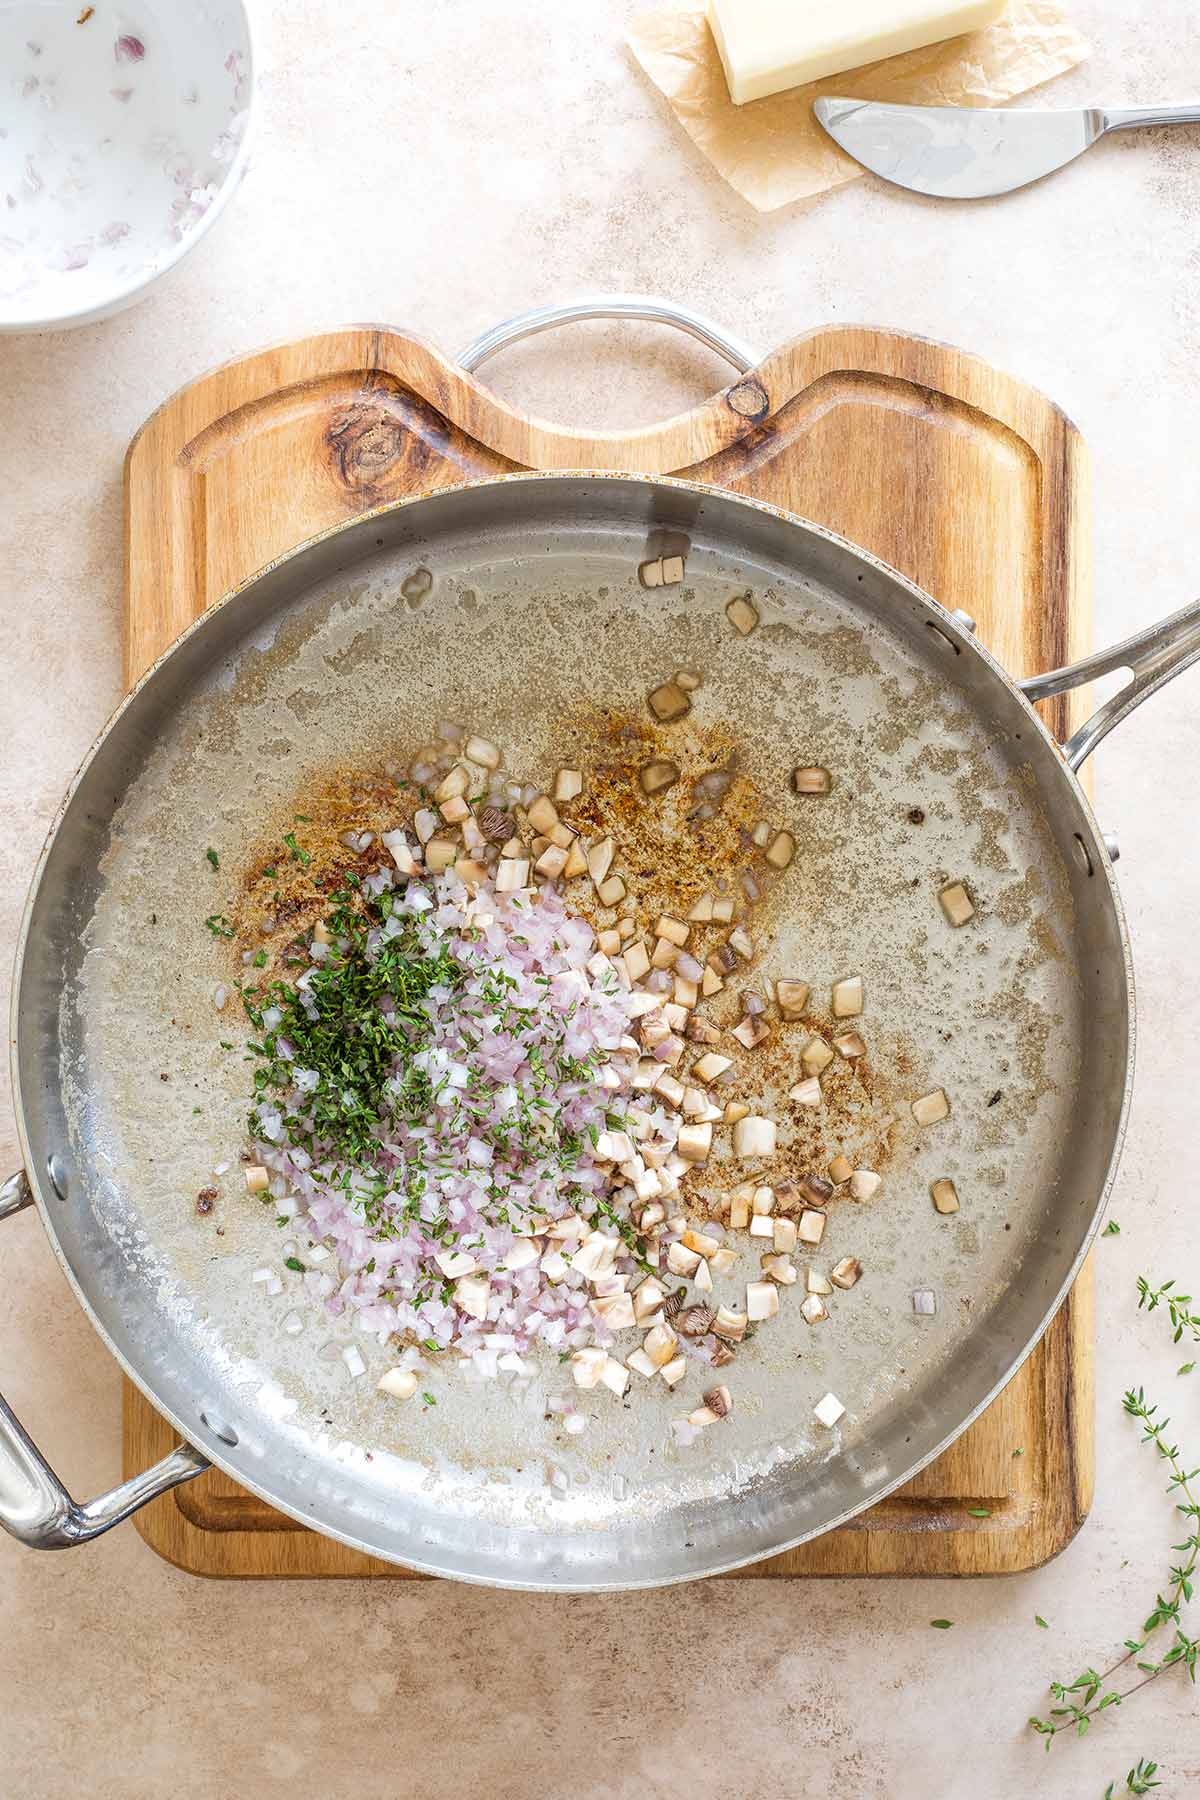
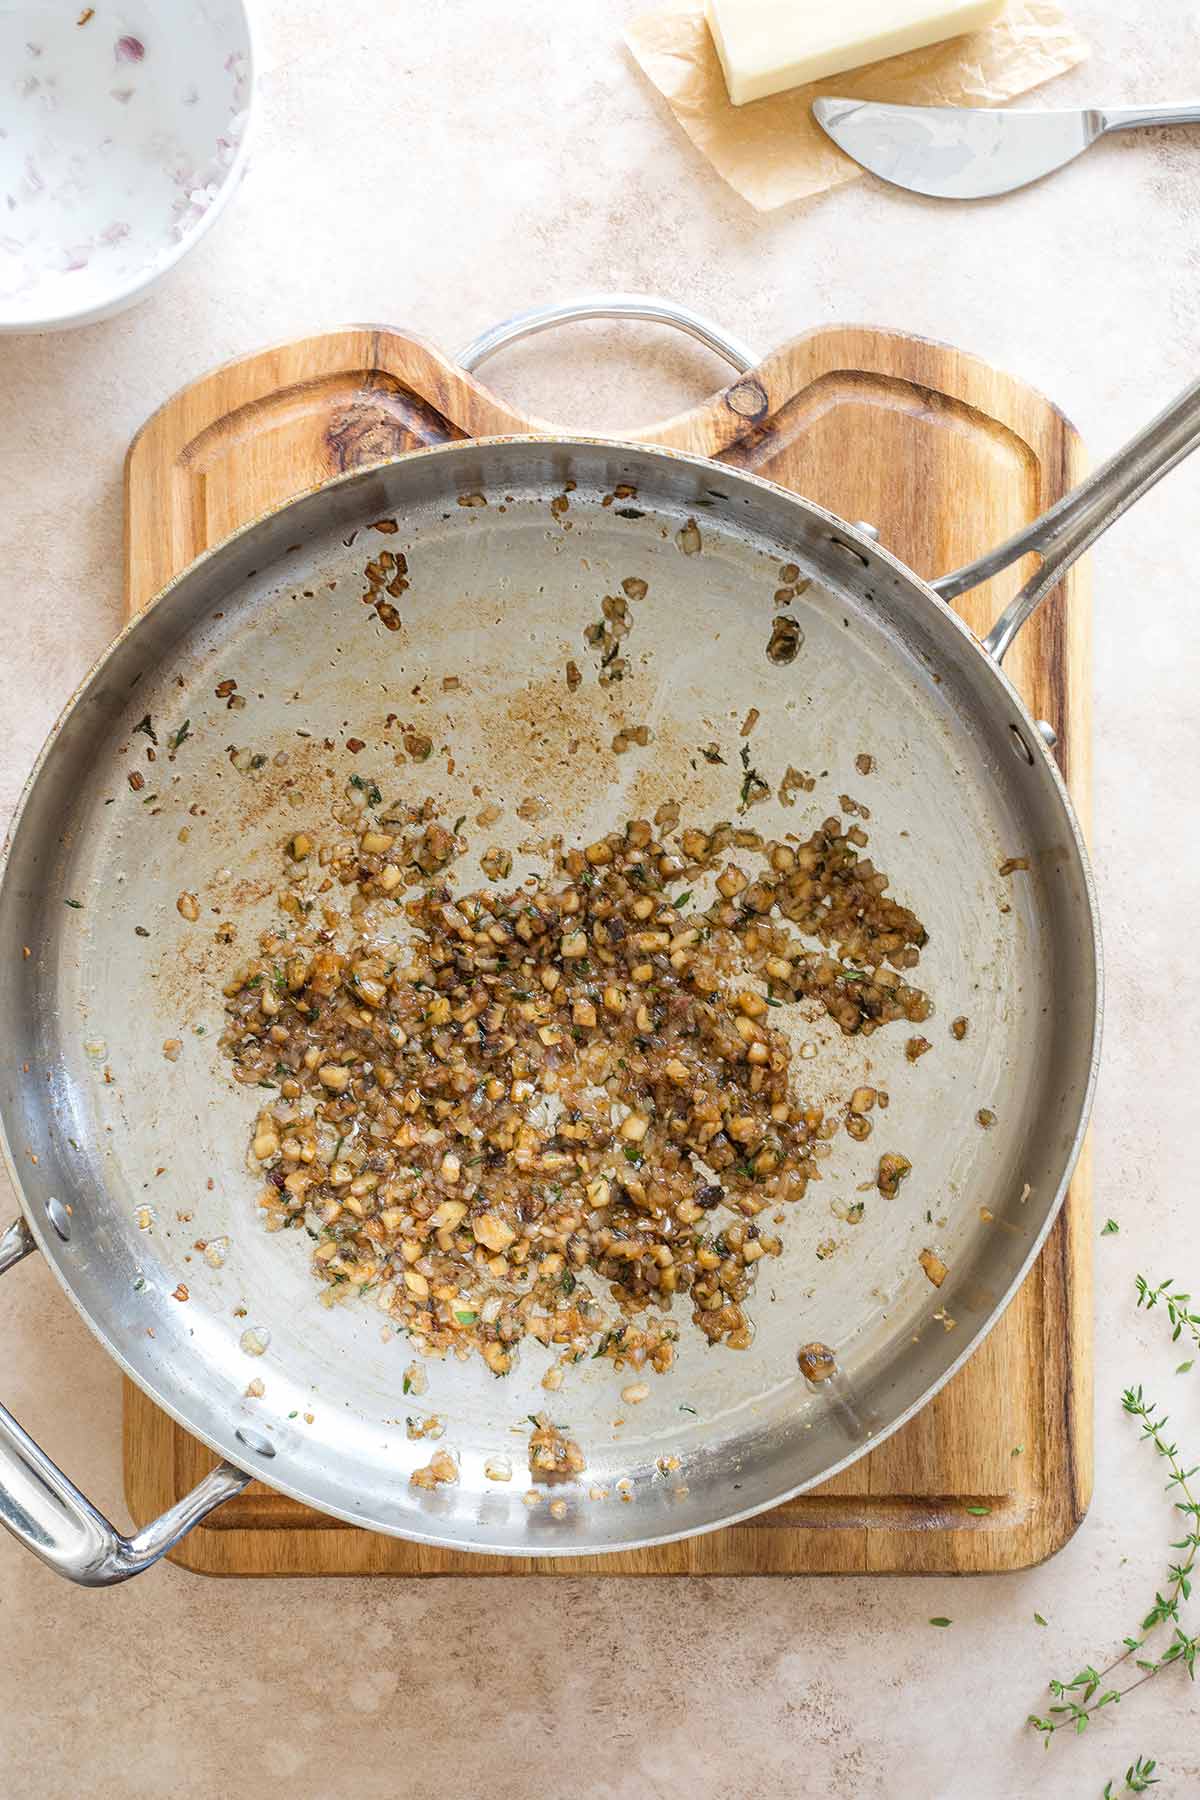
Remove your duxelles from the skillet to cool in a bowl or on a second plate (separate from the steaks).
Step #4: Rolling Out the Pastry
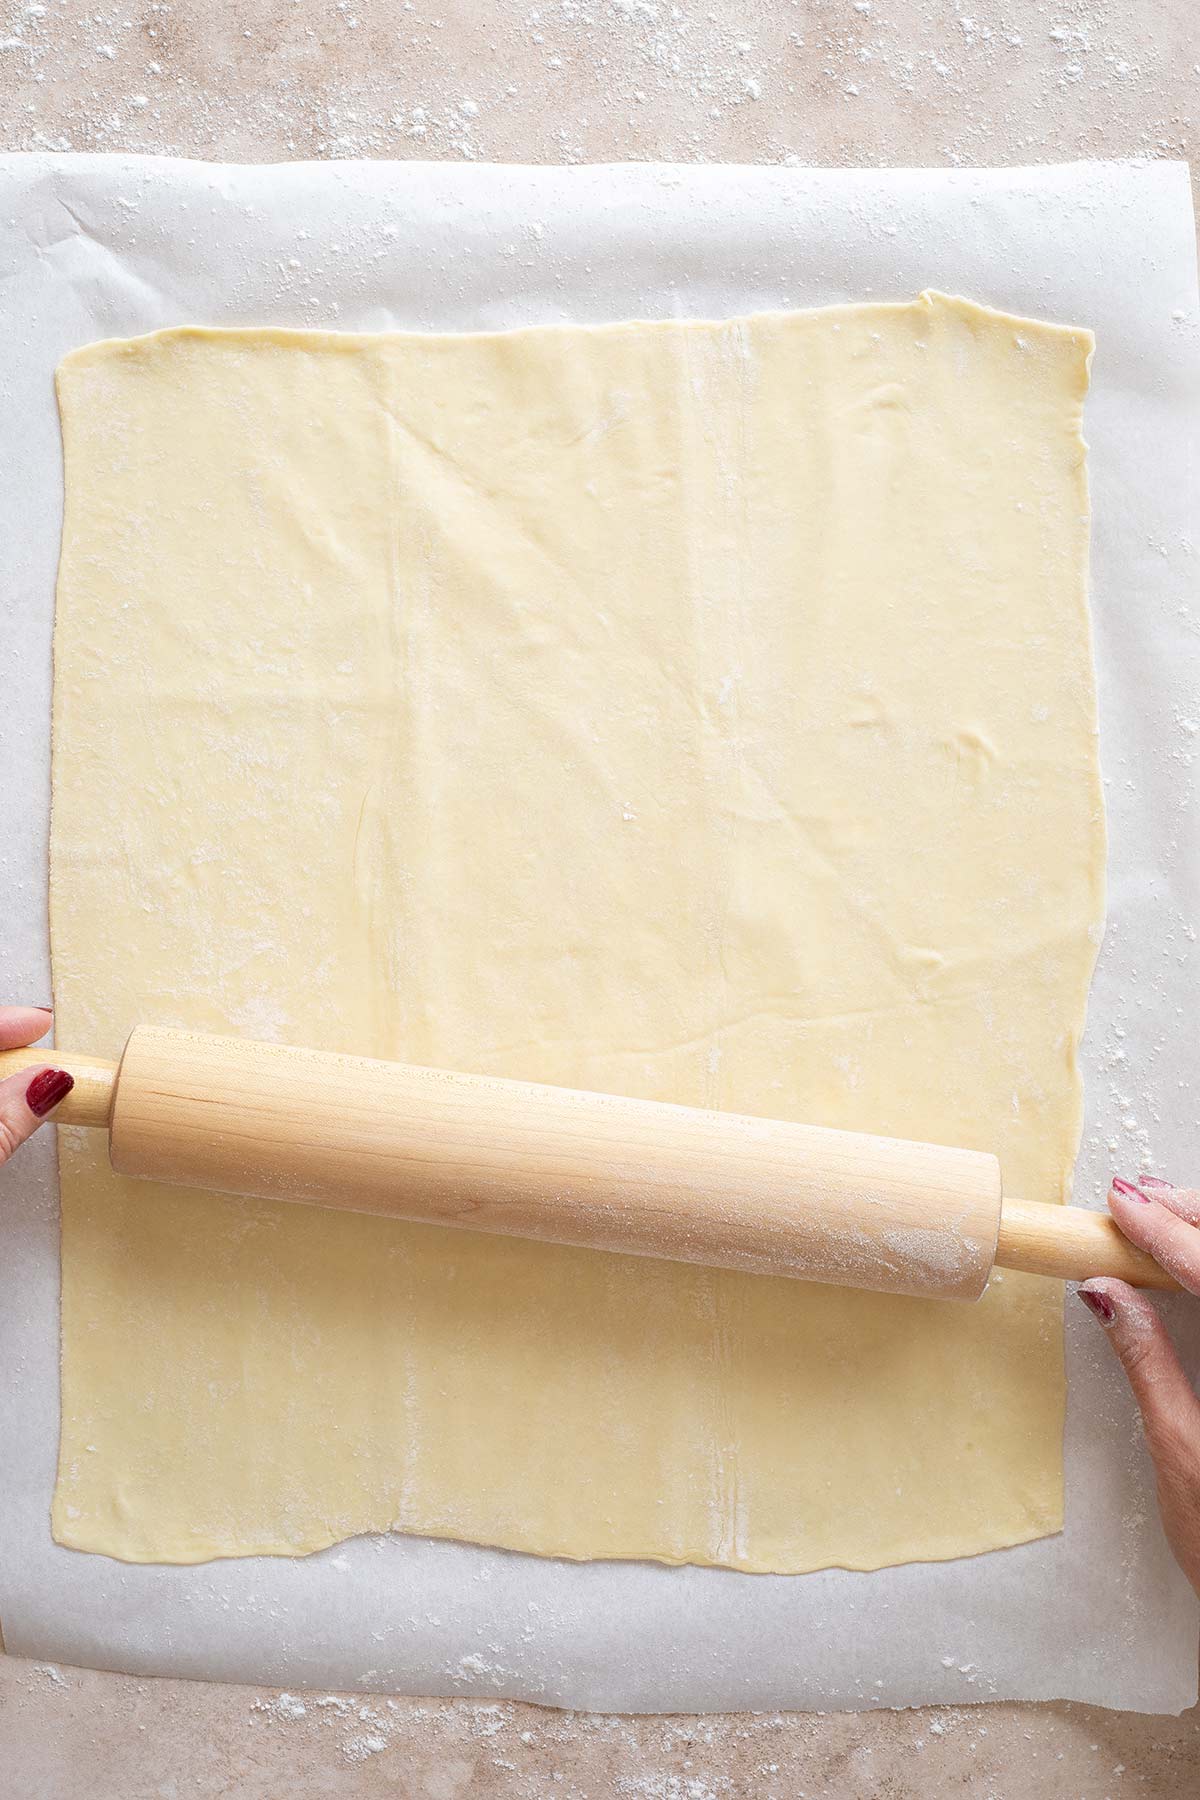
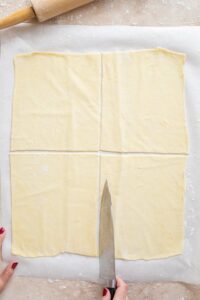
Put one {thawed!} sheet of puff pastry on a lightly floured surface. (We usually like to do this on a piece of floured parchment or waxed paper.) It helps if you lightly flour your rolling pin, too.
Roll the pastry sheet into a 13″ x 15″ rectangle.
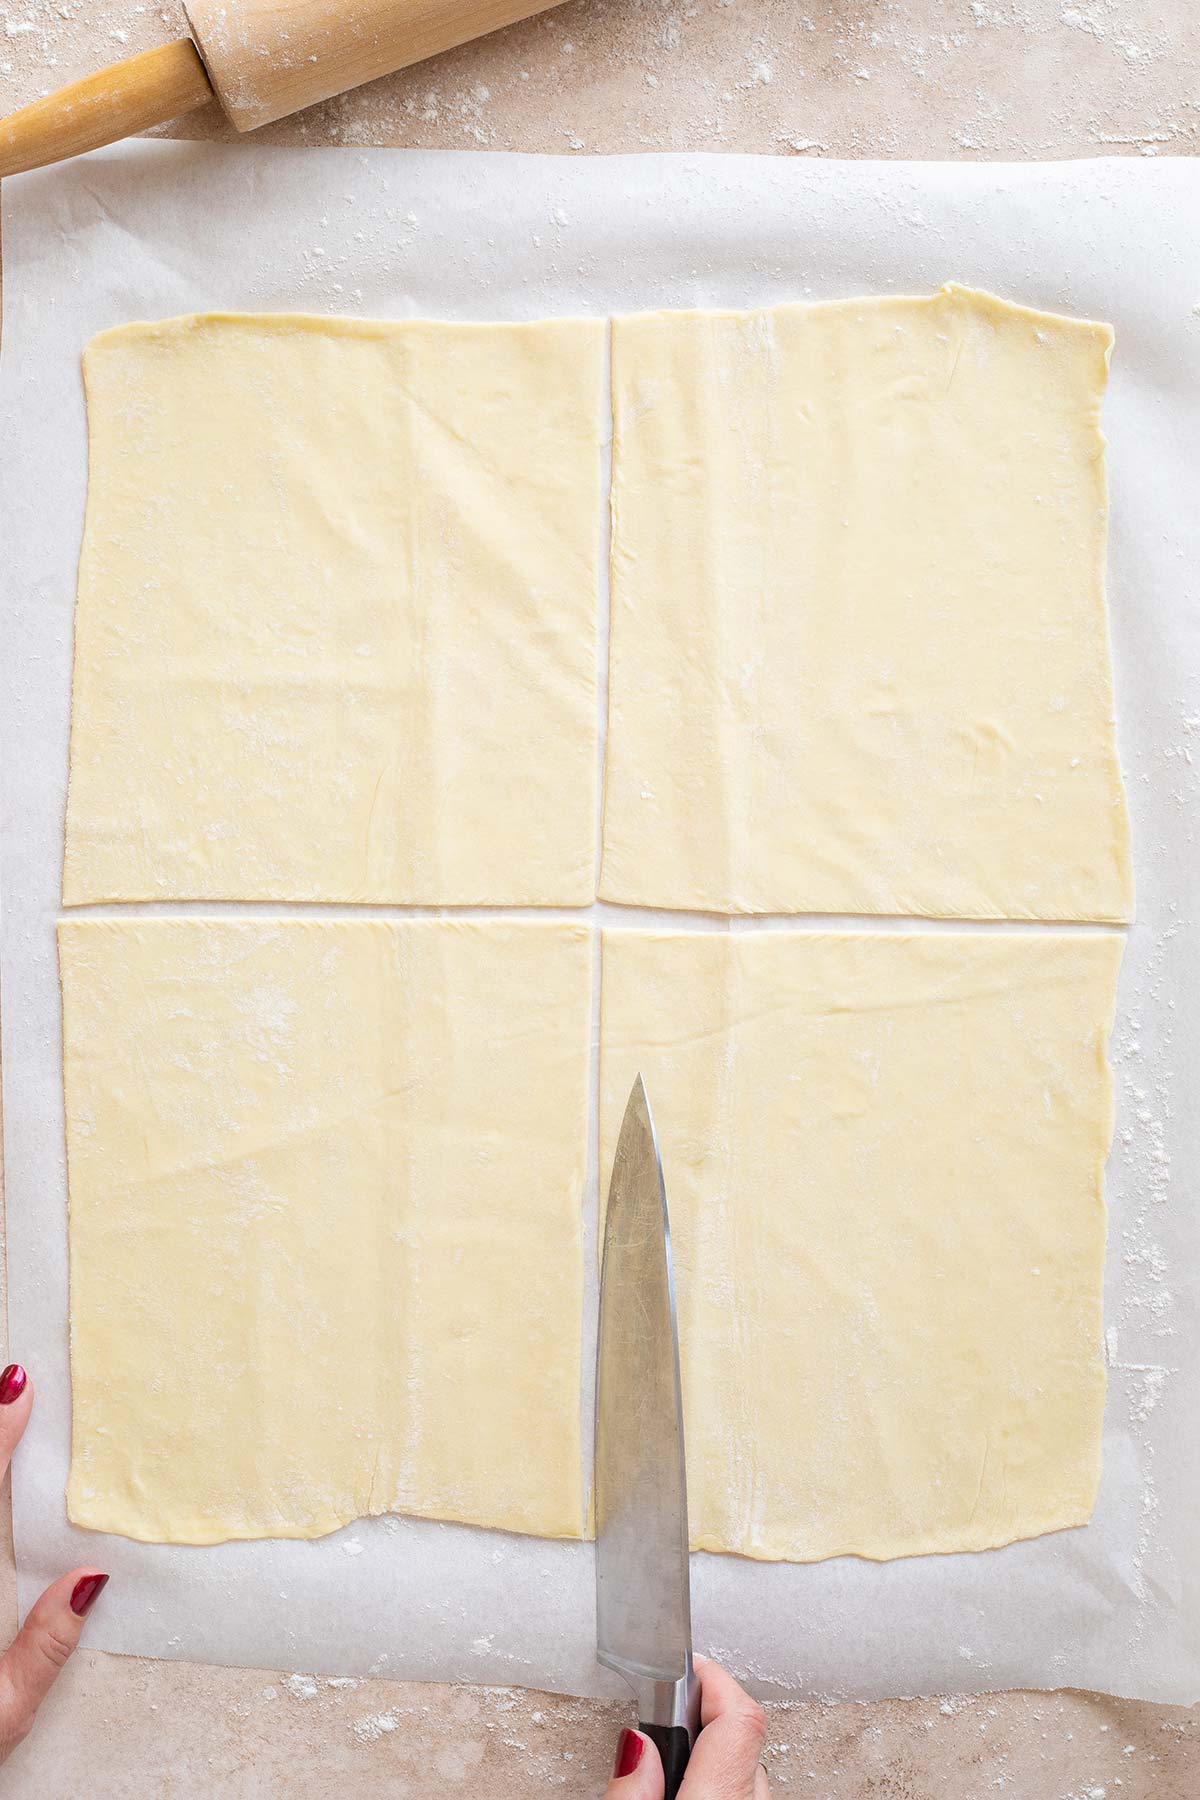
Then, using a sharp knife, cut your large rectangle into four equal sections.
Bonus Points: Decorating Your Beef Wellingtons for Holidays and Special Occasions
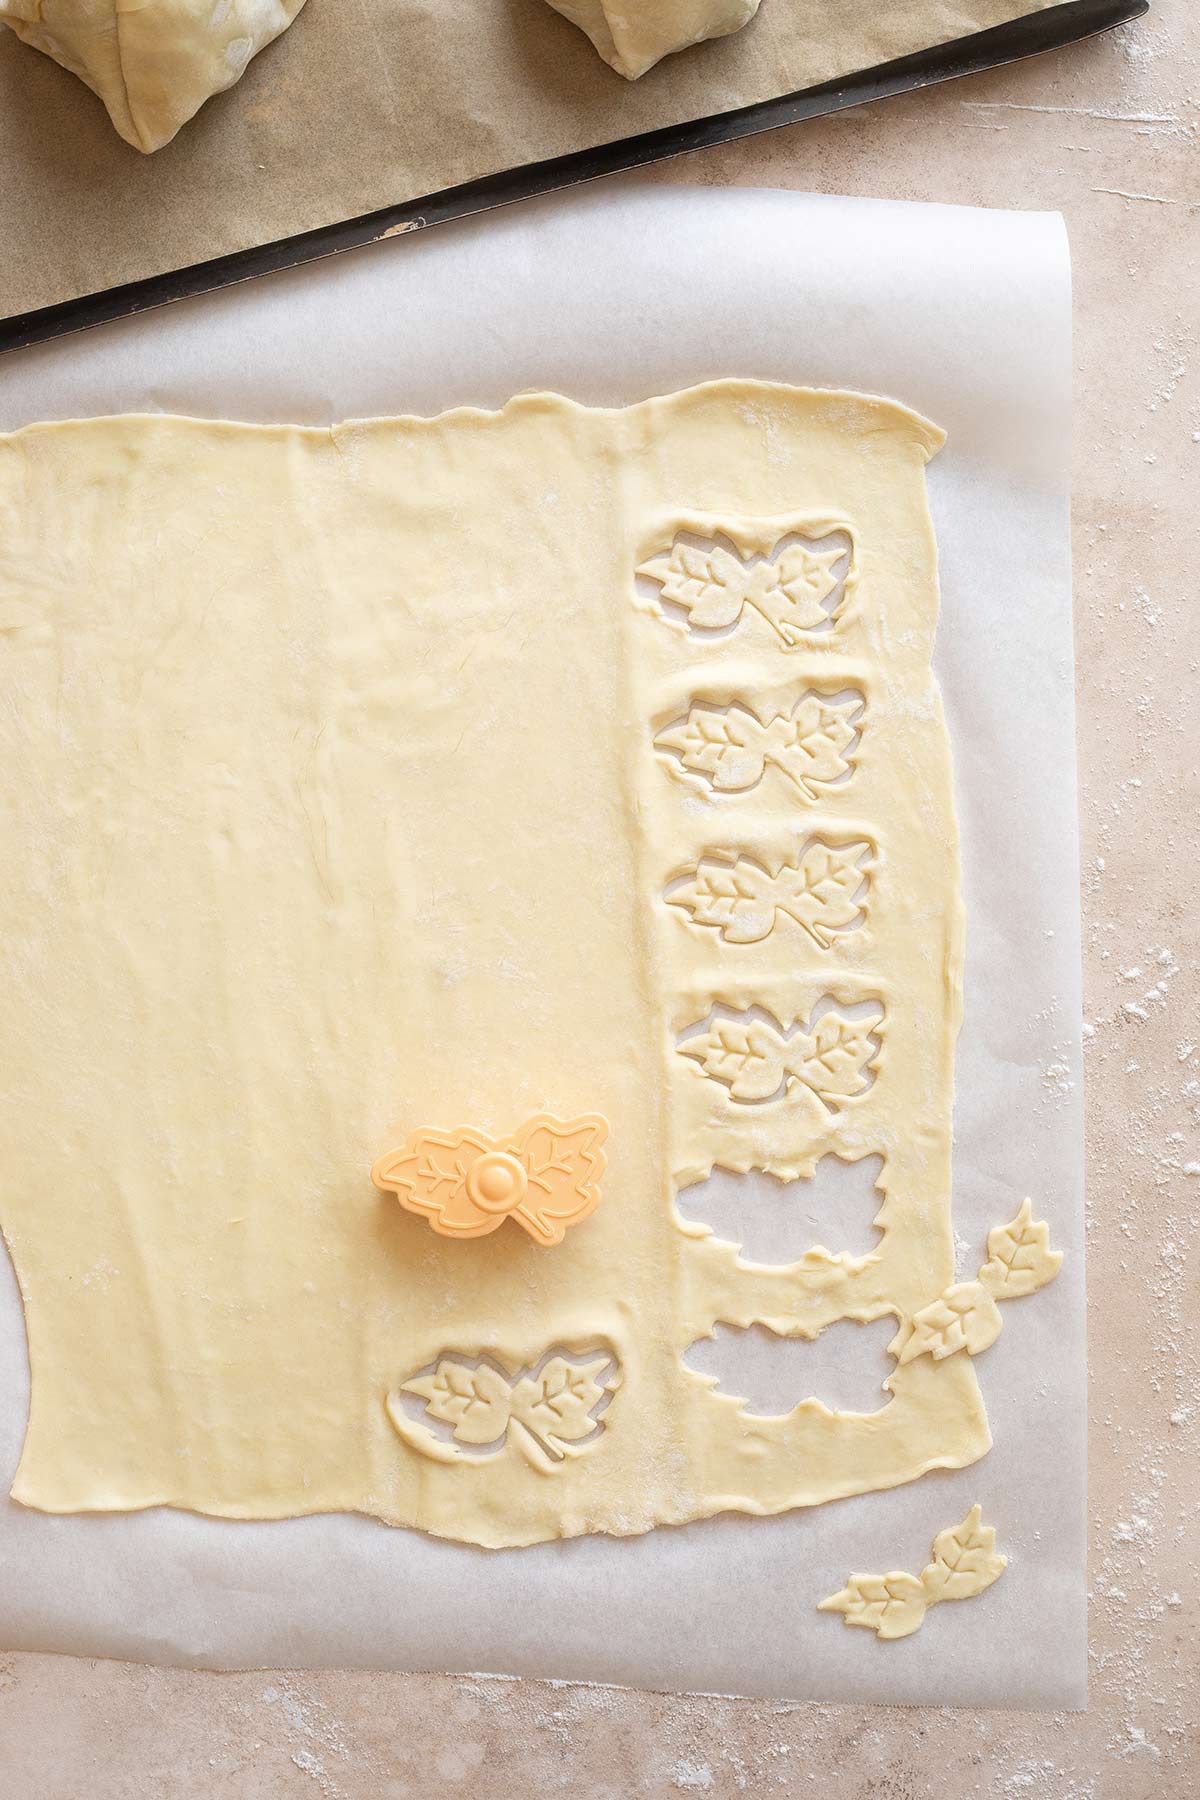
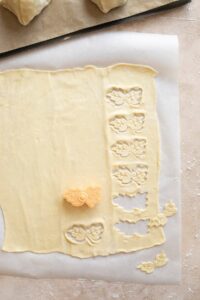
If you’re feeling extra fancy, you can use your second sheet of puff pastry (there are typically two sheets per box) to cut out fun shapes to decorate each individual Wellington.
You could do this with a paring knife … maybe slicing out simple leaf patterns, hearts for Valentine’s Day, or even a basic Christmas tree for the holidays.
Even easier, though?
Instead of a paring knife, grab some cookie cutters and use those!
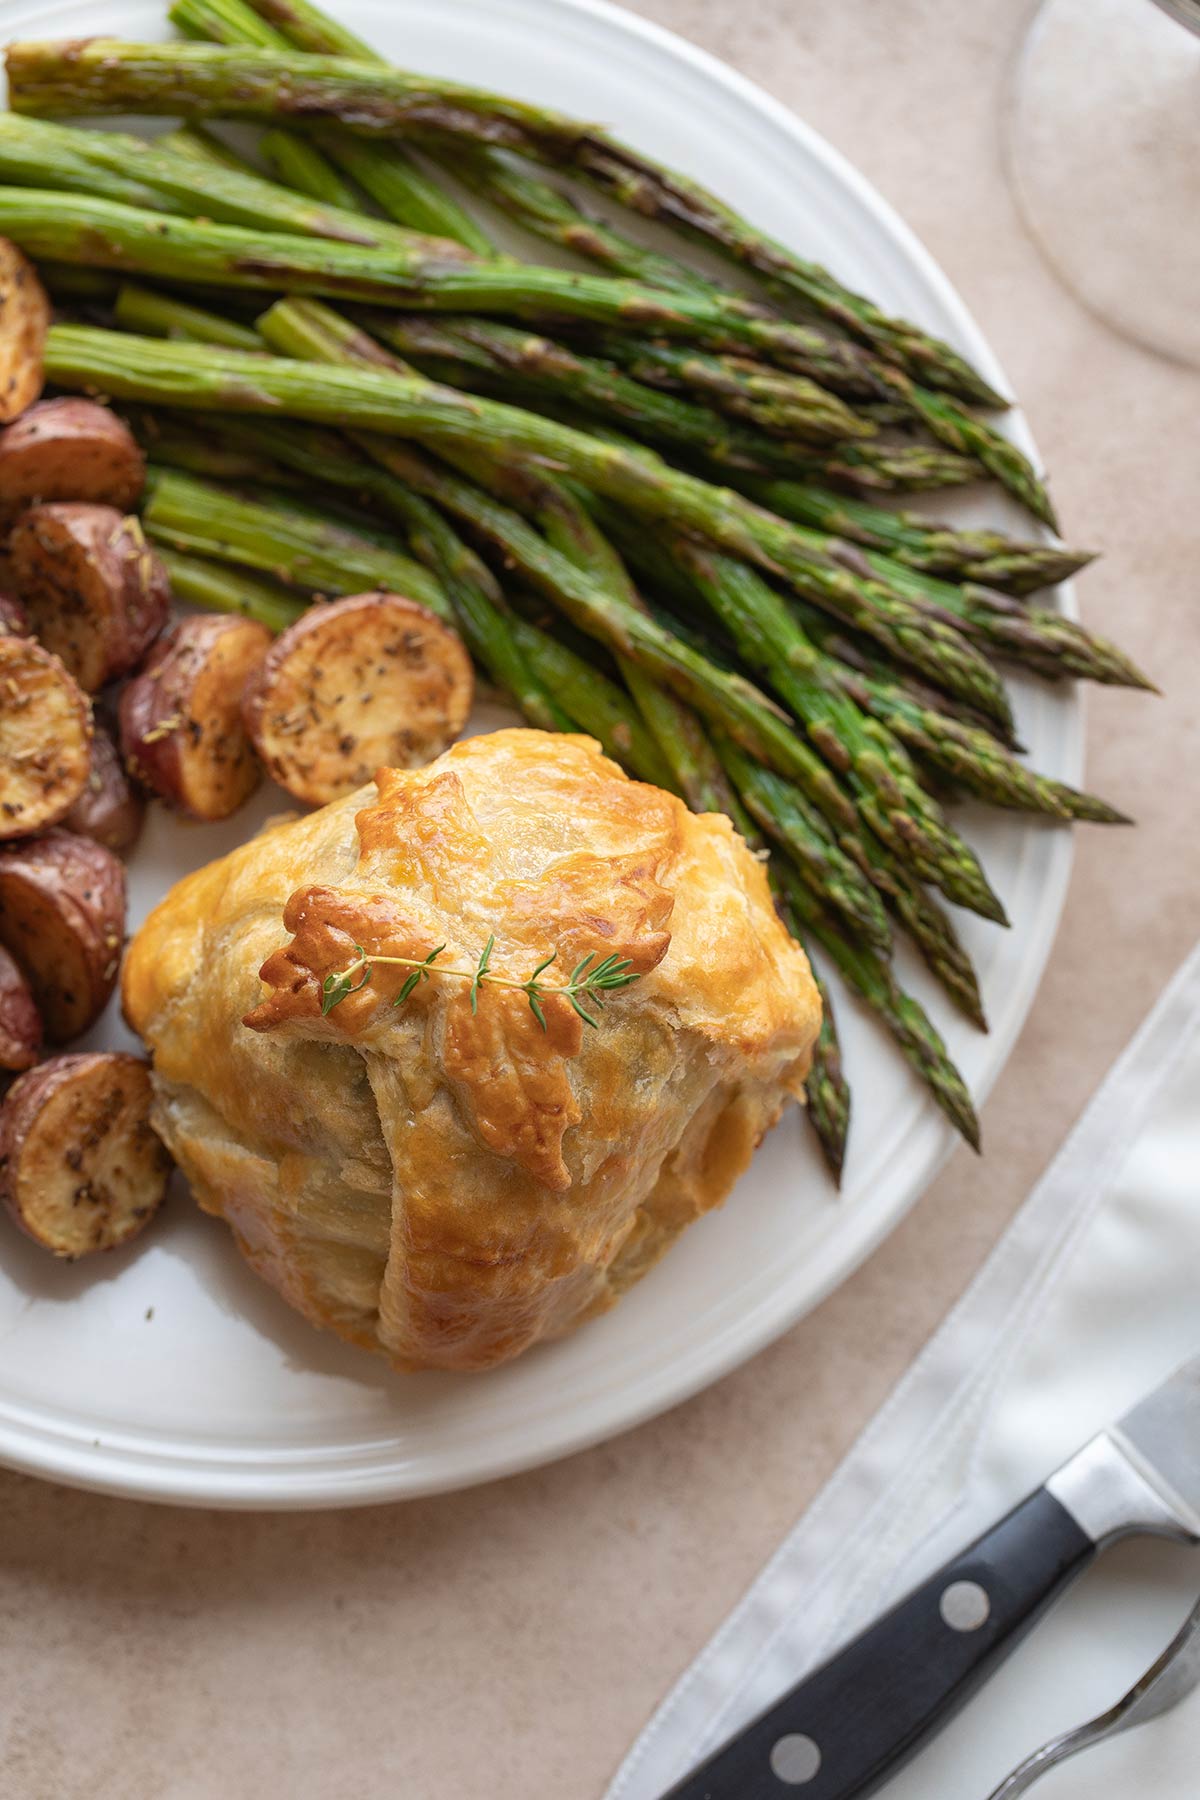
I chose a pretty leaf pattern for the photos in this article, which I thought could simply look “classy” for any occasion … but could also look a bit like holly leaves for a holiday dinner.
Get creative! You can customize your Individual Beef Wellingtons for each person (with each person’s initials, for example), or to celebrate special events and holidays. Hearts are a great bet for Valentine’s Day or a romantic “date night” dinner.
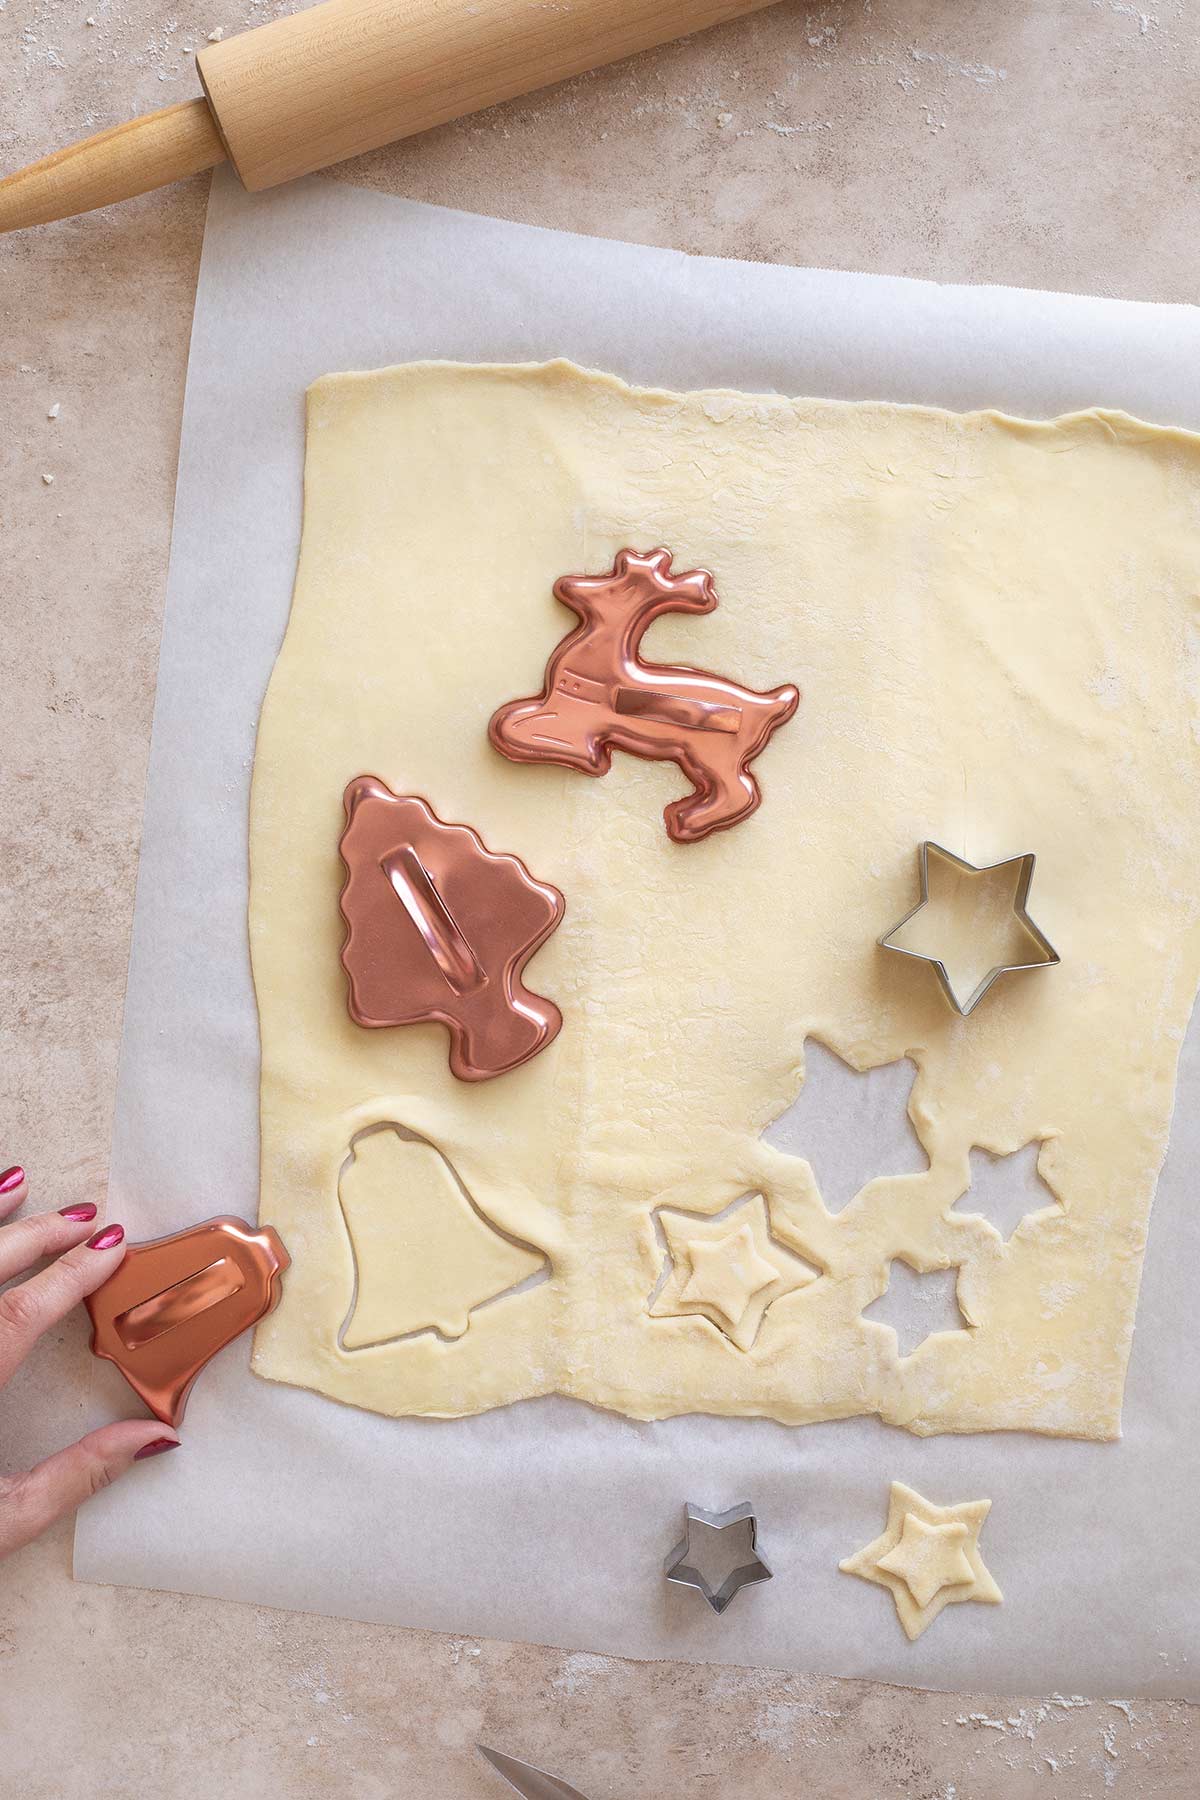
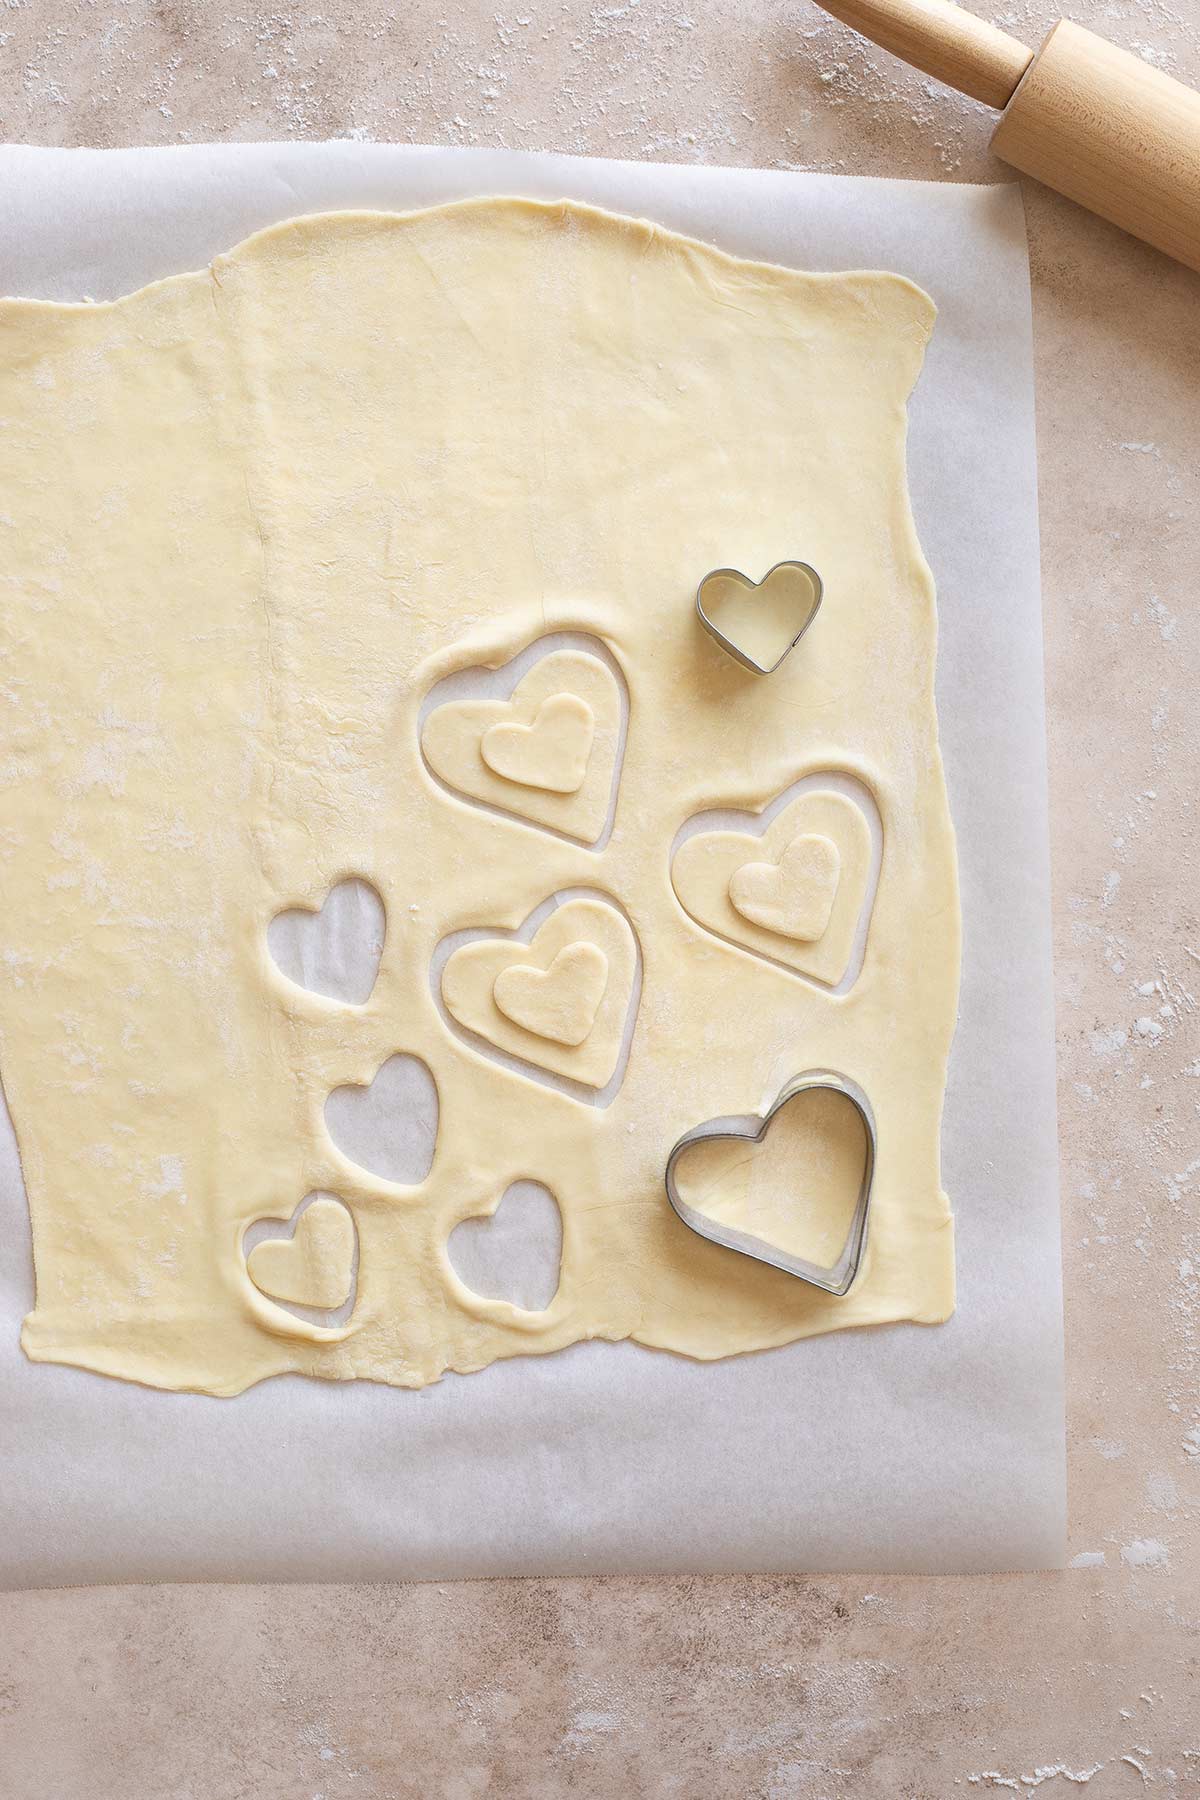
It’s an easy little flourish that’ll make your meal even more personalized and memorable!
Step #5: Assembling Your Wellingtons
Once you’ve got your pastry all ready to go, it’s time to build your masterpieces.
Gently blot your cooled steaks dry (so accumulated juices on the bottom of the steaks don’t sog out the pastry).
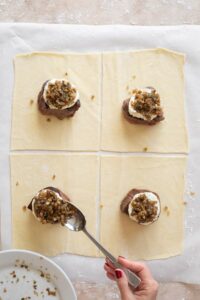
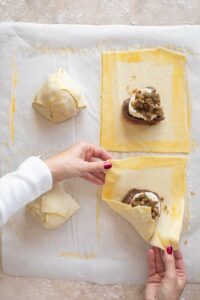
Then, arrange one filet in the middle of each section of pastry.
Spoon 2 tablespoons of cheese on top of each steak, spreading the cheese to mostly cover the steak.
Then, spoon ¼ of the mushroom duxelles mixture onto each one.
(I’ve got tips later in this article for customizing your mini Wellingtons … without mushrooms, for example.)
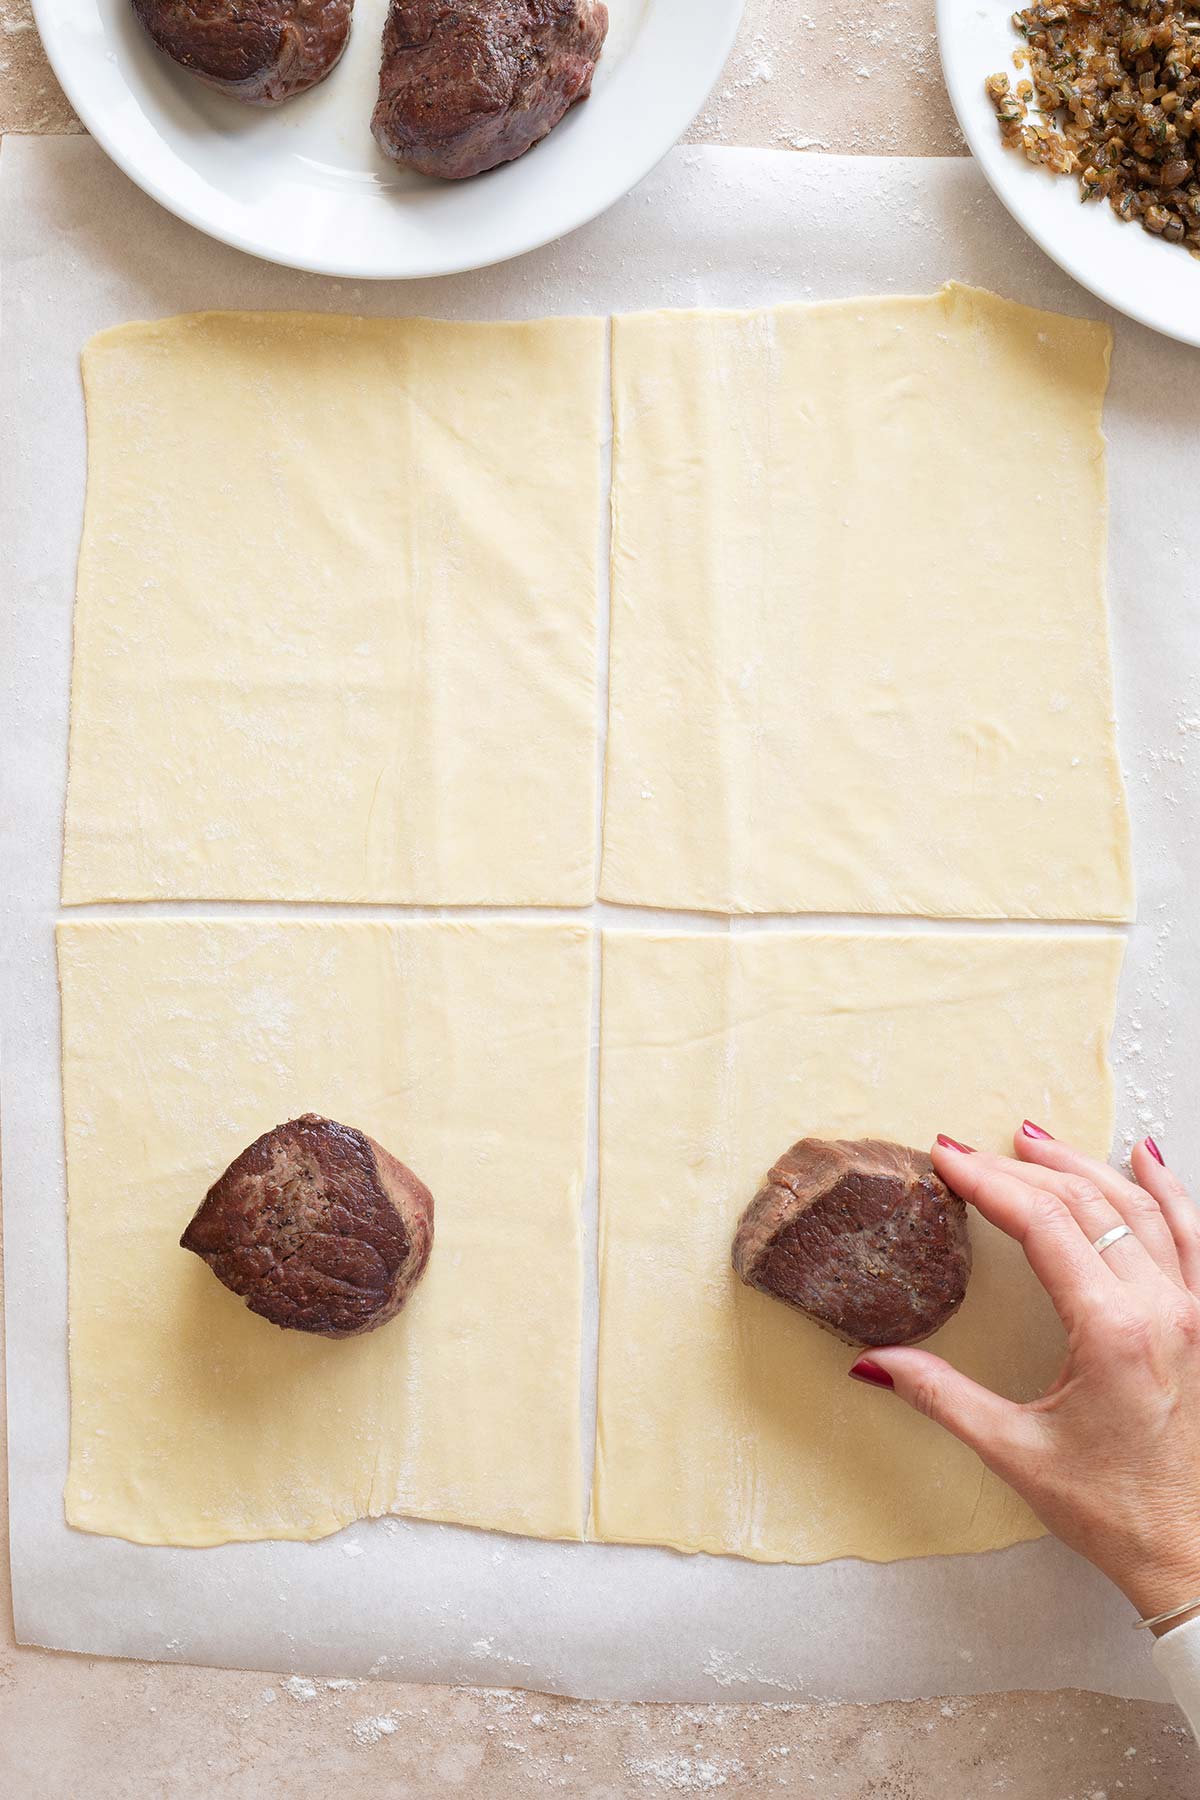
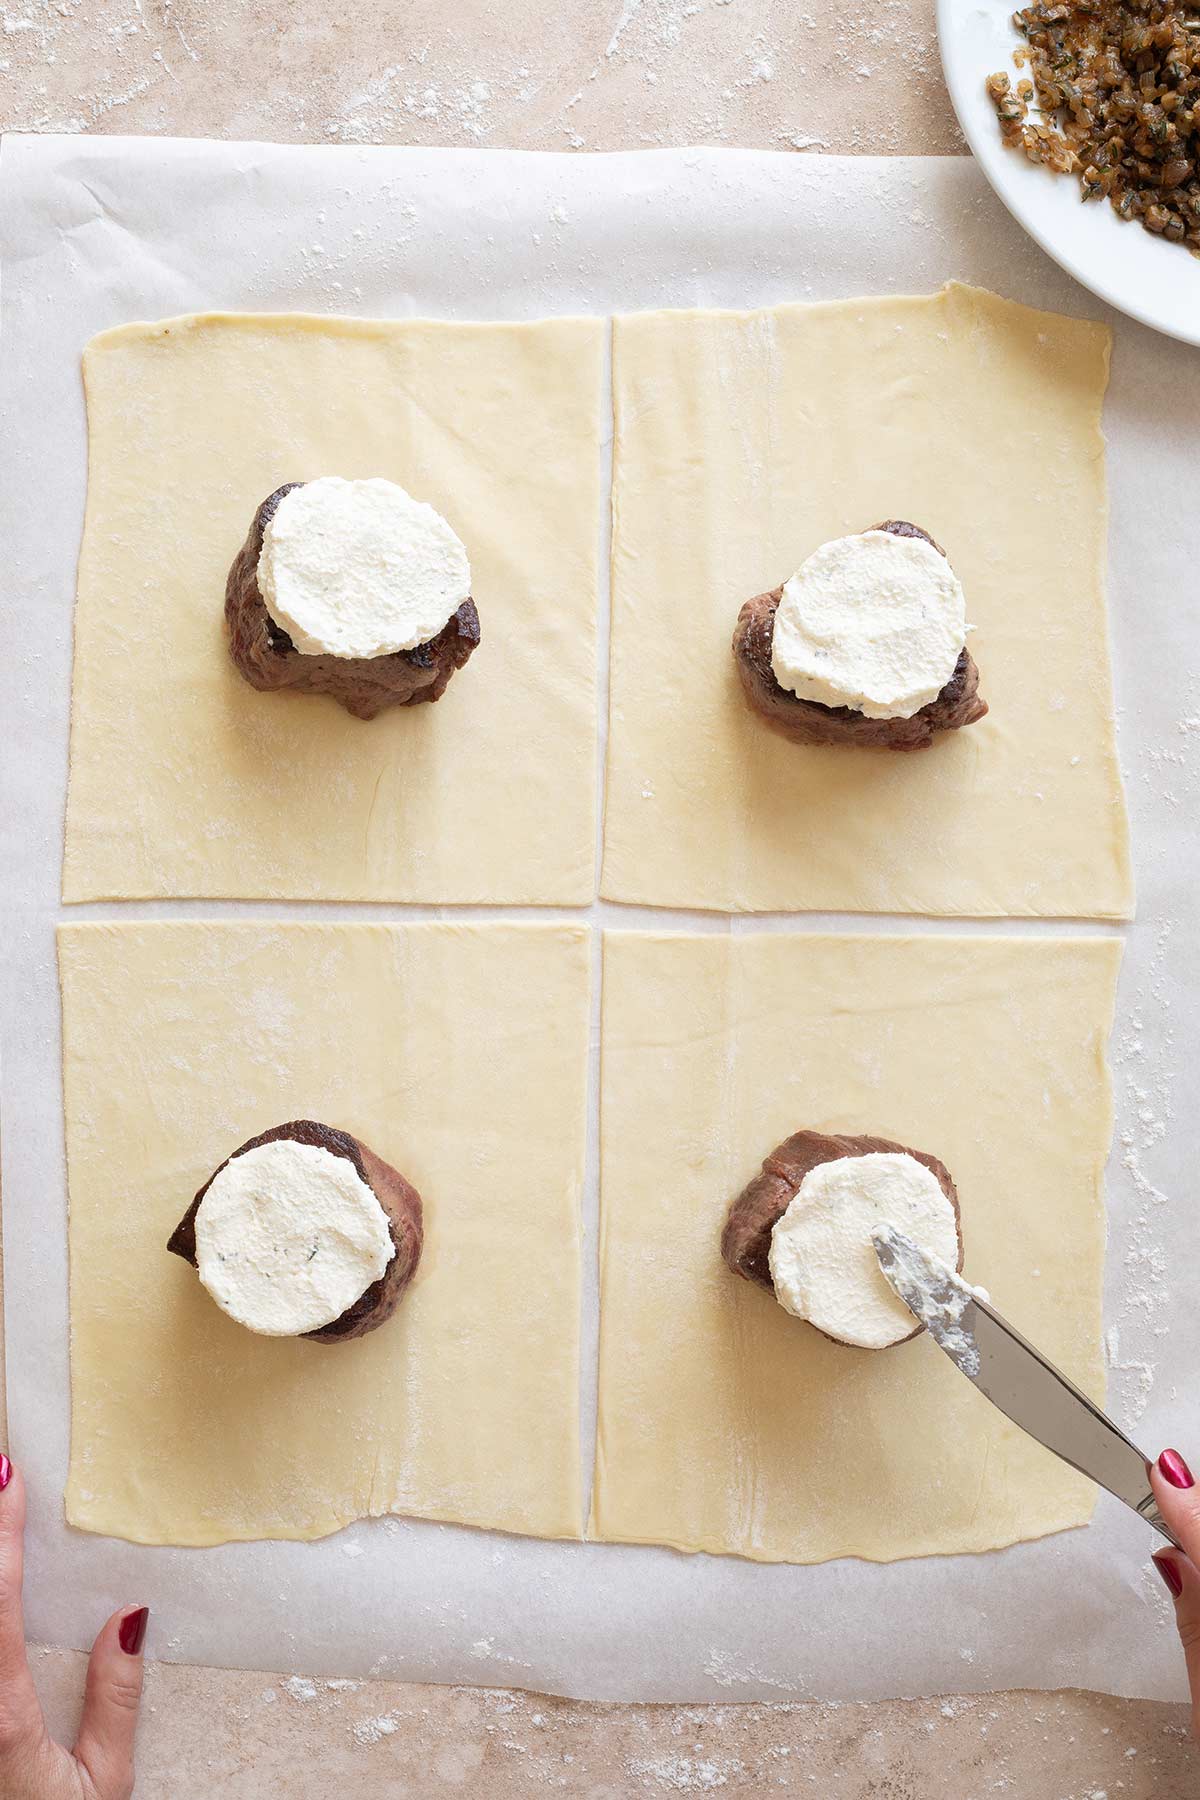
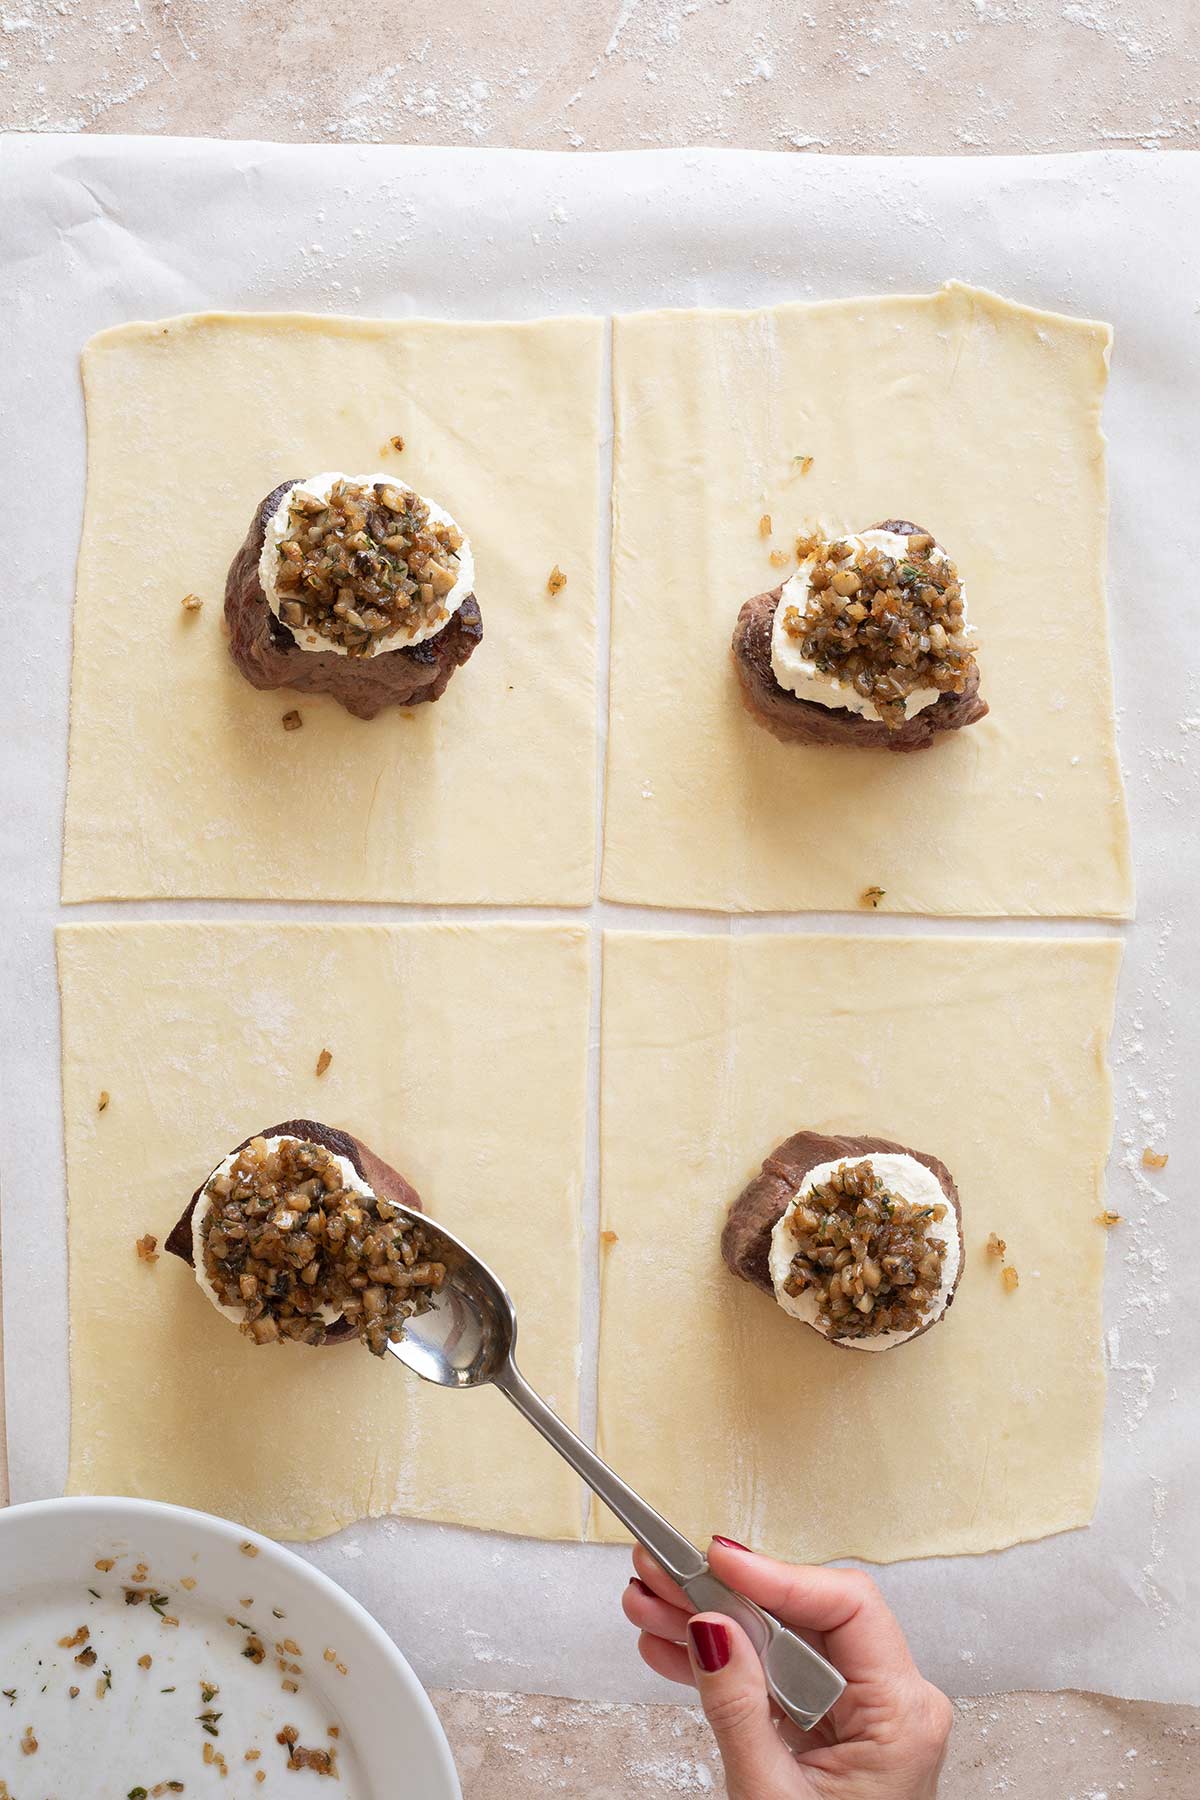
Step #6: Sealing the Pastry
After you’ve built your mouthwatering mini masterpieces, you need to make sure they’re perfectly encased in pastry. And that all the goodies tucked inside won’t leak out when you bake them to golden-brown perfection.
To do this, thoroughly brush the edges of each pastry section with lightly beaten egg.
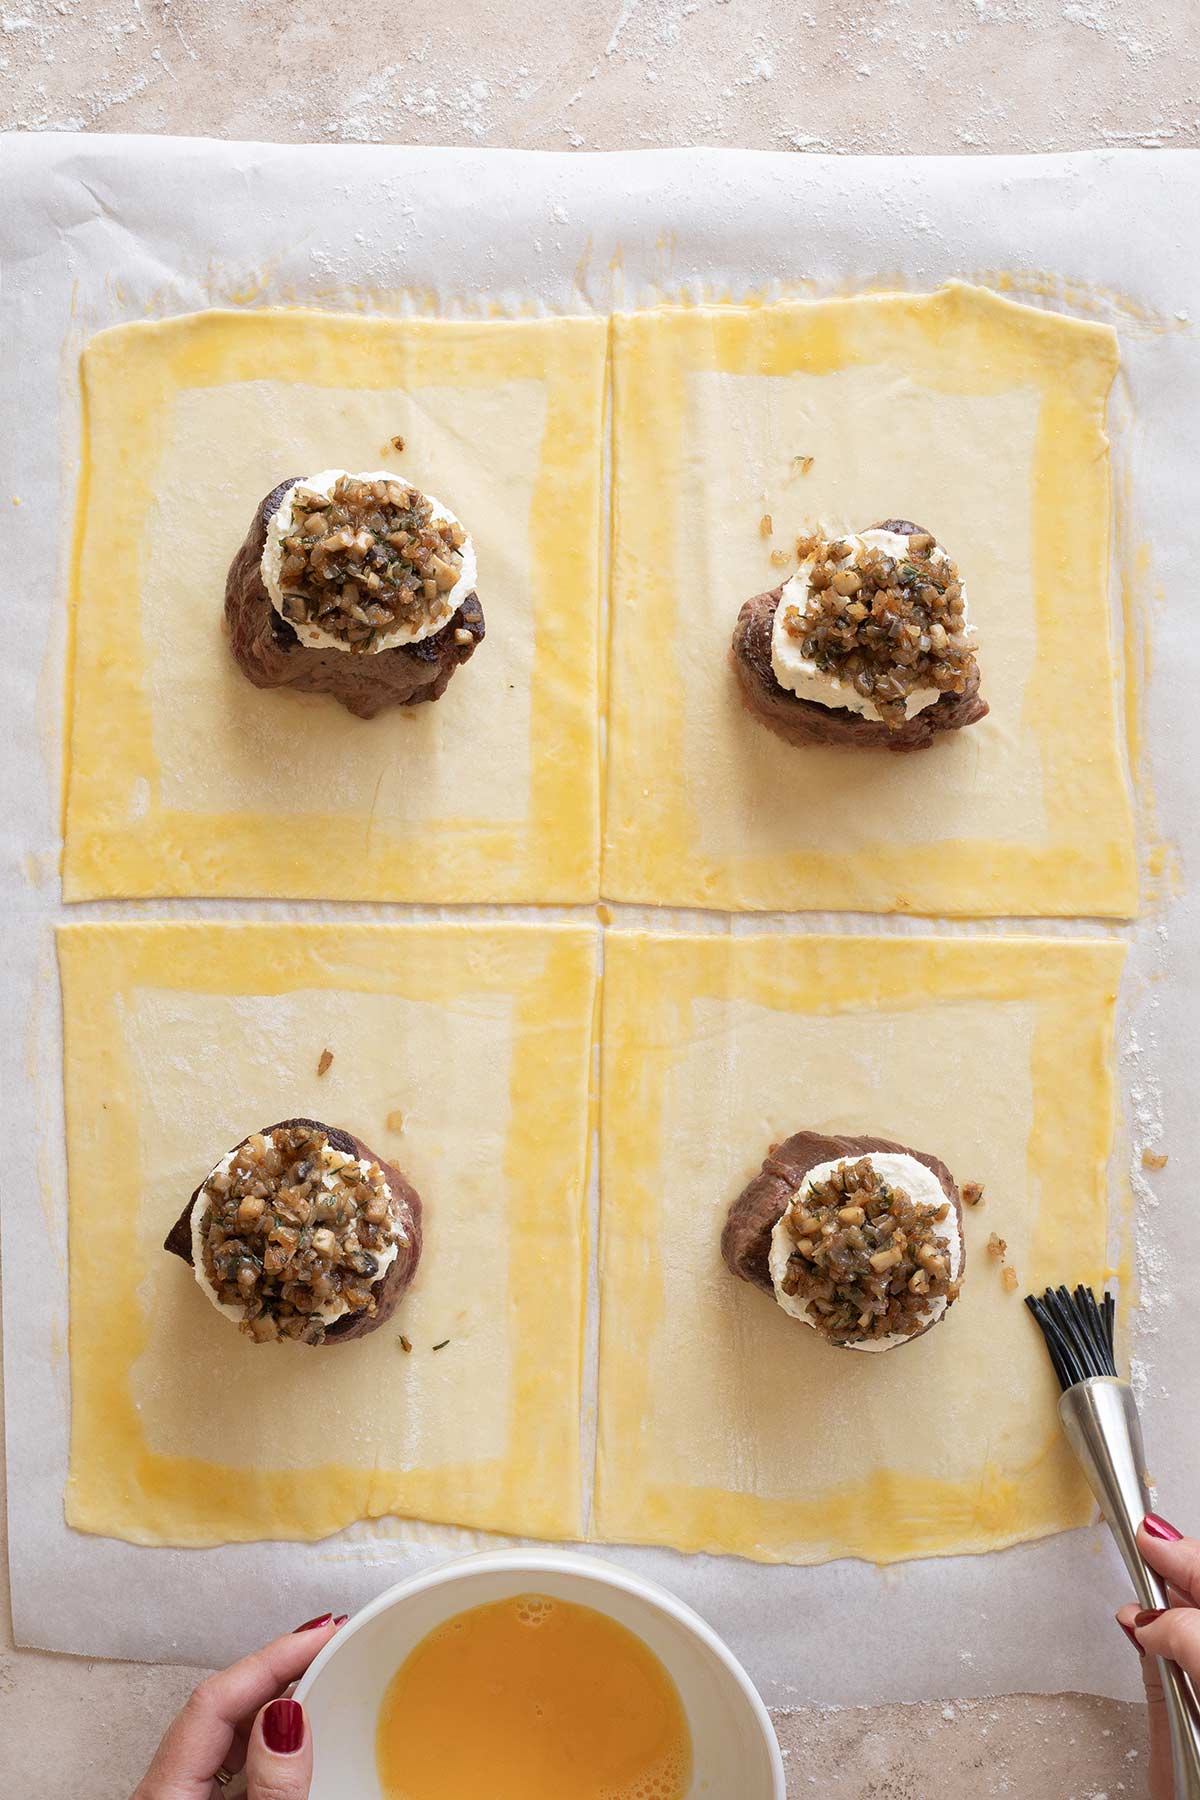
I like to use a silicone pastry/basting brush for this.
No basting brush? No problem! You can even use your fingers, or try one of these clever ideas from The Spruce Eats.
Then, fold the corners up toward the center of each filet, gently tucking in the sides of the pastry as you work.
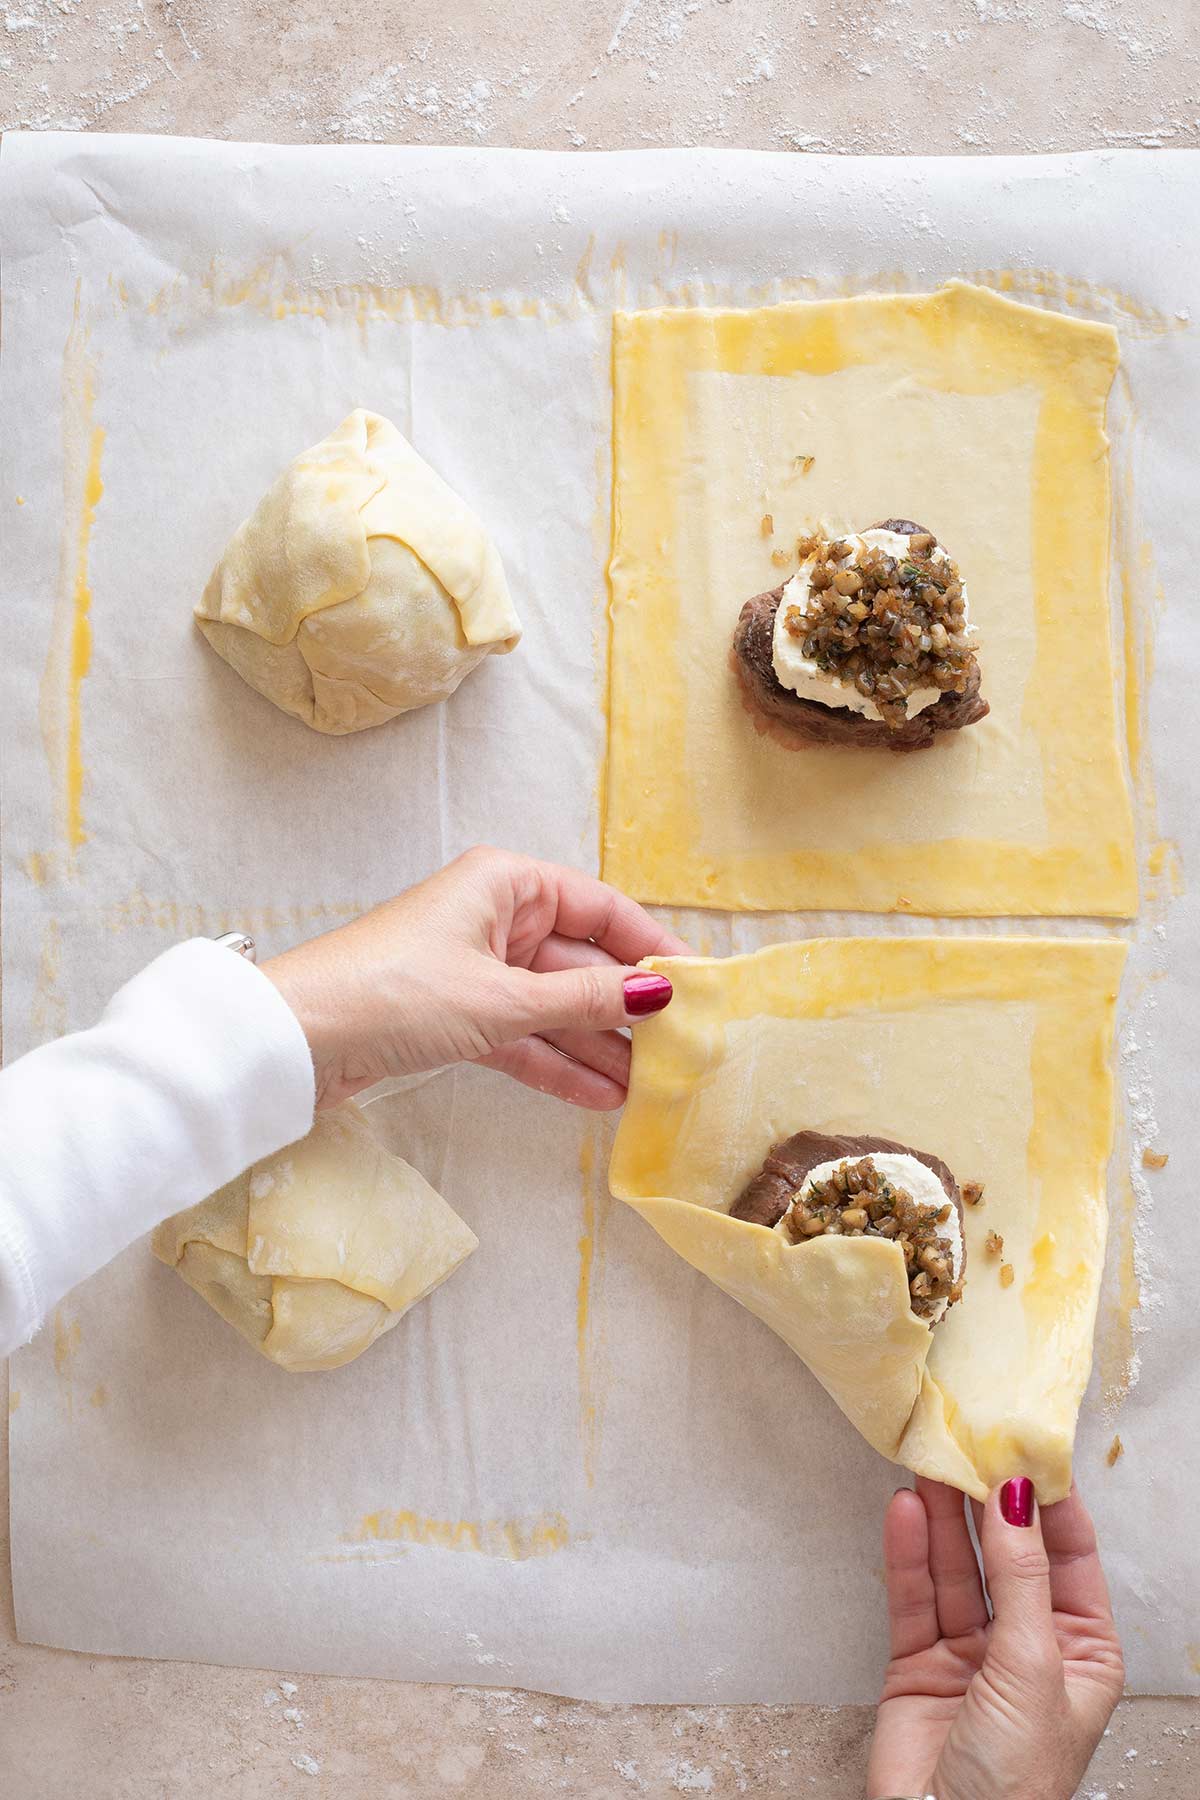
Press firmly but gently (you don’t want to squish the pastry) all around the pastry’s edges, making sure all the edges are well sealed.
Step #7: Adding Optional Decorations
Did you use your second pastry sheet to cut out fun decorations (back during step #4 above)? If so, then this is where you add them.
Brush one side of each decoration with egg wash, and gently press the decorations (egg-washed sides down) onto the top of each pastry bundle.
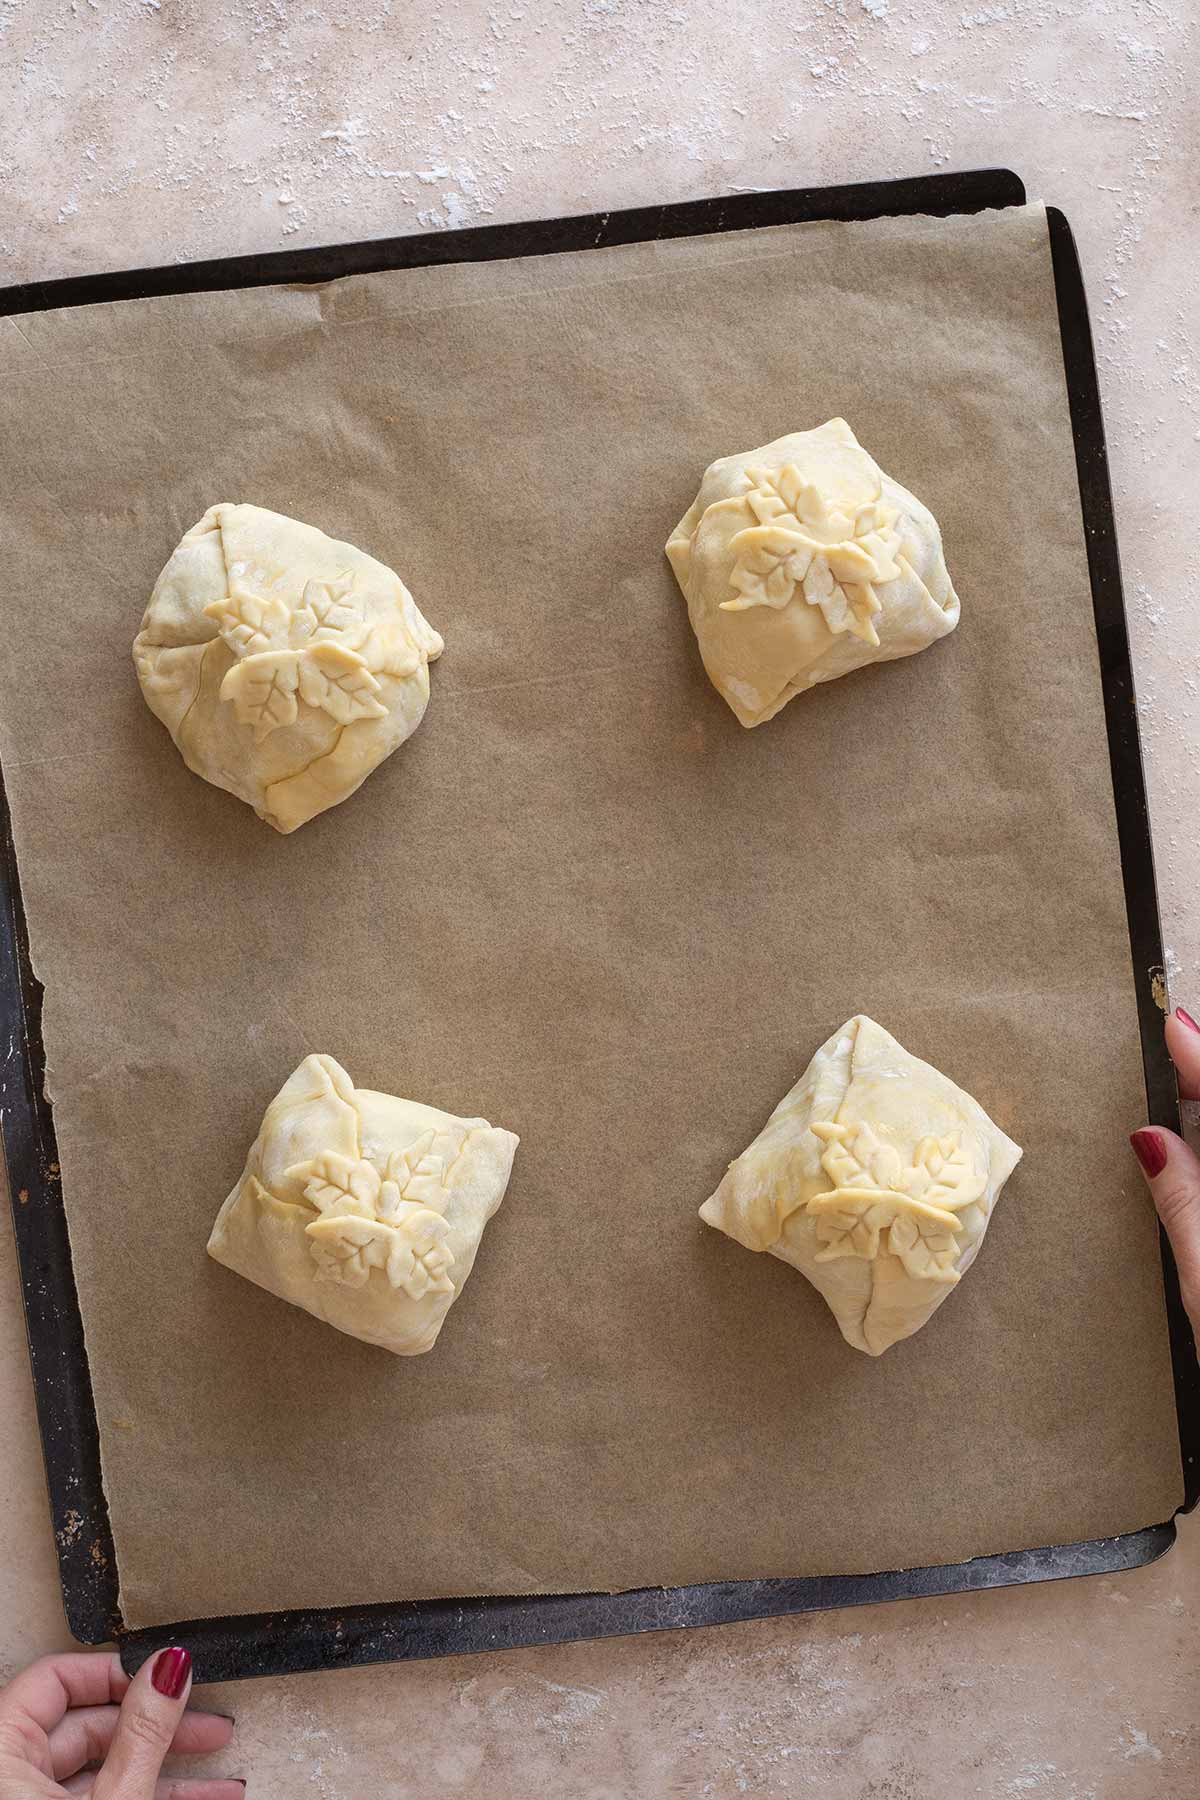
So pretty, right?
And doesn’t that extra little step make your beef Wellingtons look extra professional, too?!?
Step #8: Resting the Wellingtons (While You Go Do Something Else!)
At this point, you’re basically done with all the work. Yay, you!
But your pretty Wellington parcels ideally need a little time to hang out and rest before you bake them.
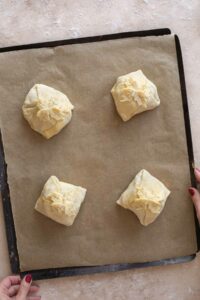
So, transfer them to a parchment-lined baking sheet and wrap the baking sheet in plastic wrap – loosely (don’t smash your beef Wellingtons) but completely (so they don’t dry out).
Pop them in the fridge for at least an hour, or overnight.
You’ll also want to cover your bowl of egg wash with plastic and refrigerate that, too, because you’re going to use it again right before the Wellingtons go in the oven.
Step #9: Baking (The Impressive Finale!)
After your Beef Wellingtons have rested, take them out of the fridge and discard the plastic wrap.
Brush each one lightly but thoroughly with the egg wash before you pop them in the oven.
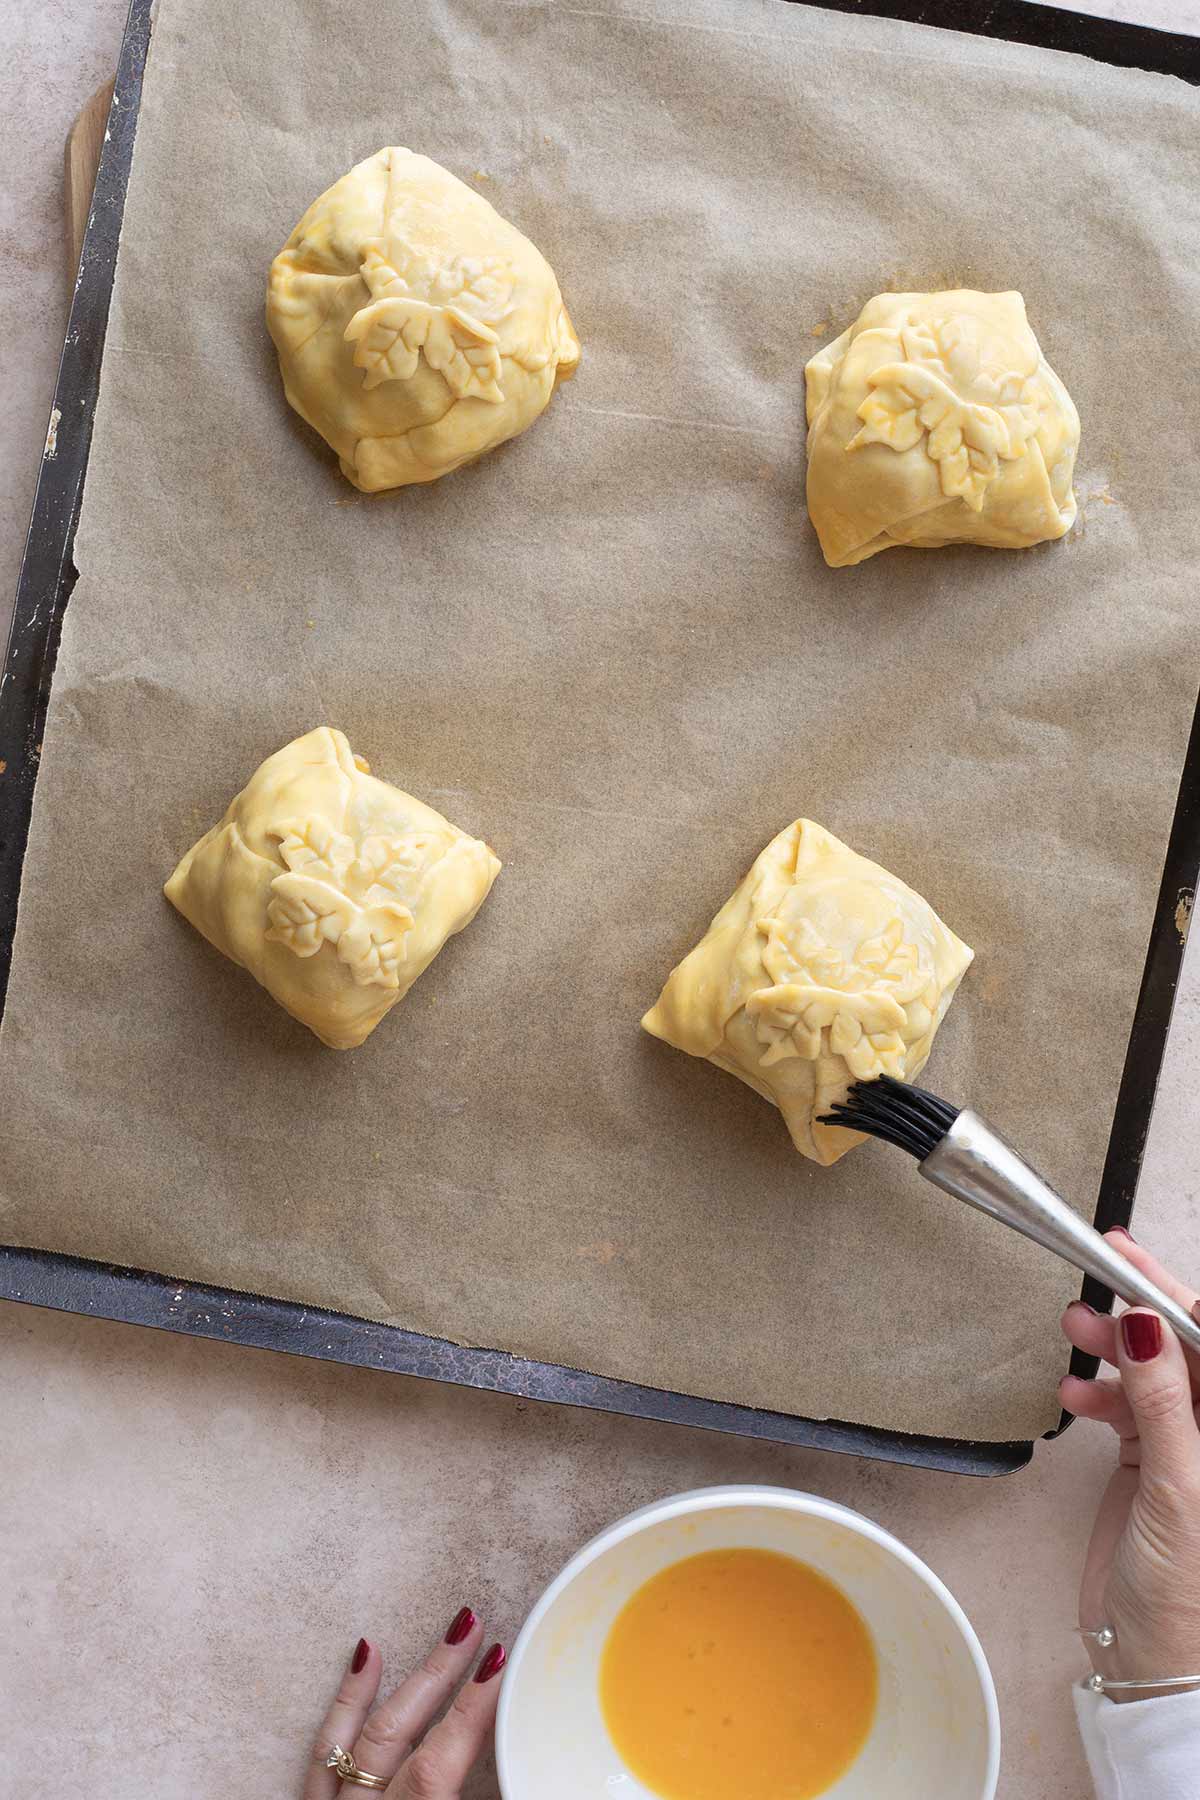
Bake them at 425°F for about 15-16 minutes for medium-rare, or about 16-18 minutes for medium.
Adjusting the Bake Time for Filet Thickness and Desired Doneness
The trick here is that it’s nearly impossible to get four 4-ounce filets of precisely the same thickness every single time you make this recipe.
Sometimes I’ve had to end up with 5-ounce or even 6-ounce filets (because of what was available at the store). Sometimes one or two of them aren’t quite as thick as the others.
Or maybe most people at your table want medium rare (highly recommended!), but somebody wants medium well.
It’s ok! You can adjust!
Just a couple of minutes either way is usually all it takes to tweak the doneness or adjust for differences in filet thickness. Even 6-ounce steaks don’t need to bake for more than about 18-19 minutes to be the perfect medium rare.
If you have one filet that’s smaller (or thinner) than the rest, the easiest thing to do is to take it out of the oven a minute or two earlier than the others. Similarly, if you have someone who wants theirs more done than everyone else’s, leave that one in for an extra minute or two, after you’ve taken the others out of the oven.
Also, if you seared your filets (in Step #2) for longer than the recommended time (so they’d release easily from the pan), you can opt to decrease the baking time by a minute or so, since your filets have already cooked longer in Step #2.
Then … serve up those gorgeous Individual Beef Wellington packets of pure joy and utter deliciousness!
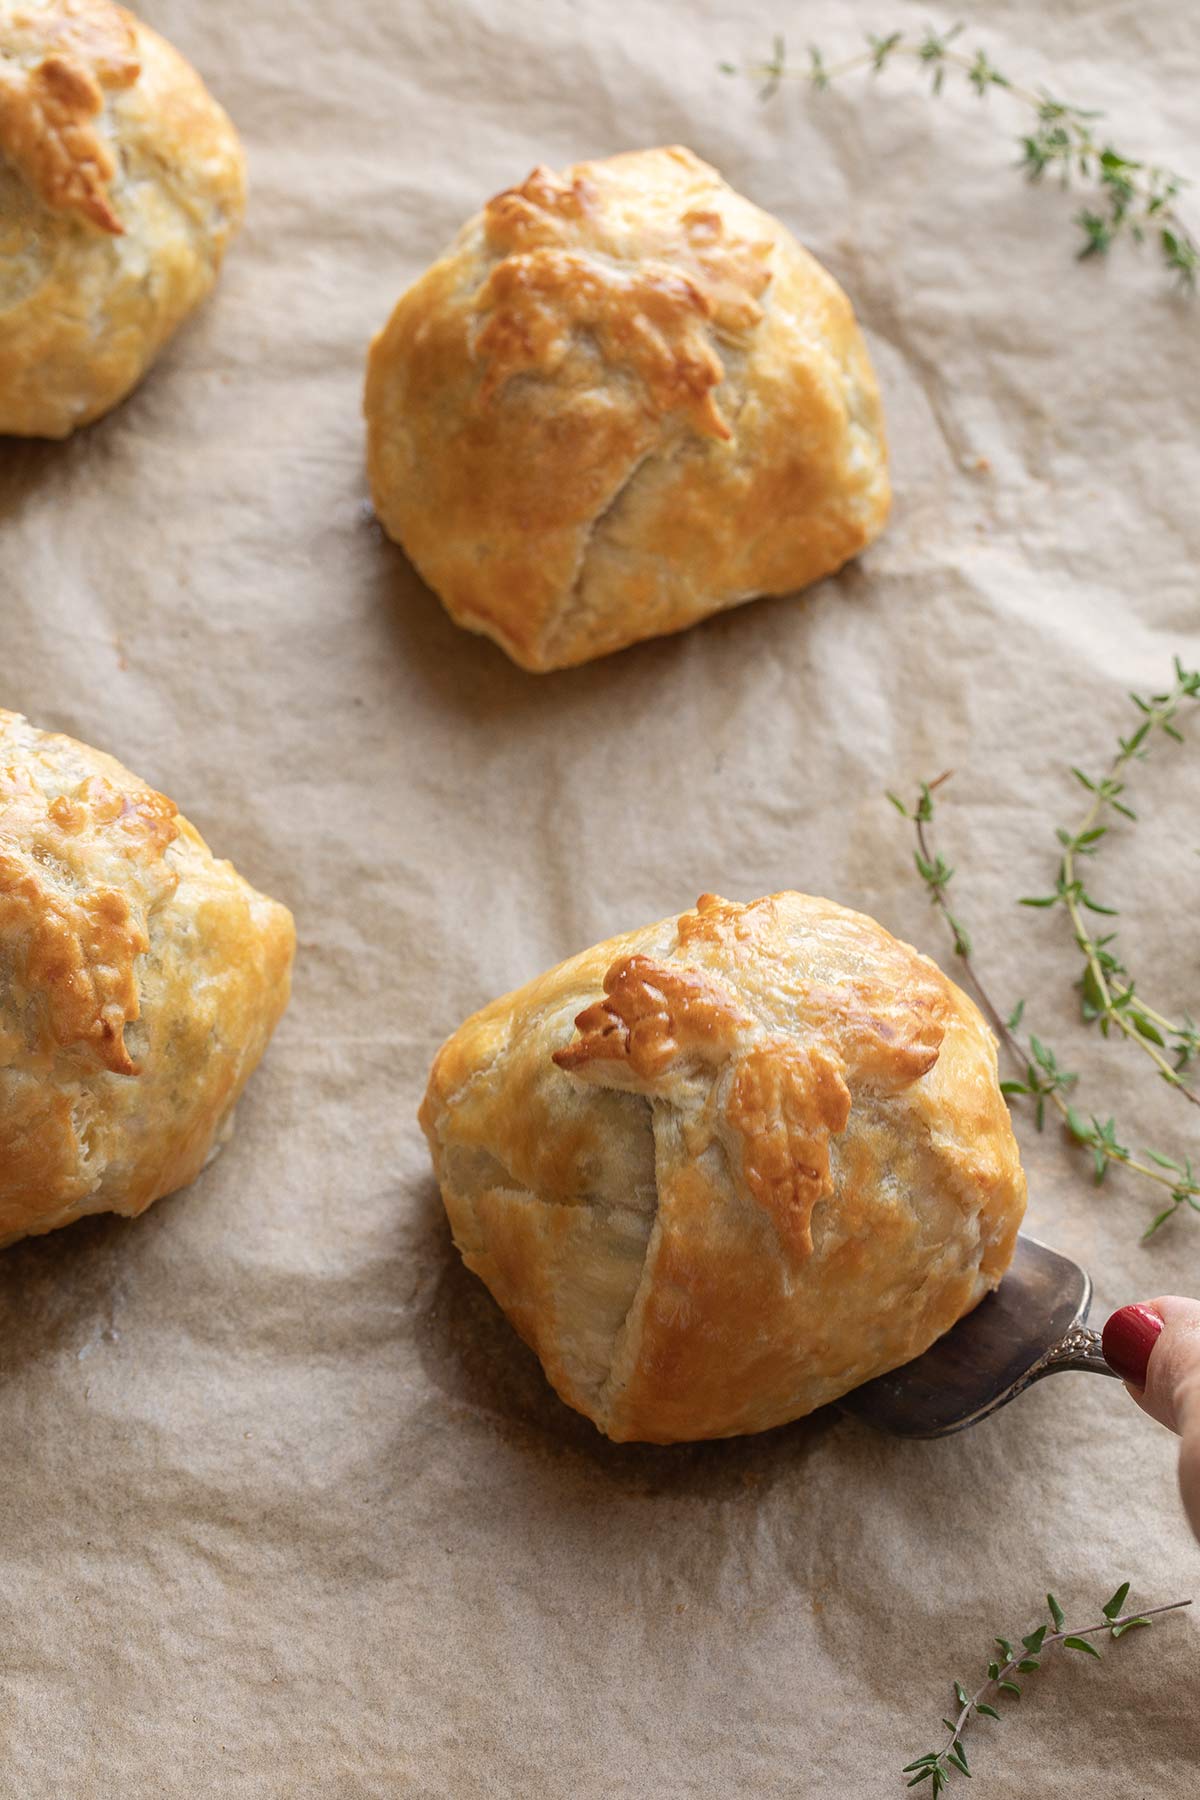
(Be prepared for complete silence to fall upon your table as people take the first bite. This usually happens at our house … no talking … everyone is completely focused on experiencing how unbelievably GOOD this is! Talking usually happily resumes again after a few bites, but sometimes drops off again, as people savor the final bite or two. Not kidding. It’s THAT fantastic.)
But you don’t want to serve your Beef Wellingtons all by themselves! Here’s what we usually do …
What to Serve with Your Beef Wellingtons
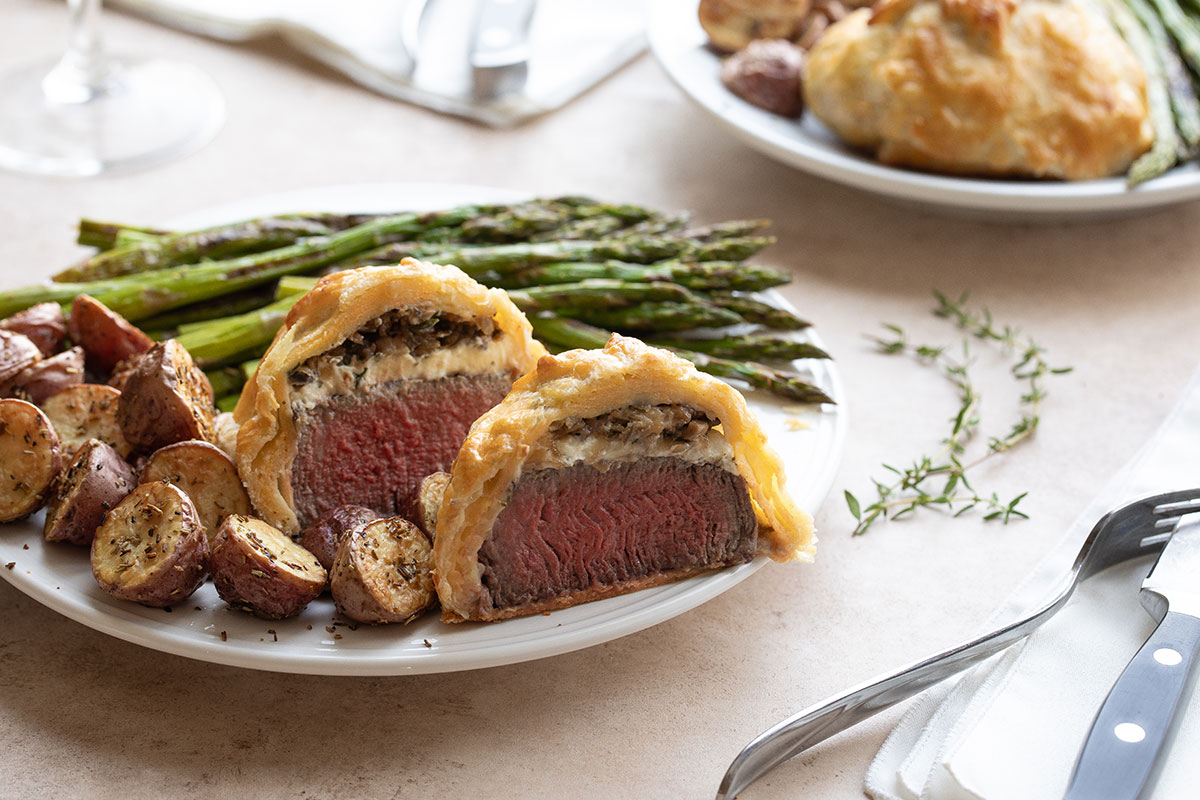
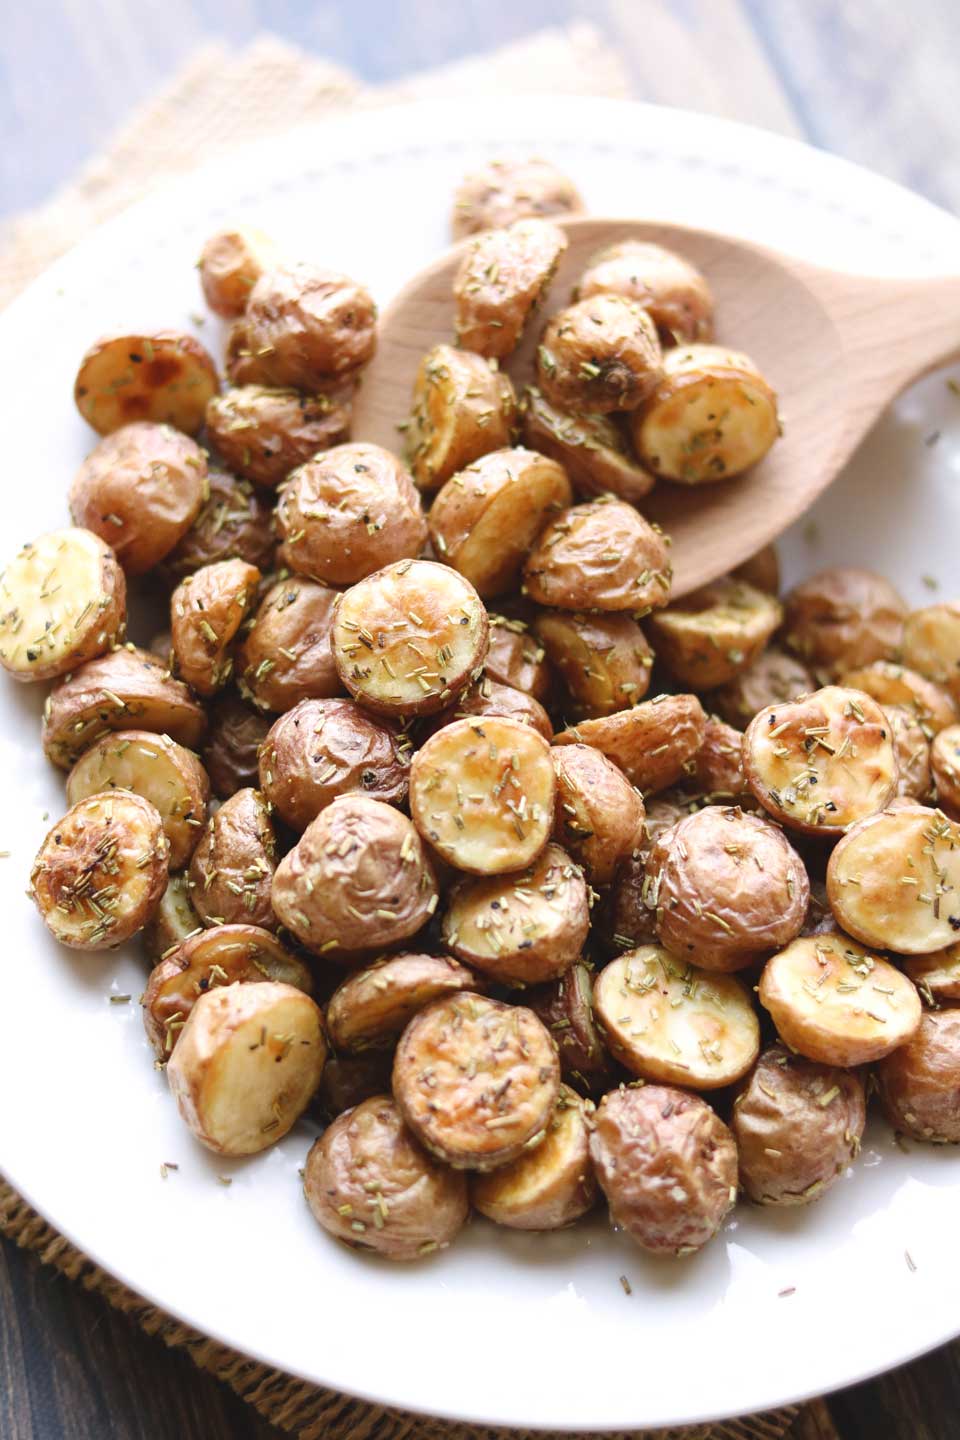
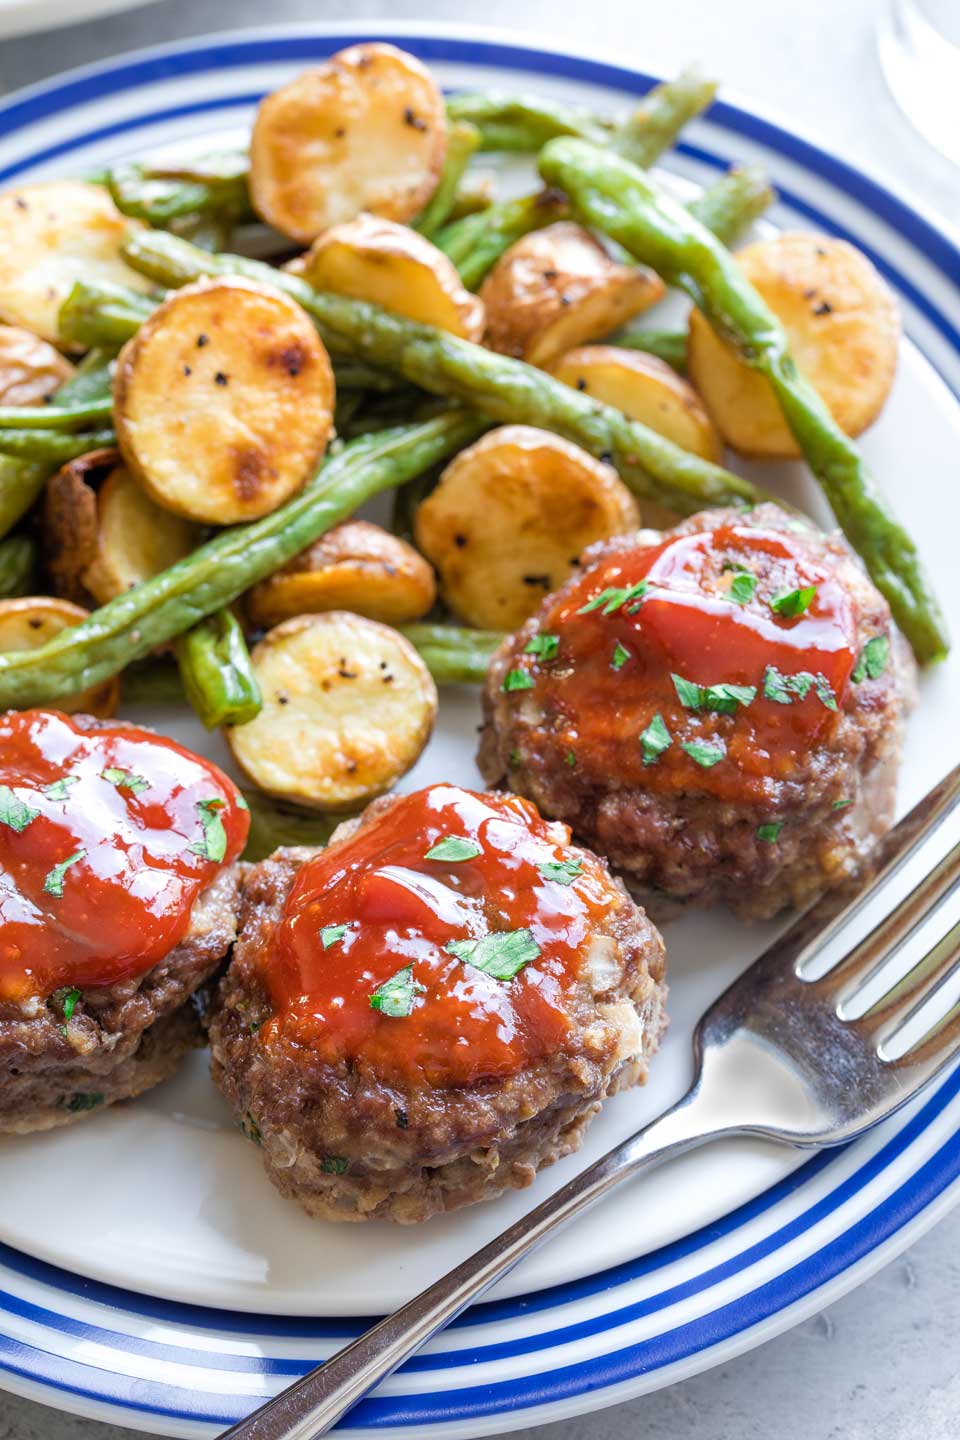
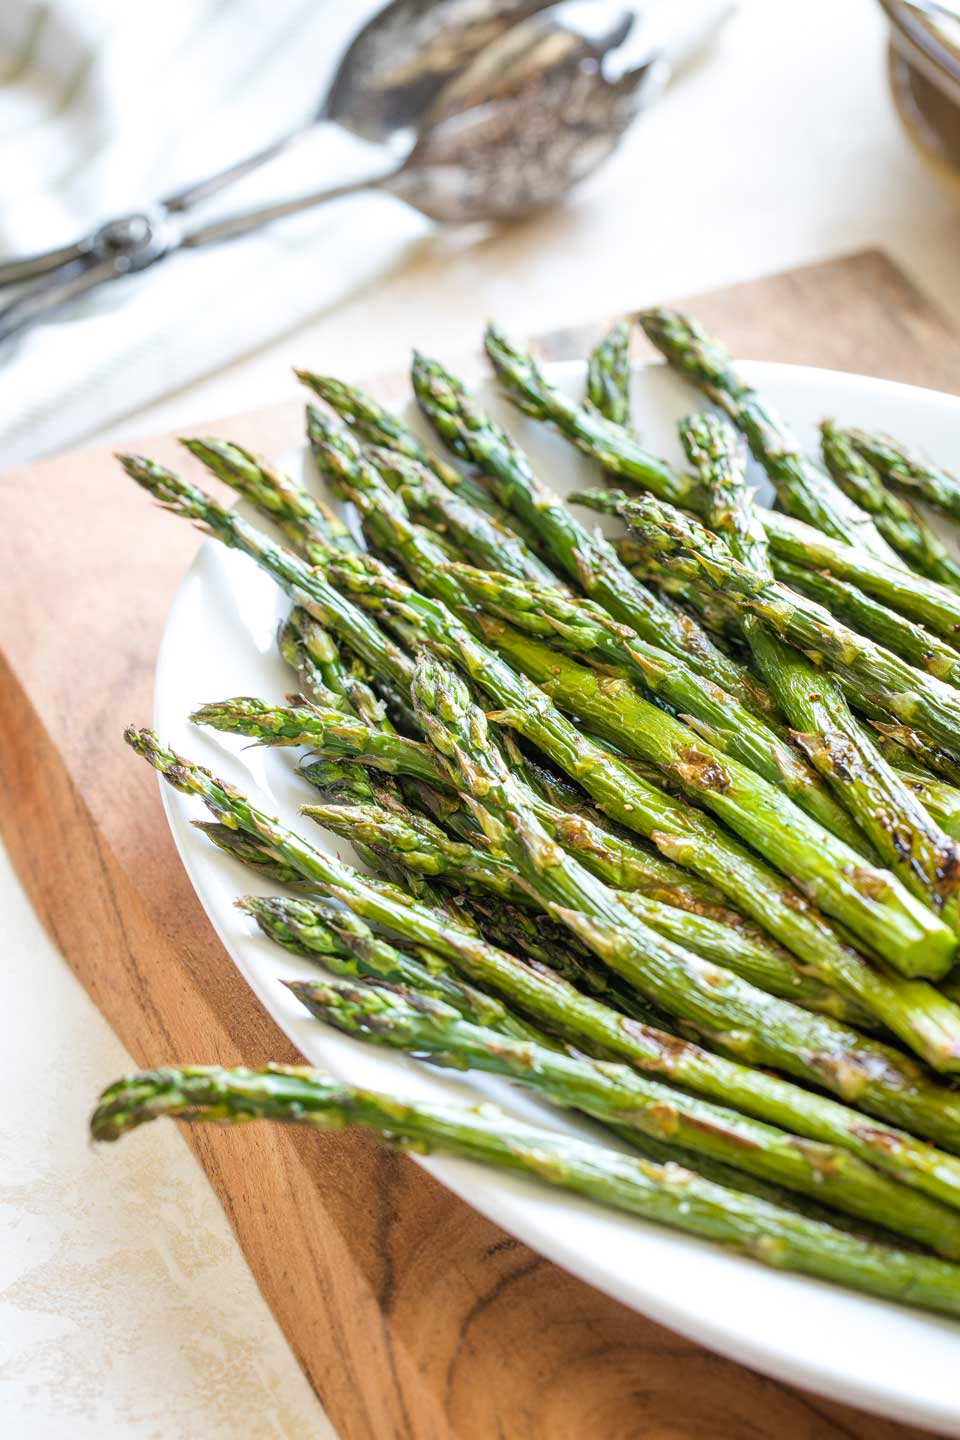
As you can see in my photos, our special occasion meal almost always includes Rosemary Roasted Potatoes and simple Oven Roasted Asparagus (or maybe, once in a while, Blistered Green Beans to switch things up).
The Beef Wellingtons are so luxuriously rich and decadent that some nice veggies are a welcome addition alongside.
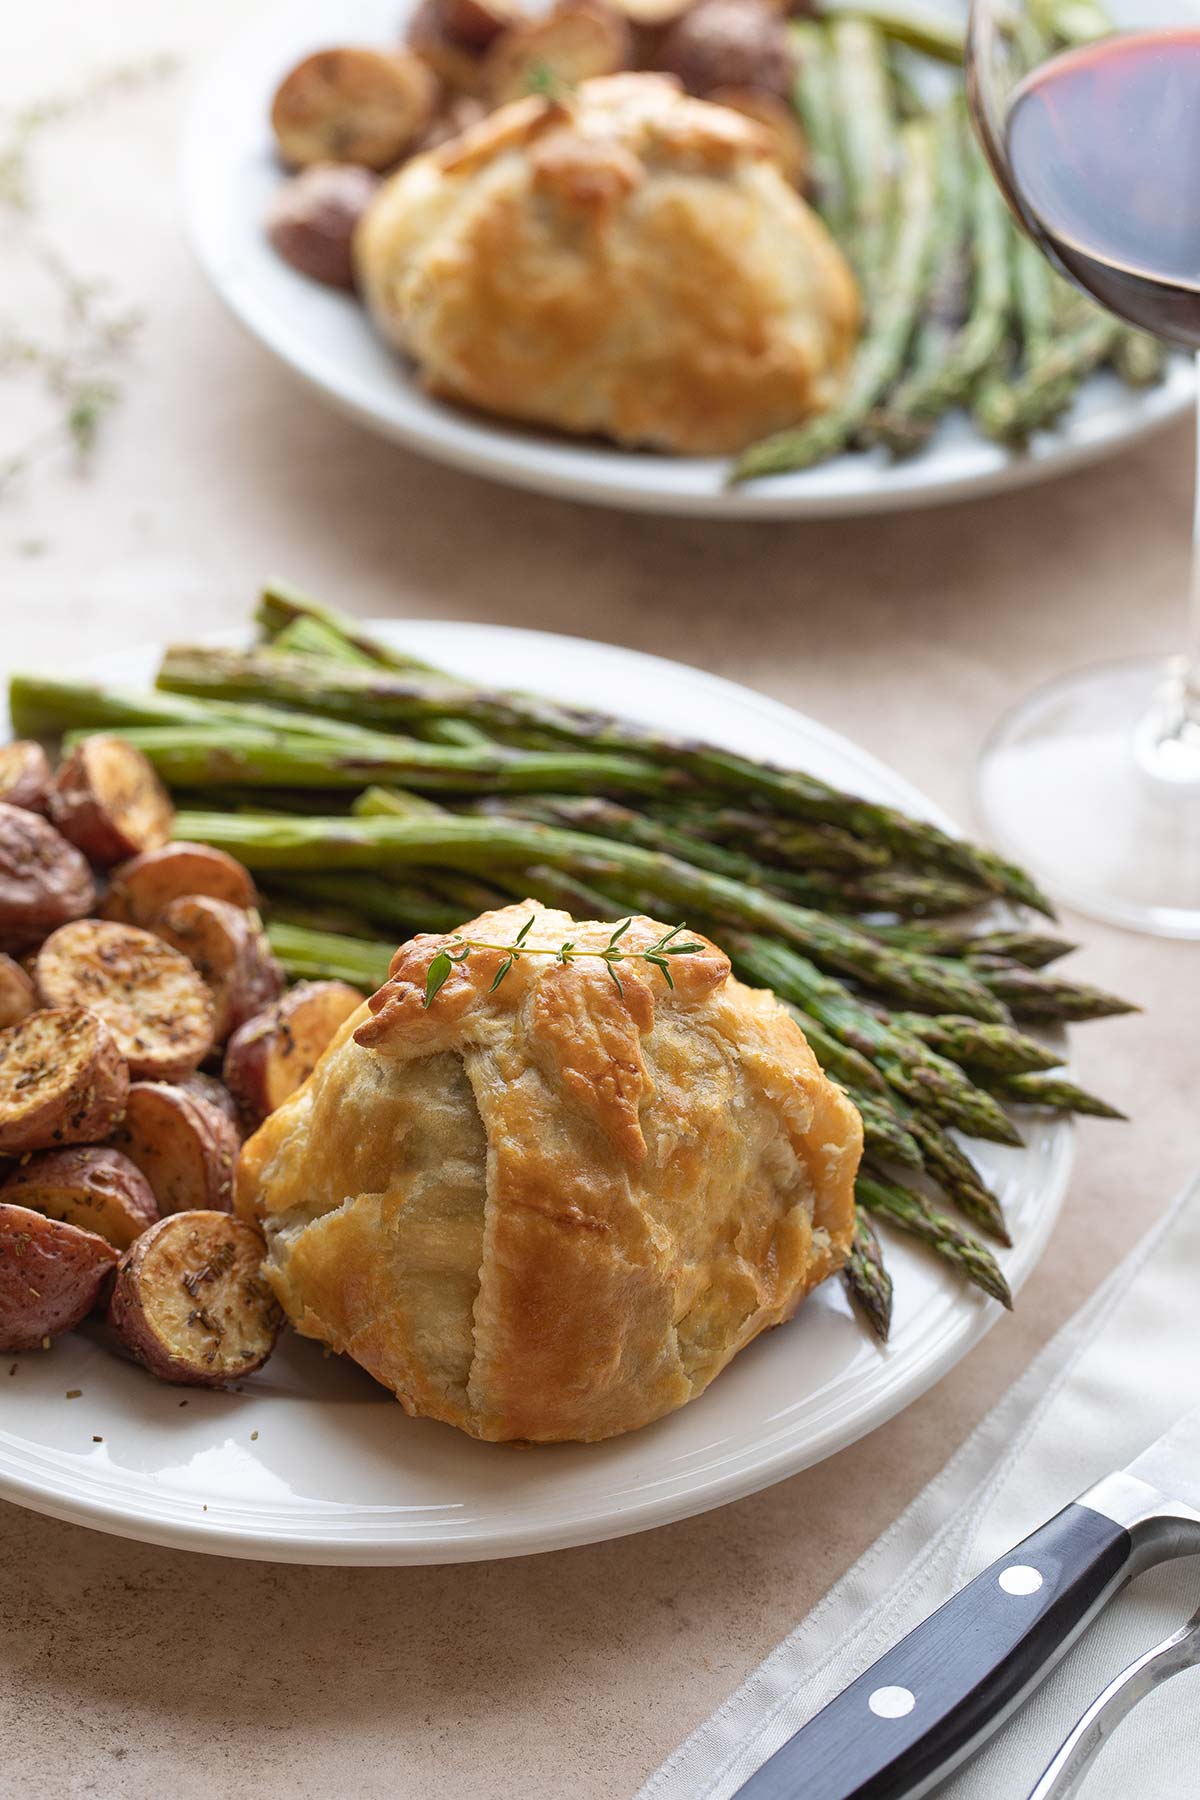
If we want a salad, it’s gotta be our favorite … Salad with Goat Cheese.
Once, to really step things up and impress my daughter’s boyfriend (who is long gone now … why did I bother trying to impress him lol?!?), I kicked off the meal with Creamy Chicken Gnocchi Soup as a starter.
If we’re serving wine with this, it’s usually red. And if we’re having dessert, it’s usually chocolate (our Chocolate Lava Dip with strawberries is perfect, especially for a romantic or Valentine’s-themed dinner celebration).
How to Customize Them
As I mentioned before, one of the MANY great things about this recipe is that you can customize it a bit for everyone at the table.
I actually always do this, since my daughter isn’t a mushroom fan, and the rest of us are happy to have extra ‘shrooms if we can get ’em. So, I usually dollop a little extra cheese on hers with only a tiny bit of the mushroom duxelles … and divide the extra duxelles amongst our other three Wellingtons.
You can easily omit the mushrooms duxelles altogether, or even omit the cheese entirely.
Alternately, you can add a bit of extra duxelles on a mushroom lover’s Wellington. Or dollop an extra tablespoon of cheese on someone’s, too.
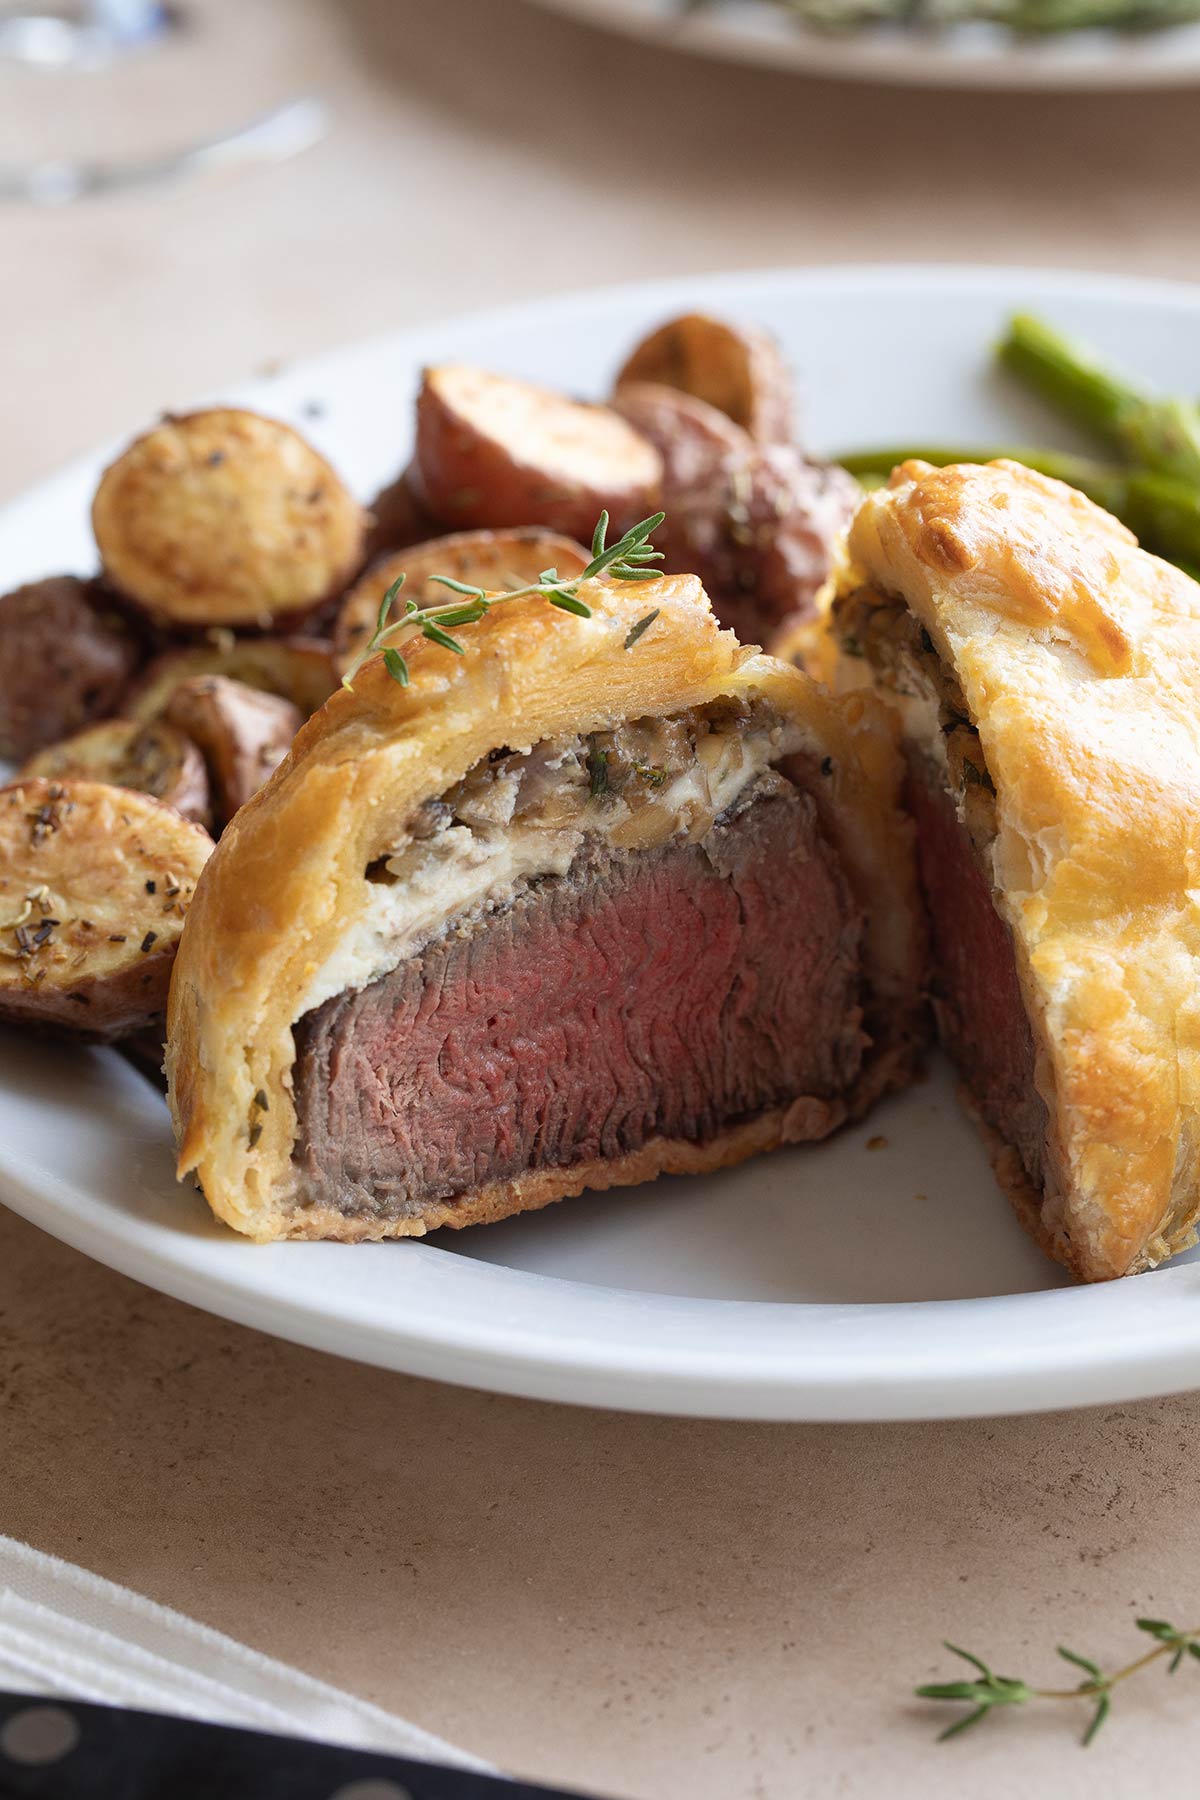
Just don’t go too crazy with the amounts. You don’t want to add so much extra decadence that your Beef Wellington packet is overflowing and doesn’t close up and seal really well.
Adapting This Beef Wellington Recipe for 2 (or More!)
It’s fairly easy to adjust the yield of this recipe (although you may end up with extra puff pastry that you’ll want to use for something else later).
Honestly, this is a perfect Valentine’s Day dinner or romantic, date night meal for two people!
And you can certainly scale the recipe up for dinner parties. When making a larger quantity, though, don’t overcrowd the skillet when you’re searing the filets – do the searing in two batches, if needed.
Make-Ahead Beef Wellington (for Easy Entertaining!)
As I said earlier … this recipe is an absolutely fantastic prep-ahead meal option. That’s especially terrific, since so many “fancy” dinners require the cook to be busy in the kitchen at the last minute, instead of relaxing and enjoying the evening with everyone else.
With these Wellingtons, you won’t have to miss all the fun, since your work can be almost entirely done hours ahead, or even the day before!
In fact, the individual packets need to be fully assembled at least an hour before they’re baked, minimum.
So yeah … you’re actually gonna get to enjoy your own dinner party this time! 😉
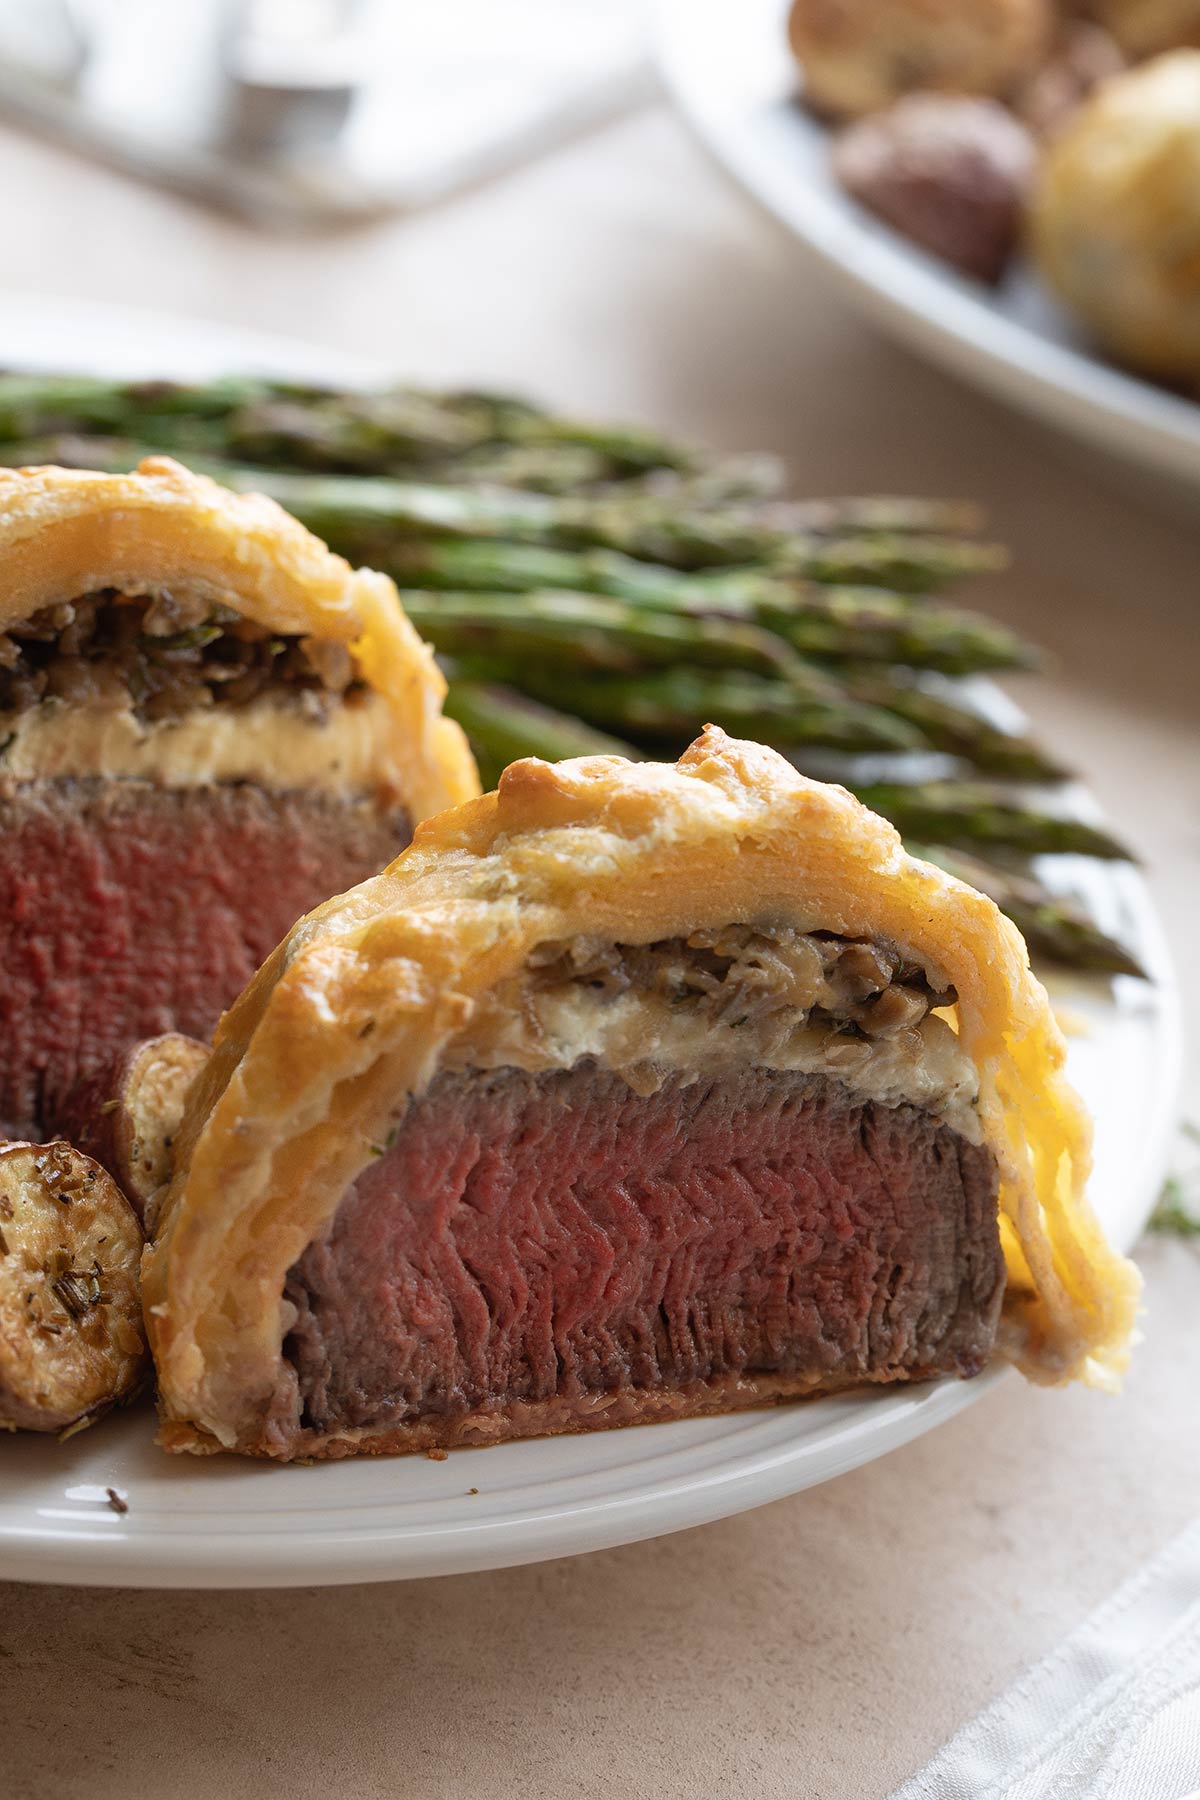
There’s really no question of why this recipe is such a legendary family favorite … our all-time most cherished celebration meal. Easy to adapt, easy to make ahead, and so gobsmackingly delicious that we have not yet found anything we’d rather make to commemorate a special night.
I know you’ll adore these Beef Wellingtons, too, and I’m so excited to finally be sharing this cherished recipe with all of you. Happy celebrating!

~ by Shelley
Love the Recipe? • Were My Tips Helpful?
__________
Please leave a 5-star rating by clicking on the stars in the recipe card below. I truly appreciate all your wonderful feedback!
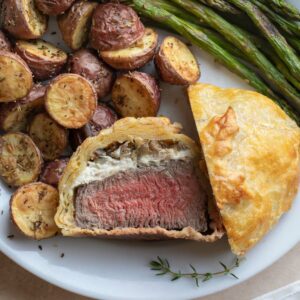
Individual Beef Wellington Recipe
Ingredients
- 4 (4-ounce) filet mignon steaks (preferably about 2" thick)
- ¼ teaspoon kosher salt
- ⅛ teaspoon black pepper
- 2 tablespoons olive oil
- 2 tablespoons butter
- ½ cup finely chopped mushrooms (we use regular "white button" mushrooms)
- 3 medium shallots (or 2 large ones), minced
- 1 tablespoon chopped fresh thyme
- all-purpose (white) flour for rolling out pastry
- 1 sheet frozen puff pastry, thawed (you only need one sheet to make the Beef Wellingtons – a second sheet is optional for making decorations on top)
- ½ cup Boursin Garlic and Fine Herbs Cheese
- 1 egg, beaten
Instructions
- Pat steaks dry and season both sides of each steak with salt and pepper.

- Preheat a large, heavy skillet (not nonstick) over high heat, until hot. Add oil, swirling to coat. Add steaks. Sear on each side for 2 minutes (for medium rare) or 3-5 minutes (for medium), or until the steaks release from the bottom of the pan without tearing away the crust that has formed. (When each side is properly seared, you should be able to work a spatula underneath to flip each one, without tearing away the crust.) Once seared on both sides, move steaks to a plate to cool.

- Turn your stove's heat down to medium high. In the same skillet, melt butter. Add mushrooms, shallots, and thyme. Sauté for 5 minutes or until very soft, stirring frequently so they don't burn. Remove from skillet to cool.

- Lightly flour your rolling pin and work surface (we like to do this on a large piece of parchment or waxed paper). Roll out one sheet of puff pastry into a 13" x 15" rectangle. Cut into four equal sections. Optionally, use the second sheet of puff pastry to cut out decorative shapes with a paring knife or with cookie cutters (see examples and tips in the article above).

- Gently blot the cooled steaks dry. Place one steak in the middle of each pastry section. Top each steak with 2 tablespoons of cheese, spreading slightly to mostly cover the steak. Then spoon ¼ of the mushroom mixture onto each.

- Thoroughly brush the edges of each pastry square with egg. Then fold the corners up to the center, gently tucking in the sides as you go. Press gently but firmly all around the pastry's edges to be sure they're well sealed with the egg.

- Optional Decoration: If you've used your second pastry sheet to cut out decorations, brush one side of each decoration with egg wash and gently press it onto the top of a pastry bundle (with the egg-washed side down). Repeat with all decorations.

- Transfer Beef Wellingtons to a parchment-lined baking sheet and wrap in plastic. Refrigerate for at least 1 hour, or overnight. Also, cover the bowl of egg wash with plastic and refrigerate.

- To Bake: Remove Beef Wellingtons from refrigerator and discard plastic wrap. Preheat oven to 425 °F. Brush each Beef Wellington lightly but thoroughly with egg wash. Bake for about 15-16 minutes (for medium rare) or about 16-18 minutes (for medium). (See notes below, or refer to article above, regarding bake times for different sizes of filets or different doneness levels.) Serve and enjoy!

Notes
Nutrition
* Nutrition information should be considered an estimate only, and may vary depending on your choice of ingredients or preparation. No guarantees are made regarding allergies or dietary needs. Always consult a physician or dietician for specific advice and questions.


This sounds so delicious and I will be making this Christmad Day. Your recipe and notes are so perfect with instruction & pics!
Question: When I take out of fridge , can I leave on counter for an hour, as I have two light courses before this as the main?
Thank -you so much!
Hi, Monica! I recommend not removing the Mini Wellingtons from the fridge more than 5-10 minutes before you pop them in the oven. You want the puff pastry to still be nice and cold when it goes in the oven – puff pastry bakes far better when it’s cold (so the butter in it isn’t softened, and you get a nice “puff” from the internal steam, rather than having the butter encased within the pastry get too warm and leak out). I’d suggest leaving these in the fridge while you serve at least the first course and get the oven preheated. I hope that helps! Have a wonderful Christmas, and please pop back and let me know how this goes! ~Shelley
So easy and SO delicious! I am sharing this with all my friends.
Oh I’m just so delighted to hear it, Marilyn – thank you for the kind feedback and lovely review! ~Shelley