DIY Ta-Cones: Fun, Healthy & Portable Taco Cones
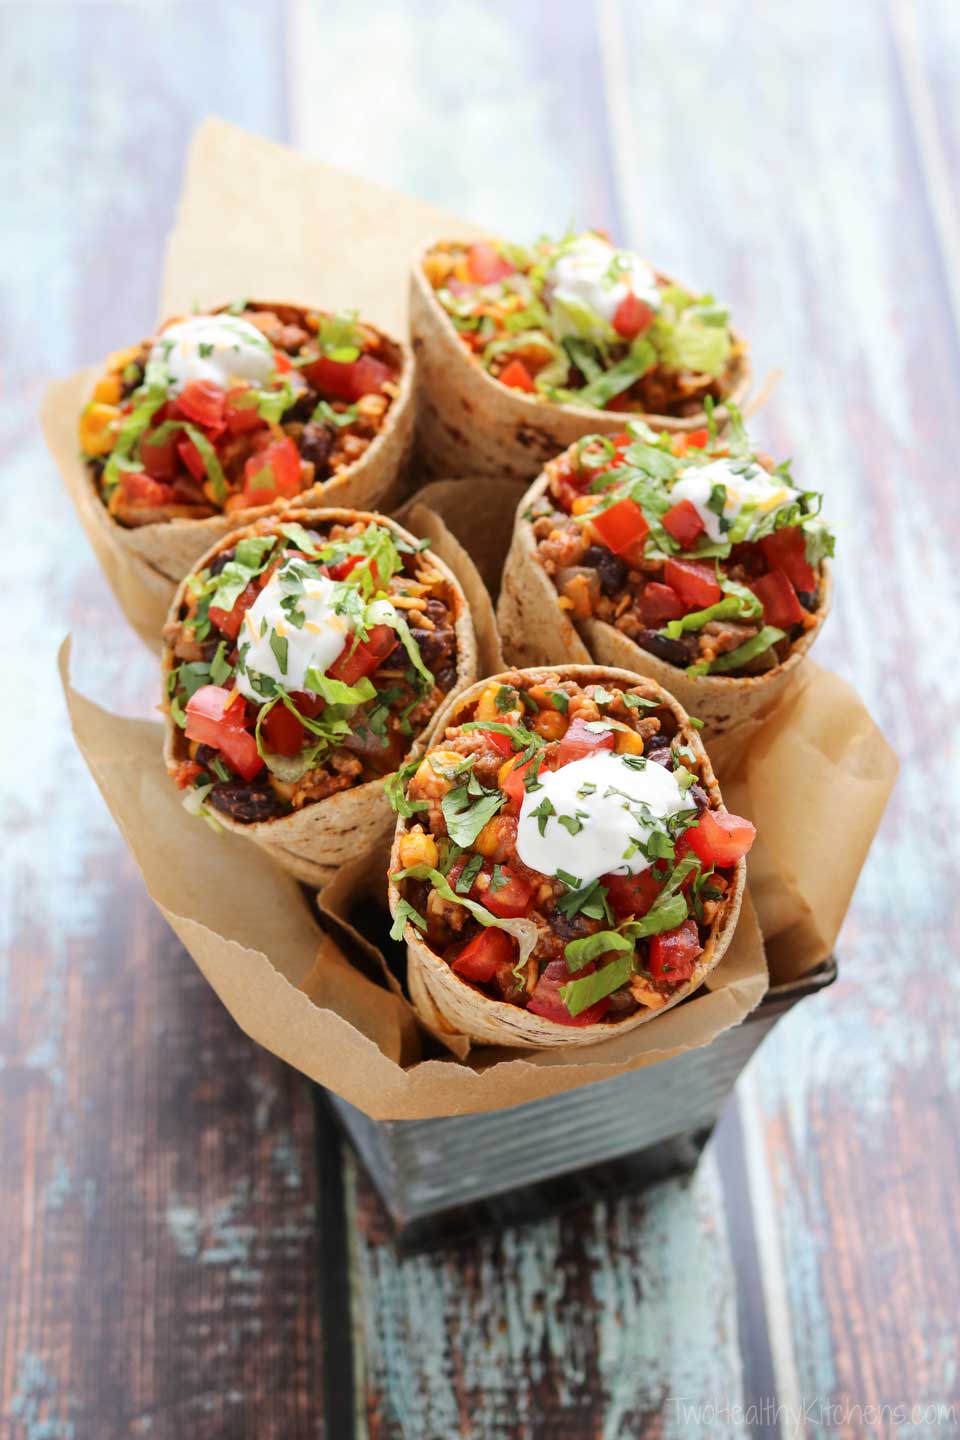
~ Taco Cones are the perfect way to transform your family-favorite taco night into a quick, portable, grab-and-go meal! Our DIY Ta-Cones can even be prepped ahead – an easy make-ahead dinner recipe that you can rewarm all week long, whenever your family is ready to eat! Such a creative, fun twist on traditional tacos – great for taco bar parties and tailgates, too! ~
This Recipe Is: • Ready in 30 Minutes or Less • Make-Ahead •
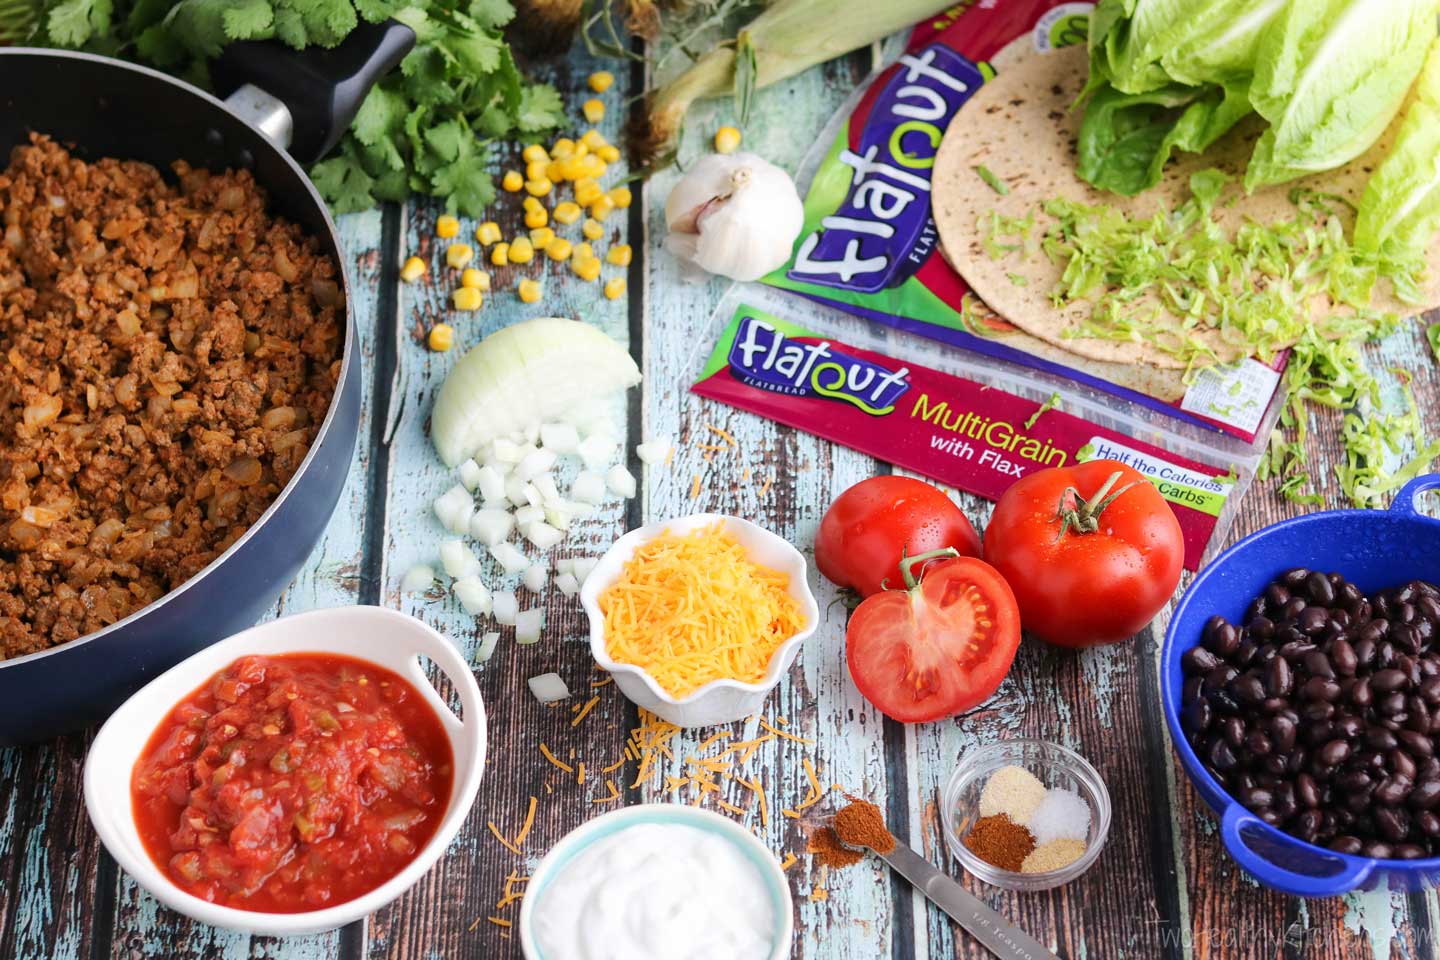
* As you’ll see in our photos, we originally photographed this pinwheel recipe using Flatout flatbreads (sponsored by that company). However, you can easily substitute a soft, flour tortilla instead of the Flatouts. For the best nutrition boost, we recommend choosing a whole grain tortilla.)
Need a family-fave dinner that’s totally able to head right on out the door on busy evenings? Wanna take “Taco Tuesday” on the road?
I hear ya!
No doubt – when it comes to keeping families happy at mealtimes, tacos are a slam dunk. There are so many ways to switch ’em up, which means everybody’s happy! Yay, tacos!
Here at THK we have enough inspiration to keep your family noshing through many a Taco Tuesday (and most other days of the week, too!). No kidding … we’re talking Crock-Pot Chicken Tacos, Mediterranean Tacos, Shrimp Tacos … even a 7-Layer Taco Salad and cute little Taco Burger Sliders. Plus a jaw-dropping showcase of ultra-unique, seriously different tacos. And don’t even get me started on our list of taco-related Mexican recipes like skillets, pizza and hummus!
But all those taco recipes are missing one shiny little attribute: portability.
Convenient, grab-and-go, I’m-hurrying-as-fast-as-I-humanly-can portability.
Tacos simply don’t dash out the door to soccer practice very well – unless you love spot-cleaning salsa off your kids’ uniforms and shampooing the minivan seats (#NotMeThanks).
For sure, I’ve noticed the clear trend: you guys love portable! Take a classic, fam-fave food and make it minivan-friendly, and you’re happy, happy!
Our Chicken Parmesan Wraps blew the doors off as instant, runaway hits. Noted. And those loaded-up Peanut Butter Sandwich Wraps have been crushing it on Pinterest from day one. Heard that. Oh – and portable Chicken Pot Pies? Classic comfort food to go … you guys loved them!
So, it’s time. Time to take the taco obsession and set it free to roam … to roam out the door and onward toward all your busy-night activities.
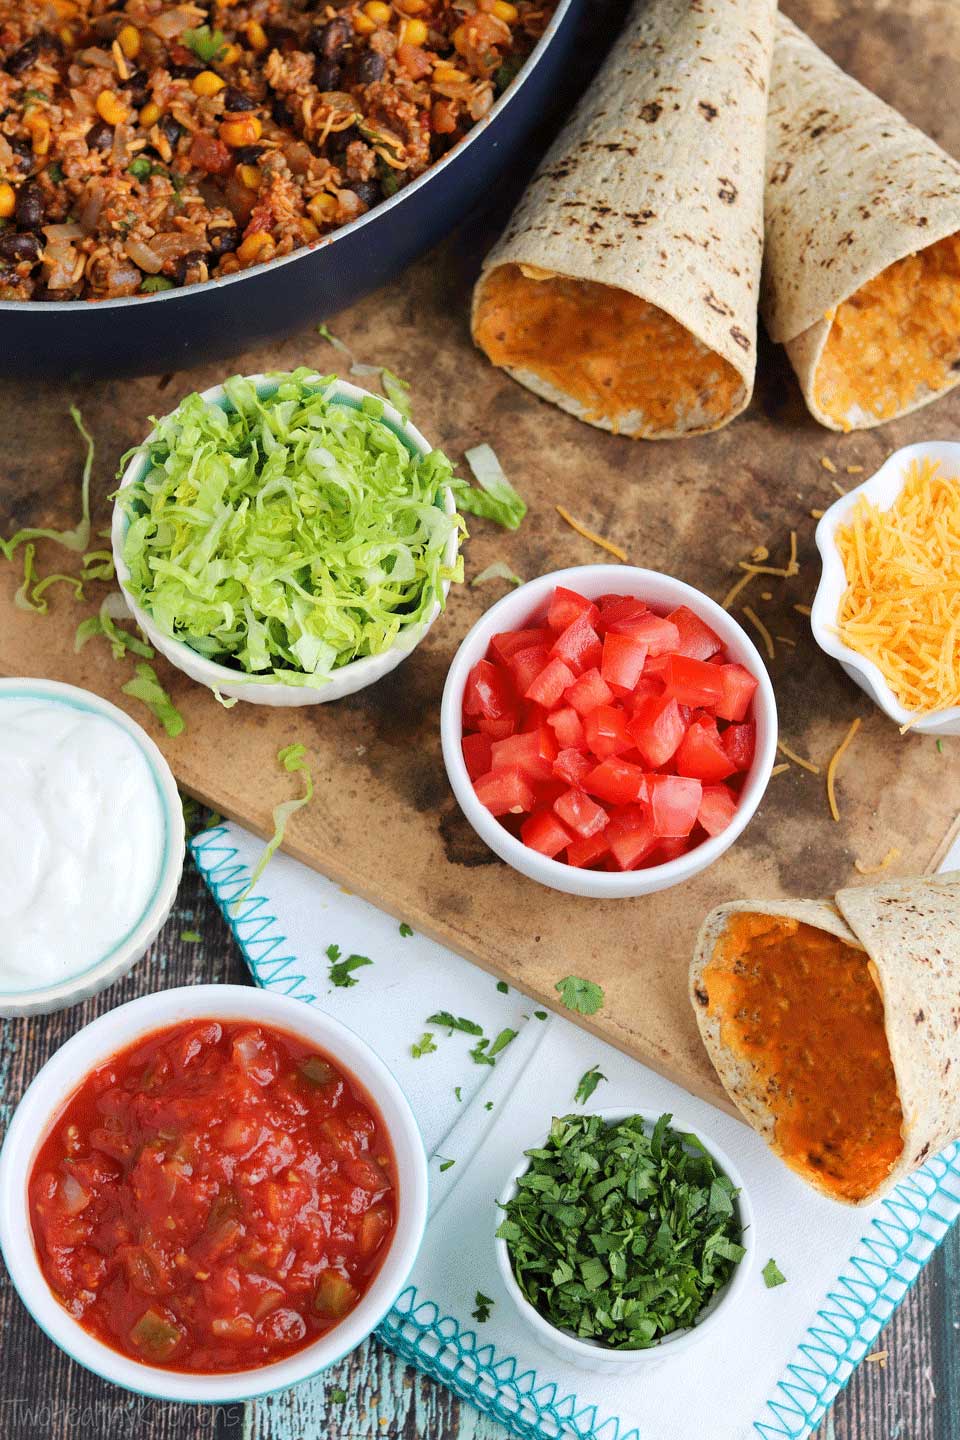 Heck, these Ta-Cones are even happy roaming around a campout or backyard party. Set up a taco bar with plenty of fixins, let everyone customize their own with those handy pre-made DIY cones, and the party is on! (Mariachi band entirely optional.)
So, how do we turn plain ol’ tortillas into perfect DIY Taco Cones? Easy!
A Step-by-Step Guide to Easy Taco Cones
As we note on the recipe card, this recipe is set up to be adjustable.
The exact number of cones you’ll want to make and how far you can stretch the taco meat will depend on how tightly you wrap your cones, how many additional toppings you layer in there with the taco meat, and how high you pile on the toppings (hint: for maximum, mess-free portability, don’t pile them on too high).
So, let’s just take this one cone at a time, one step at a time. And trust me: after you’ve done this once, you’ll be able to crank these cones out in no time! They’re super easy!
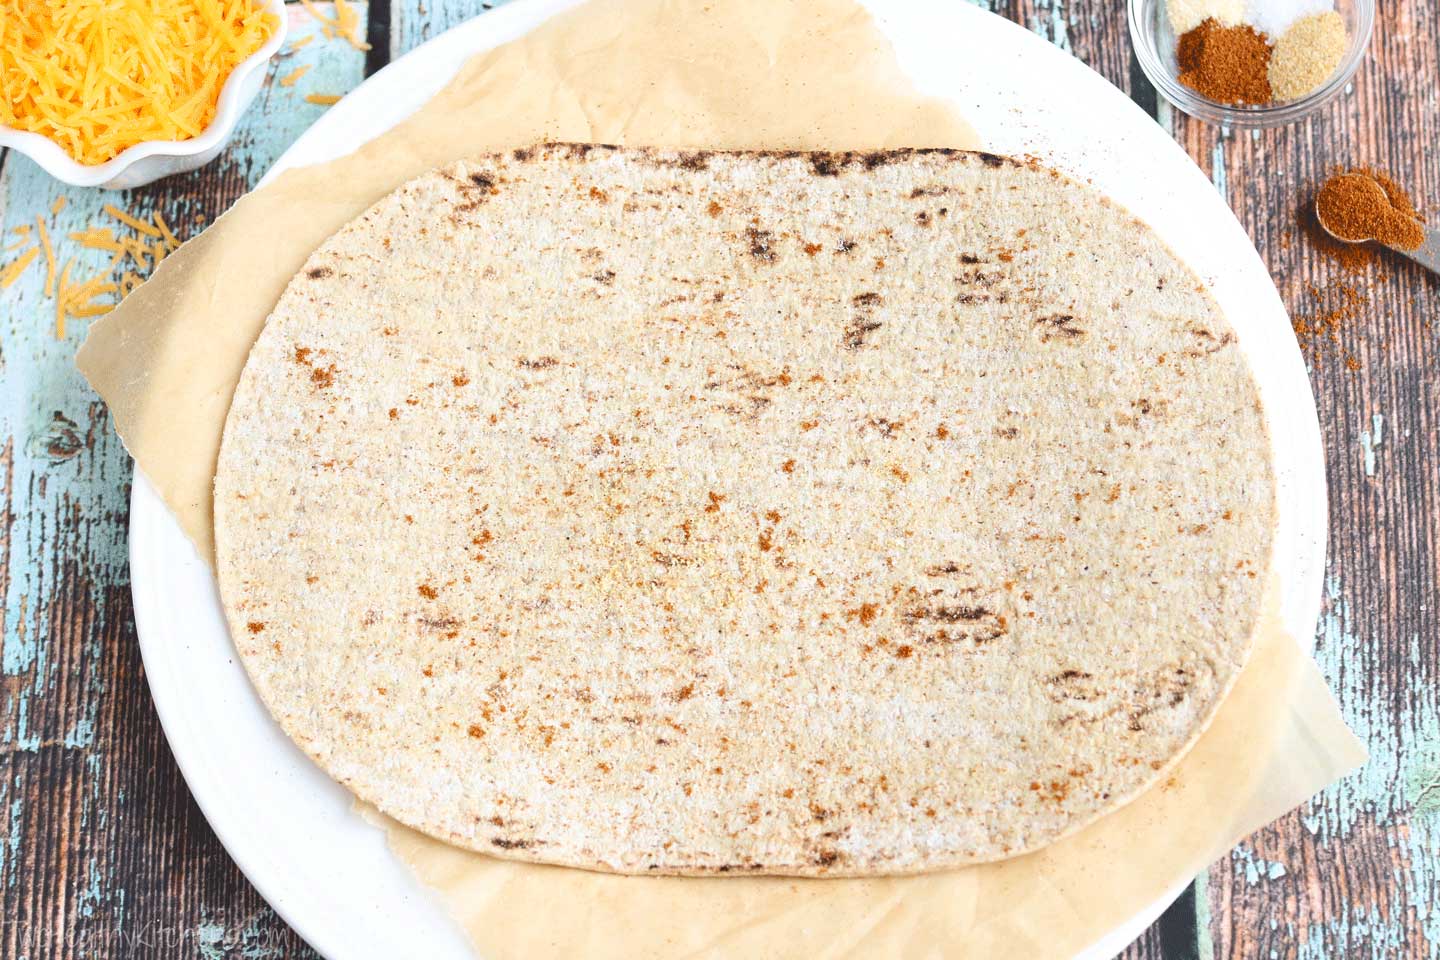
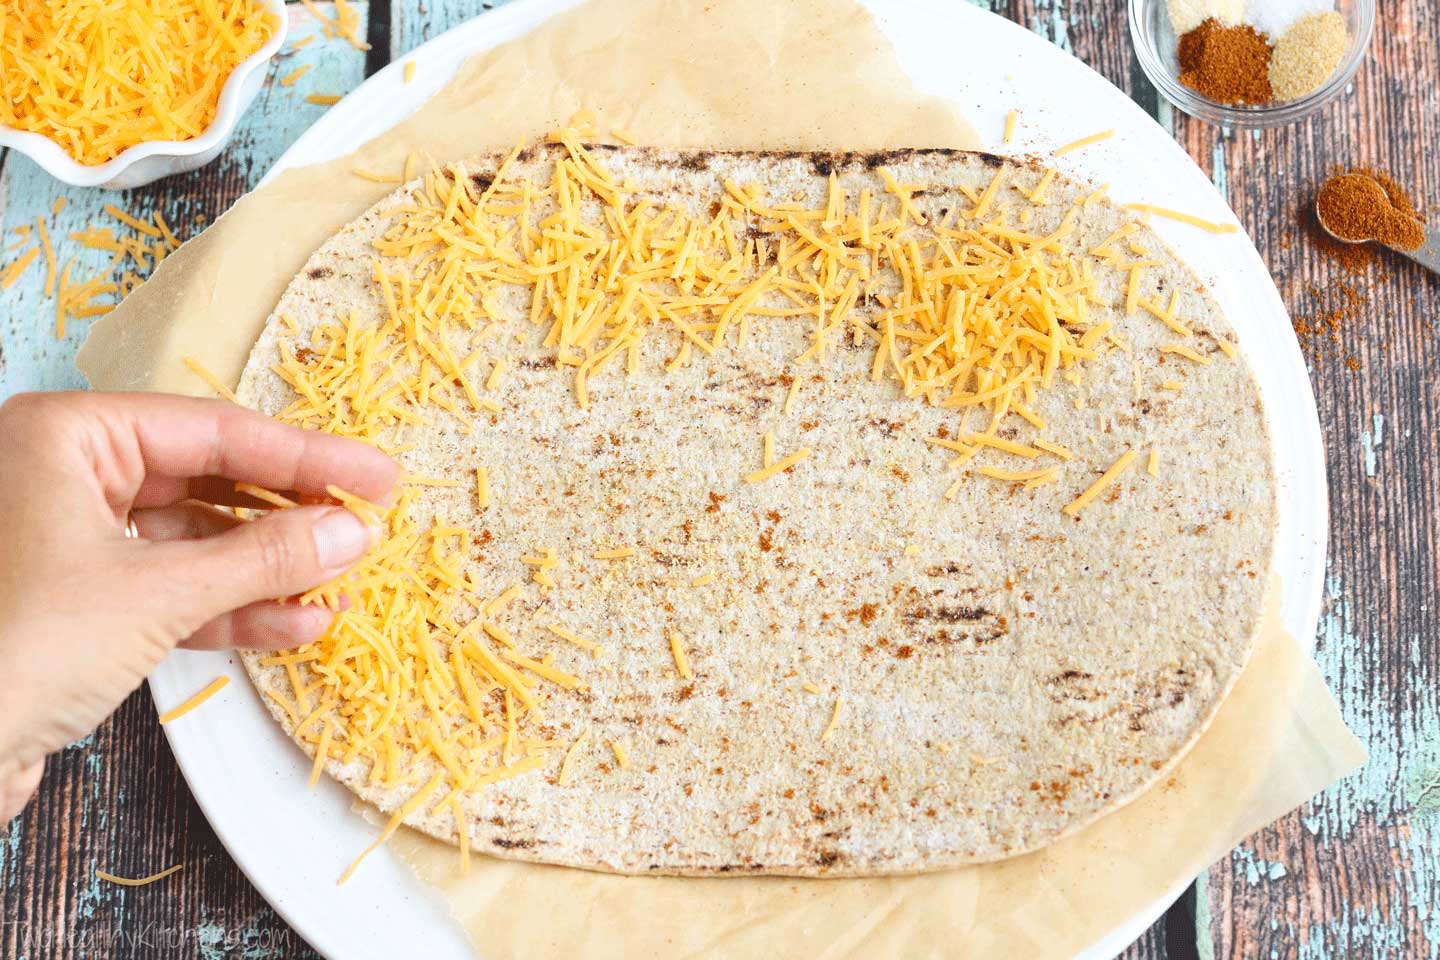
1) For each taco cone, you lay a tortilla on a microwave-safe plate and sprinkle it evenly with a Mexican-inspired blend of spices.
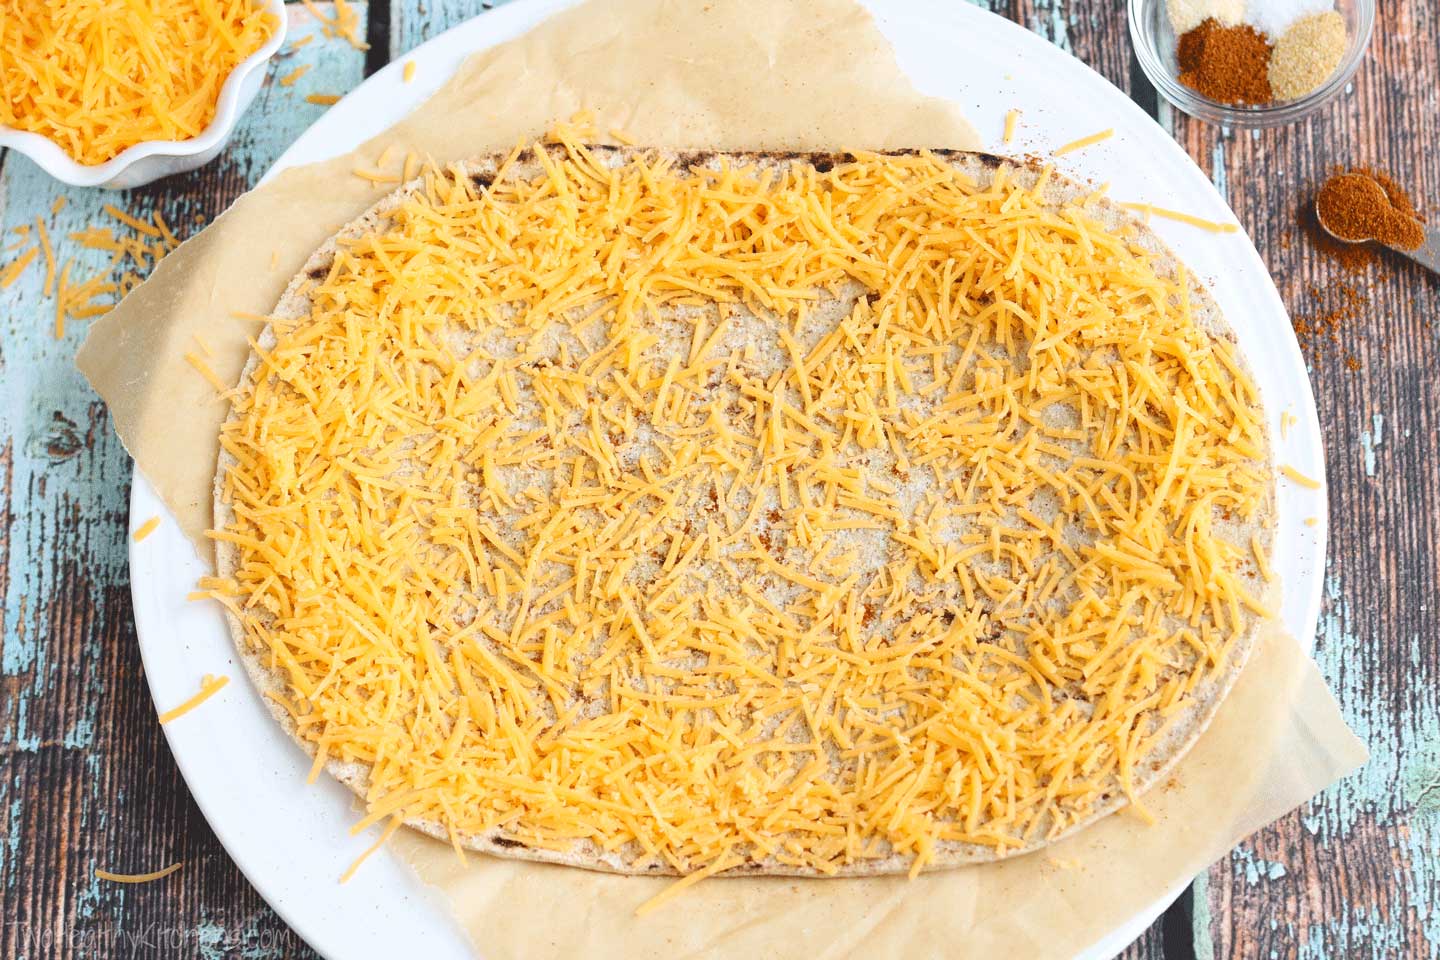
2) Next, you sprinkle reduced-fat cheese on top of the spices.
3) As you’re sprinkling the cheese, try to get most of it toward the outer edges of the tortilla.
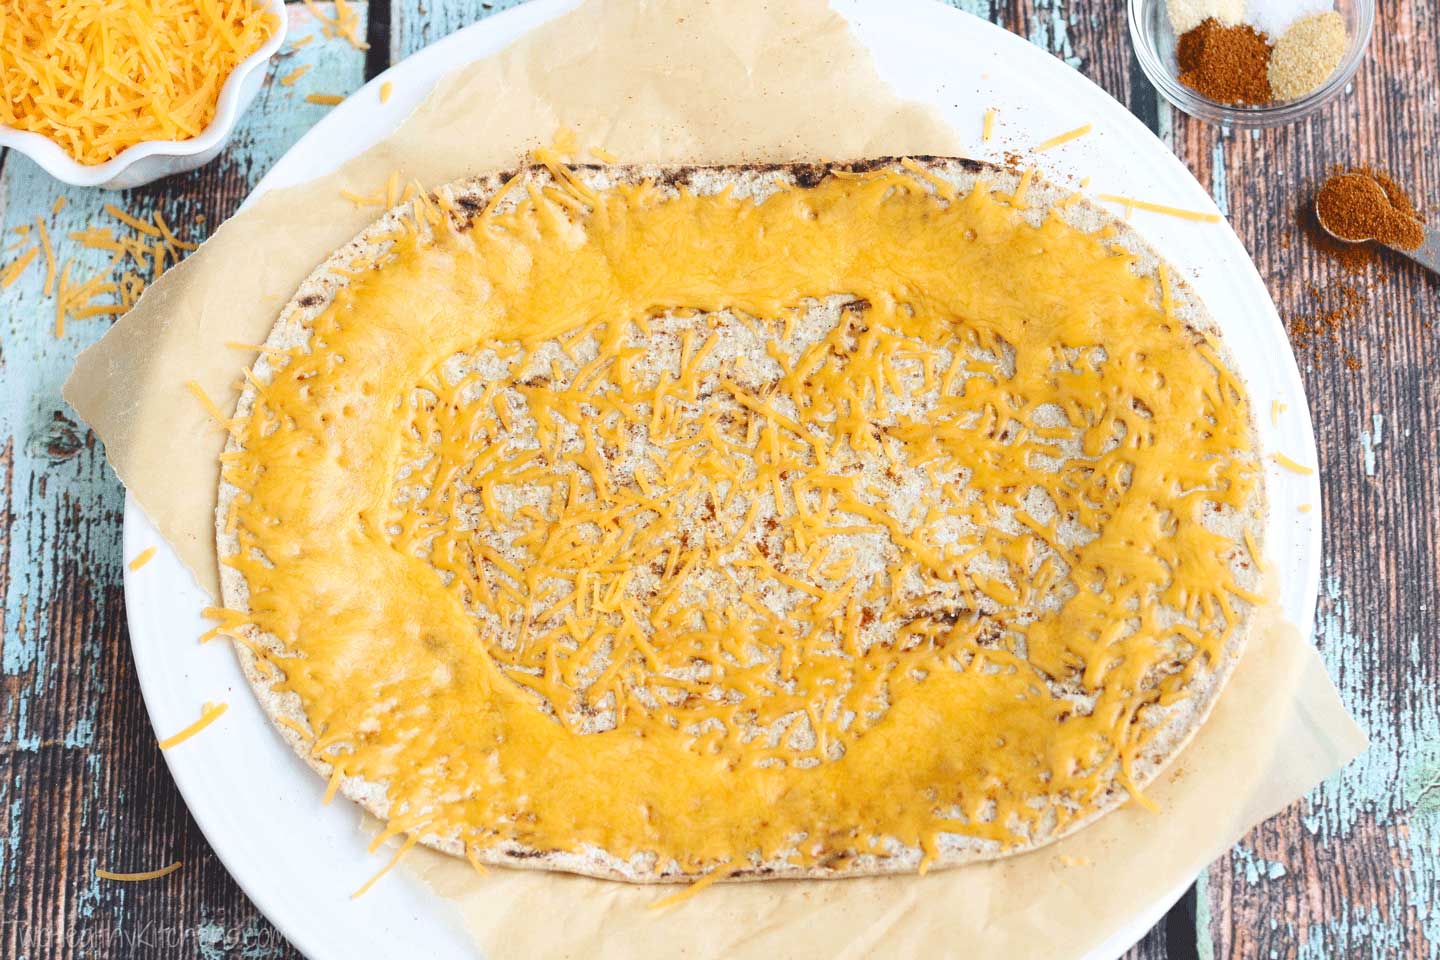
4) After a quick tour through your microwave, that cheese is now melty-gooey, and ready to act as your edible cone glue! Brilliant!
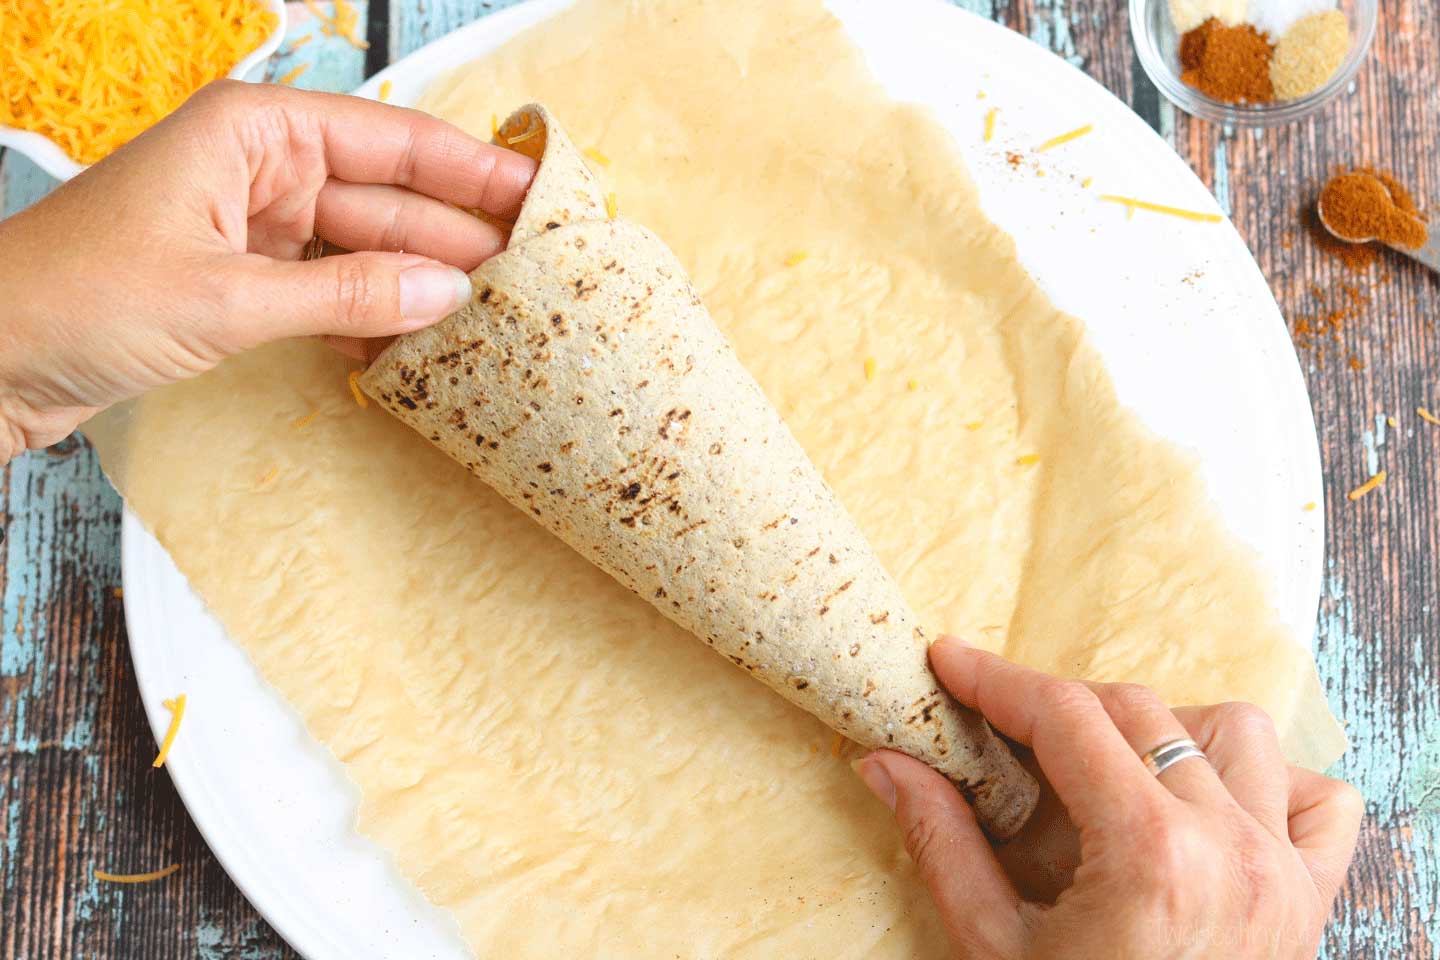
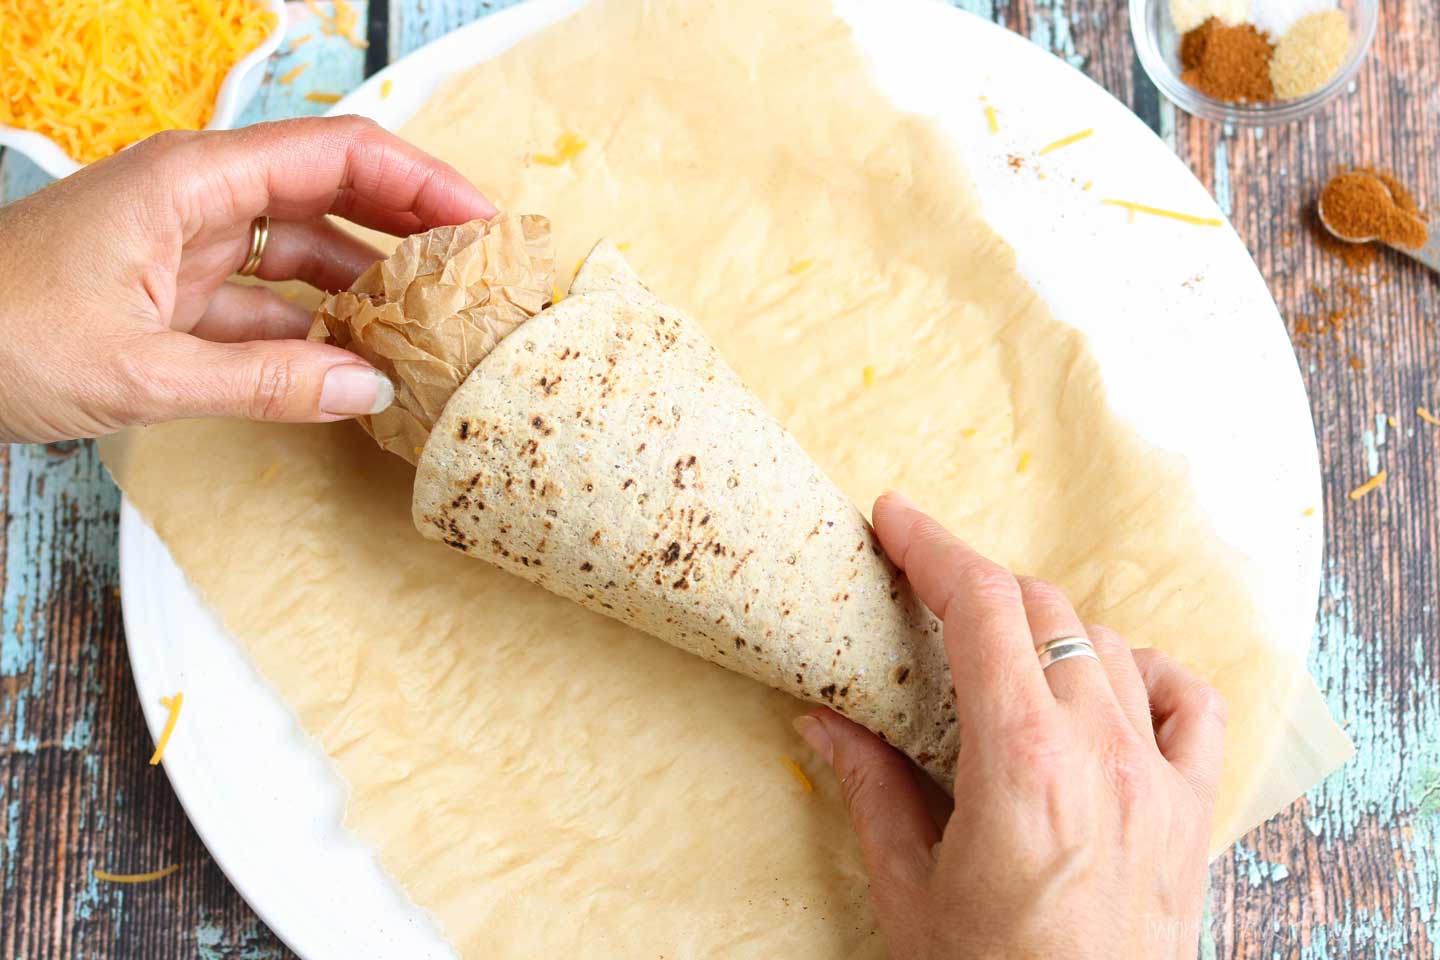
5) As soon as you pull the tortilla from the microwave, and while the cheese is still very melty, you shape the tortilla into a cone, rolling two edges toward each other and pressing gently but firmly around the edges to make sure the edges seal.
6) At this point, your taco cone will be warm and floppy. To help it hold its shape, stuff a balled-up wad of parchment paper inside. Note that paper towels, aluminum foil and wax paper are all a big no-go here, for a variety of reasons. Go with parchment so you don’t spark a fire in your microwave and so you’re able to pull it back out of the sticky cheese inside your cone.
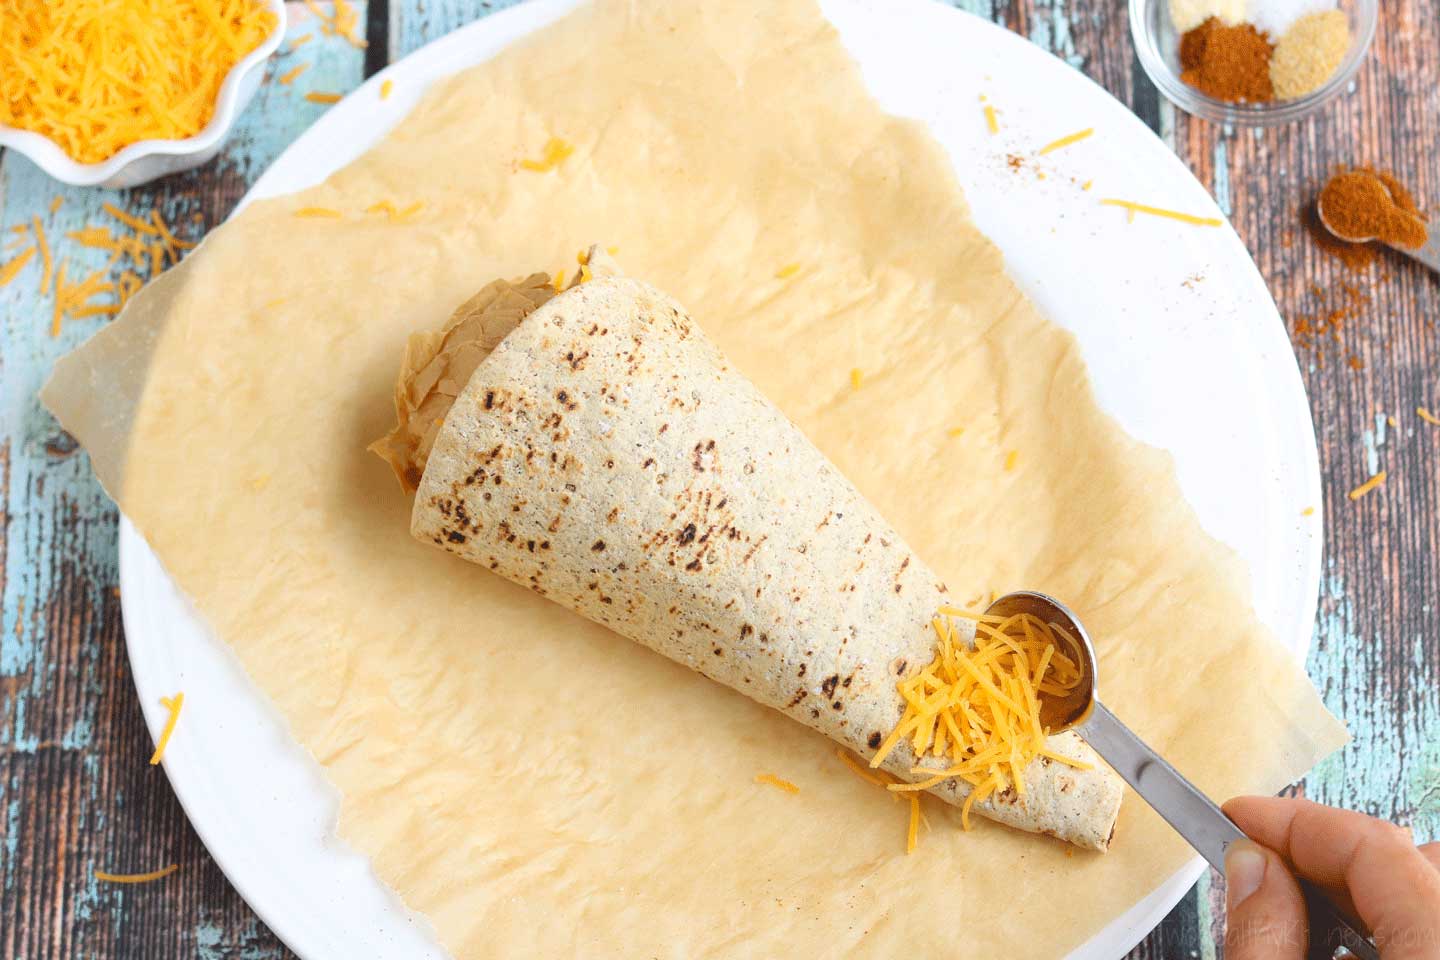
7) To make sure no yummy taco drippings escape out the bottom of the cone and onto that spic-and-span soccer jersey your kiddo’s wearing, take one quick moment to seal up the bottom (with that magical, cheesy food glue, of course!). Just sprinkle a tiny bit of cheese near the tip of the taco cone, and …
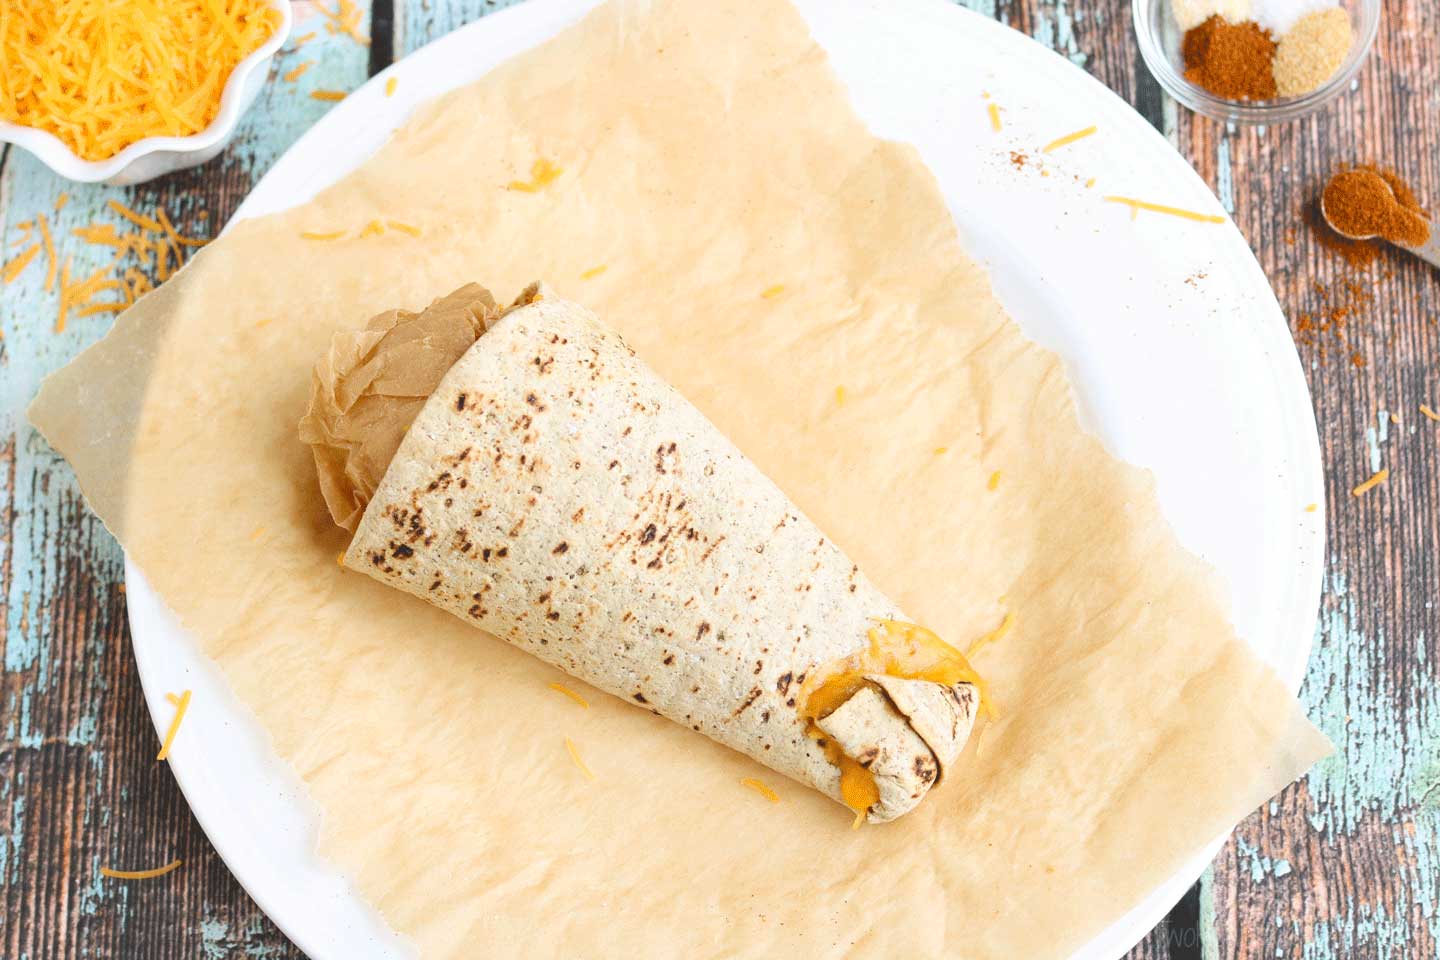
8) … after another quick tango with your microwave, you can “glue” the tip into place, all sealed up and drip-proof!
We recommend letting each cone sit for at least five minutes, before you remove the parchment and add the filling. That allows the cheese to firm up so the shape holds better.
You Can Even Make These Ta-Cones Almost Entirely Ahead!
If you’re making the cones ahead … say, to have on hand so you can whip out dinners, as needed, all week long, or so you can have a big pile of cones at-the-ready for a fun taco bar … simply let the cones cool completely, then wrap them tightly in plastic and refrigerate them for up to two or three days.
You can gently reheat them, if you want, when you’re ready to serve them – just to take the chill off – but that’s not necessary if you’re laying them out for a taco bar.
You can make the taco meat mixture a day or two in advance, as well. Just cover it and stash it in the fridge. Then, you can either reheat the entire skillet all at once, or you can portion out a little bit at a time, to whip up just the right number of Taco Cones for any family members that come hungrily through your door, scouting for dinner. Just thrust a Ta-Cone into their hands, and they’re heading off to their next activity – with great nutrition to power them through!
Why These Fun Tacos Are So Nutritious
- Well, for one thing, you can easily jam in some more nutrition by using a tortilla that has some fiber-rich whole grains (even flax!). Lotsa bang for your nutrition buck.
- Then, there’s the taco meat itself. We recommend using the very leanest ground beef you can find. I typically opt for 93% lean beef, but I’ll grab 96% on days I can find it. If you prefer, you can swap in ground turkey, but be sure to check the nutrition label: some ground turkey is actually notably higher in fat than extra-lean ground beef, so be sure you know what you’re buying.
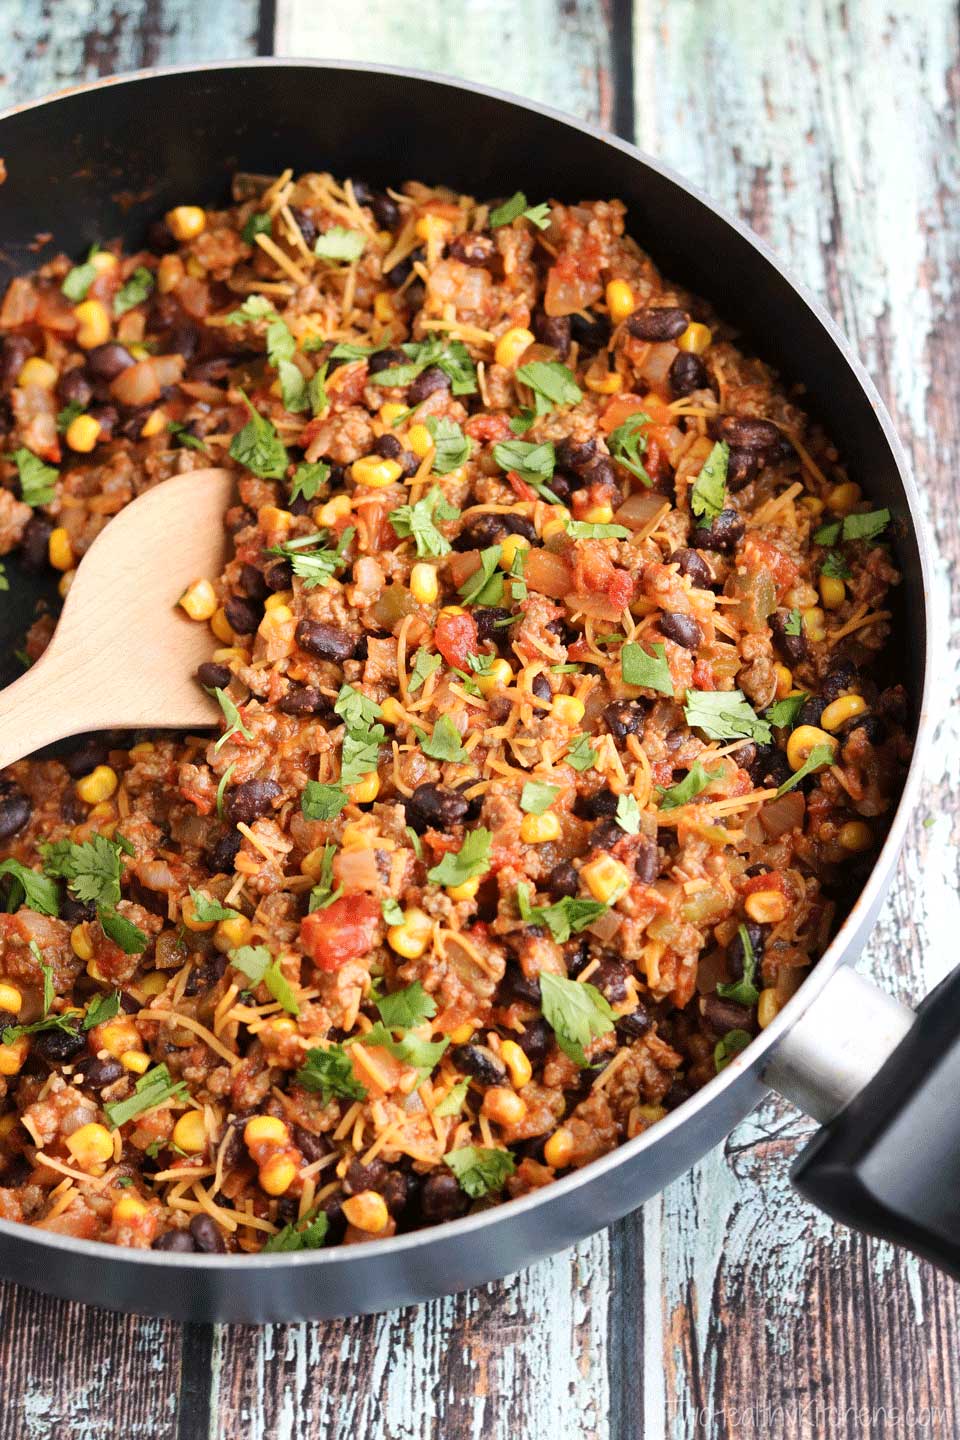
- Plus, we strrrrrrrretch that taco meat by adding in loads of healthy veggies: garlic and lots of onions, an entire can of black beans, plus some corn and a jar of lycopene-rich salsa.
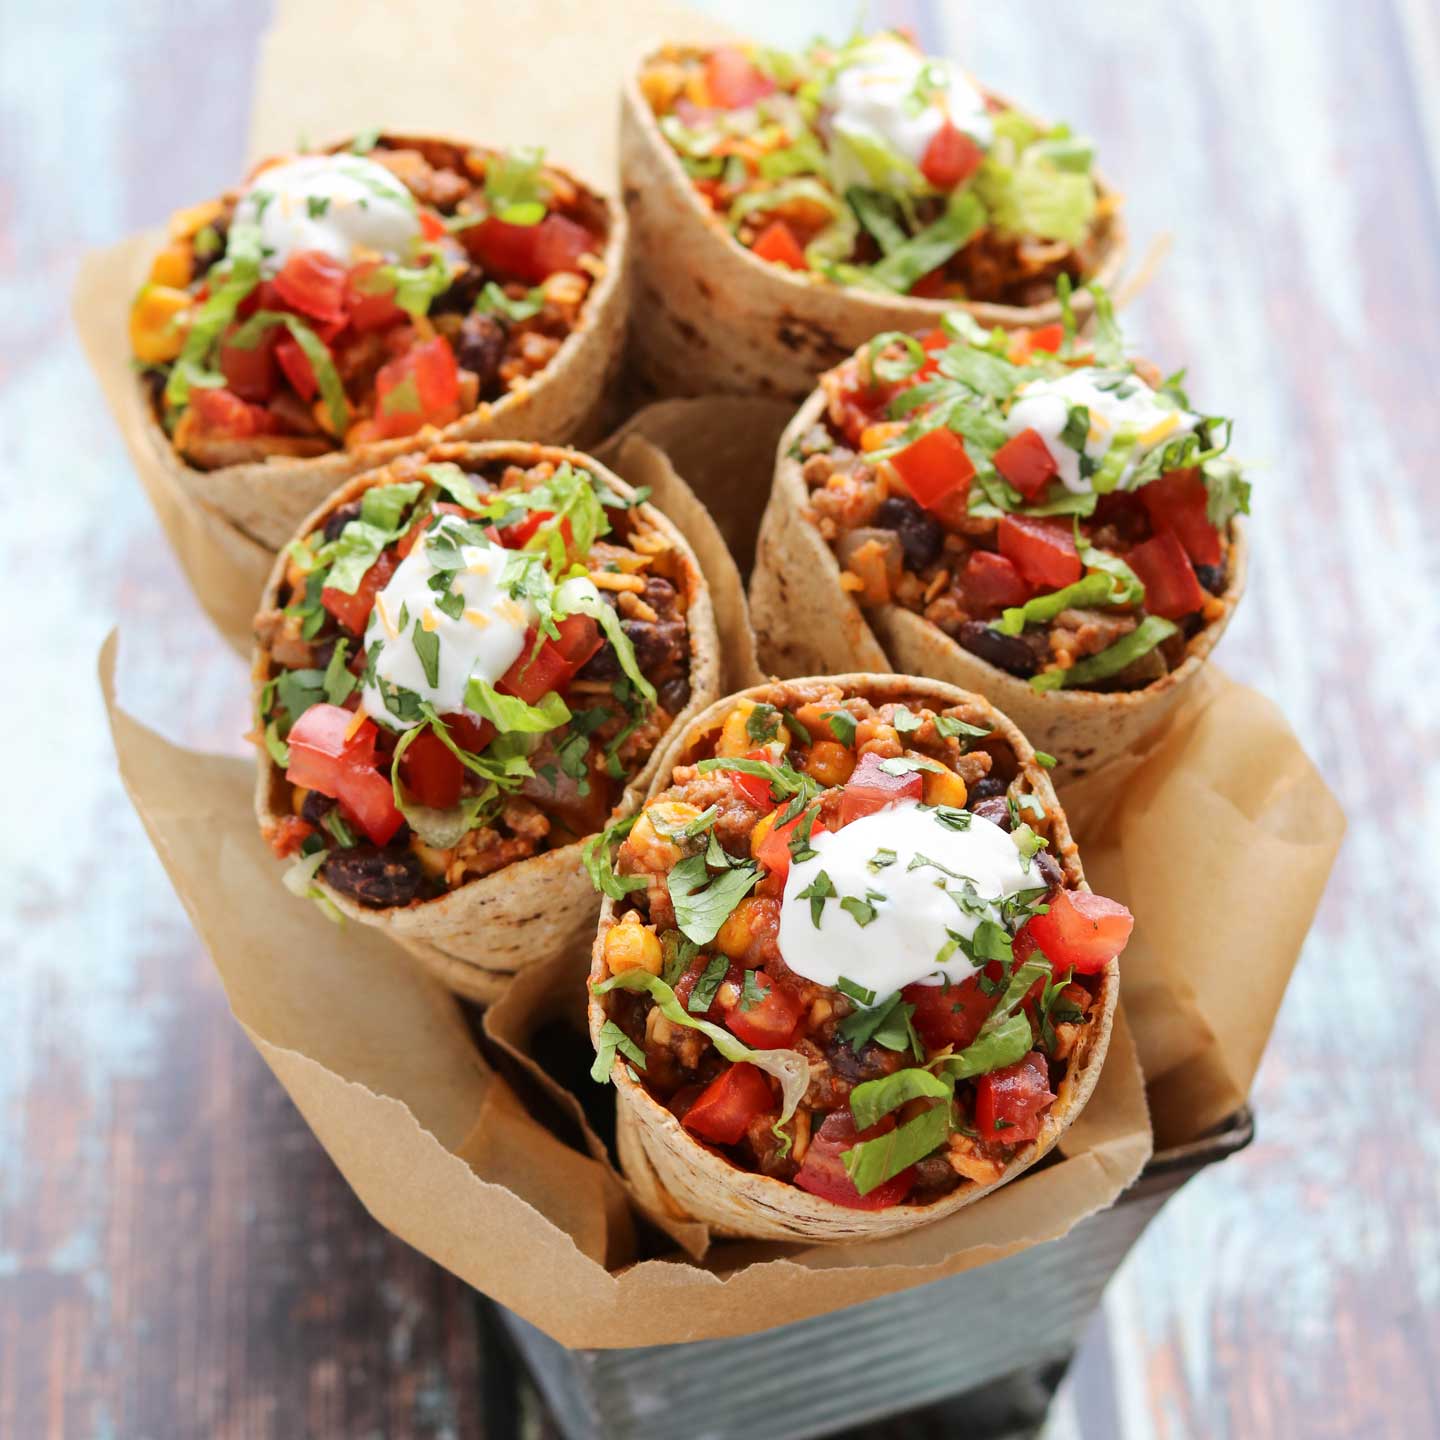
- And that’s before we even start talking about toppings. To really amp up the nutrition, use plenty of fresh veggies to finish off your Taco Cones. Diced tomatoes are a great bet, and plenty of thinly sliced lettuce, for sure! We generally prefer not to use the traditional iceberg lettuce, opting instead for more nutritious varieties. We think romaine is a perfect choice – it’s texturally pretty similar to the iceberg most people are used to eating with tacos, but it’s also more nutritious.
So, How Do You Eat a Taco Cone?
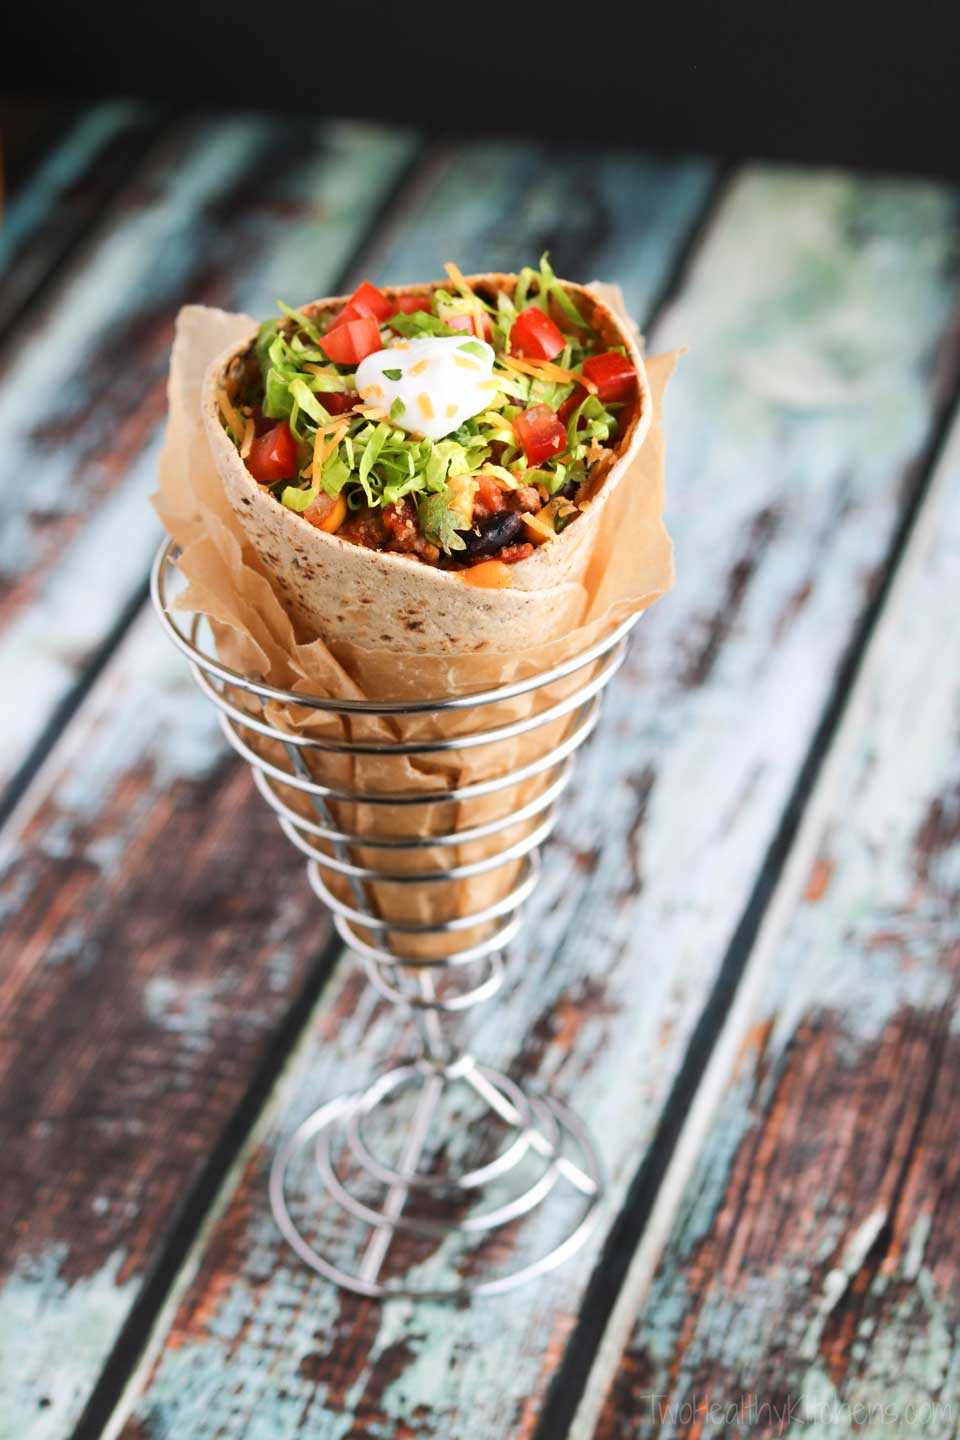
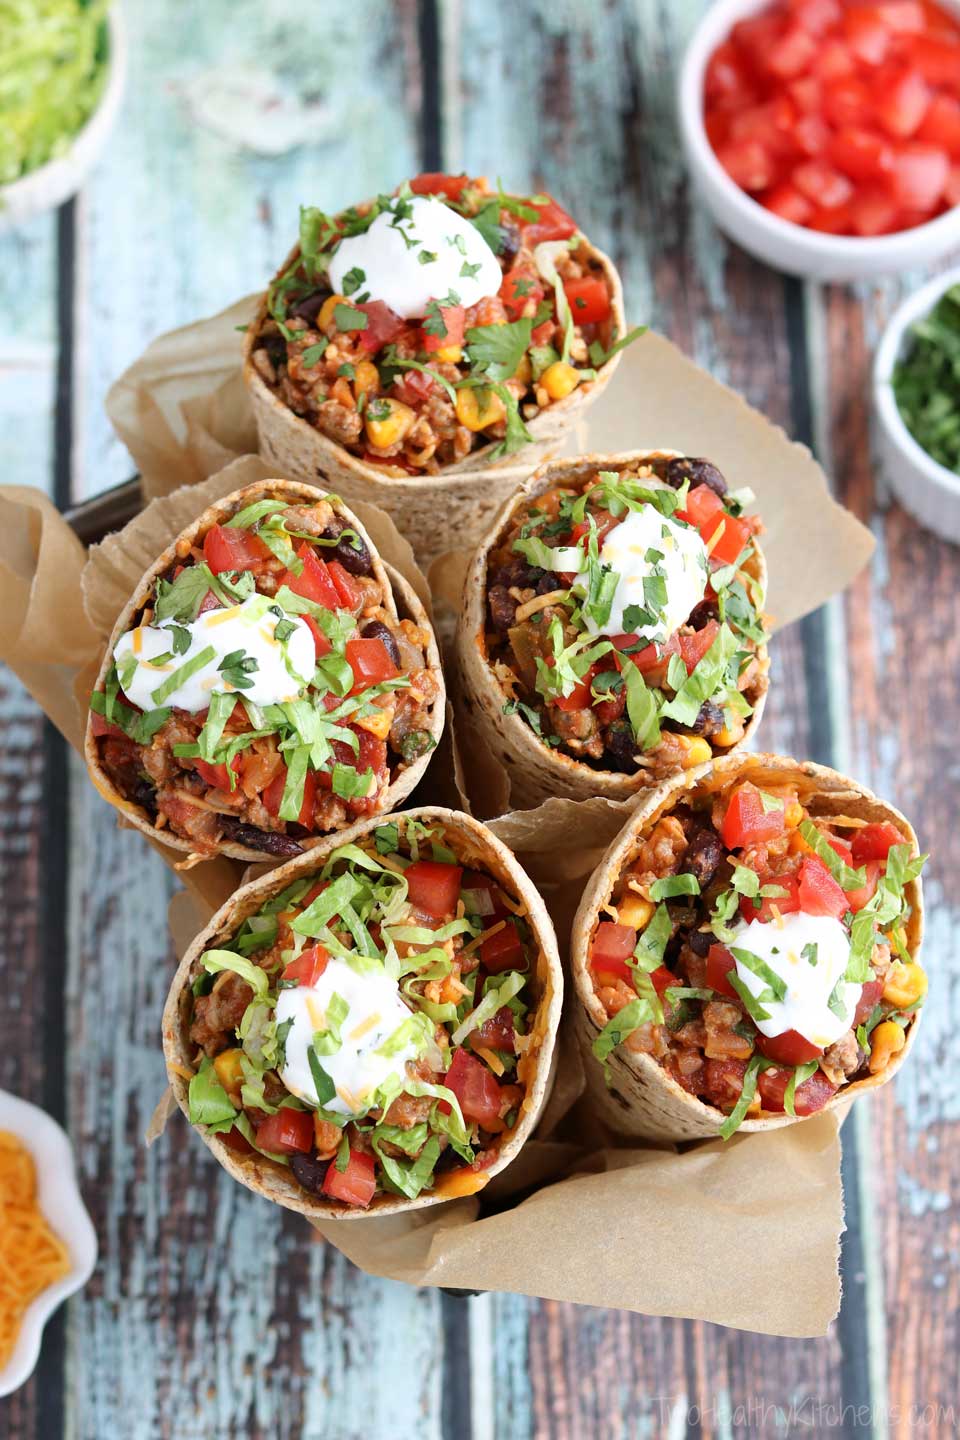
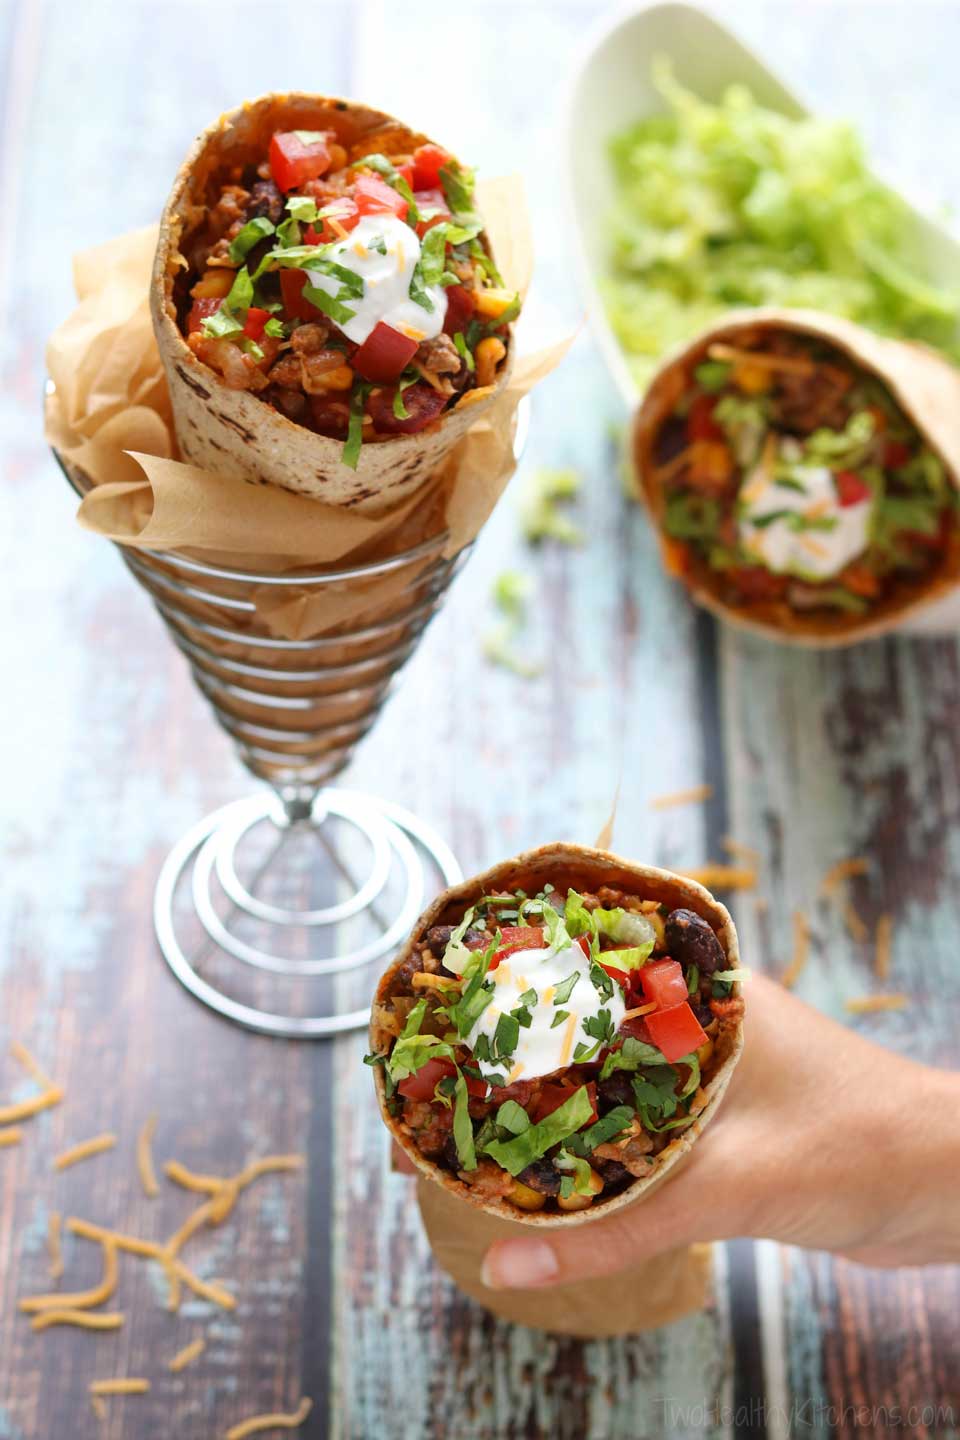
We nibble on these just like we would an ice cream cone – no fork required!
If you want, to keep things extra tidy, you can wrap each finished Ta-Cone in some parchment or a paper towel, even a sandwich baggie.
Of course, if you really want to involve cutlery, you can place each cone in a tall glass (or a party-perfect red Solo cup!) and offer forks alongside. But honestly … where’s the fun in that?!? We vote forks-free all the way!
So simple!
And just like that … the taco is reinvented!
Everything you love about tacos, but with all the the great nutrition and on-the-go portability you need to take on the world (or … ahem … the soccer mom carpool line). Taco night will never be the same!
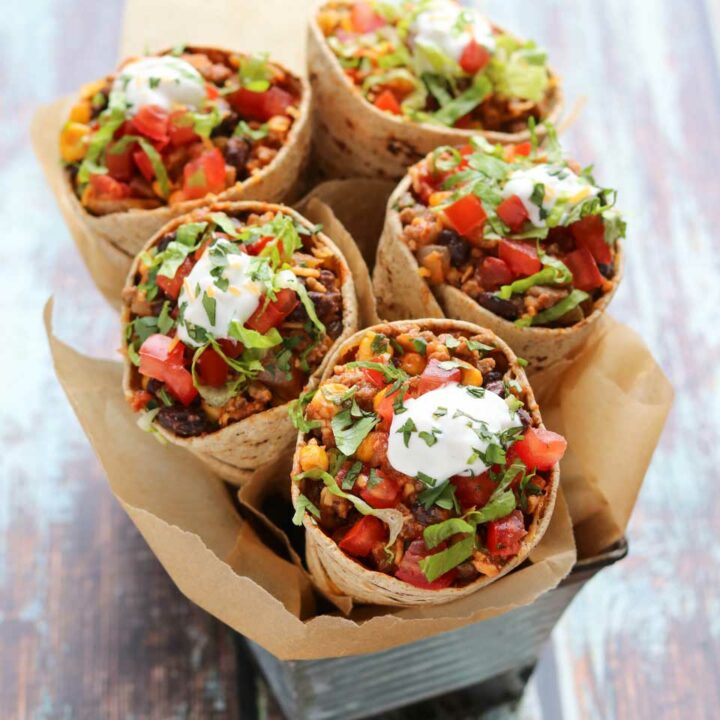
DIY Ta-Cones: Fun, Healthy & Portable Taco Cones
These Taco Cones (Ta-Cones) make taco night portable! Plus, they're an easy make-ahead dinner recipe you can rewarm all week long. Great for taco bars, too!
• Ready in 30 Minutes or Less • Make-Ahead •
Ingredients
Taco Meat Filling (enough filling for about 10 Taco Cones, see note)
- 1 pound extra-lean ground beef or lean ground turkey
- 2 cups chopped sweet onion (from about 1 medium onion)
- 1 teaspoon minced garlic
- 1 (16-ounce) jar thick and chunky salsa (see note)
- 1 (15-ounce) can black beans (preferably organic or reduced-sodium), rinsed and drained
- 1 cup fresh or frozen corn (no need to thaw if frozen)
- 1 (1.25-ounce) packet reduced-sodium taco seasoning (see note)
- 1 cup shredded, reduced-fat sharp cheddar cheese
- 1/4 cup minced fresh cilantro
DIY Cones (ingredients listed are enough to make 1 cone, the exact number of cones you will need to make can vary – see note on yield)
- 1 tortilla (preferably whole-grain)
- 1/16 teaspoon cayenne pepper
- 1/16 teaspoon garlic powder
- 1/16 teaspoon onion powder
- 1/16 teaspoon sea salt
- 1/3 cup + 1 teaspoon shredded, reduced-fat sharp cheddar cheese, divided
Optional Additional Fillings and Toppings
- chopped lettuce (we use romaine), chopped tomatoes, additional minced cilantro, reduced-fat sour cream, hot sauce, and/or your other favorite taco toppings
Instructions
Taco Meat Filling:
- In a large nonstick skillet over medium heat, cook ground beef, onions, and garlic until ground beef is cooked through, about 10-12 minutes. Stir occasionally to crumble beef. Drain if needed.
- Add salsa, black beans, corn, and taco seasoning to skillet, stirring thoroughly to combine. Continue cooking about 5 minutes longer, until heated through.
- Remove from heat and stir in 1 cup cheese and cilantro.
Cones (refer to photos in post for a step-by-step visual guide):
- Meanwhile, for each cone, lay one tortilla on a large microwave-safe plate. Sprinkle the tortilla evenly with cayenne, garlic powder, onion powder, and salt. Sprinkle 1/3 cup cheese on top of seasonings, concentrating more of the cheese toward the outer edges of the tortilla.
- Microwave tortilla for about 30-45 seconds, just until cheese is melted. Remove tortilla from microwave and immediately (while cheese is still very melty) roll it into a cone shape. Press firmly but gently around the edges to make sure they are sealed by the melty cheese.
- Place a crumpled ball of parchment paper (NOT aluminum foil, wax paper, or paper towel) into the cone to help it hold its shape. With the cone laying on its side on the plate, sprinkle remaining 1 teaspoon cheese in a little pile near the tip of the cone. Return the cone to the microwave for about 30 seconds, just until the teaspoon of cheese is melty. Remove tortilla from microwave and immediately fold tip of cone up, gently pressing it into the teaspoon of melted cheese to hold it securely in place and close off the tip of the cone.
- Set cone aside until you're ready to proceed with filling it and serving. We find that allowing the cones to sit for at least 5 minutes is ideal, as they are still quite pliable and floppy when first removed from microwave. They harden a bit to a perfect, more rigid texture after sitting for about 5 minutes. Remove parchment paper from cone before filling.
To Fill Each Taco Cone:
- Depending on exactly how many additional toppings you choose to layer in, you will probably use roughly 1/3 cup of taco meat mixture for each cone. Begin by stuffing some of the warm meat mixture into the very bottom of the cone. Layer the remaining taco meat with optional toppings such as lettuce and tomato, so that the toppings are interspersed throughout the cone and not just all piled on the taco meat at the top of the cone.
Serve immediately.
Notes
Yield: This recipe makes enough taco meat filling for about 10 Taco Cones. Exactly how many Taco Cones this will ultimately yield depends on (1) how many taco toppings (shredded lettuce, tomato, etc.) you layer into each cone, (2) how tightly you wrap your cones, which will dictate how much room is available for fillings, and (3) how high you pile the filling in each cone (to keep them less messy, we recommend not overfilling them).
Salsa: We highly recommend choosing a thick and chunky variety, so the filling isn't too runny and messy. Additionally, we typically use a mild salsa, but you can opt for something more spicy if that's what your family enjoys.
Taco seasoning: There are differences in the amounts of sodium (and other ingredients) in various brands, so it's a good idea to read the nutrition information for the brands offered at your store.
Make-ahead options: Both the cones and the meat filling can be made up to a few days in advance, before the final Taco Cones are completely assembled. Store the cones and the taco meat separately in air-tight bags or containers in the refrigerator. The taco meat filling can be rewarmed as one big batch, or you can heat up a little filling at a time to make single-serving Taco Cones all throughout the week. For the cones, if you would like, just before filling them, you can re-microwave each one – with parchment paper stuffed inside – for about 15-20 seconds to take the chill off, and then fill them with rewarmed taco meat filling and additional toppings.
Nutrition Information:
Yield: 10 servings Serving Size: 1 coneAmount Per Serving: Calories: 287Total Fat: 7gSaturated Fat: 4gTrans Fat: 0gUnsaturated Fat: 3gCholesterol: 52mgCarbohydrates: 24gFiber: 6gSugar: 5gProtein: 32g
Nutrition calculation includes extra-lean beef (not turkey), and analysis does not include optional toppings. Nutrition information should be considered an estimate only, and may additionally vary depending on your choice of ingredients or preparation. No guarantees are made regarding allergies or dietary needs. Always consult a physician or dietician for specific advice and questions.

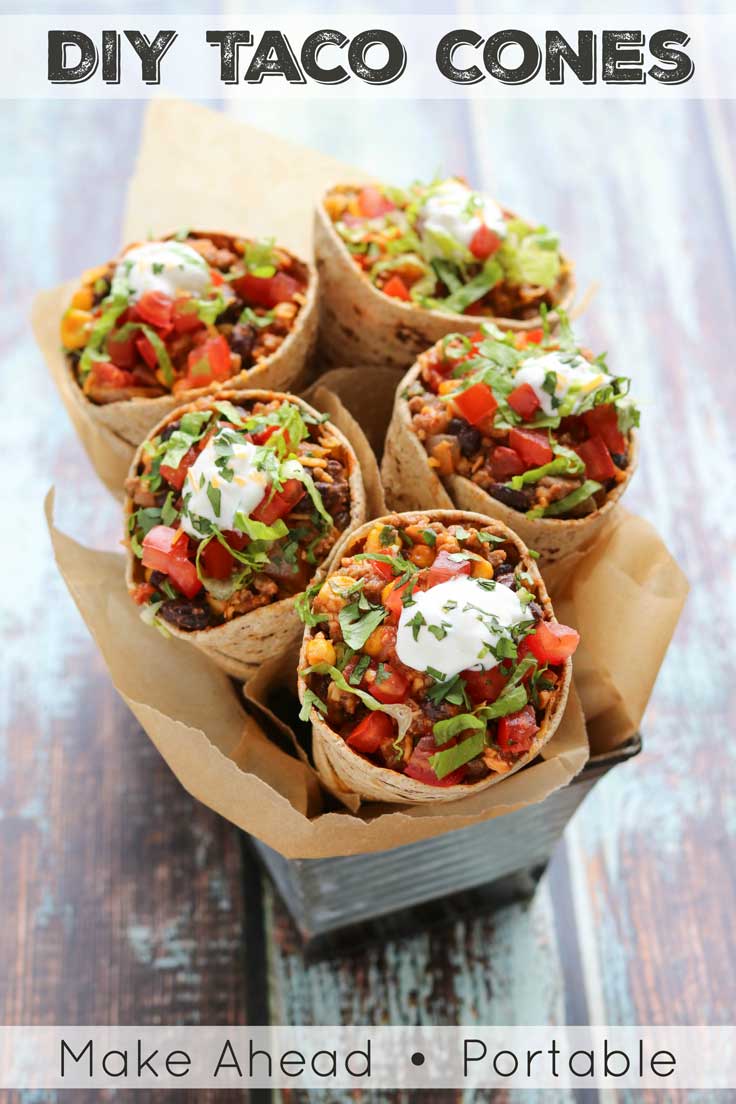


This is a cool recipe and will be loved by kids – definitely worth a try!
Kids love them, no doubt, but they’re pretty darn fun for adults, too! In fact, these are a nifty little idea for a camp-out or tailgate or backyard taco bar. Portable tacos that let everyone eat as they chat and mingle … plus, they’re so novel that they’re sure to spark some ice-breaker convos as your guests customize their own loaded-up taco cones! ~Shelley
Well that sure looks like a fun idea! I’d eat tacos this way any day 🙂
I know, right?!? Not that regular ol’ tacos aren’t fabulous … but these Taco Cones really are so fun! And yay – portable, too! No matter how much I try to create family meals where we can all sit down together to spend a little time together, chat, and share our days … well, some nights portable grab-and-go meals are the only thing that works! 😉 ~Shelley
These taco cones are GENIUS! My kids would absolutely love them!
Elizabeth, you’re always so kind! 🙂 And if my own kiddos are any indicator, I would definitely say that your kids will for sure love them! Enjoy! ~Shelley
Oh wow, what an awesome idea! I have never seen these before. Bookmarking!
Thanks so much, Jovita – what a really sweet compliment! 🙂 ~Shelley
This is such a cute idea! We use the Flatout wraps all the time, so I’ll definitely be pulling out this idea next time.
Oh my goodness, Dara – since you guys are already total Flatout fans (I’m not surprised! 😉 ) I think you’ll especially love how nutritious this recipe is! A healthy beef taco recipe loaded with veggies, plus tons of fiber and protein – so cute, so fun, so healthy! ~Shelley