7-Layer Christmas Potluck Salad
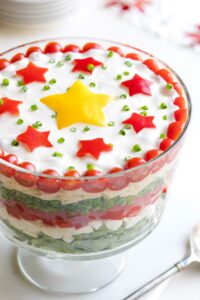
~ The classic 7-Layer Salad gets a holiday makeover with gorgeous red and green Christmas stripes! It’s easy to make, yet pretty enough to be a standout at any Christmas potluck or holiday party! ~
This Recipe Is: • Ready in 30 Minutes or Less • Make Ahead • Vegetarian Option (without bacon) • Gluten Free (depending on brand of bacon) •
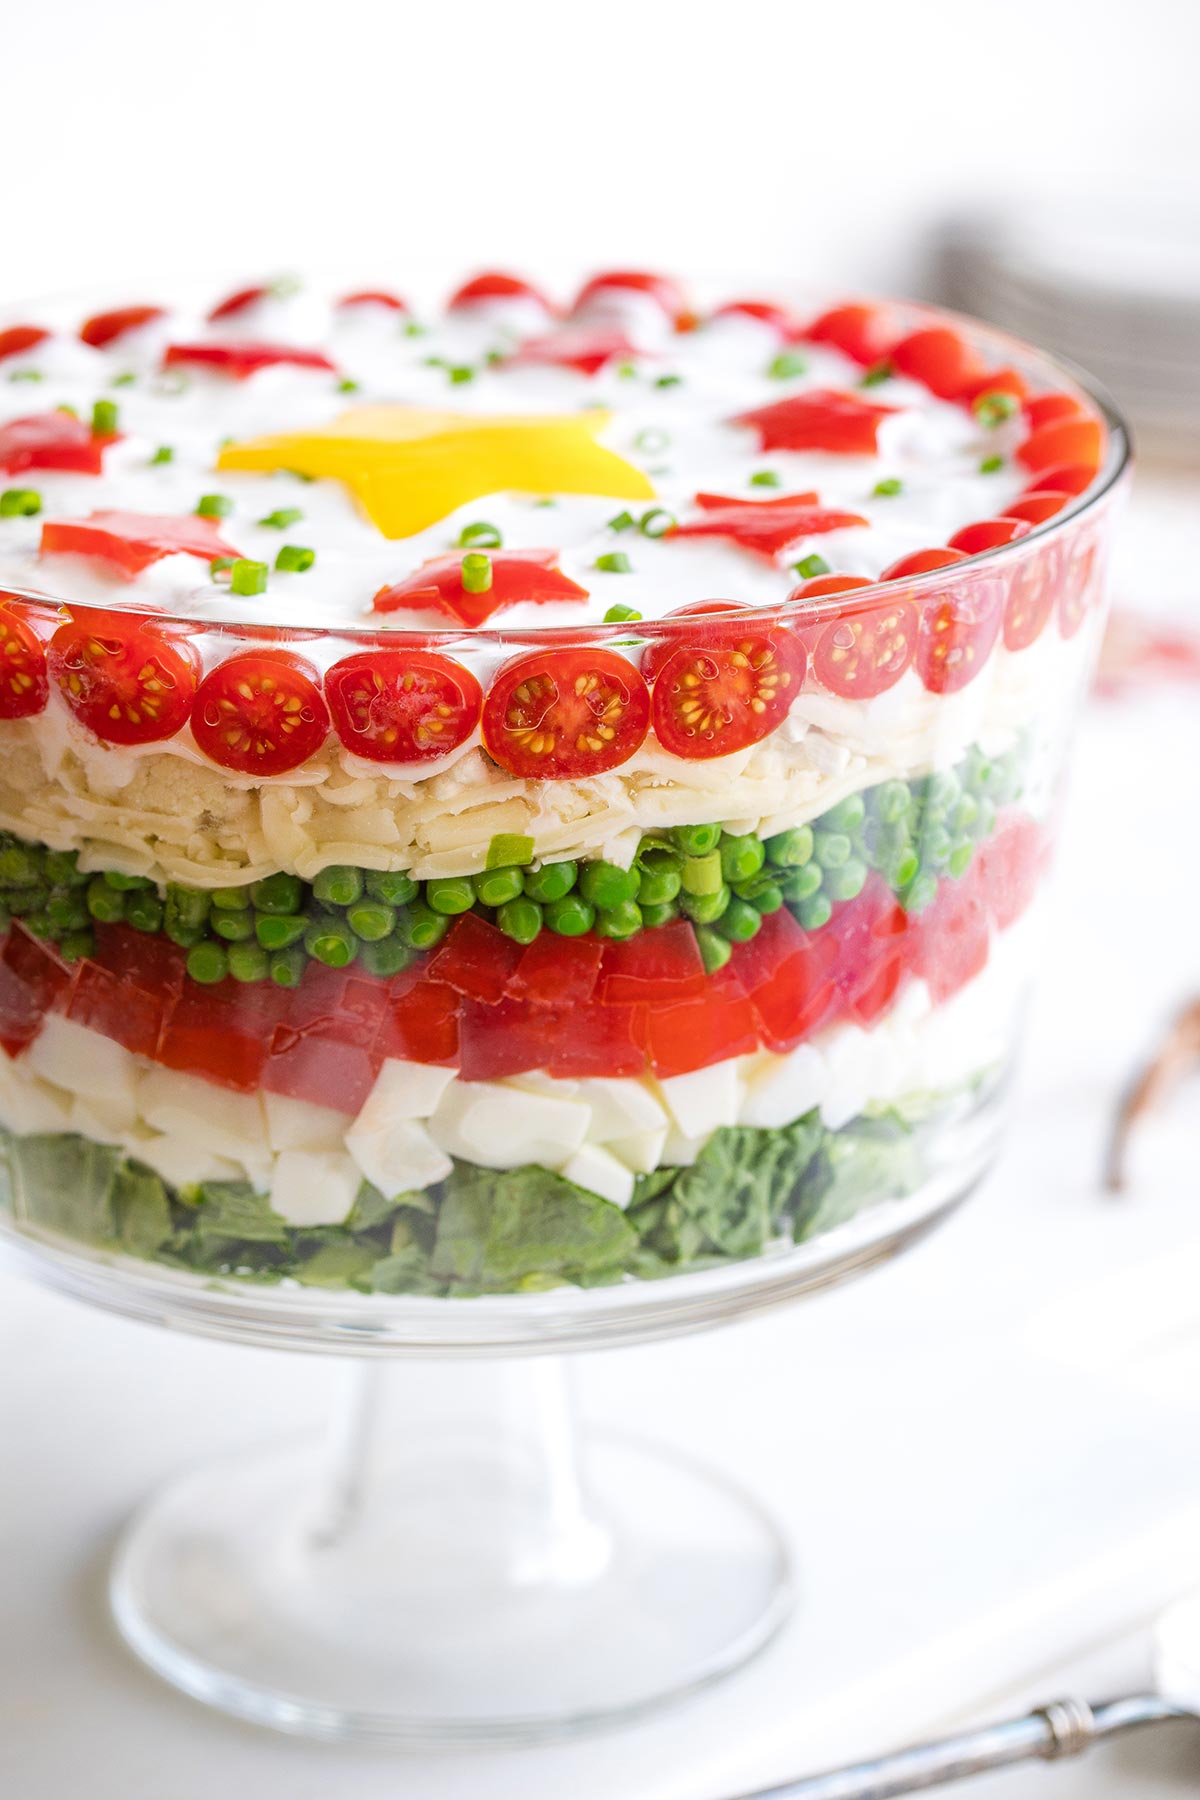
When it comes to family potlucks, I’m often asked to bring the salad. Might seem like a boring assignment, but I LOVE it! First of all, because I legit love salads …
… But also because it’s such a fun challenge to come up with salad recipes that truly surprise everyone. Ones that rise way above ho-hum, mandatory green salad status … to be true showstoppers!
Over the years, I’ve created a lot of memorable salads. I mean, if I’m gonna spend the time to make it, I want it to be a standout, truly fit for a celebration!
This gorgeous 7-Layer Potluck Salad is an eye-popping standout, for sure!
And it solved another problem for me, too.
You see, last year, I decided that I needed a new Christmas Salad idea.
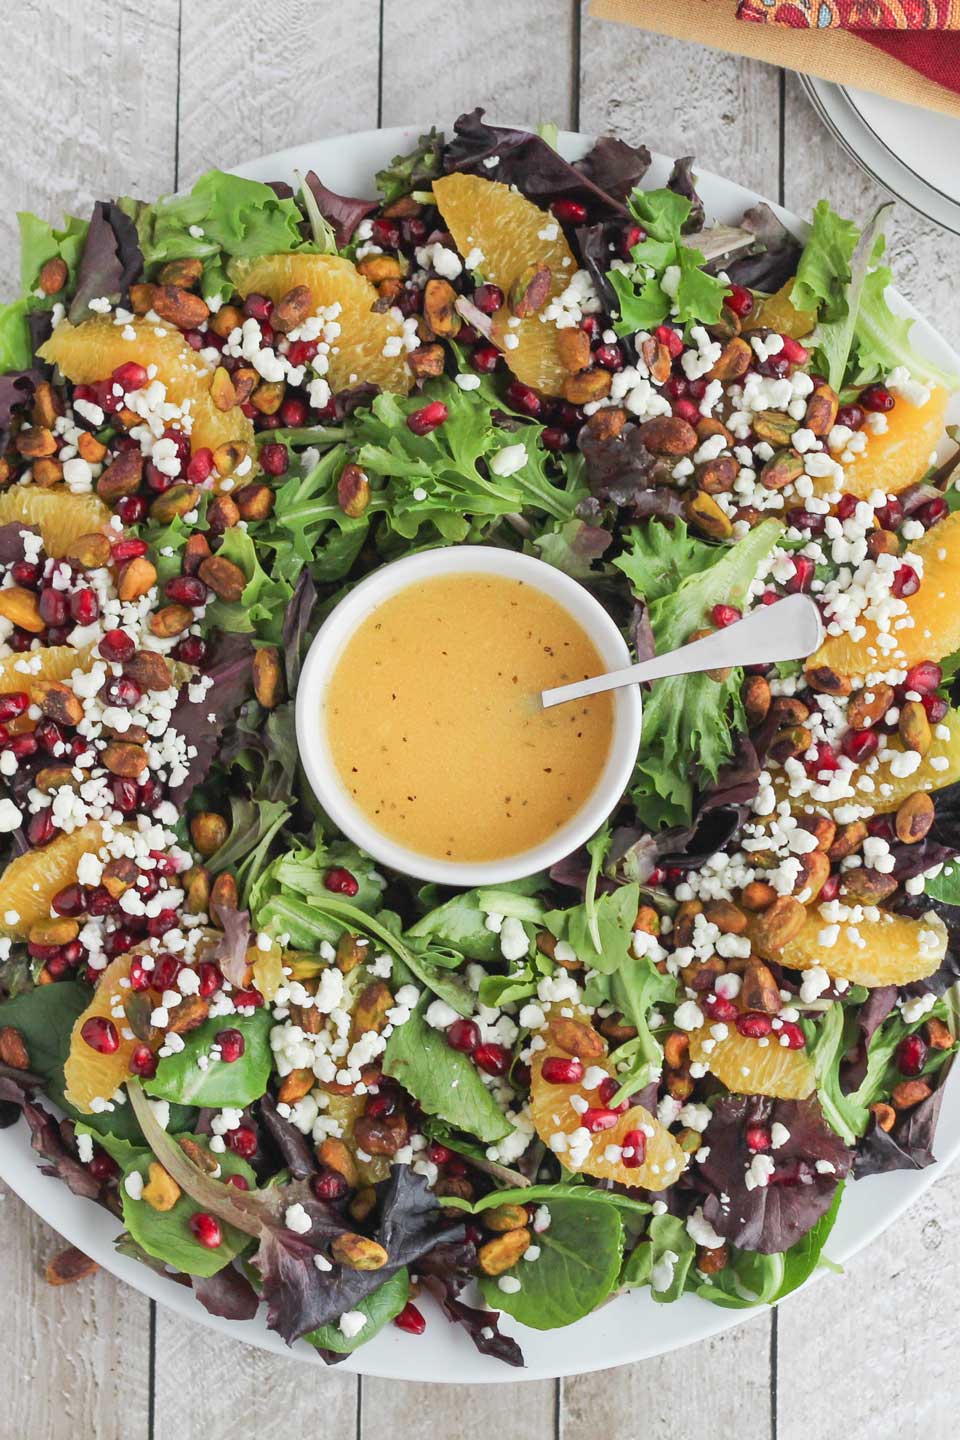
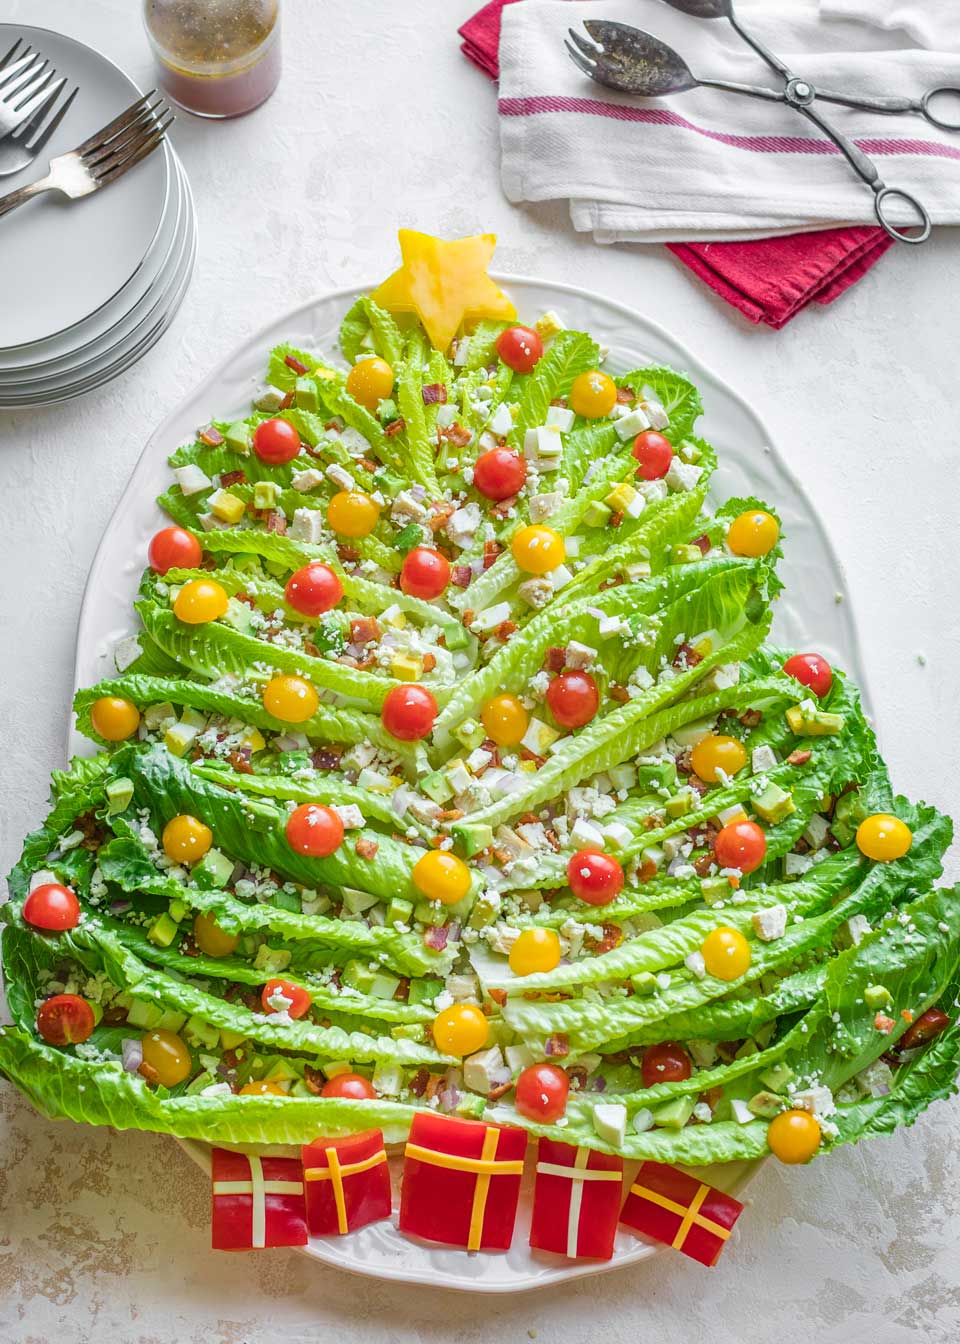
Sure, people absolutely rave about my “original” wreath-shaped Christmas Salad … and they never seem to get tired of it, no matter how many times I make it. Ditto my cute Christmas Tree Holiday Salad.
But I still feel that pressure of surprising everyone with something new to try.
So, for our big family Christmas party last year … my husband and I created this new Christmas salad recipe. Something unique and new. Something surprising and fun.
And ya know what? It was a big, BIG success!
I absolutely couldn’t wait to share it with all of you for the holidays this year!
Why You’ll Love This “Holiday” Version of 7-Layer Salad
Basically, because there is layer upon scrumptious layer of flavor and texture! That’s the beauty of a 7-Layer Salad, after all!
I’ve got tried-and true-directions, so the layers work out nicely, in pretty, alternating colors. But you can adjust on the fly however you please.
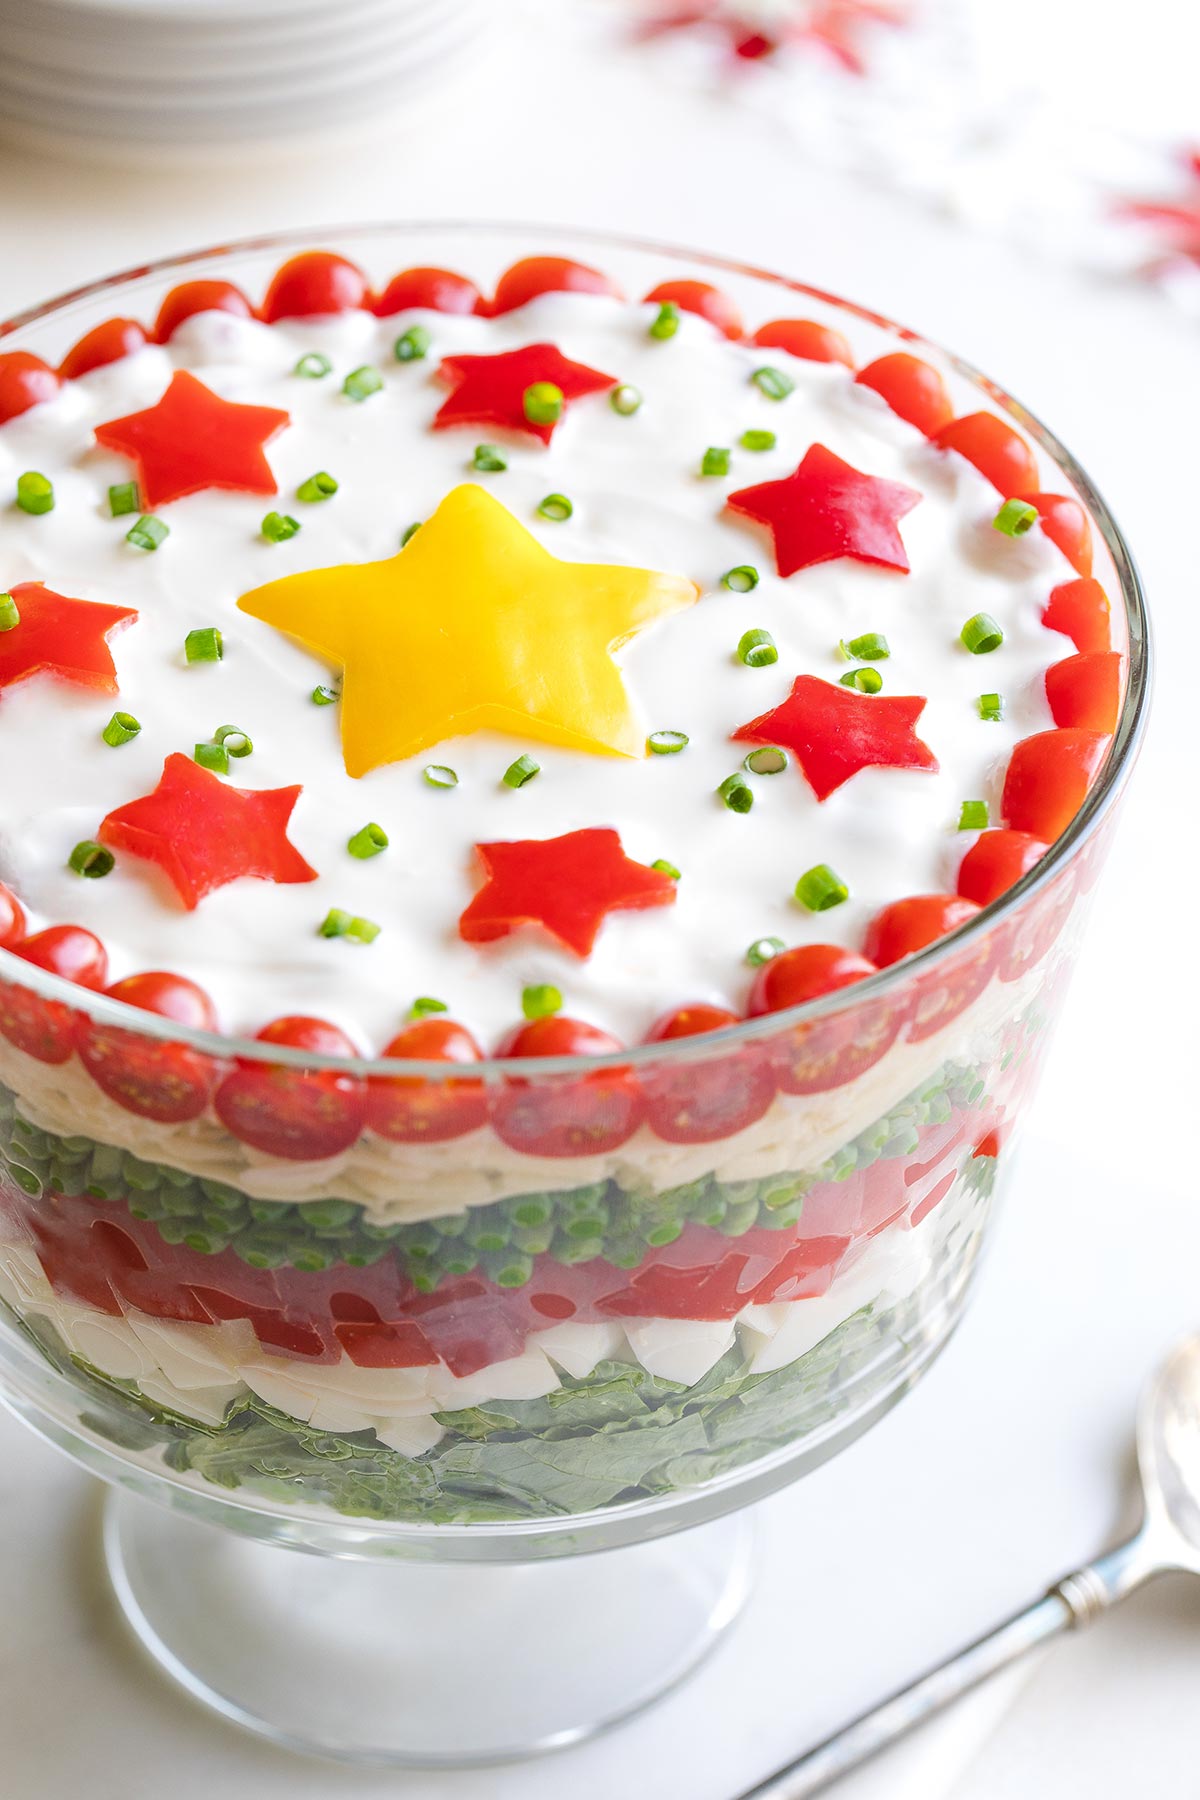
Oh! And one of my favorite things about any recipe, is if you can make it ahead of time. Especially at the holidays! Make-ahead recipes give you so much peace of mind and flexibility, keeping the holidays stress-free.
But Wait … What IS a 7-Layer Salad??
Ah, I’m glad you asked!
To be honest, I sort of thought everybody knew about those iconic, retro, 7-layer potluck salads from “back in the day.” But when we took this masterpiece to our family Christmas party last year, I realized that lots of people have actually never heard of this culinary phenomenon.
So, a little explanation is in order!
According to Wikipedia, the classic Seven-Layer Salad likely originated in the South around the 1950s. The Smithsonian agrees this salad recipe probably has southern roots, adding that it’s now common in American Midwestern kitchens, as well. It’s become a staple at summer church potlucks and picnics.
Basically, 7-Layer Salads feature layers of salad greens (classically iceberg), with colorful vegetables. Usually there are layers of hard-cooked eggs, bacon and cheese, too.
This salad’s also commonly got green peas in it, and (according to Wikipedia) in the South it was sometimes even called “Seven-Layer Pea Salad” because the peas were such a prominent ingredient.
The “salad dressing” is probably the most unique part of the iconic 7-Layer Salad, though. It’s typically just a thick slather of mayonnaise, sometimes in combination with sour cream, and sometimes with sugar (as much as 1/2 cup!) to make it sweeter. (But don’t worry … you know we lightened ours up for you! More on that in a sec …)
The dressing really is THICK – not like a normal ranch-style salad dressing that drips across your salad greens. It’s usually spread to form a thick, final layer on the top of the salad, sealing it all together (although sometimes you’ll see versions that position the dressing layer more in the middle).
Nowadays, you can find lots of different riffs on the 7-Layer Salad theme. We’ve even got a unique, Mexican-inspired variation called Easy 7-Layer Taco Salad that’s awesome for summer picnics.
But today, we’re channeling more of the classic ingredients (with a bit of a healthy, modern makeover). Let’s talk about that makeover for a sec …
How This Version Is Healthier Than Those Naughty “Classics”
Kinda funny … Wikipedia says that those long-ago, vintage Seven-Layer Salads “helped to give salads of the 1950s a bad name … when it came to health.”
Not surprising, really. A thick slather of mayo on top of a salad? Not a great start.
And I understand that’s the classic method. But it honestly doesn’t even sound good to me. Just … so … mayo-y.
I knew there had to be a better way. Not only healthier, but also more interestingly updated and cleaner, for today’s modern tastes.
Turned out to be surprisingly easy!
Our updated salad dressing has a little mayo, mixed in with tangy Greek yogurt, plus a drizzle of honey for sweetness, and layered acidity from apple cider vinegar. Nice!! Ok, now we’re talkin’!
It still has all those old-school, 7-Layer vibes, but in a fresher, lighter, modern way.
A few other tweaks help keep this version lighter and leaner, too. (Great for Christmas parties, where every calorie saved is another calorie you can enjoy at the cookie table!)
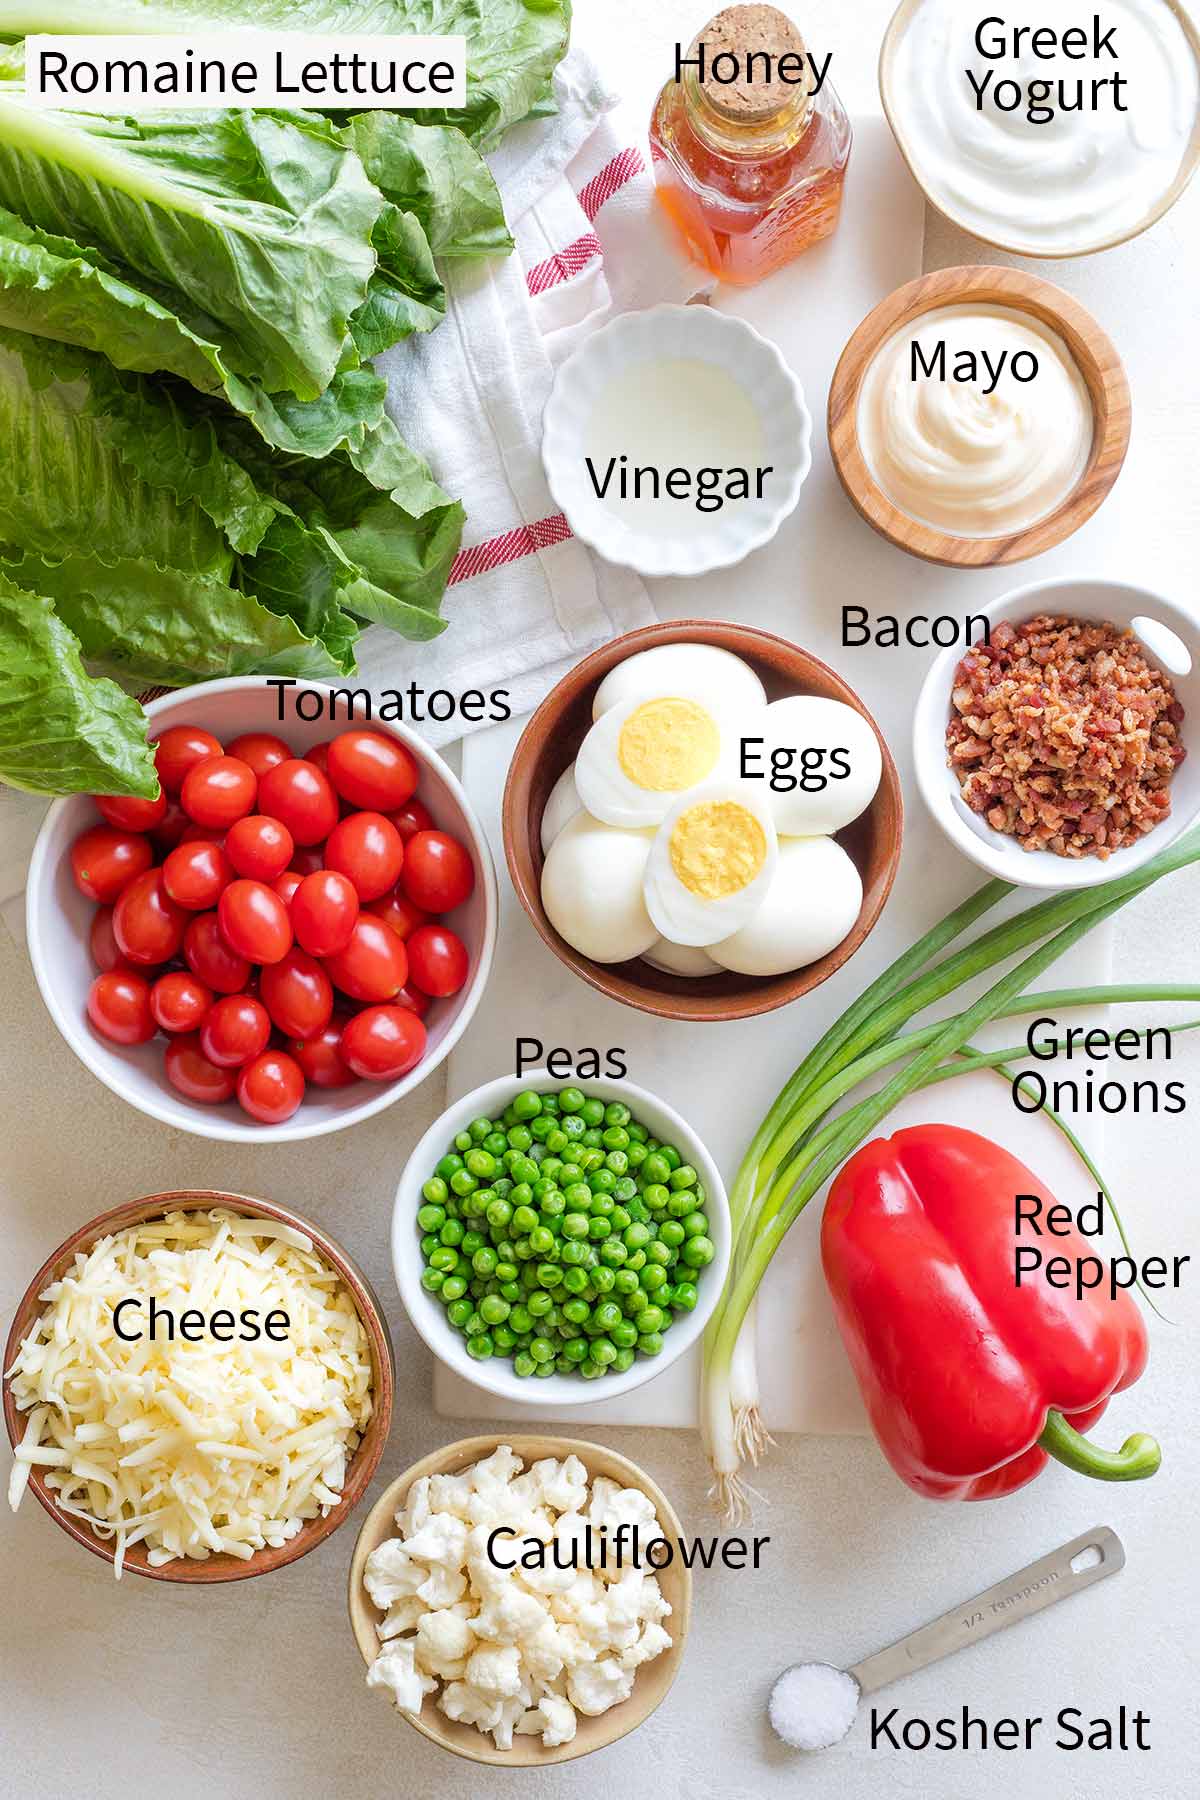
We still use cheese and bacon. But we opt for healthier, reduced-fat bacon options … and just a little bit of it. (Also, note that you can leave the bacon out entirely to make this recipe vegetarian.)
And, although it can be hard to find in some stores, I recommend grabbing reduced-fat white cheddar when you can find it.
The rest of the salad is jam-crammed with flavorful and nutritious veggies … brilliant!
How to Bring This Beauty Together
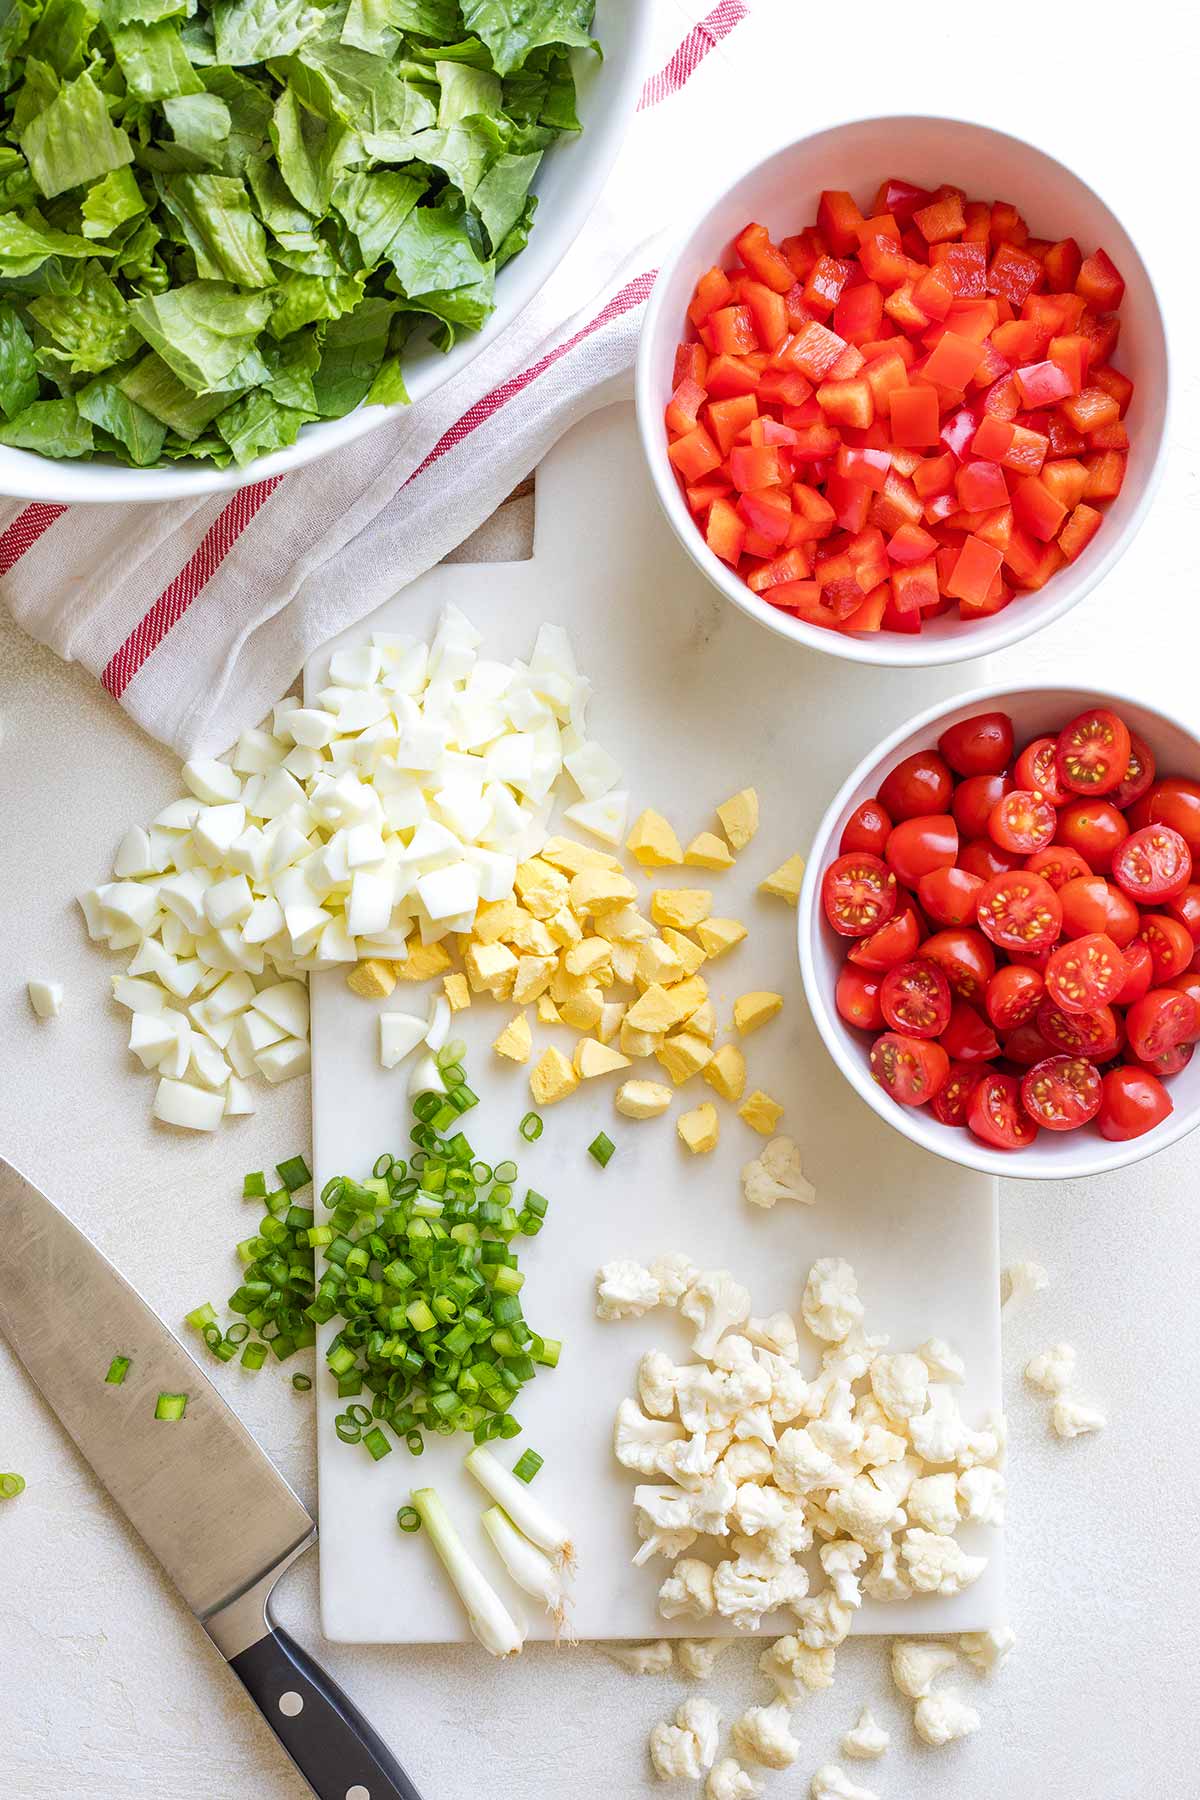
The only real effort here is chopping your ingredients … plus a few moments to whisk together your dressing.
Beyond that, it’s really all about the fun of building your layers and watching such a gorgeous, colorful dish come together, right before your eyes!
Here’s how to build your masterpiece, layer by layer …
Choosing the Right Salad Bowl
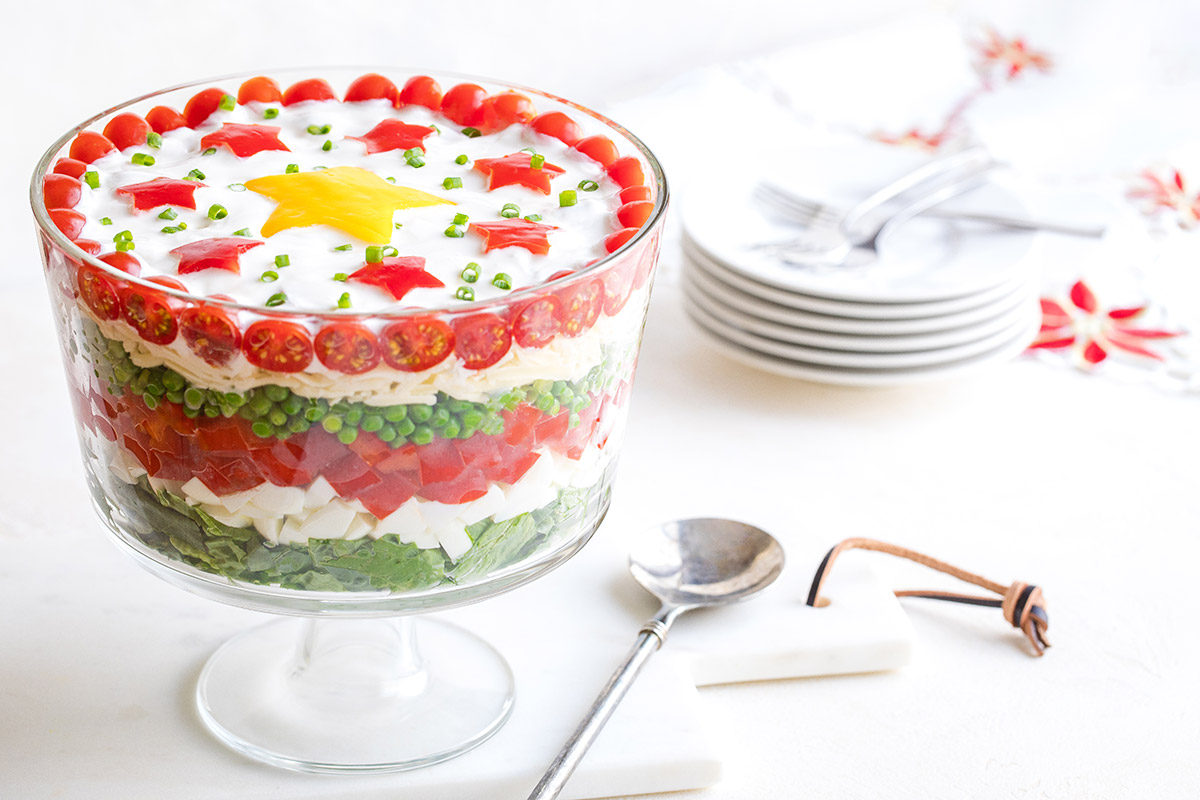
You definitely want to make this in a clear glass bowl, so everyone can see the pretty red-white-and-green layers! A straight-sided bowl (like a trifle bowl) is ideal. The bowl you see in my photos is about 8″ across and 4½” tall.
If your bowl has slightly different dimensions, you can adjust as you build your salad, by slightly increasing or decreasing the amount of ingredients in each layer, and then adjusting the amount of dressing accordingly.
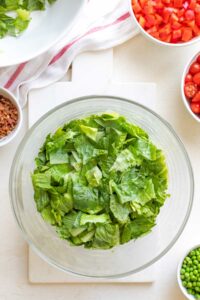
Layer #1: Green Lettuce
Put about ¾ of your romaine lettuce in the bottom of your bowl, in an even layer.
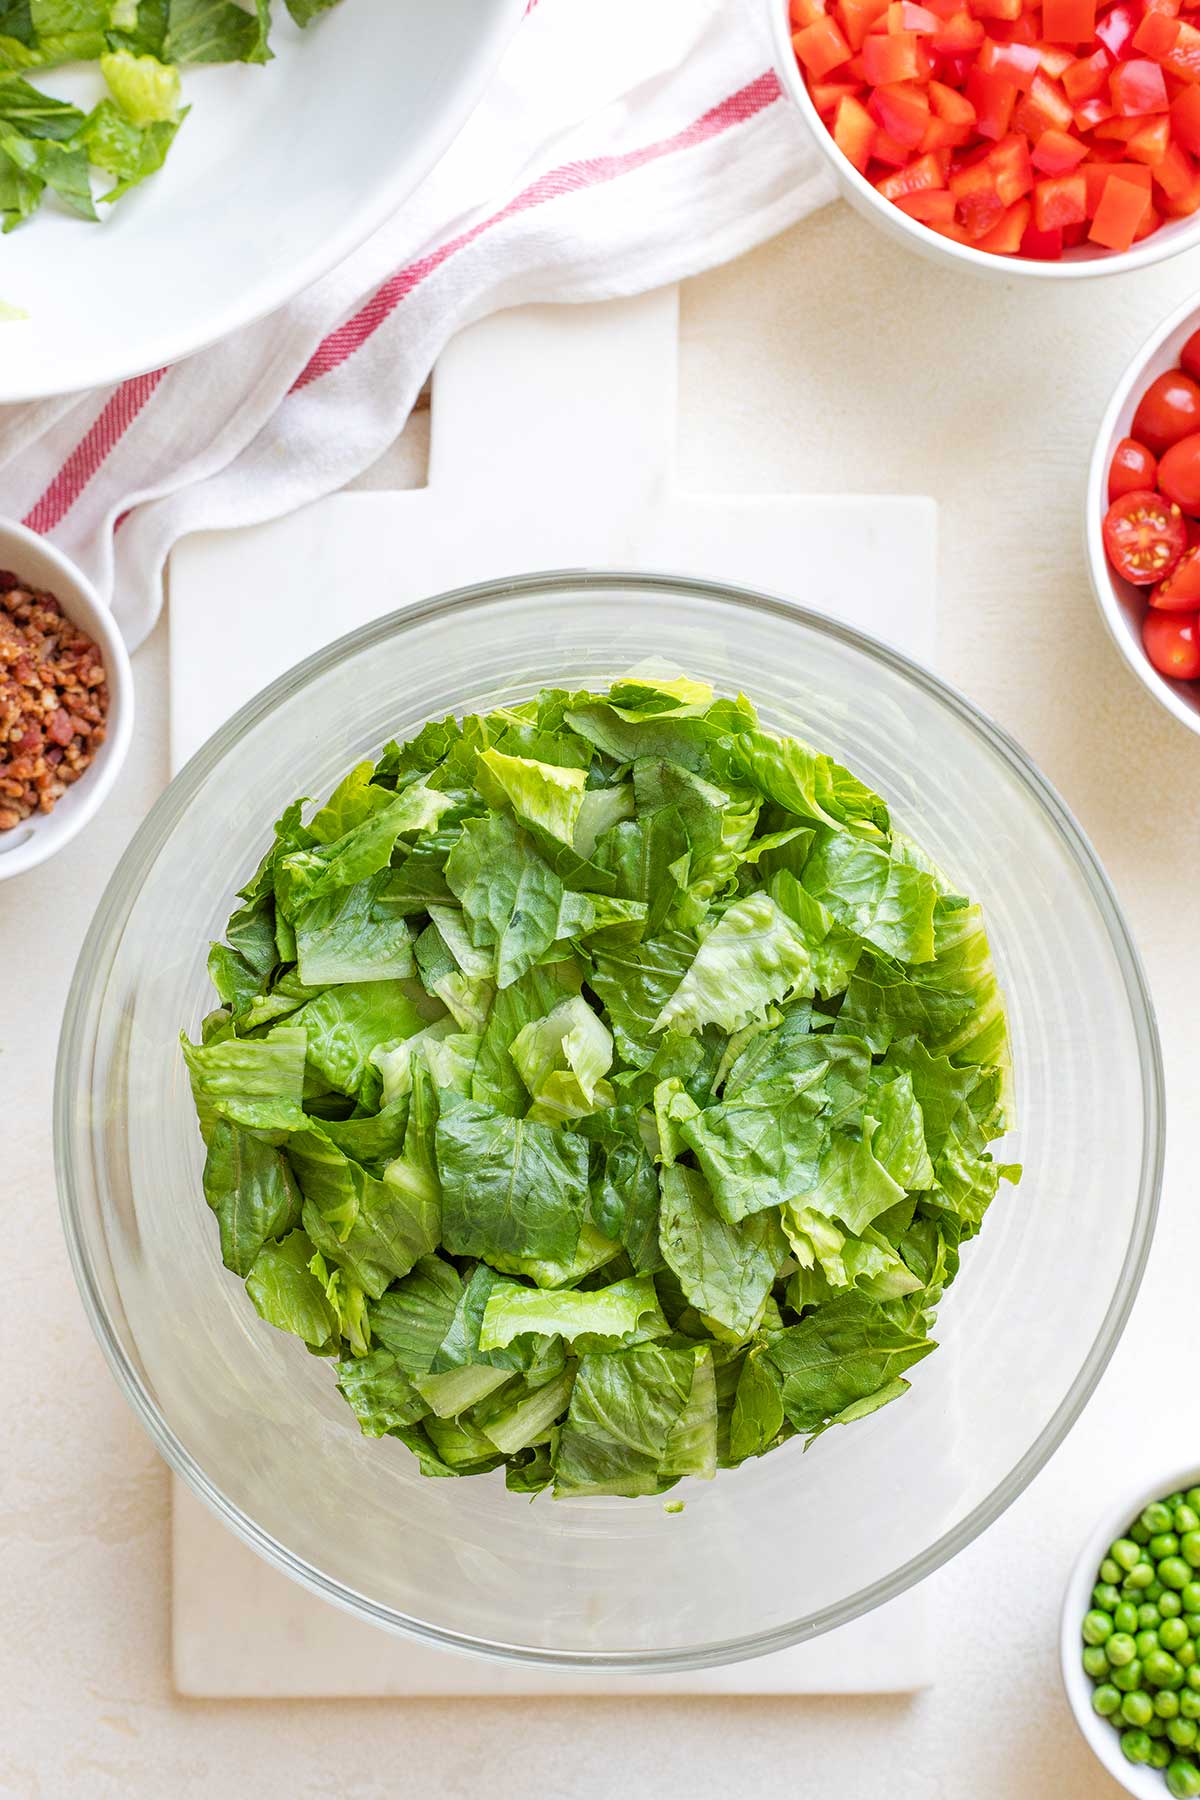
Clever Tip: Reserving Some of the Lettuce
You might be wondering why we don’t put ALL of the lettuce in the bottom of the bowl.
It’s a handy trick we learned years ago from Ree Drummond (aka The Pioneer Woman) in the recipe for her classic Layered Salad. (And which we also use in our own recipe for Easy 7-Layer Chicken Taco Salad, too!)
The sneaky trick to building a GORGEOUS 7-Layer Salad is to make sure that the stripes of colorful ingredients are pushed more against the side of the glass bowl, so that people can see them … rather than piling them toward the center of the bowl.
But, that means that you need to fill in with something toward the middle, right? That’s where you use the extra lettuce you reserved!
Works like a charm!
Just be sure not to go overboard with this idea – you don’t want the center to be ALL lettuce with no toppings in there.
And if you get to the end of your salad construction, and find you have a tiny bit of extra lettuce that didn’t get used? No worries … save it for another use (like a quick side salad) later in the week.
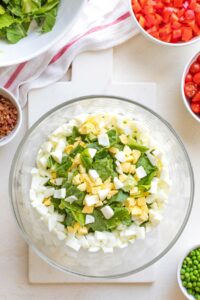
Layer #2: White Eggs
Next comes a white layer of hard-boiled (aka hard-cooked) eggs.
To save time, you can grab already-cooked eggs in most grocery stores. Or, if you want to make your own, we have great tips on how to get perfectly cooked hard-boiled eggs every time.
The key here is to make sure this layer looks WHITE as people view the layers on the side of the glass bowl.
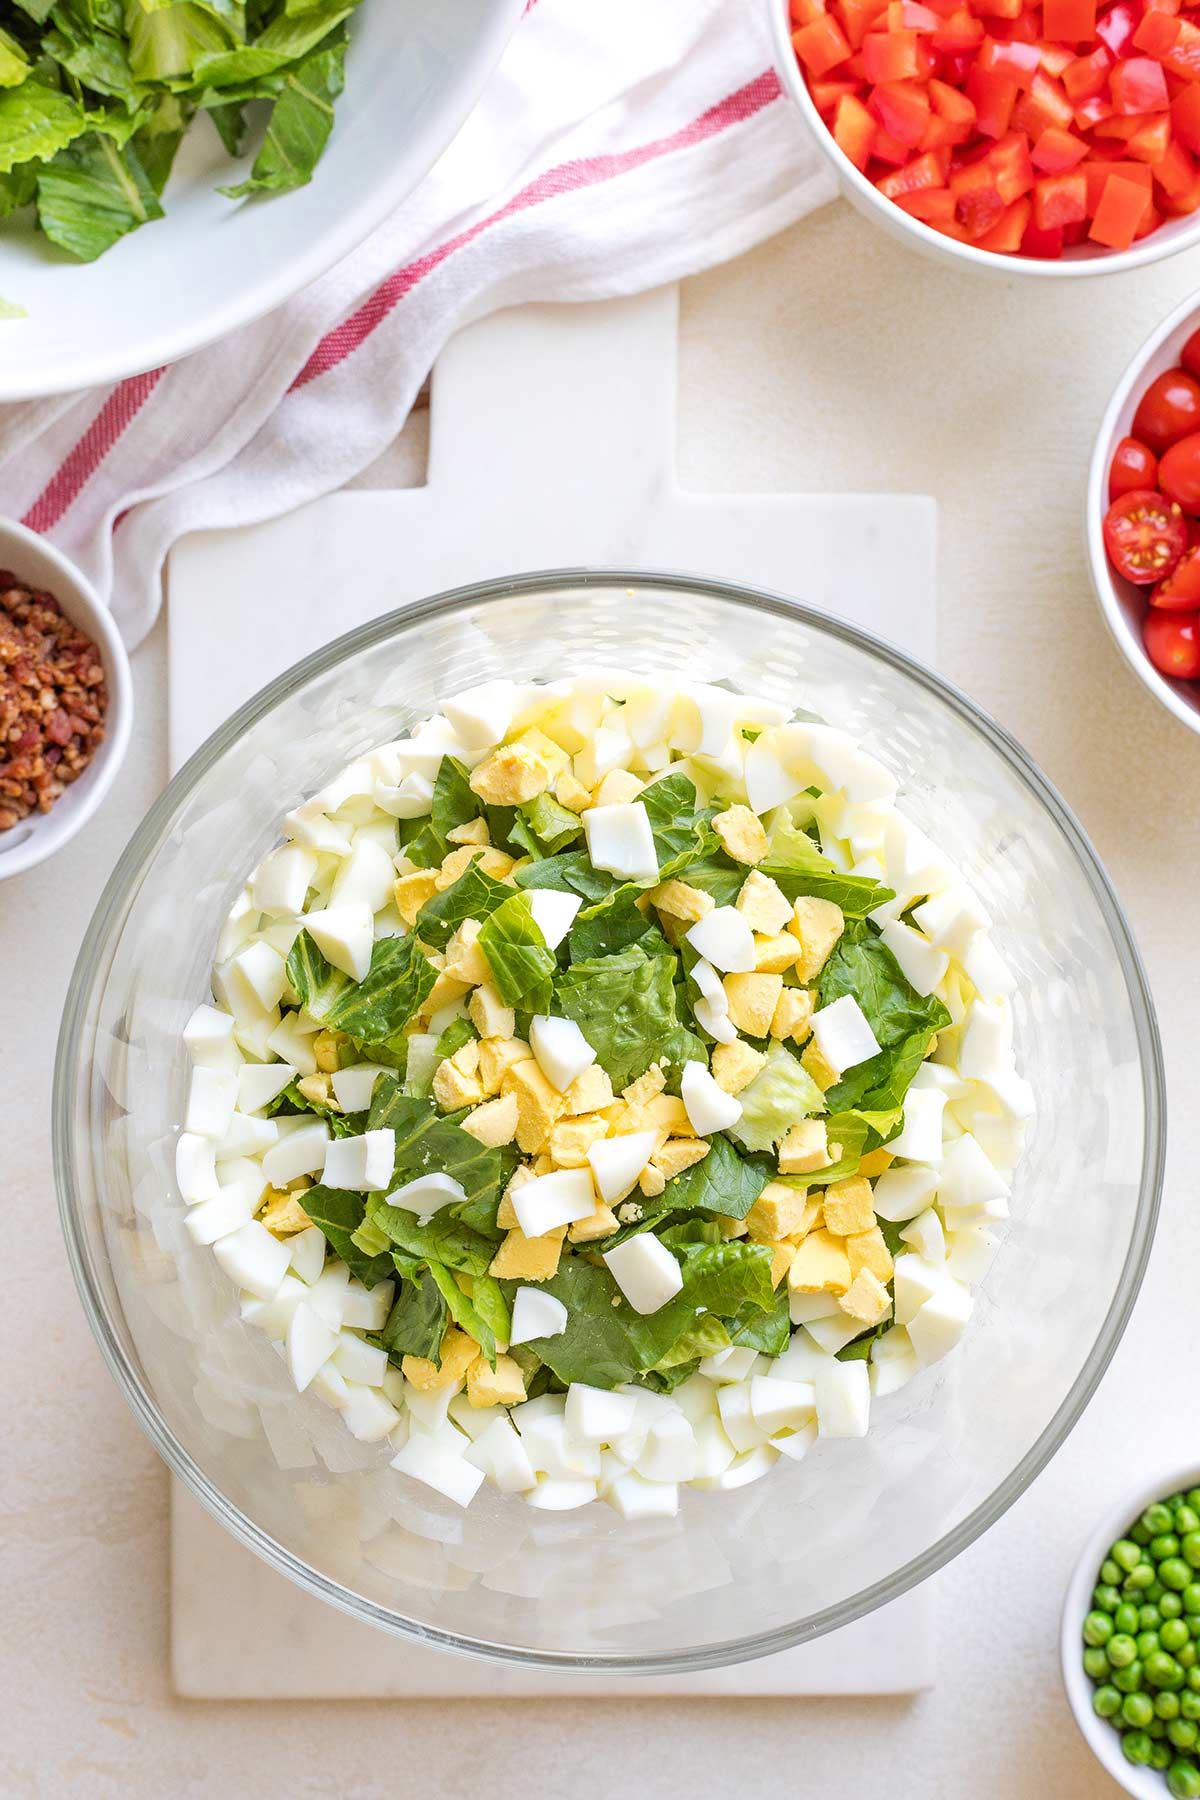
To do that, you want to make sure only the white parts of the egg are scattered against the glass. The yellow yolks should be kept slightly further back, toward the middle of the bowl, so they aren’t visible.
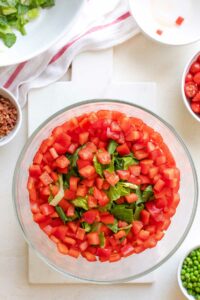
Layer #3: Red Bell Peppers
As you build your red pepper layer, I recommend that you press the skin of the red pepper chunks against the glass, as much as possible. Since the skin tends to be more vibrantly red than the inner flesh of the pepper, having the skin pressed against the glass looks prettier.
Then scatter more pepper pieces in toward the center.
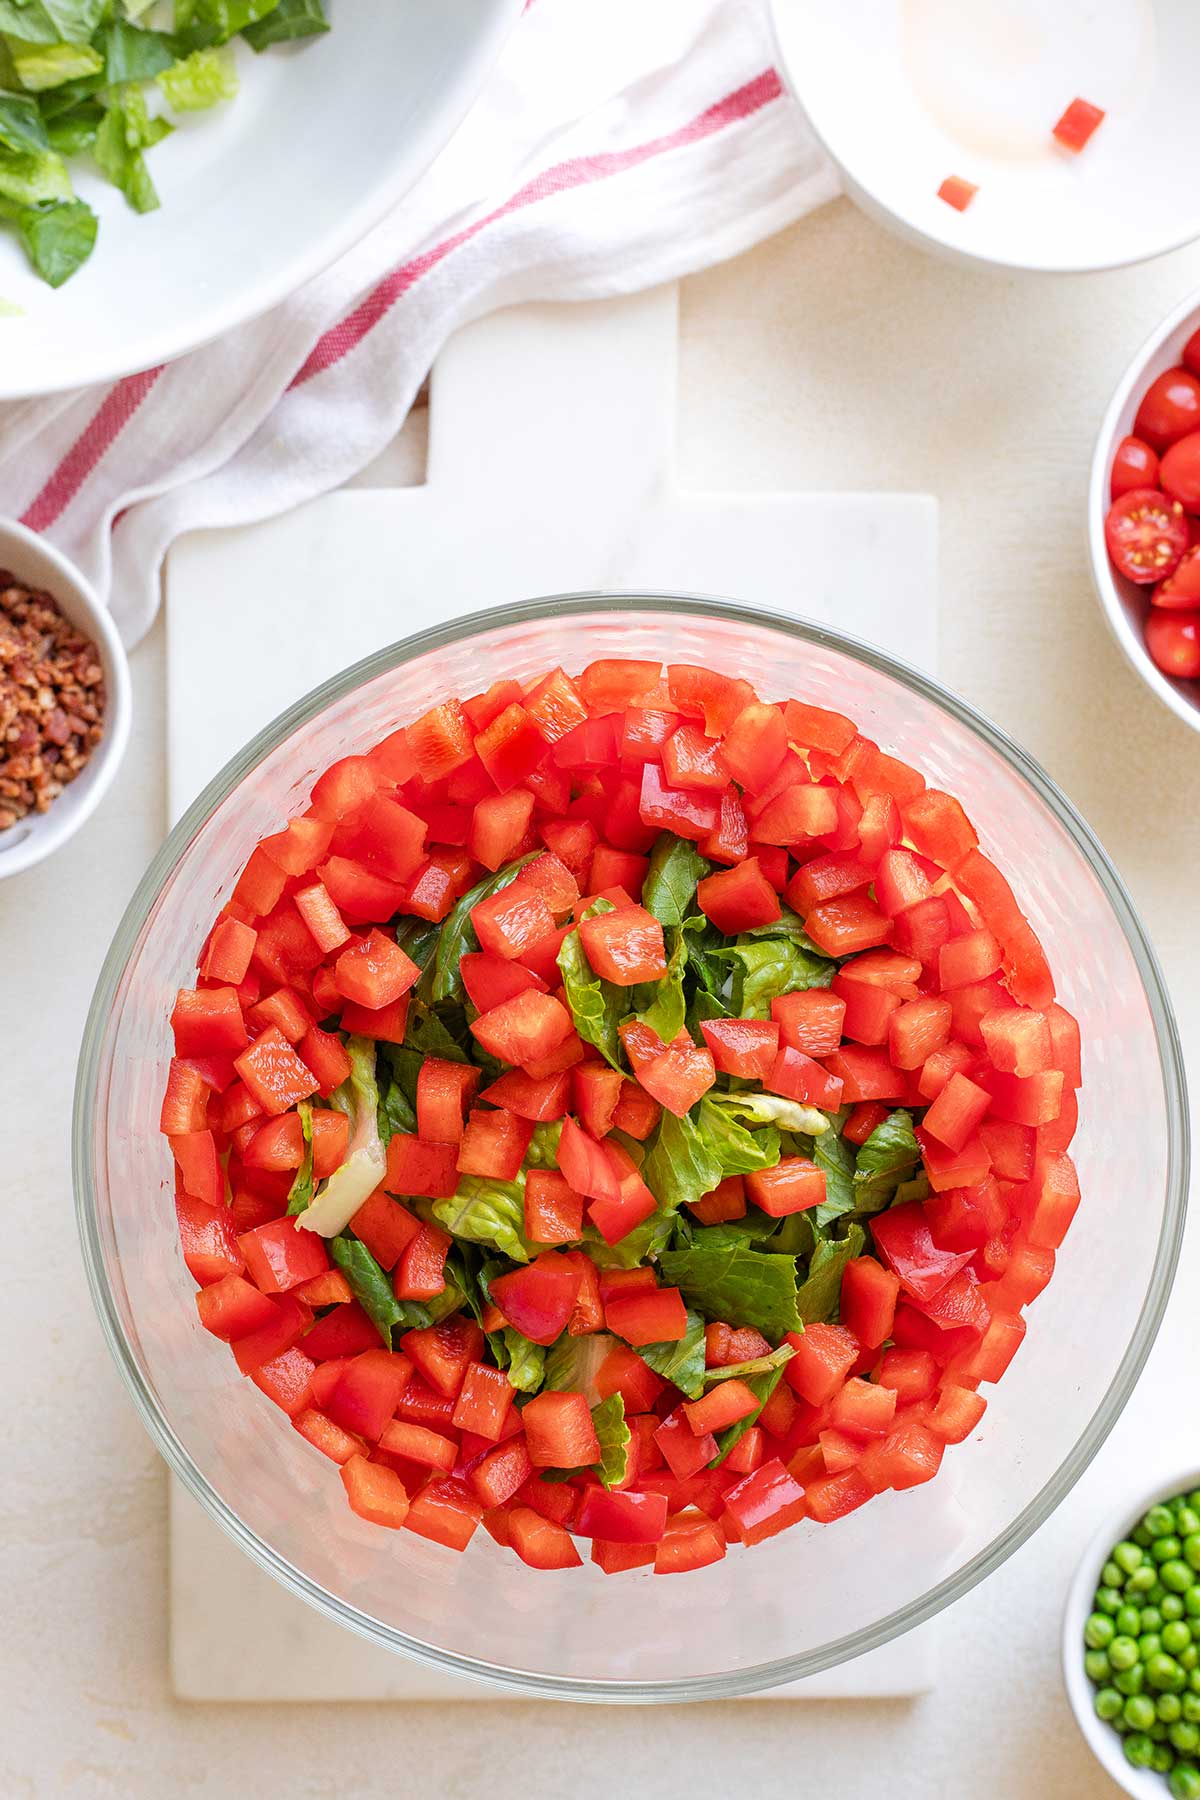
And remember, you can fill in the center with a little extra romaine lettuce as you’re building, to keep the layers flat and even.
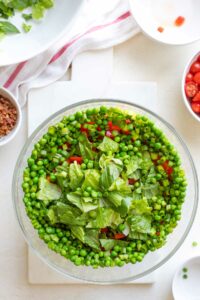
Layer #4: Green Onions and Peas
Next, you’re going to scatter your peas and green onions on top of the red pepper layer.
Make sure to pile the onions and peas high enough against the glass to form a nice, visible layer.
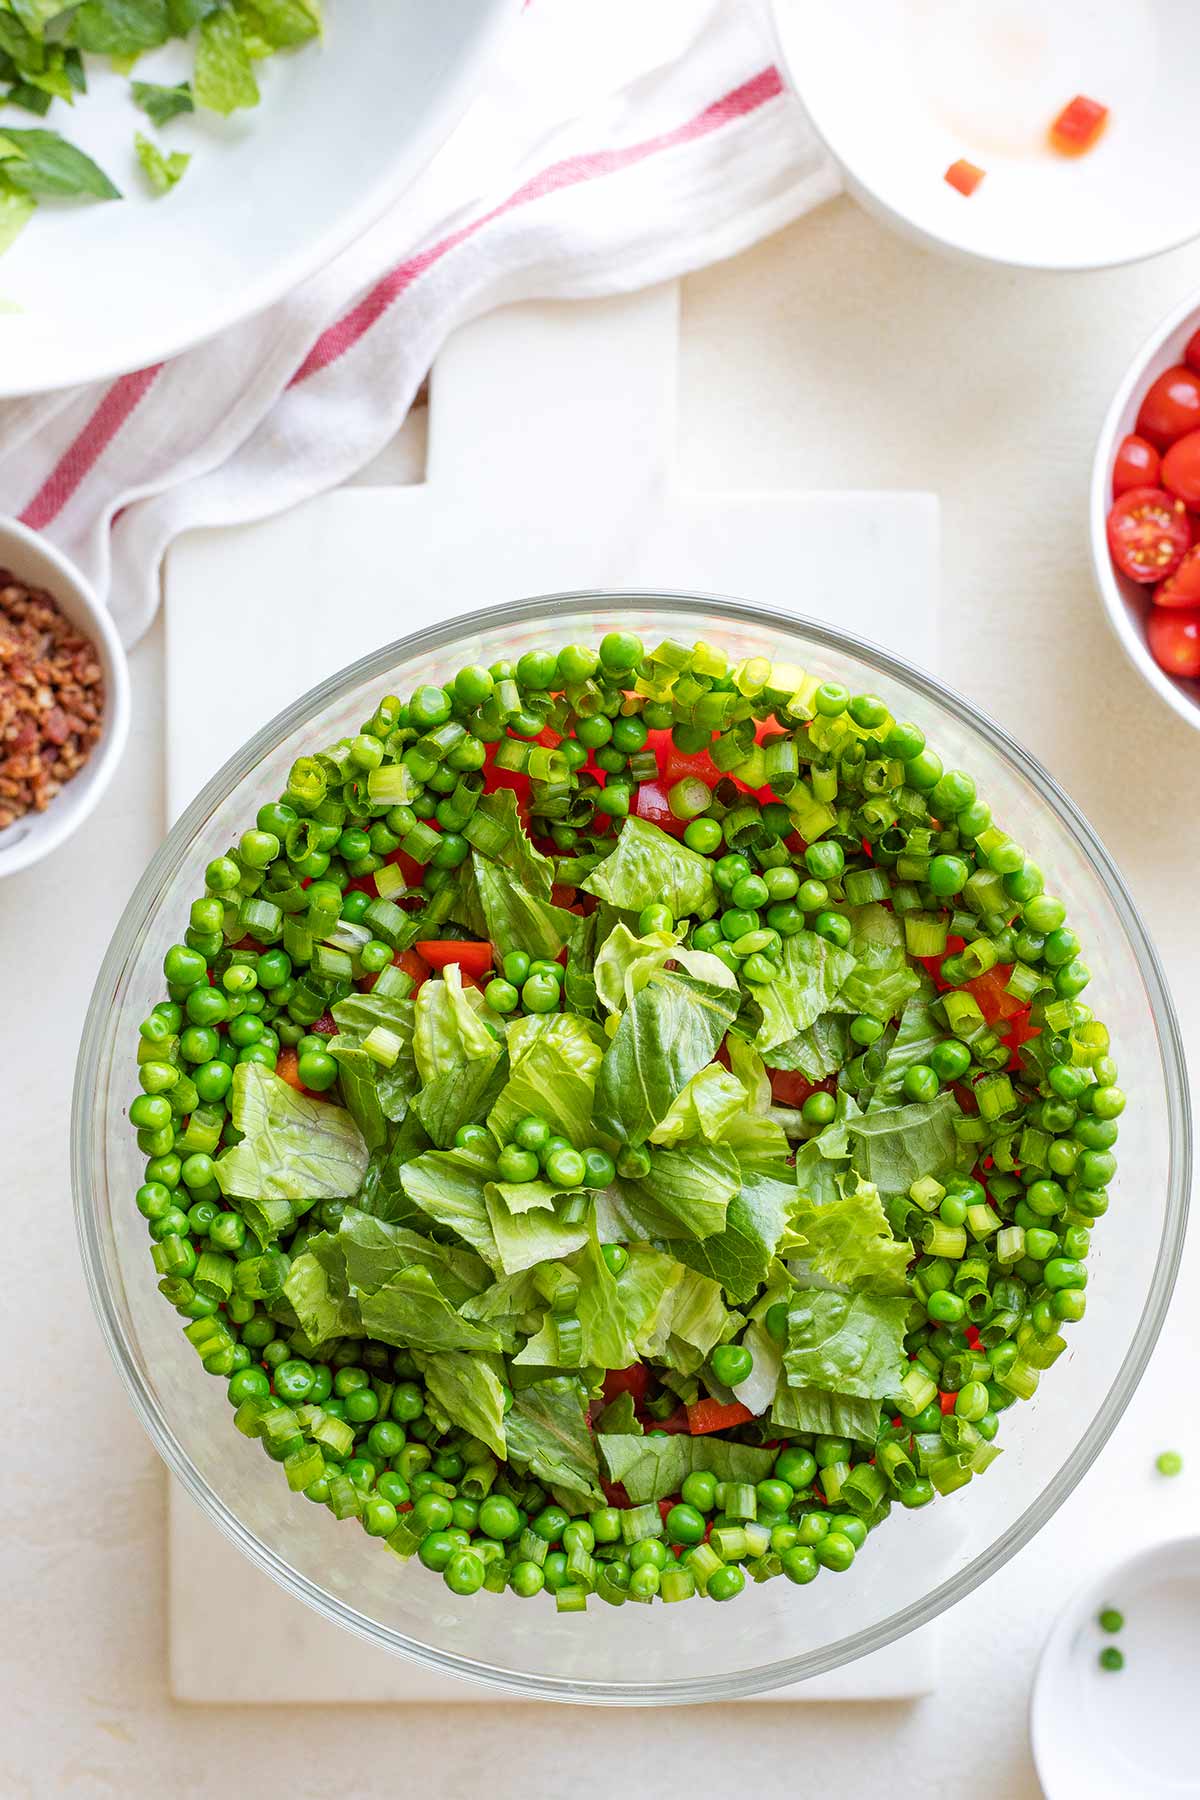
For this layer, probably more than any other, most of the veggies will end up nearer to the glass. But that’s ok, because a little extra romaine scattered in the center will even everything out perfectly in this layer.
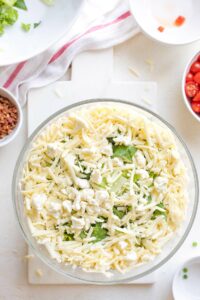
Layer #5: White Cheddar Cheese and Cauliflower
A couple of tips here: I typically use sharp white cheddar for extra flavor.
And, when I can find it, I prefer to use a reduced-fat white cheddar, but it’s not available in some stores.
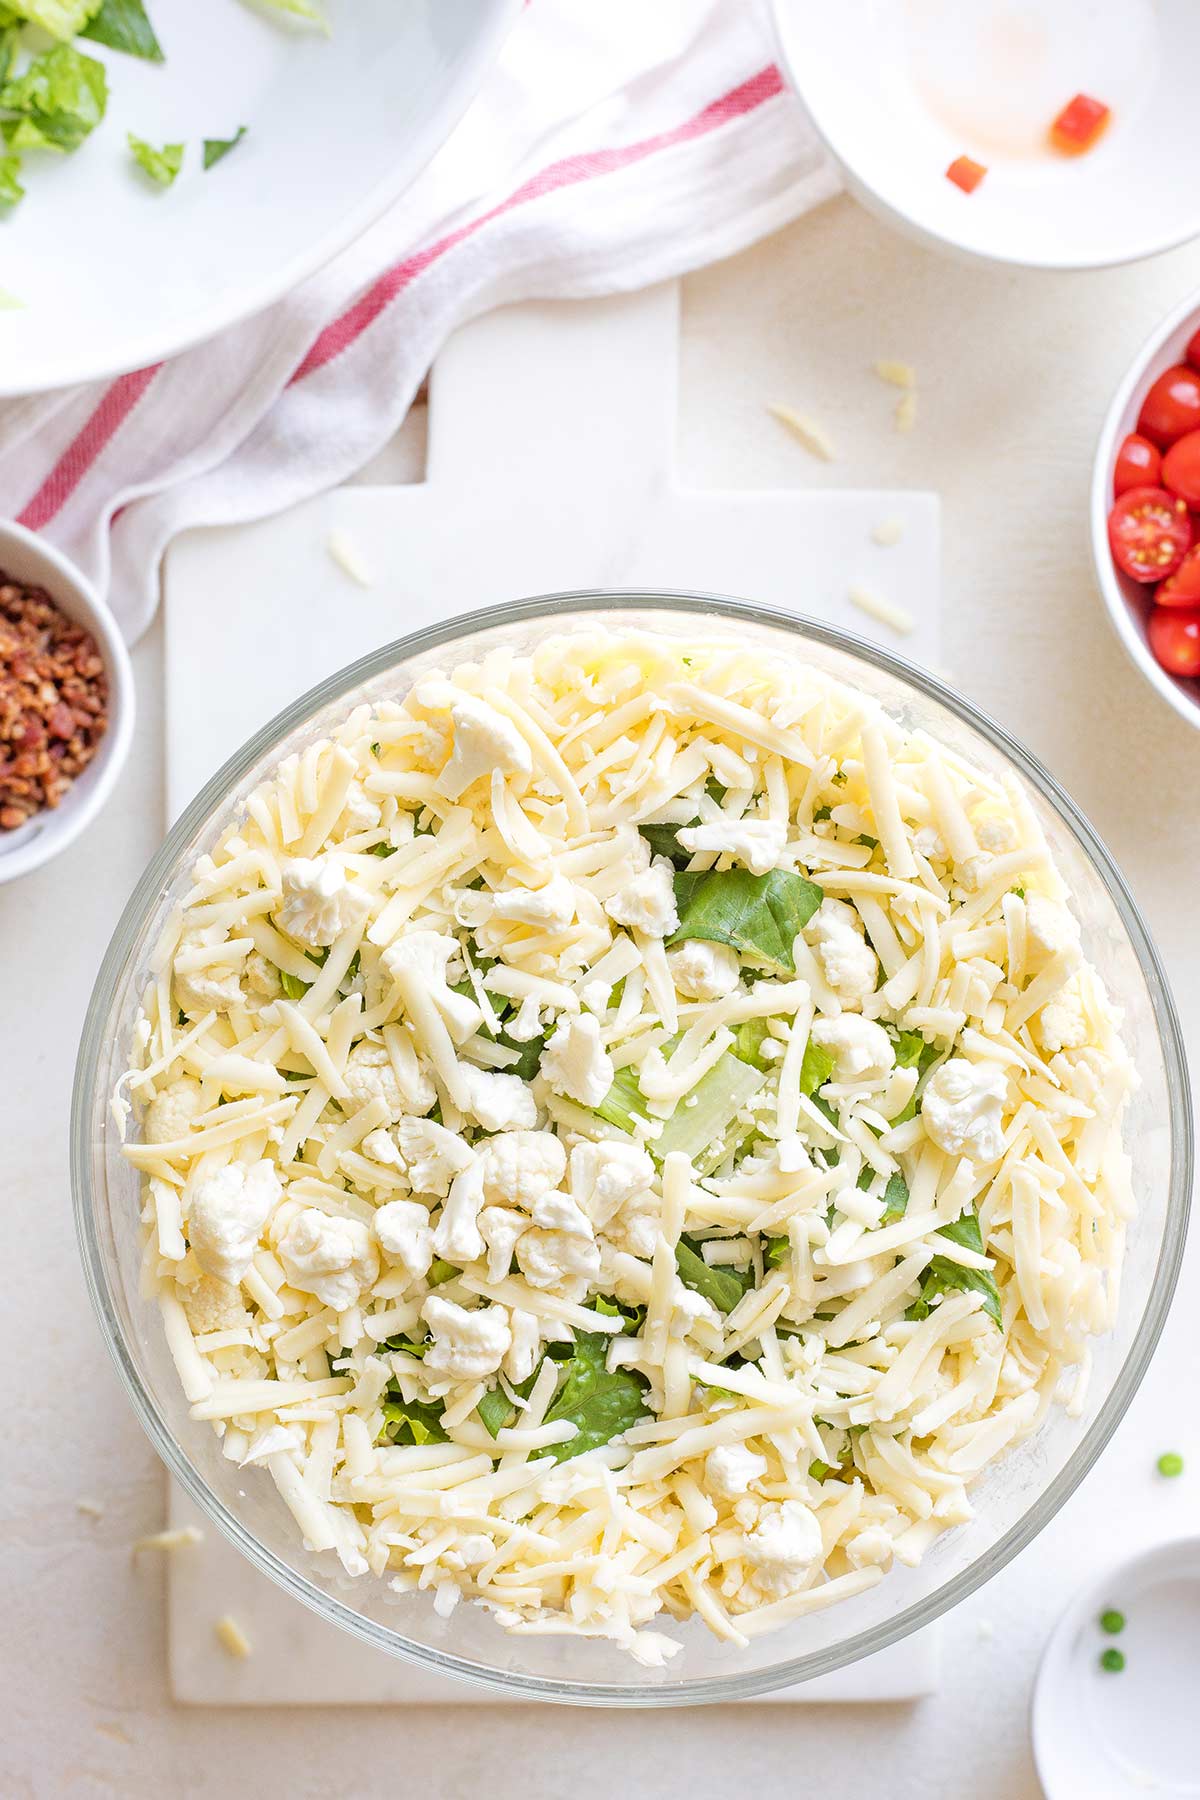
Also, a key here is the size of the cauliflower. I suggest using very small florets, so they’re more similar in size to other ingredients like the small peas, and don’t overwhelm the rest of the salad.
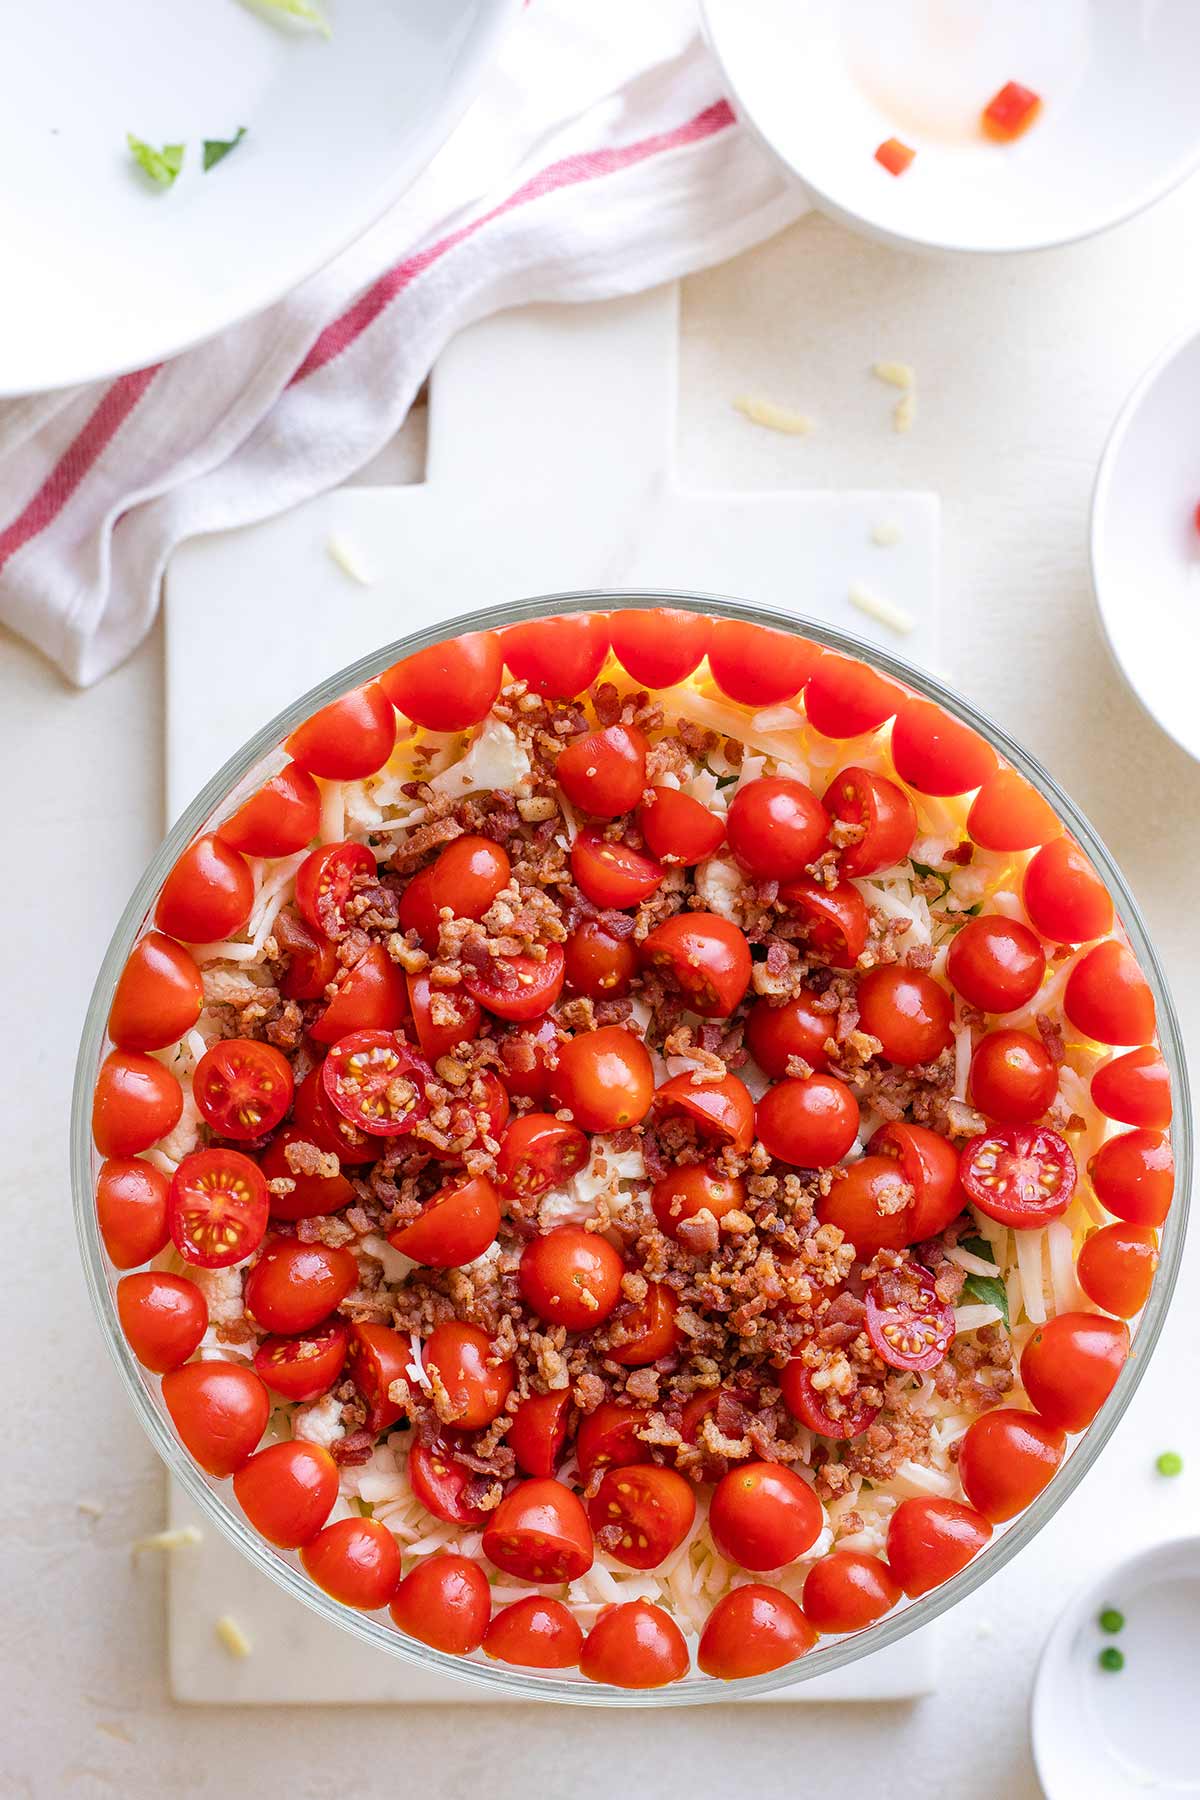
Layer #6: Red Tomatoes (and BACON!)
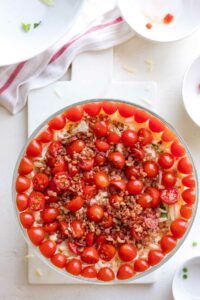
To make this layer really impactful, I like to press the cut sides of the tomatoes flat against the side of the glass bowl, forming a single row all the way around the bowl.
So pretty, right?!?
The rest of the halved tomatoes, as well as the bacon, get scattered in the center.
Ideally, the tomatoes you pressed against the glass sides will stick up a little higher than the rest of this layer, creating a “dam” all around the edge of the bowl.
That “tomato dam” will help to contain the dressing you’re going to add in the next step, and prevent the dressing from dripping down the inside of the glass bowl and making your gorgeous layers look untidy.
Tips on the Bacon
• Shortcut – While you can certainly cook and crumble your own bacon, I always save time by grabbing a packet of real crumbled bacon (not Bac-Os!!), which you can usually find in the salad dressing aisle. I like Hormel 40% less fat Real Crumbled Bacon.
• Cooking Your Own – If you do want to cook your own, though, I recommend buying an organic or nitrate-free brand, and choosing lower-fat center-cut bacon. You could even go with lower-fat turkey bacon to keep things lean.
• Gluten Free Options – If you’re watching gluten intake, note that the bacon is the main thing in the recipe that could be a problem, depending on the brand/product you buy. While most raw bacon should be gluten free, you should definitely check the packaging to be sure. And be aware that pre-cooked real bacon crumbles may have additives that contain gluten.
Making This Salad Vegetarian
It’s easy to create a vegetarian version of this salad by simply leaving out the bacon!
Alternately, of course, you could choose a plant-based bacon substitute.
If you’ll be serving this potluck salad to a mixed group, you could also opt to offer a dish of crumbled bacon on the side, for those “carnivores” who wish to add it.
Layer #7: White Dressing
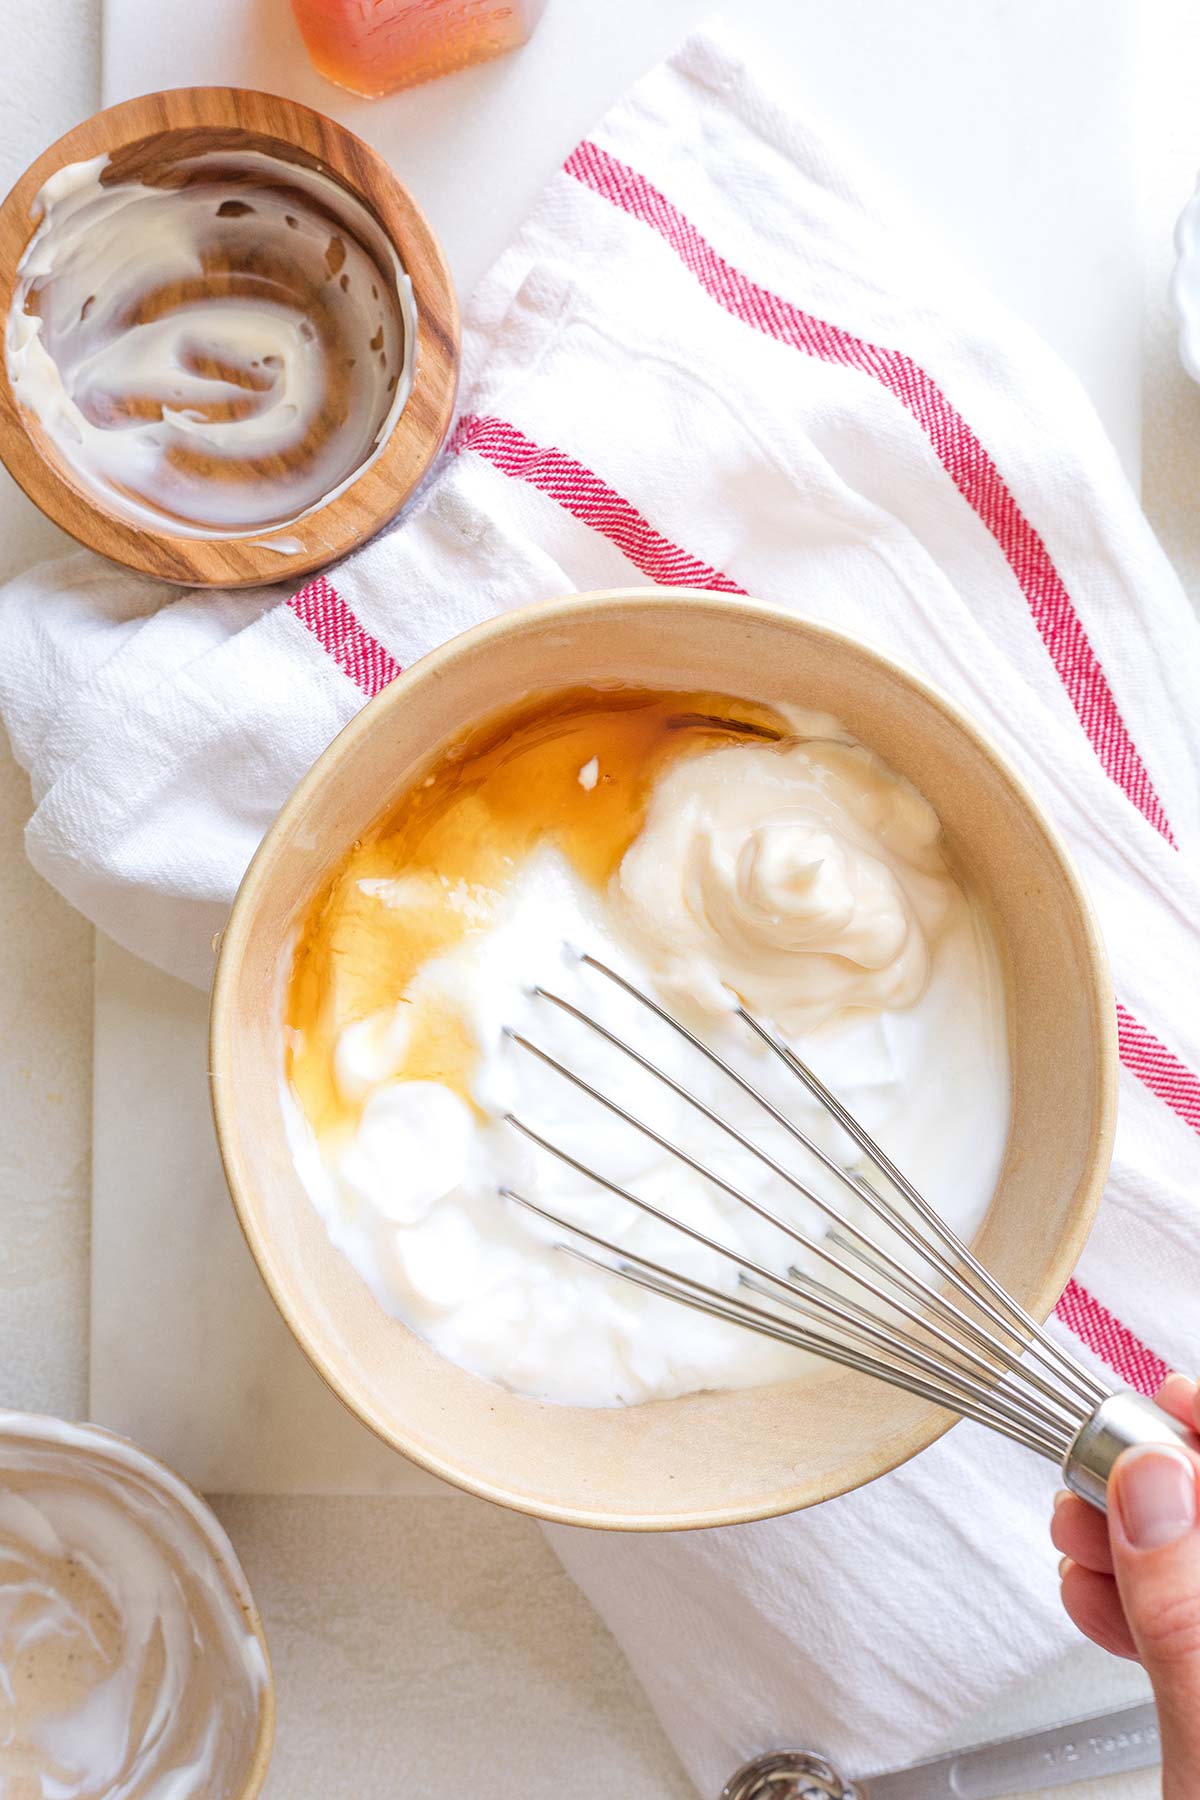
To make your dressing, grab a bowl and whisk together your Greek yogurt, mayonnaise, apple cider vinegar, honey, and kosher salt.
You want it all to be thoroughly, smoothly combined.
YES … 7-Layer Salad Dressing is THICK!
Remember earlier when I explained that classic 7-Layer Salads often just have mayo for the dressing, maybe combined with sour cream, or with some sugar stirred in for sweetness?
So … yeah … we’re talking about a THICK dressing here. Not a drippy ranch dressing poured from a bottle or a slippery, liquidy vinaigrette.
It’s meant to form a thick layer, spread across your salad. Not dripping all down through it to ruin the appearance of the pretty layers you’ve built.
After people scoop salad onto their plates, they typically wanna toss it all around a bit. That not only distributes the thick dressing, but also mixes all the different toppings together.
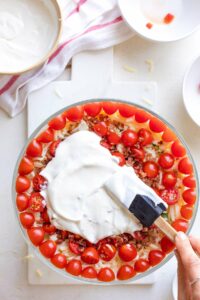
Spread your dressing across the top of the salad, trying to even out any bumps or lumps from the layer below.
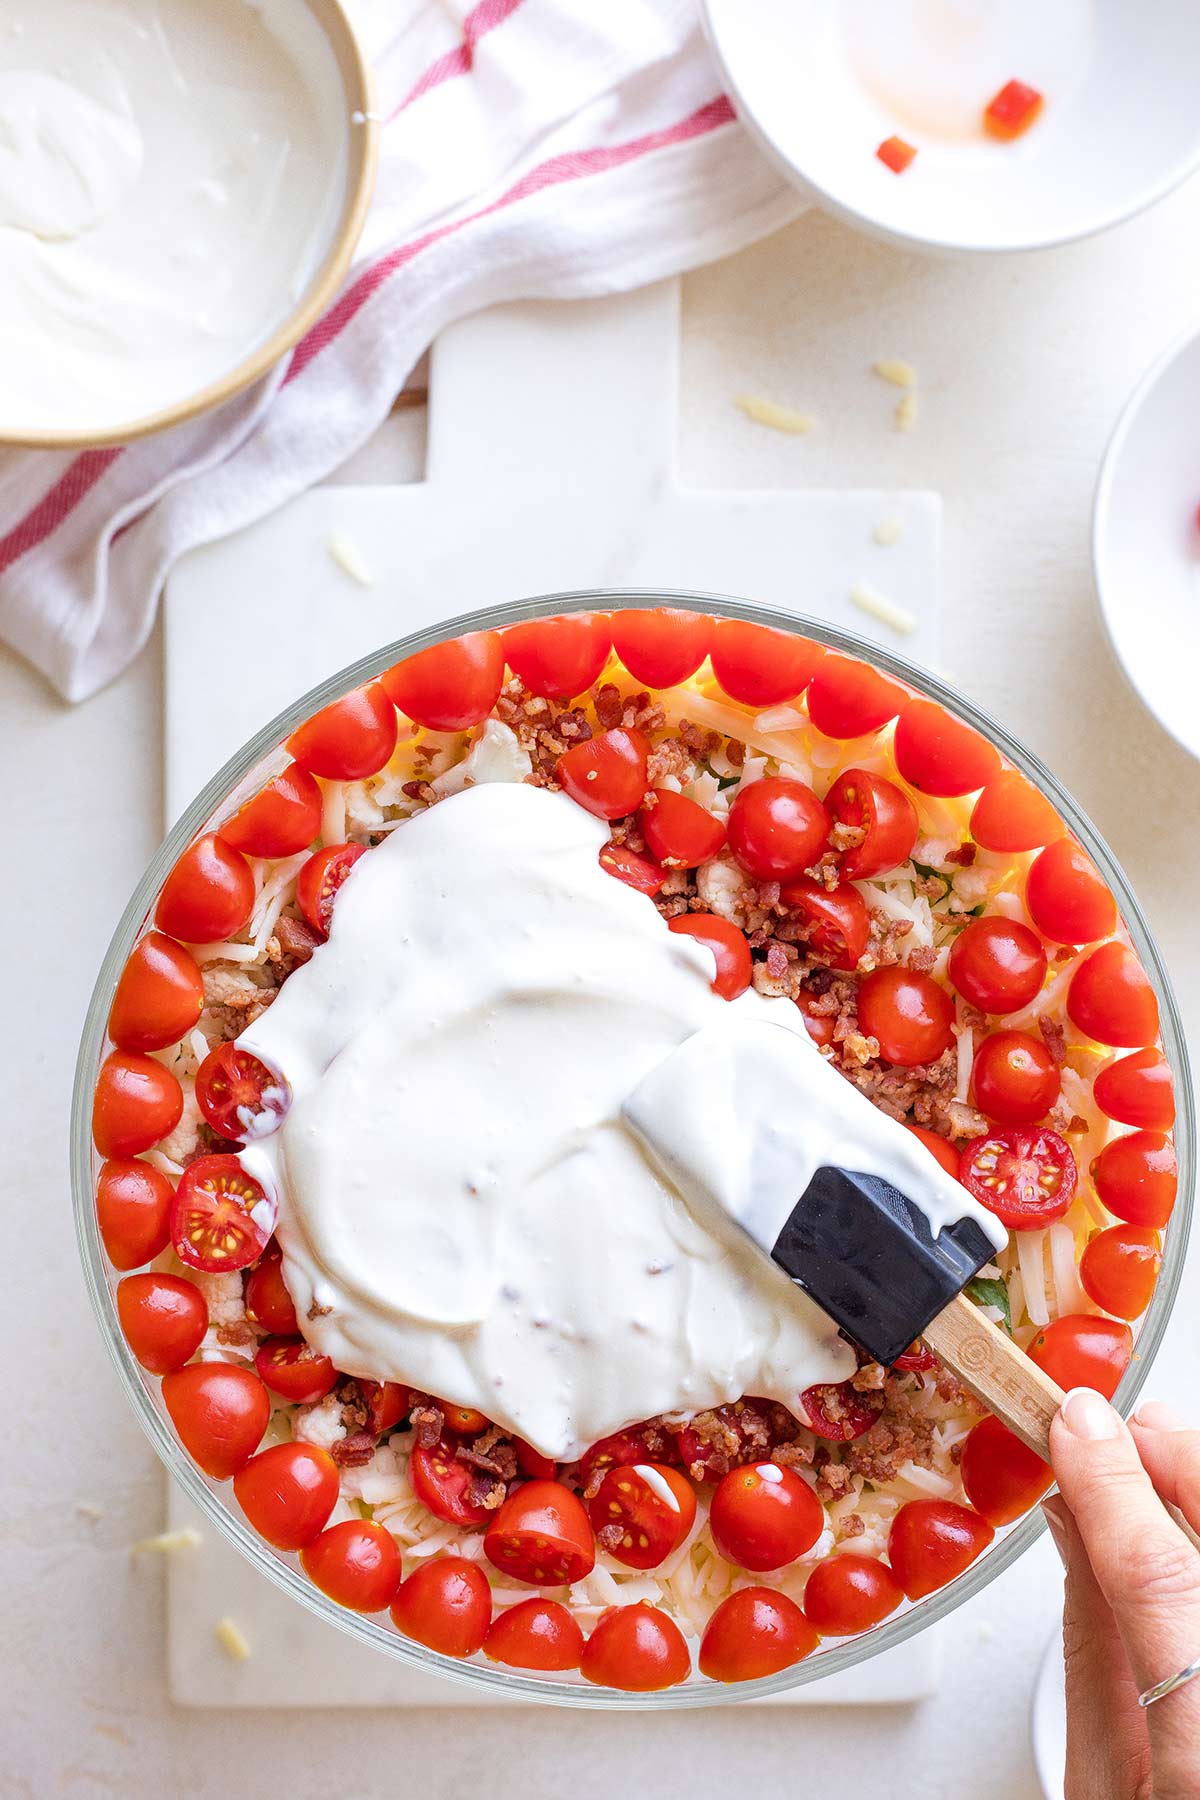
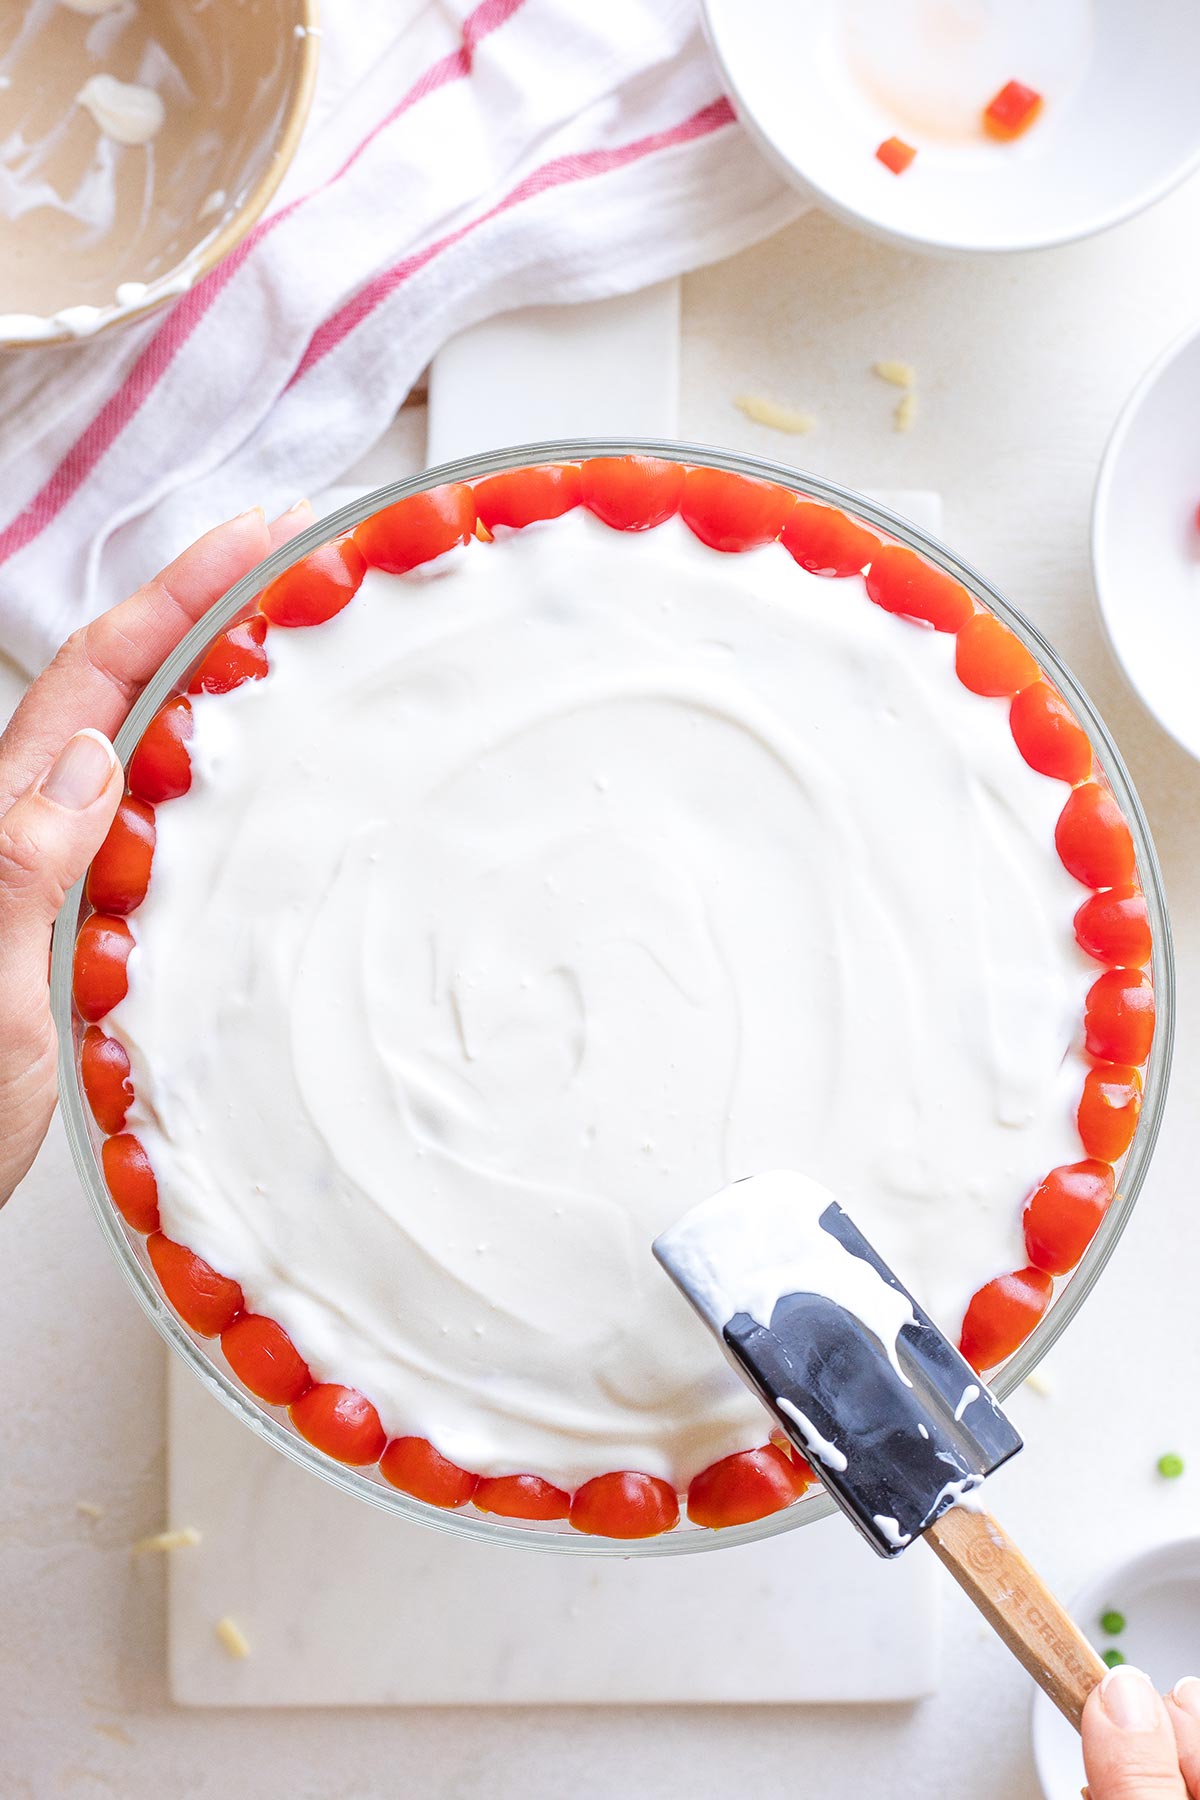
Push the dressing against that “tomato dam” you created around the edge in Step #6, but don’t spread it all the way to the glass.
That will help to ensure that your dressing won’t get too near the glass and start to slide down the inside of the bowl.
Decorating Your Gorgeous Layered Masterpiece
You can decorate the top of your salad any way you please, but here’s what I like to do …
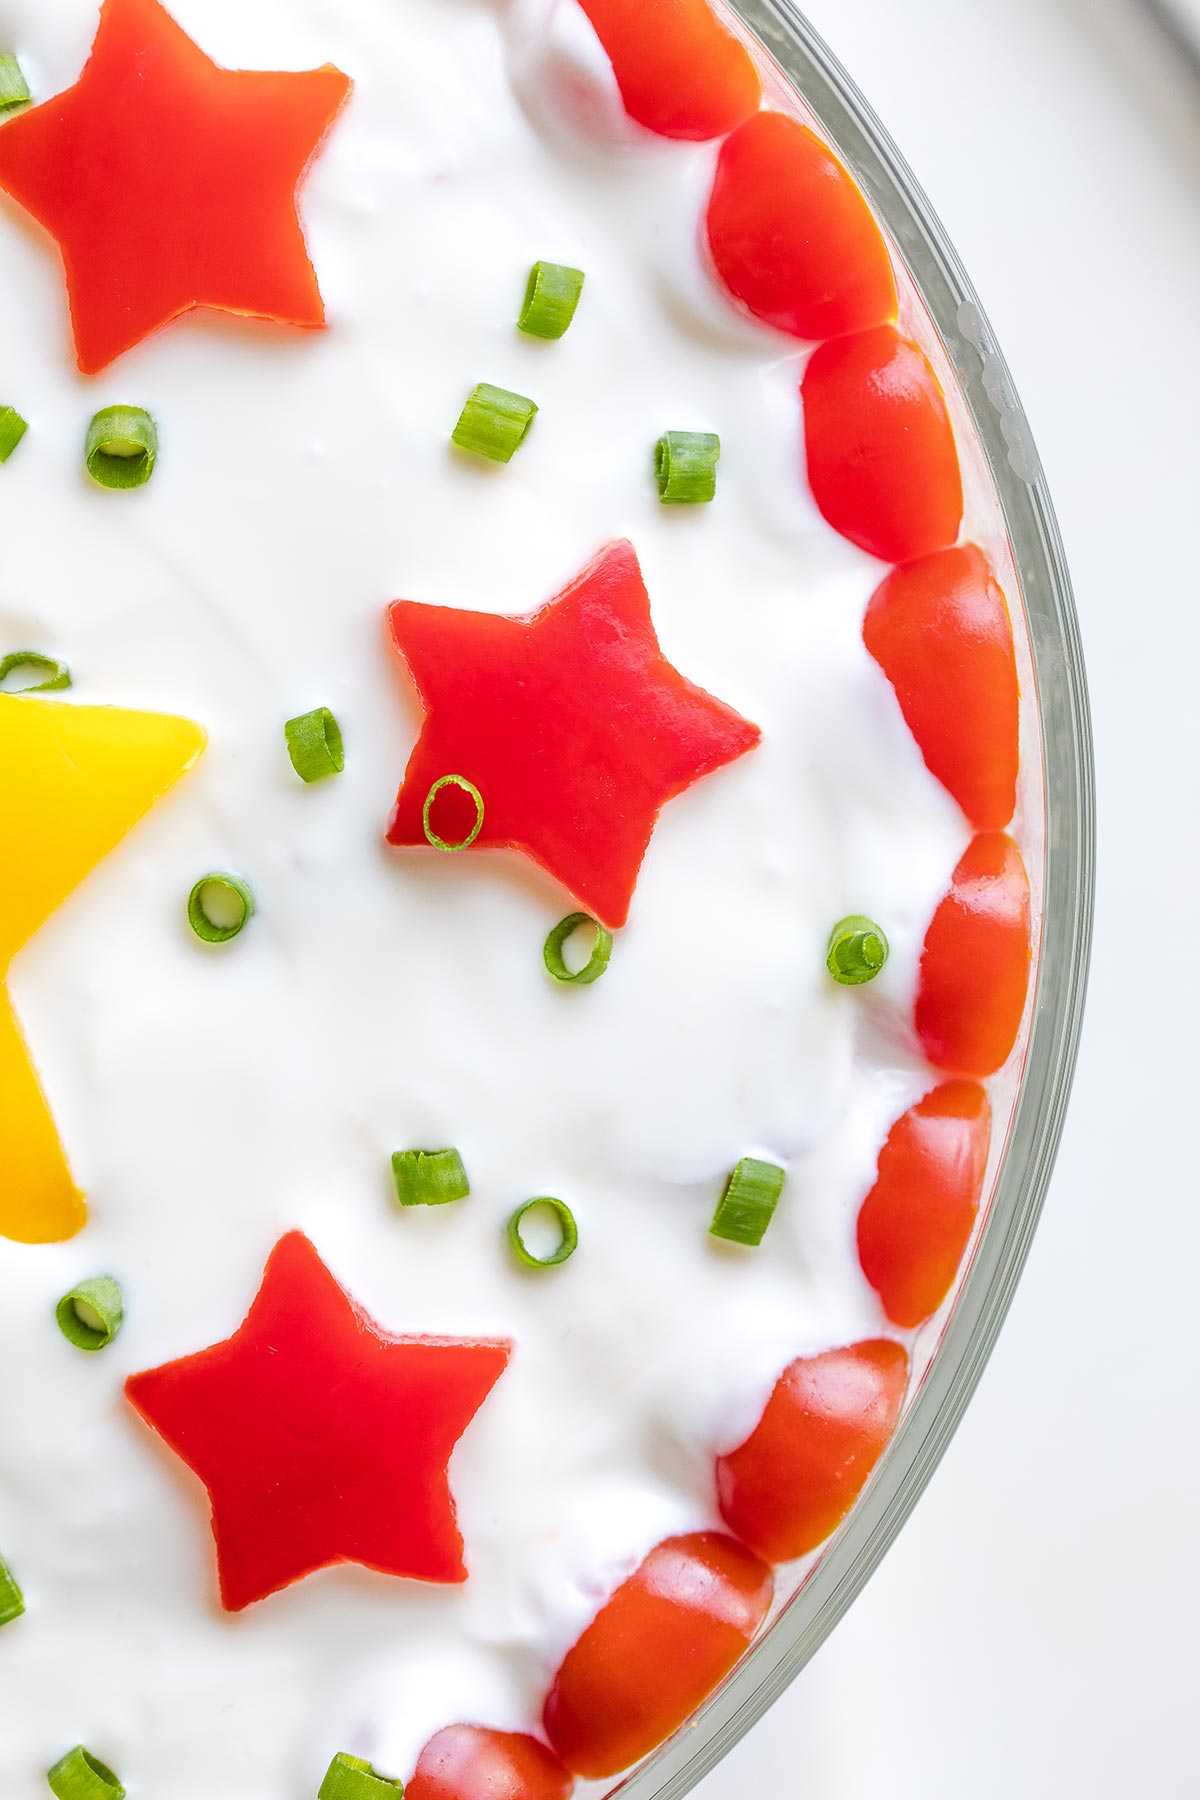
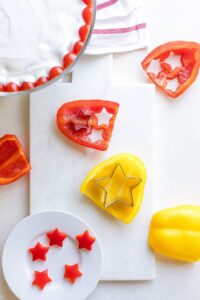
Grab a couple of bell peppers, and slice off the sides to create flat planks. I chose red and yellow peppers for my photos, but you could use green, too.
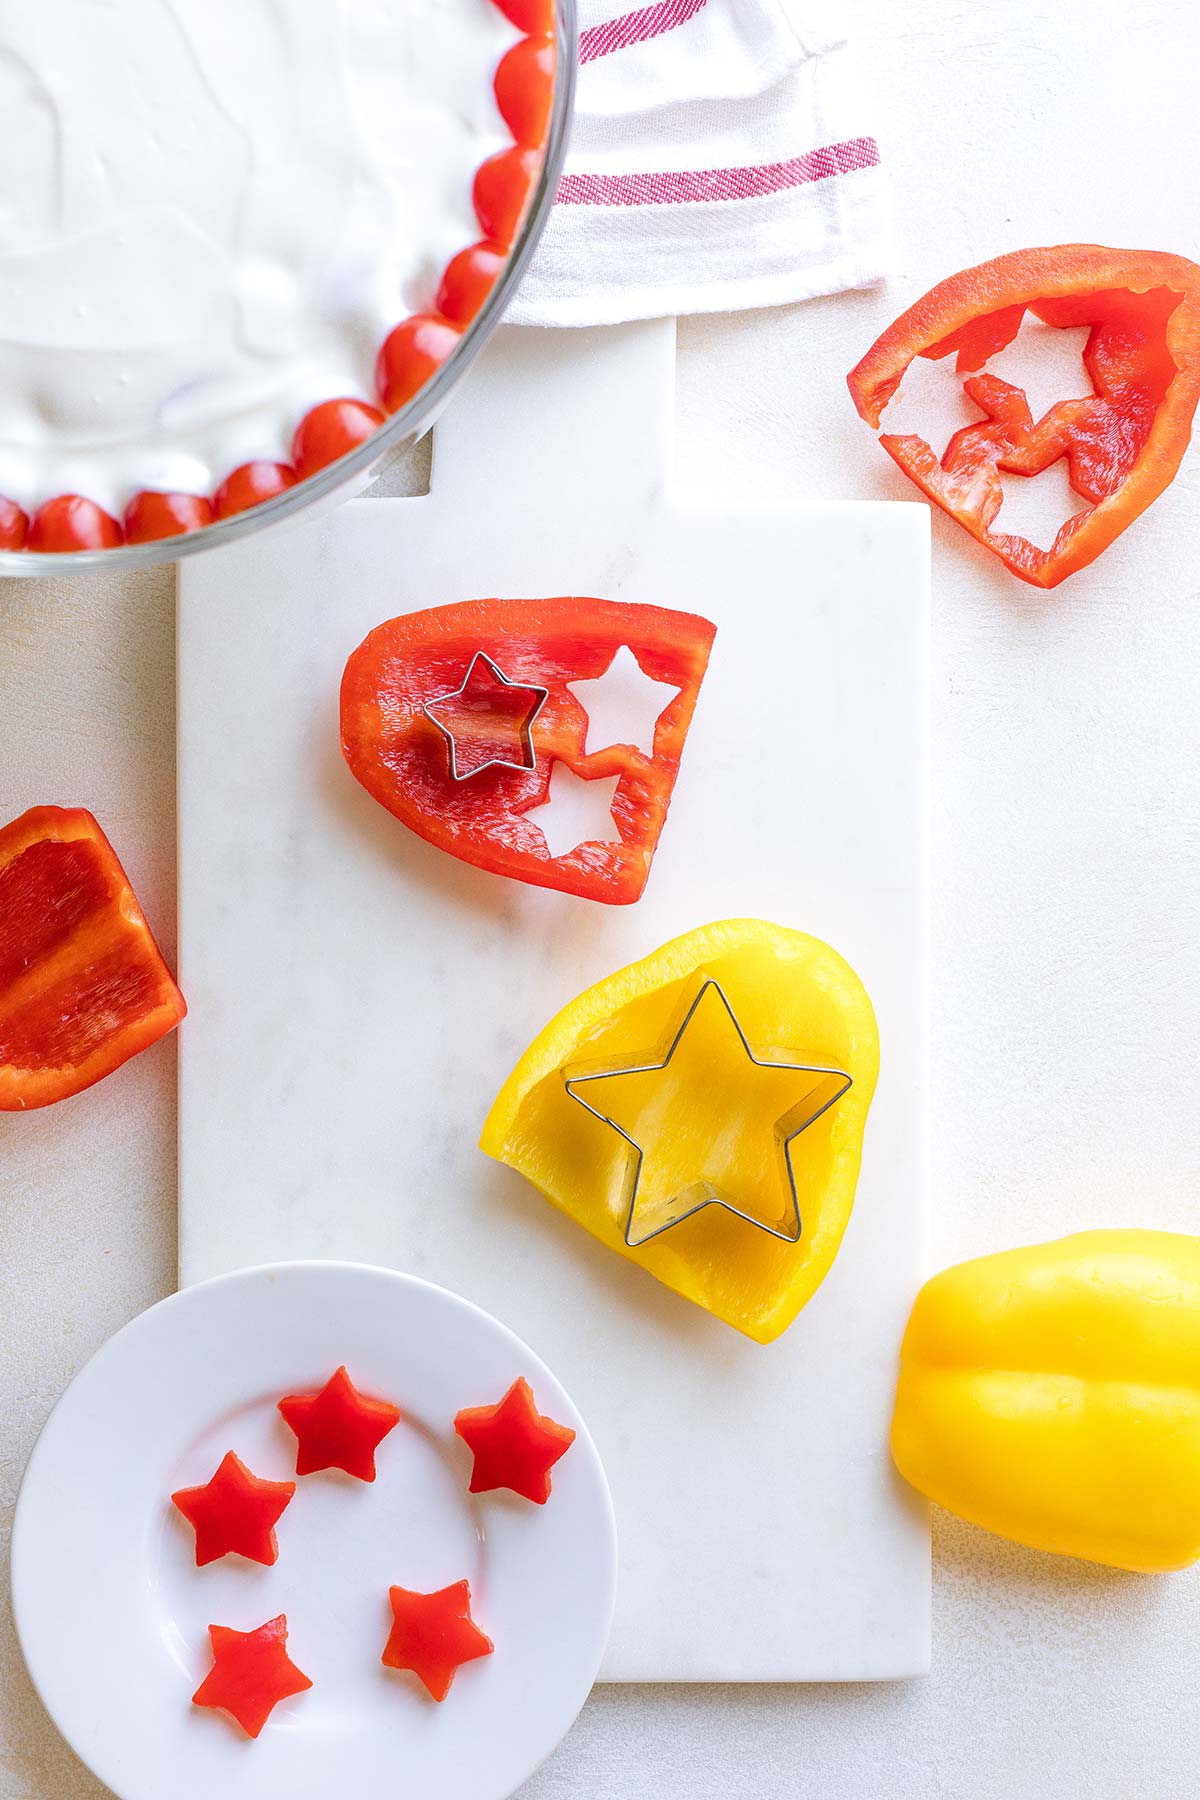
Then, I grab a couple sizes of star-shaped cookie cutters, and cut stars out of the pepper planks.
It’s the same technique I use in creating a pepper “bow” to garnish my Hummus Wreath Christmas Appetizer.
Sharp metal cookie cutters work best (not flimsy plastic ones). And I find that it’s most effective to lay the pepper planks skin-side down.
Arrange your pretty “pepper stars” any way you like.
And maybe scatter a few thin slices of green onion around, too.
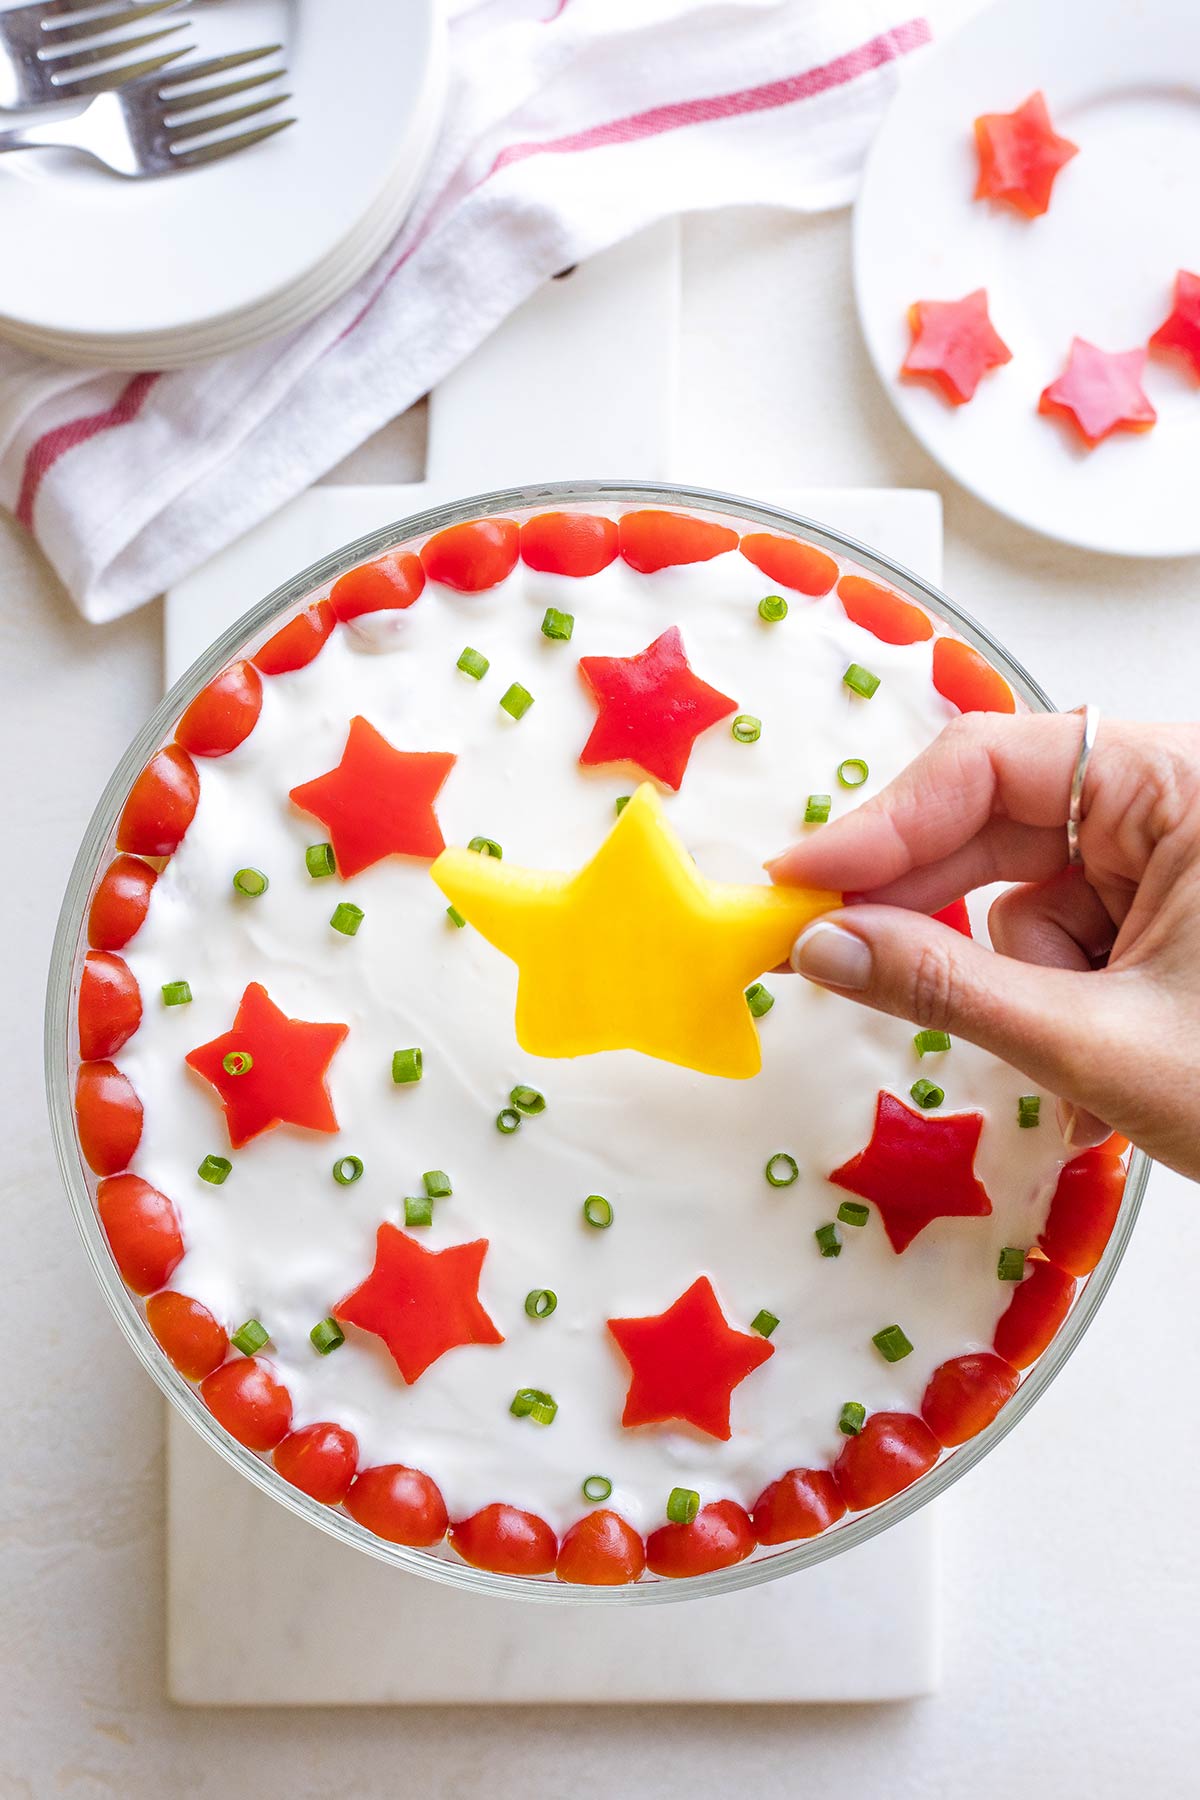
Fast, easy, and adorable!
How to Serve Your Seven-Layer Potluck Salad
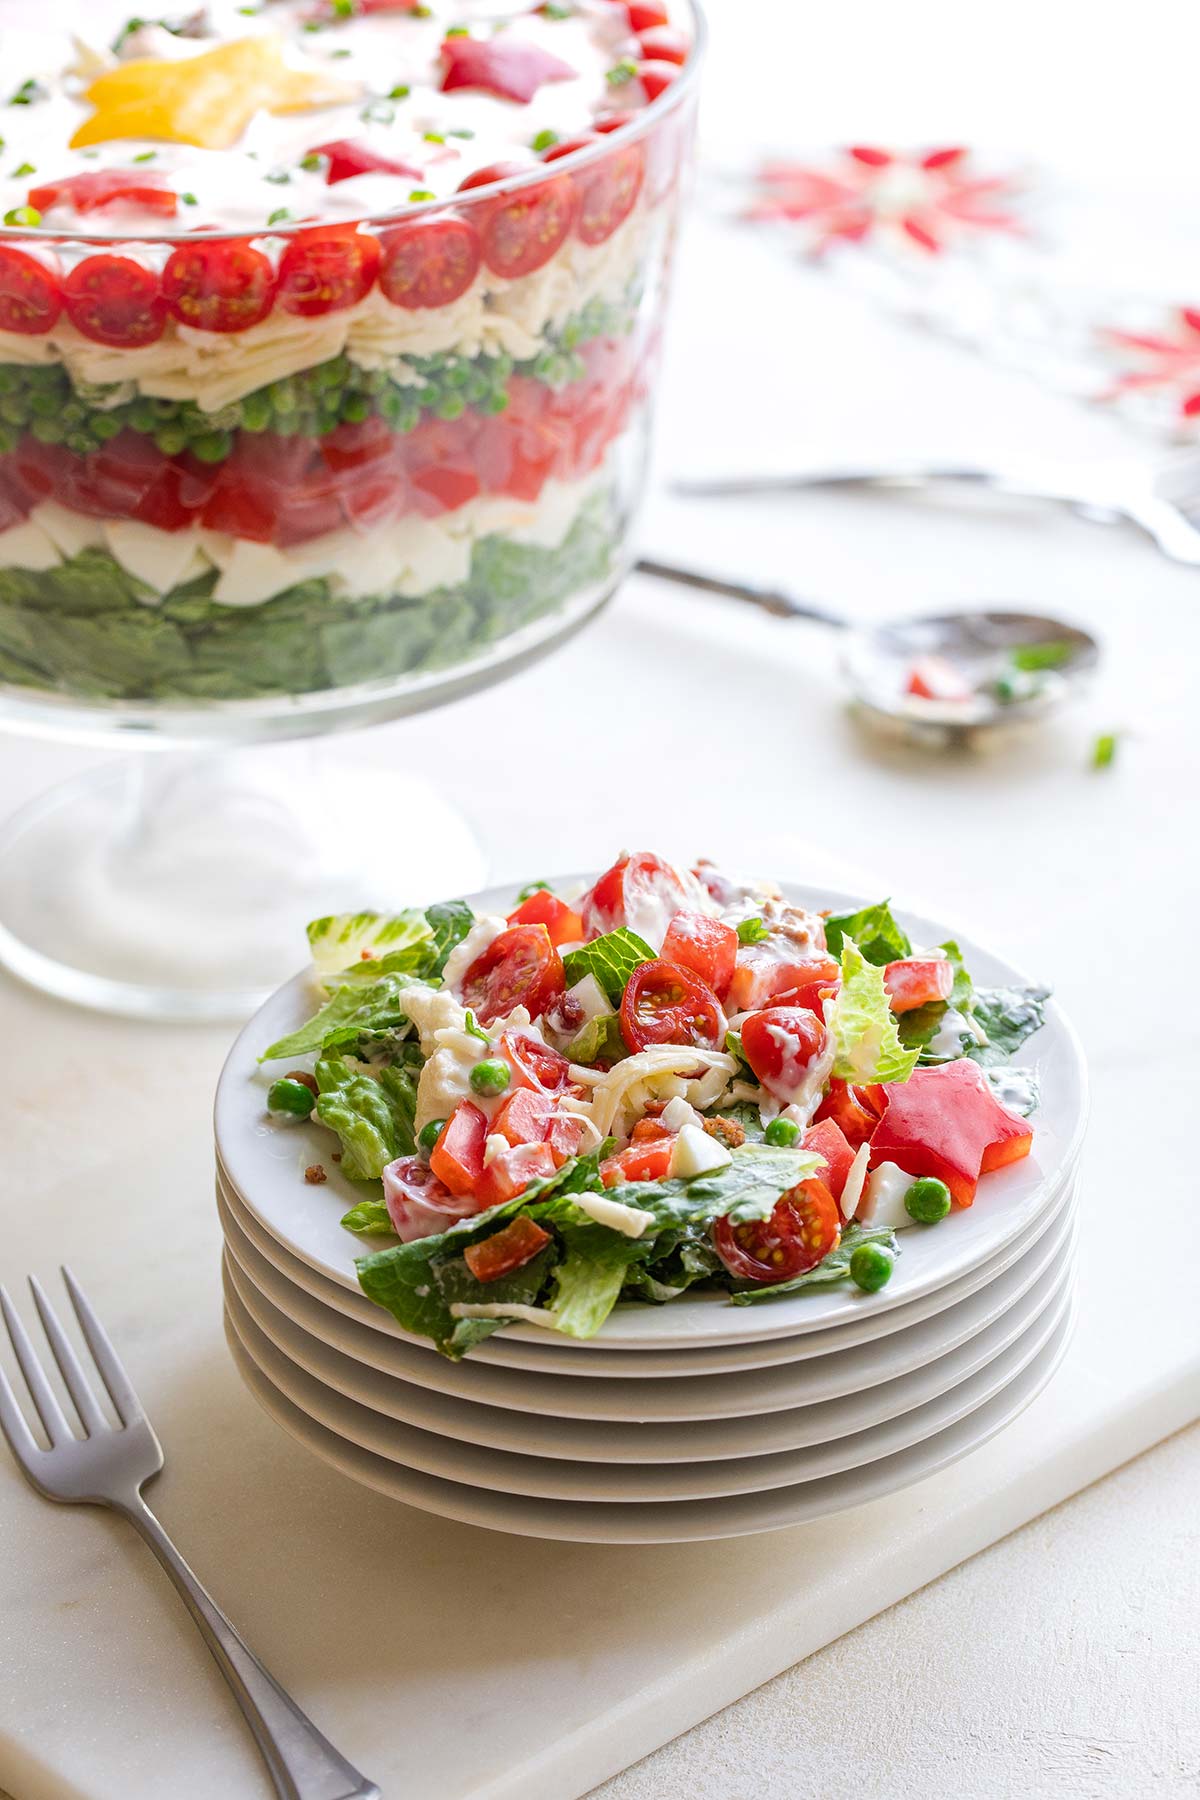
The key to serving this salad is to be sure your party guests get a taste of every single layer.
The best way to do that is with a long-handled serving spoon that can easily scoop all the way to the bottom.
Once plated, 7-Layer Salads usually benefit from a bit of stirring to distribute the thick dressing more evenly through the veggies, and to toss all the salad ingredients around, so you get that great variety of flavors and textures in every single bite.
Making 7-Layer Salads Ahead of Time
Like most 7-Layer Salad recipes, this holiday potluck version can be made up to 1 day in advance. Just pop it in the fridge until you’re ready to serve it.
Salads like this may tend to compress a little bit if they aren’t served right away. But don’t worry! It will still look pretty. (And you know LOVE recipes that can be made ahead of time, especially during the rush-rush-rush of the holidays!)
So, if you’ve been invited to a Christmas potluck party, and you’re searching for a unique stunner that’s sure to impress … this salad is definitely it! (Pssssst … need a potluck-appropriate holiday appetizer, too? Check out our collection of 50 Christmas Potluck Appetizers for heaps of inspiration!)
Since 7-Layer Salads have become so iconic, showing up at potlucks since at least the 1950s … well, you know they’ve got crowd appeal. And with the pretty Christmas-colored stripes, this holiday version is so very perfect for the season!
Turn on some Christmas music and throw this together over a few FaLaLas … and have a very, very merry Christmas!

~ by Shelley
Love the Recipe? • Were My Tips Helpful?
__________
Please leave a 5-star rating by clicking on the stars in the recipe card below. I truly appreciate all your wonderful feedback!
7-Layer Christmas Potluck Salad
Ingredients
- 10-12 cups chopped romaine lettuce (to make this look "Christmas-y" I like to use the darker green parts only, reserving white parts for another use)
- 6 hard-cooked eggs
- 1¾ cup chopped red bell pepper
- ¾ cup frozen green peas, thawed
- ⅓ cup sliced green onions (green parts only)
- 6 ounces sharp white cheddar cheese, shredded (to equal about 2¼ cups) (preferably reduced-fat, if you can find it)
- 1 cup very small cauliflower florets
- 1¾ cups halved grape or cherry tomatoes
- ¼-½ cup crumbled bacon or real bacon bits {NOT Bac-Os} (see note) (omit bacon for vegetarian version)
- 1¼ cups nonfat plain Greek yogurt
- ¼ cup mayonnaise (preferably lower-fat, olive oil-based)
- 2 teaspoons apple cider vinegar
- 2 teaspoons honey
- ½ teaspoon kosher salt
- options for decorating: red and yellow bell peppers + extra sliced green onions
Instructions
- Layer 1: In a clear, glass trifle bowl (ours is about 8" across and 4½" tall), spread about ¾ of the romaine lettuce in an even layer. As you build the remaining layers, continue adding a little more romaine as you go, to help fill in the center and even out each layer as needed (refer to photos in the article above and see note below).

- Layer 2: Spread your hard-cooked eggs so that most of the whites are visible at the edges of the salad, against the glass, and most of the yellow yolks are toward the middle and not visible from the glass side of the bowl. Fill in with a little extra romaine in the center, as needed.

- Layer 3: Spread your red pepper pieces on top of the egg layer. I like to press some of the pretty "skin" sides against the glass (refer to photos above). Fill in with a little extra romaine in the center, as needed.

- Layer 4: Sprinkle the peas and green onions on top of the red peppers, making sure to pile them tall enough against the glass to make a nice layer. Fill in with a little extra romaine in the center, as needed.

- Layer 5: Sprinkle the cheese and cauliflower on top of the pea layer, making sure to pile it higher against the glass. Fill in with a little extra romaine in the center, as needed.

- Layer 6: Press cut sides of tomatoes in a single layer against the glass, as shown in photos. Sprinkle bacon and remaining tomatoes in an even layer. The tomatoes pressed against the glass should stick up higher than the rest of the tomatoes and bacon in this layer. That's ok, because it will actually from a pretty "dam" to contain the dressing you'll spread on top, and to help prevent the dressing from dripping down along the glass.

- Layer 7: For the dressing, in a medium bowl, whisk together yogurt, mayonnaise, vinegar, honey, and salt until thoroughly and smoothly combined. Spread the dressing evenly across the top of the salad, stopping at the "tomato dam" and not pushing the dressing all the way to the glass. (If for some reason [like a smaller trifle bowl], you haven't used all the lettuce, you can opt to use slightly less dressing on top.)

- For decoration, use star-shaped cookie cutters to cut stars out of the flat sides of your red and yellow bell peppers (refer to photo in article above). Decorate the top of your salad with pepper stars and thin slices of green onion, as desired.

- Serve immediately, or cover in plastic and refrigerate up to 1 day before serving. (The salad may settle and compress a little the longer it sits, but still looks pretty.) To serve, offer a long-handled spoon so people can dig to the bottom of the bowl and scoop up some of each layer. As noted in the article above, the dressing for typical 7-Layer Salads is meant to be very thick, so people normally stir it through their portion and toss all the layers together on their plate before eating.

Notes
Nutrition
* Nutrition information should be considered an estimate only, and may vary depending on your choice of ingredients or preparation. No guarantees are made regarding allergies or dietary needs. Always consult a physician or dietician for specific advice and questions.


Looks yummy! I can’t wait to make it!
I hope you’ll love it just as much as we do, Virginia! It’s such a fun, festive HOLIDAY version of those retro layered potluck salads! So pretty for a party! 😀 ~Shelley
Love this! My mother made layer salad often. The original recipe that she started with explained that the thick dressing was used as an air tight seal. The salad should be made ahead and refrigerated. When she served it, the contents would be super crisp! Opposite of what you would think of a made ahead green salad would be!
Hi, Kellye! I’m so happy to hear you loved this! And I really enjoyed the story of your mother’s salad – it’s such fun to celebrate vintage family recipes and the memories they carry along with them! Hope you’re having a wonderful holiday season! ~Shelley