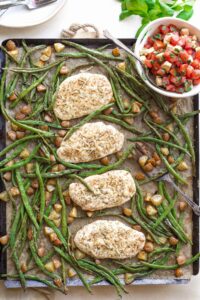
Sheet Pan Chicken and Vegetables (with Italian Caprese Topping)
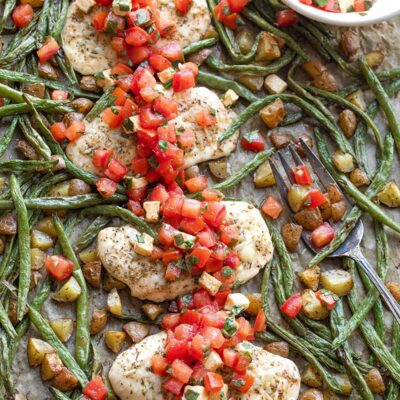
~ This delicious meal-in-one features Iayers of Italian flavors and two cheeses! After baking, drizzle your seasoned sheet pan chicken and vegetables with a flavorful caprese topping full of juicy tomatoes, fresh mozzarella and fragrant basil. (Or serve the topping on the side for pickier eaters, so everyone at your dinner table is happy!) ~
This Recipe Is: • Gluten Free (see note) •
If you’re a busy cook like me, then you’ve no doubt already fallen in love with sheet pan dinners.
They’re super easy! And this YUMMY Italian baked chicken is no exception.
Your main course (you know … the chicken) roasts in the oven right along with the veggie side dish.
Minimal fuss, and minimal pots and pans to clean up later.
Such a joy, for so many reasons!
Why You’ll Love This Particular Sheet Pan Recipe
This sheet pan dinner is extra-special, with layer upon layer of terrific Italian flavors. (But still so very easy, I promise!)
You’ve got:
- Succulently tender chicken breasts, highlighted with melted parmesan cheese …
- Both potatoes and green beans (so everyone can pick and choose from two different vegetables) …
- All seasoned with a blend of Italian herbs and spices.
- And, for the final flourish, a generous drizzle of vibrant caprese topping with tomatoes, chunks of fresh mozzarella, fragrant basil, balsamic vinegar, and a little pop of garlic. (Psssssst … and if not everyone at your dinner table is gonna love the caprese topping, never fear … just serve it on the side. The chicken and vegetables are a slam dunk for picky eaters, and are still really tasty even without the extra layer of caprese goodness!)

Sound too fancy to be easy??
Nope nope nope!
Believe it or not, this little recipe truly is so very simple to make (and so blissfully simple to clean up later, too).
Big, big flavors without a lot of effort. Just the way I like it!
Absolutely perfect for the busy cook who still wants to delight the whole family!
Here at THK, we’ve spent more than a decade simplifying recipes for busy families, so by now you KNOW that’s the name of the game around here.
Ok ok … I hear ya … you can’t wait to make this. Mmmmmmm for sure! Here’s all you have to do …
How to Make Your Sheet Pan Chicken Dinner
Ingredient Prep
Other than a little chopping, there’s really not much prep you need to do. The ingredients are beautifully simple, and don’t need a lot of extra work to shine.
The only additional little step you might choose to take is to pound your own chicken, rather than purchasing thin-cut chicken breasts at the store.
Ideally, the chicken for this recipe should be an even ½-inch thick. But, when I buy thin-cut breasts at my local grocery store, I’ve found that they’re typically thinner than that … only about ¼-inch thick (and usually not very evenly thick from their centers to their edges).
Now, I don’t want you to worry about this detail. Although I do think ½-inch thick chicken works the very best, I’ve also tested this recipe for you (more than once) with those ¼-inch thick, store-bought breasts.
We can make either work here, and the recipe card gives you bake times for either thickness.
So don’t worry, either way!
But, if you’d like to pound your own chicken so it’s spot-on perfect (which is honestly VERY easy to do), here’s how …
How to Pound Chicken Breasts to an Even ½-Inch Thickness
I use a round meat flattener (similar to this one on Amazon). If you don’t happen to have one, you can also successfully use a rolling pin.
Place your chicken in a heavy-duty plastic bag. Putting it in this type of bag is useful for several reasons:
- For one thing, it helps to contain any potential contamination from the raw chicken.
- And, a clear bag is important, since you want to be able to see the chicken as you work, so it ends up being evenly the correct thickness.
- Lastly, it needs to be a thicker, heavy-duty bag, so that it doesn’t tear as you work.
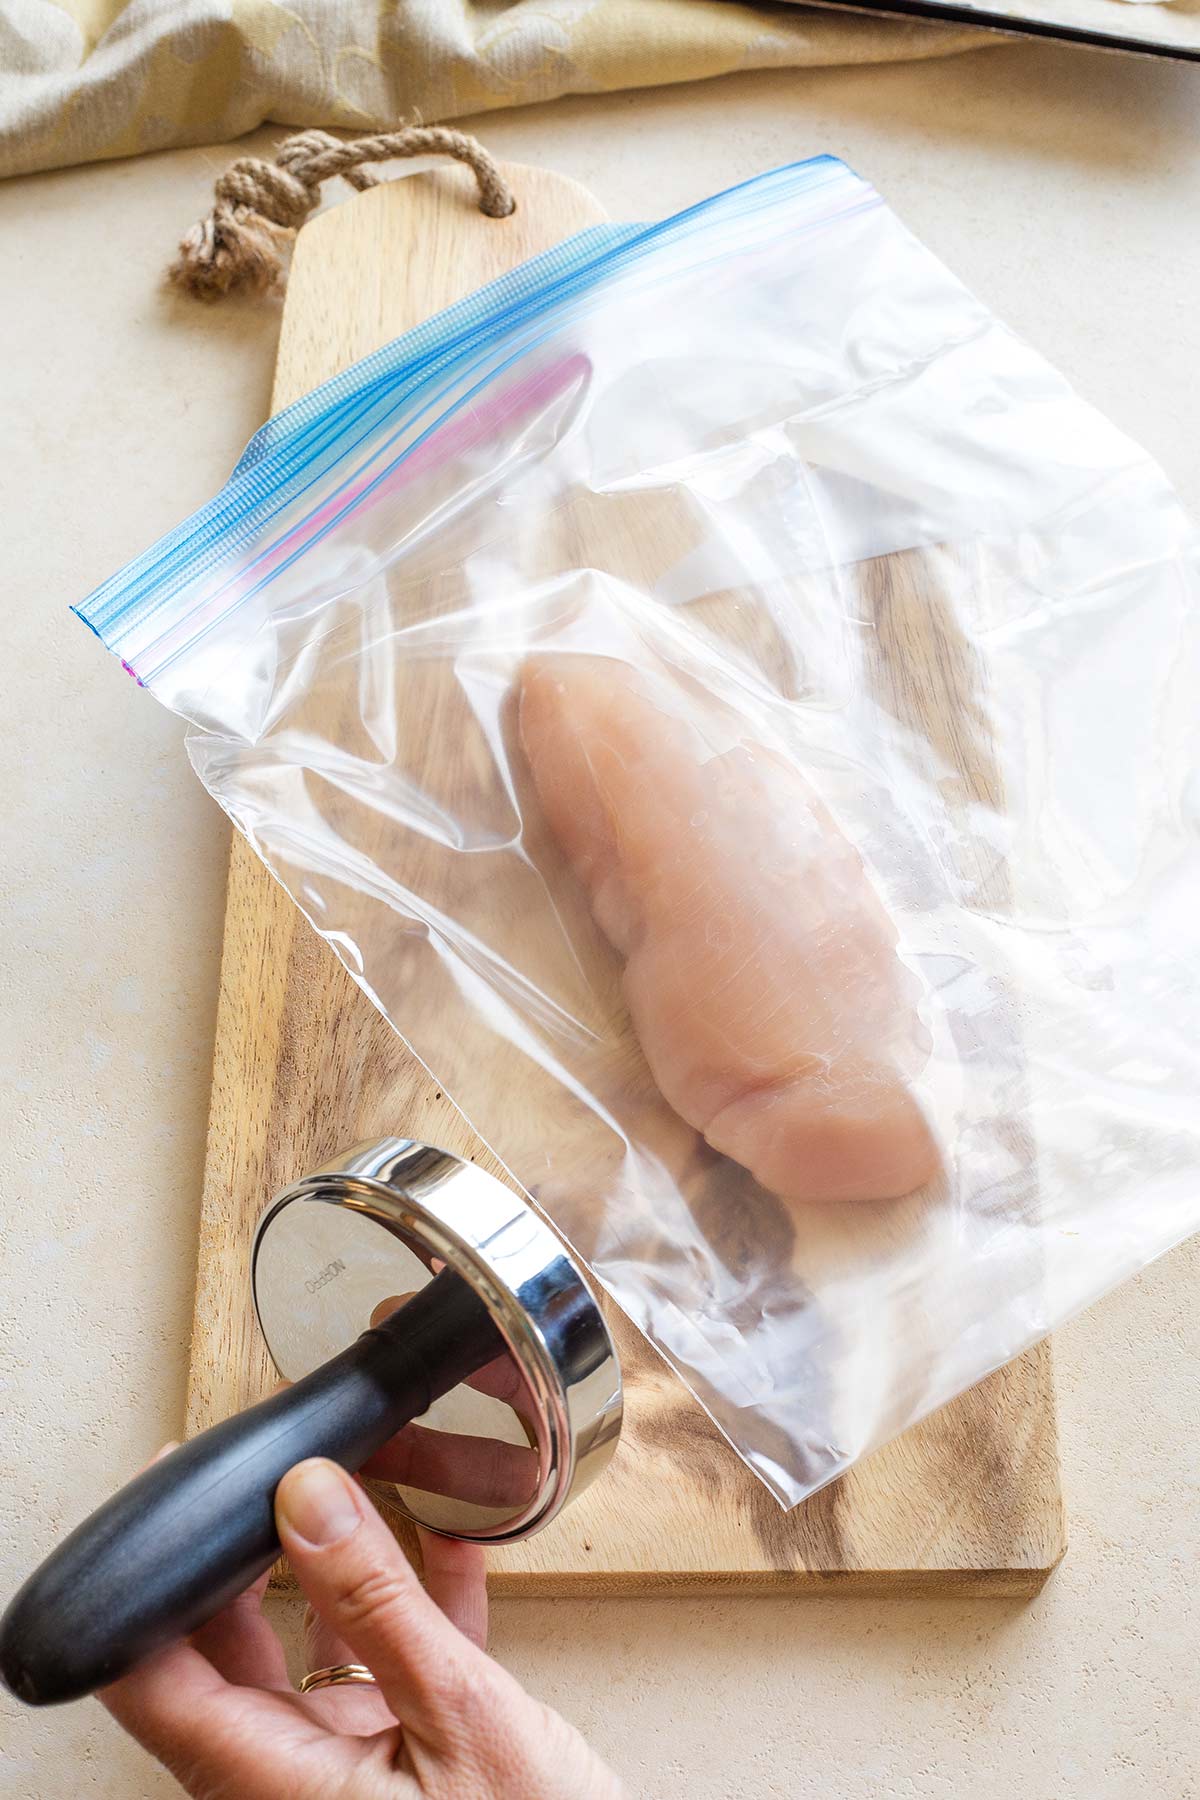
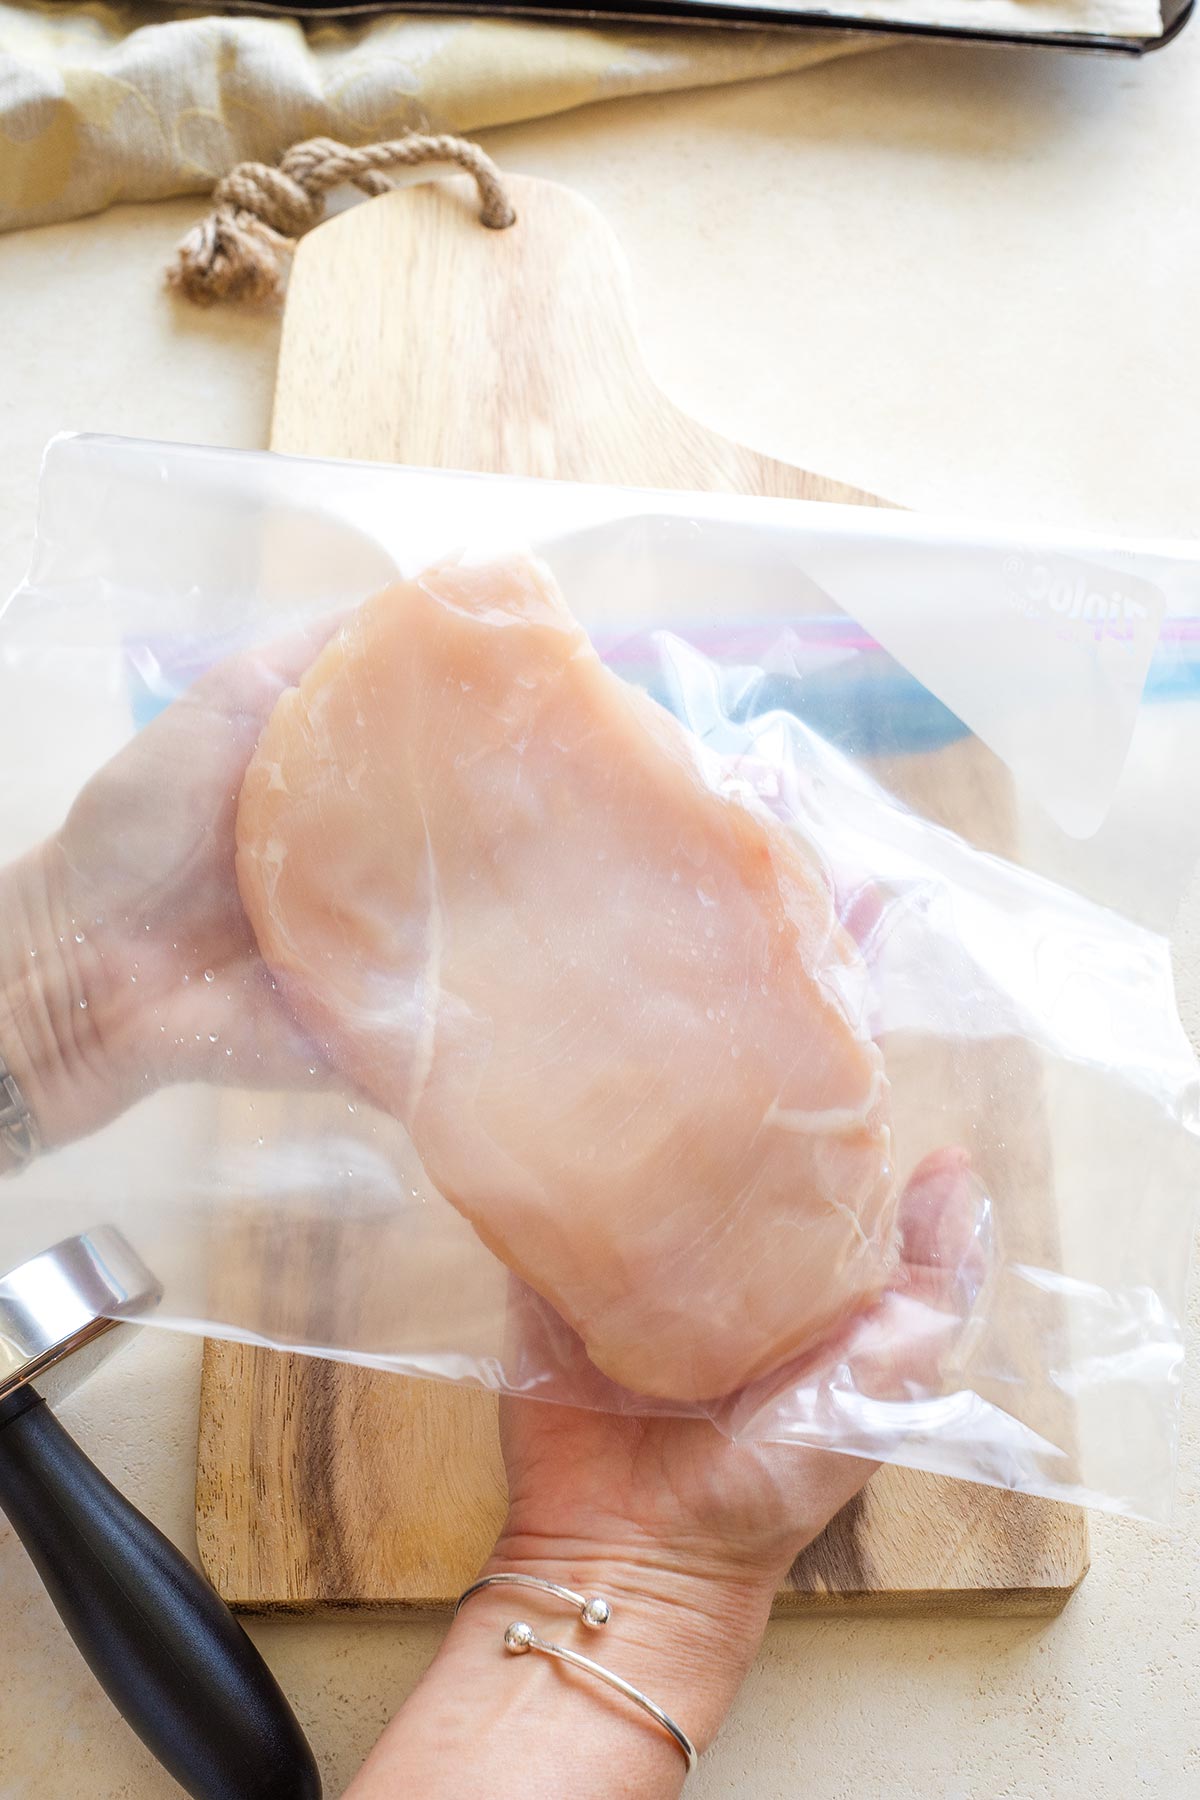
Then, use sideways blows to flatten your chicken outwards from the center. Don’t just pound straight down. Think down … but also OUTWARDS. Kind of a glancing, diagonally downward motion.
But again, if you don’t want to do this yourself (or need to shave a couple minutes off your prep time on a busy night), then you can simply purchase thin-cut breasts at the store, and adjust the baking time as directed in my recipe card below.
Ok! Now that you’ve got everything prepped, let’s pull this recipe together!
Get your oven preheating to 400°F, and let’s get dinner DONE!
Step #1
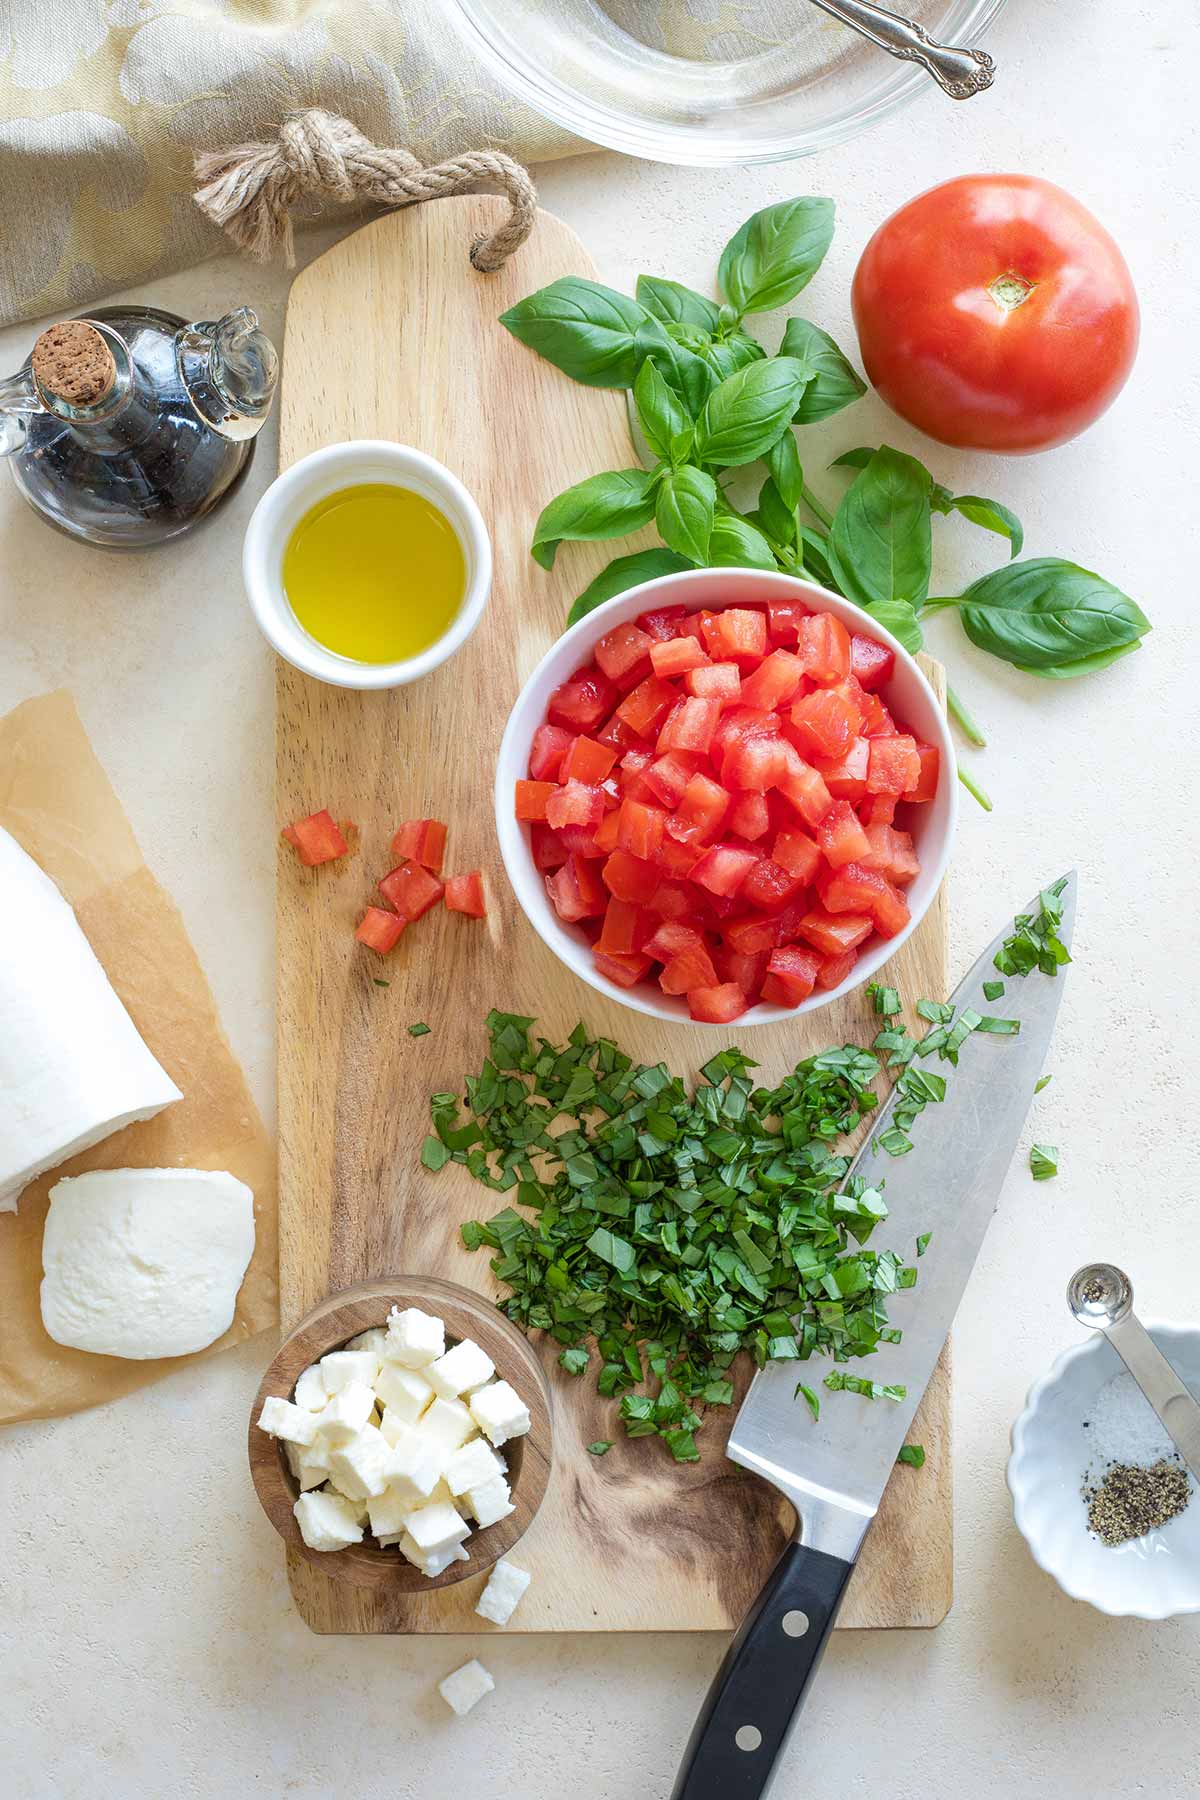
Start by making the scrumptious caprese topping. (Psssst … It’s almost identical to the one I use for our Caprese Grilled Fish – so if you’re a caprese fan, put that recipe on your must-try list, too. Oh! And we’ve also got a great caprese-based appetizer you serve on grilled polenta – check it out for grilling season.)
Caprese is best with really good-quality ingredients, so choose a nice balsamic vinegar, fresh mozzarella (instead of part-skim), and the best tomatoes you can find (see my suggestions in the FAQ box below for making mid-winter tomatoes work).
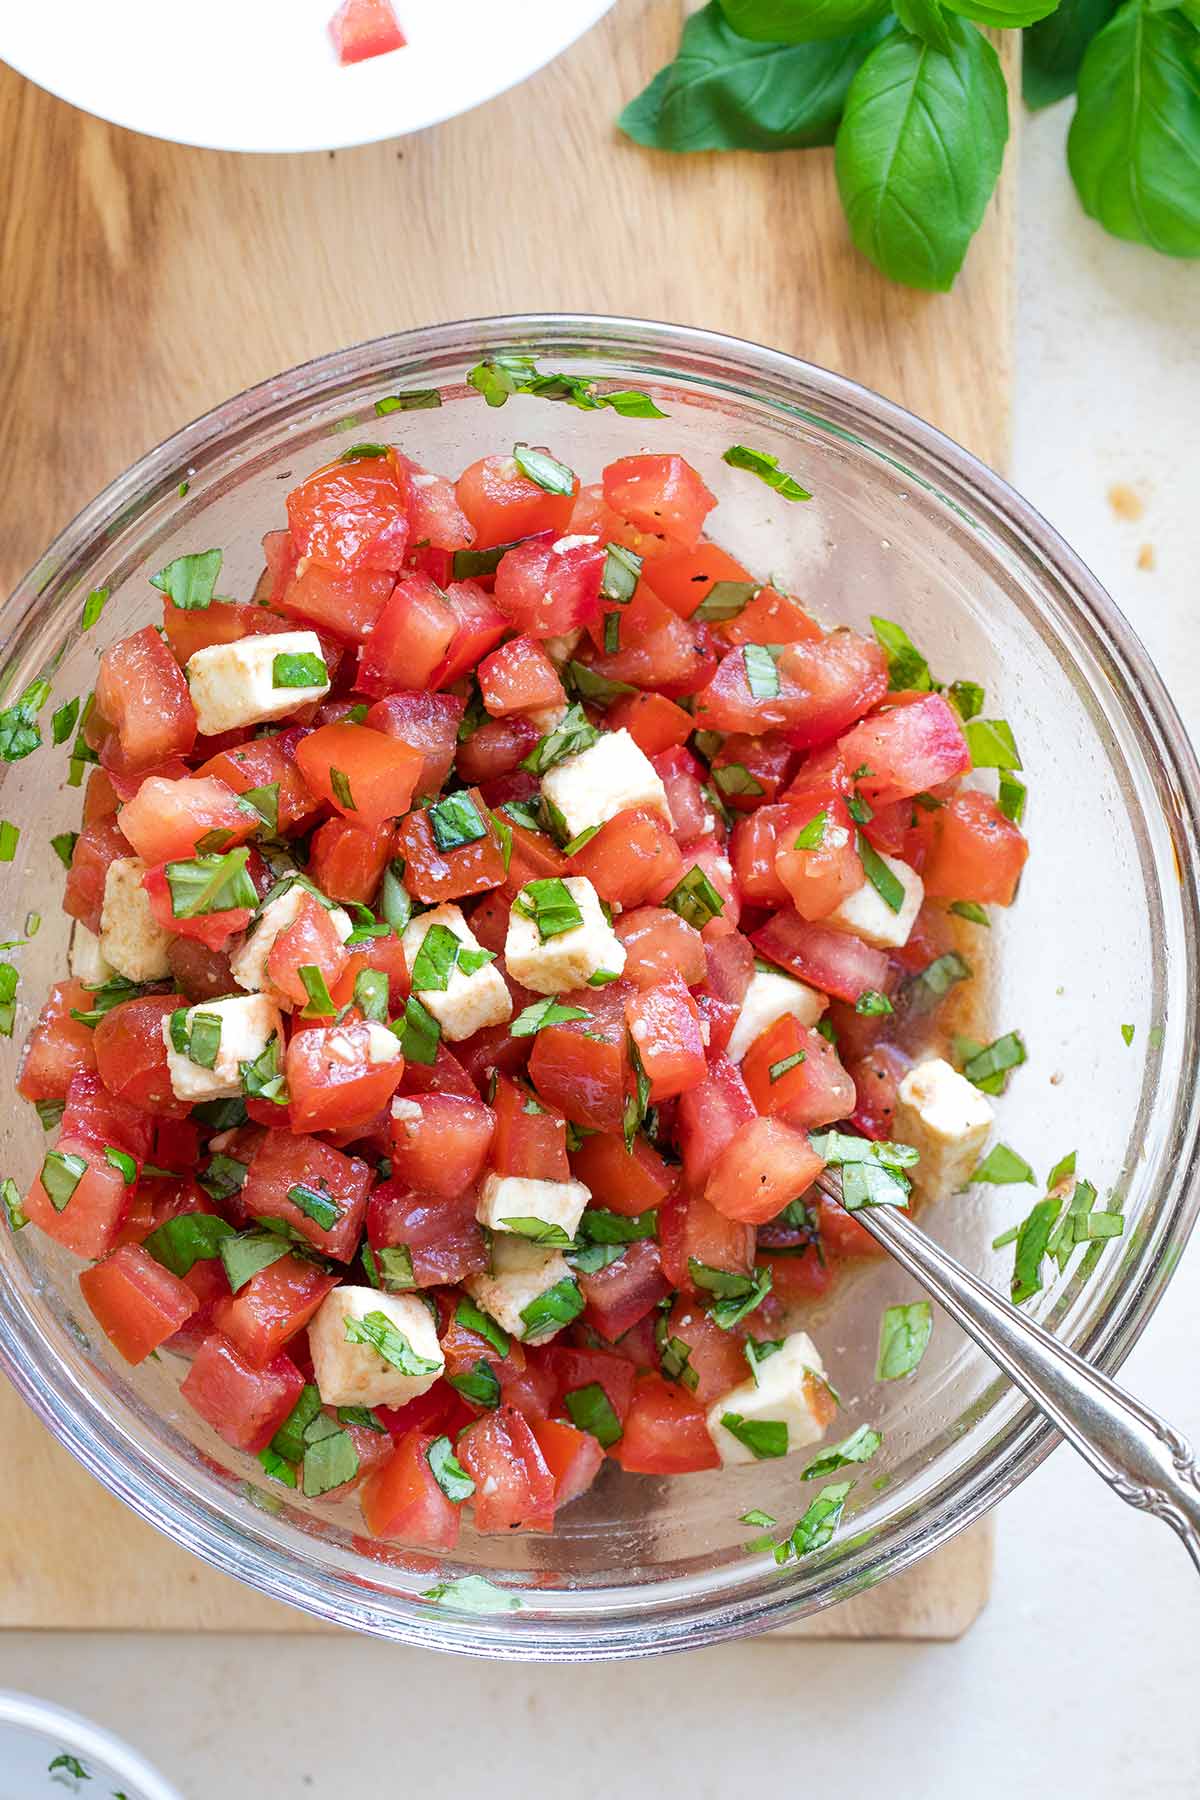
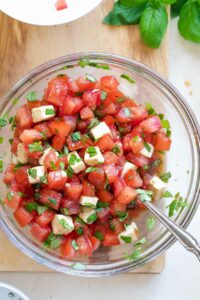
You want to mix up this caprese topping first, so it’ll have a little time to sit and marinate while you bake your chicken and vegetables. That’ll ensure the caprese flavors meld perfectly.
It’s really easy to do – simply toss all the topping ingredients into a bowl and stir them together. Then set the bowl aside while you work on the chicken, potatoes and green beans.
Make It Your Own!
The caprese topping is a snap to tinker with, to fit your family’s tastes or the precise flavors of the produce you’re using. (For instance, are your tomatoes more sweet this time around, or more acidic?)
Feel free to add more garlic, or amp up the basil, or dial back the balsamic – whatever you’d prefer. Just before serving (after the flavors have melded), take a little taste and tweak as needed.
Step #2
Now, I know I’m calling this a “sheet pan” dinner, but technically we’re using two sheet pans here. (Although I like to combine everything onto one sheet pan at the end for a pretty presentation when I take our dinner to the table.)
There’s a good reason for using two.
Depending on a variety of factors – like how thick your chicken is, and how thin or tender your green beans are – the chicken and vegetables will end up needing slightly different bake times (and can vary a little every time you make this recipe).
Using two sheet pans gives you total control, so your chicken ends up succulent and juicy, and your veggies are cooked precisely to your liking.
Plus, just like with my Sheet Pan Shrimp Fajitas, we’ve got SO many veggies here, and I like to spread them out and give them plenty of room to roast properly.
As I’ve said again and again, when roasting vegetables, it’s important to remember that they like their “real estate”! They’ll roast much better if they have enough room, since piling them up will lead to them steaming more than actually roasting.
So, anyway. Two sheet pans.
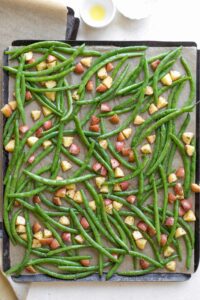
Grab the first sheet pan and line it with some parchment (for speedy cleanup!).
Quick Tip: Don’t Dirty a Bowl!
Toss your potatoes and green beans with some of the olive oil, Italian seasoning, salt, and pepper … right there on the sheet pan.
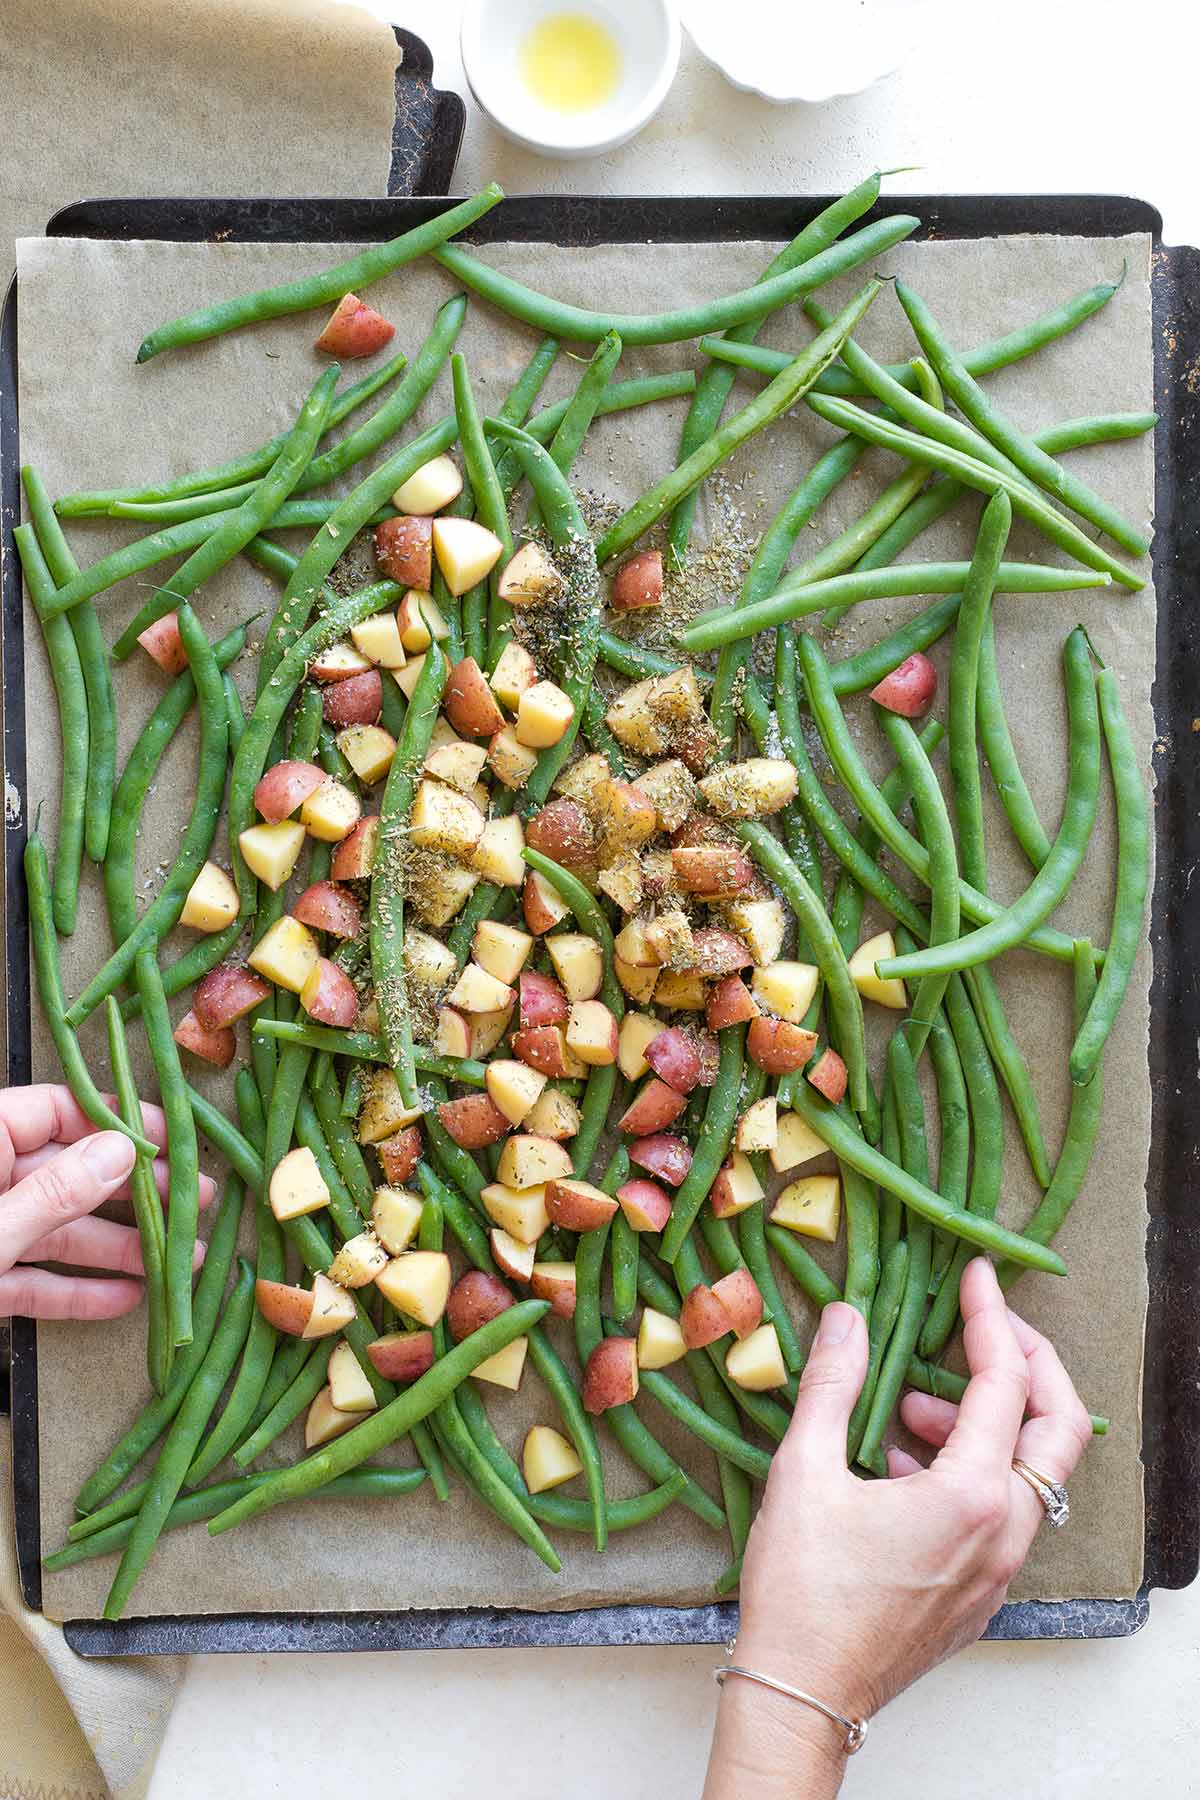
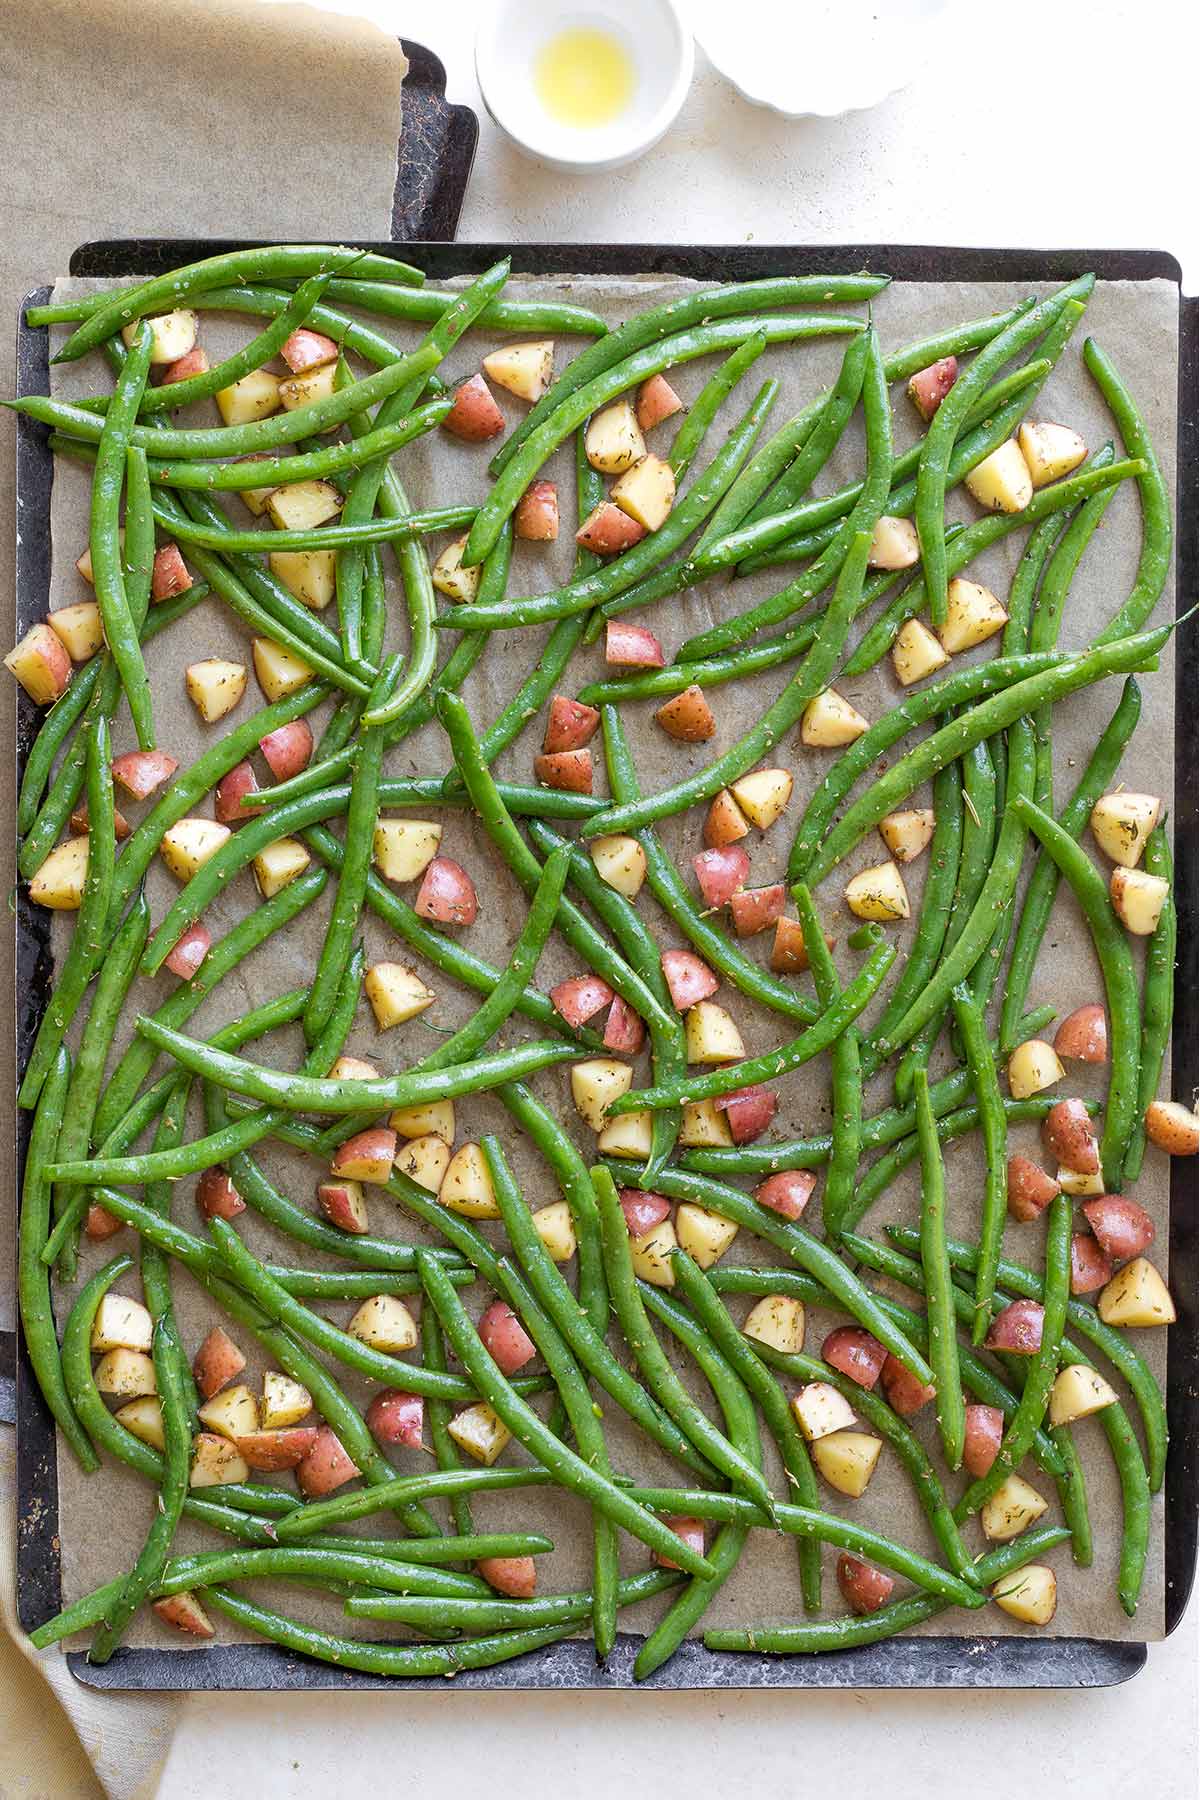
Then, spread them out so they have plenty of space (remember … give ’em their real estate).
Step #3
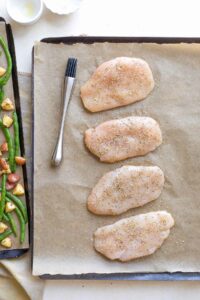
Now, grab a second parchment-covered sheet pan for the chicken.

Drizzle the remaining oil evenly over both sides of your chicken breasts. (I usually use a silicone basting brush to spread the oil around.)
Then sprinkle the rest of the Italian seasoning, salt, and pepper evenly over both sides of the breasts, too.
Step #4
Pop both baking sheets in the oven.
I like to position the sheet pan of vegetables on a rack closer to my oven’s heating element.
Let ’em bake for 12 minutes.

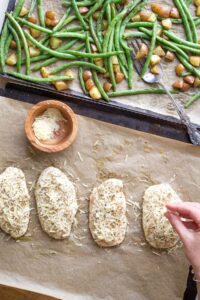
Then, give the vegetables a good stir (spreading them back out when you’re done).
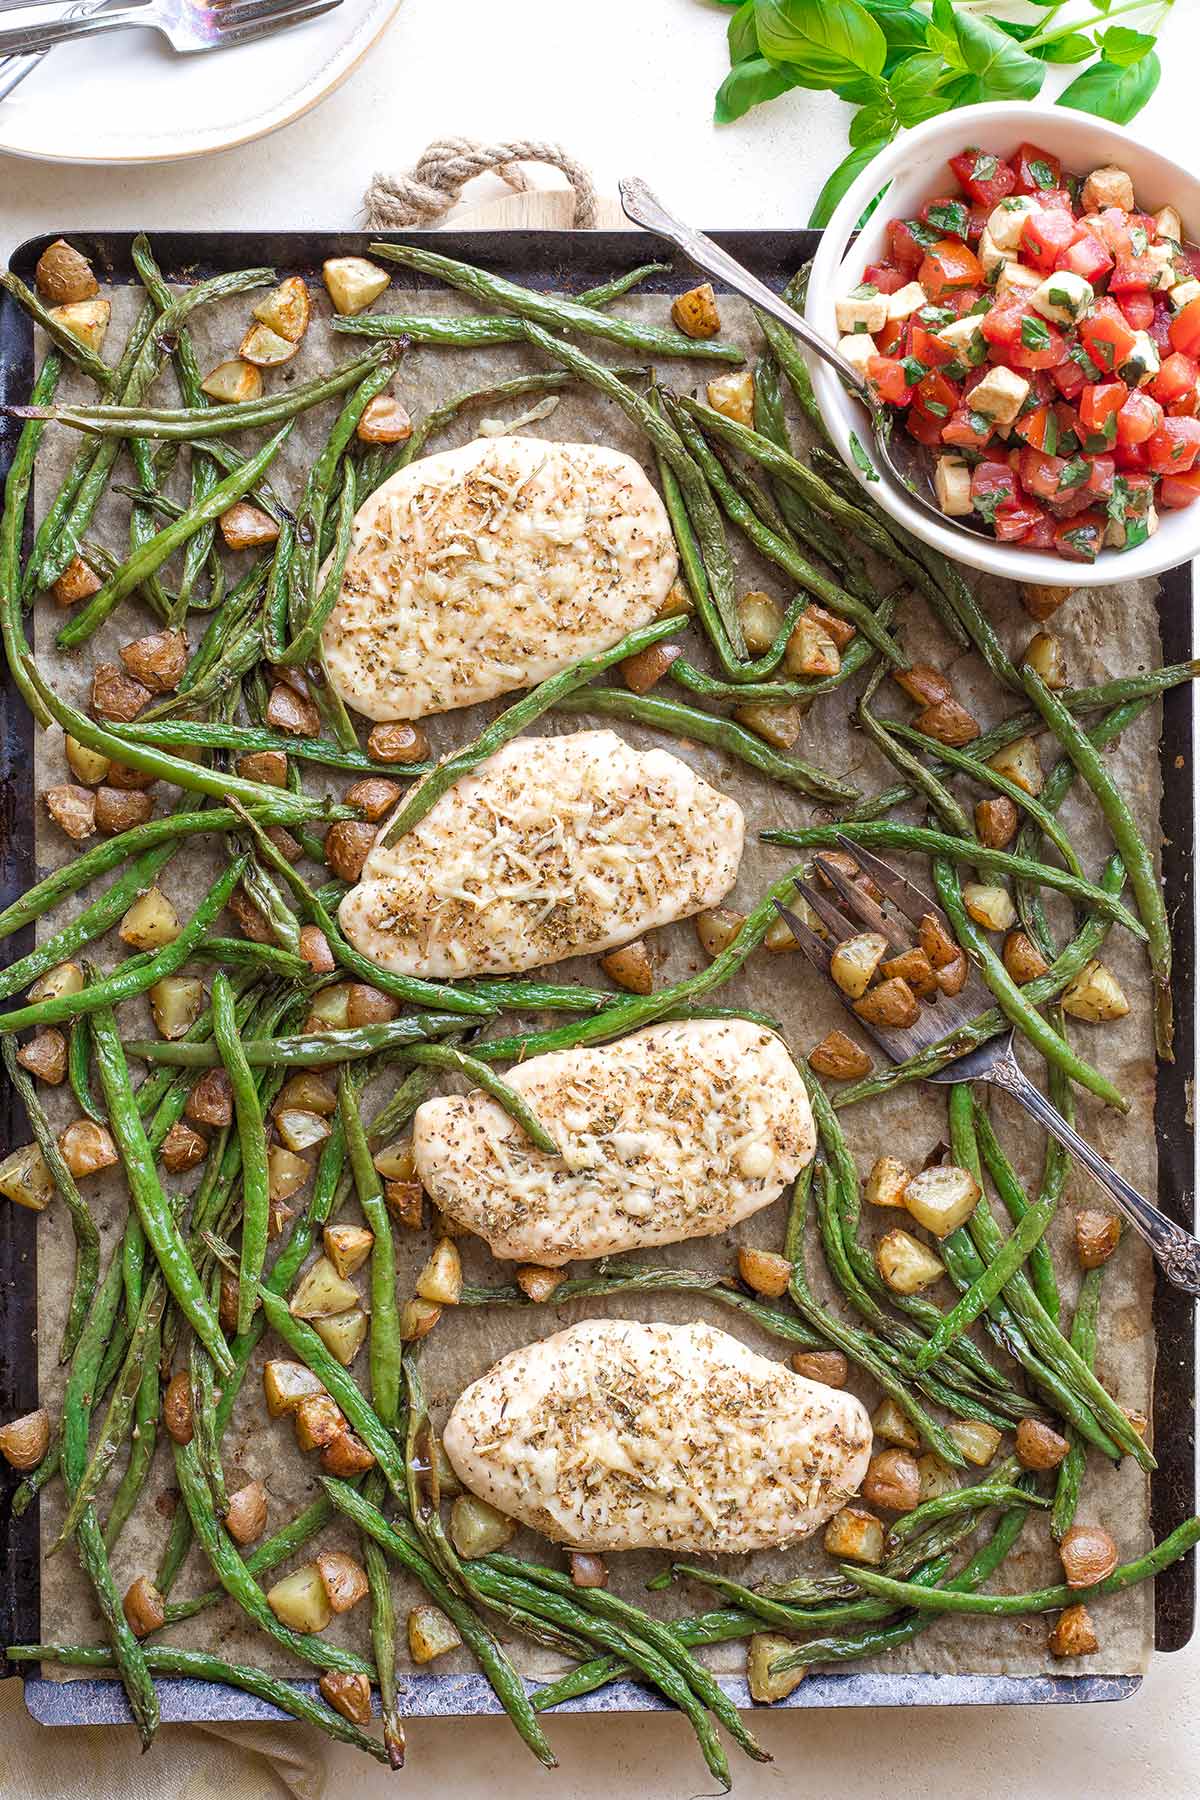
And sprinkle the parmesan cheese on top of your chicken so it can get all nice and melty during the final minutes of baking. (YUM!)
Then put both sheet pans back in the oven for just a few minutes more.
Step #5
AND … here’s where the beauty of using TWO sheet pans really shines.
You’re gonna let your chicken bake for about another 7-10 minutes, until it’s perfectly done … tender and juicy with that savory, melted cheese on top. (For safety, the USDA recommends an internal chicken temp of 165°F.)
Chicken Thickness and Cooking Time
Now we circle back to our discussion of whether you bought thinly sliced chicken breasts (which are typically about ¼-inch thick), or flattened your own chicken to the ideal ½-inch thickness.
Perfectly, evenly ½-inch thick chicken breasts will need about 7-10 minutes in the oven after you sprinkle on the parmesan cheese.
But, I also ran store-bought, thin-cut breasts (¼-inch thick) through a couple rounds of testing for you, too. Those thinner chicken breasts will only need about 6 minutes of baking time here, 7 minutes absolute tops.
Not a huge difference, but you don’t want to overbake and dry out your chicken, of course!

Pull that tantalizing, juicy, cheese-topped chicken from the oven and let it rest while your veggies enjoy a little more baking time.
Depending on how thick and how tender your green beans were, and a few other factors (like how close the baking sheet actually was to the oven’s heating element and how done/firm you like your beans), the vegetables will need somewhere between 3-10 minutes longer to be mmmmmmmm … just right.

Step #6
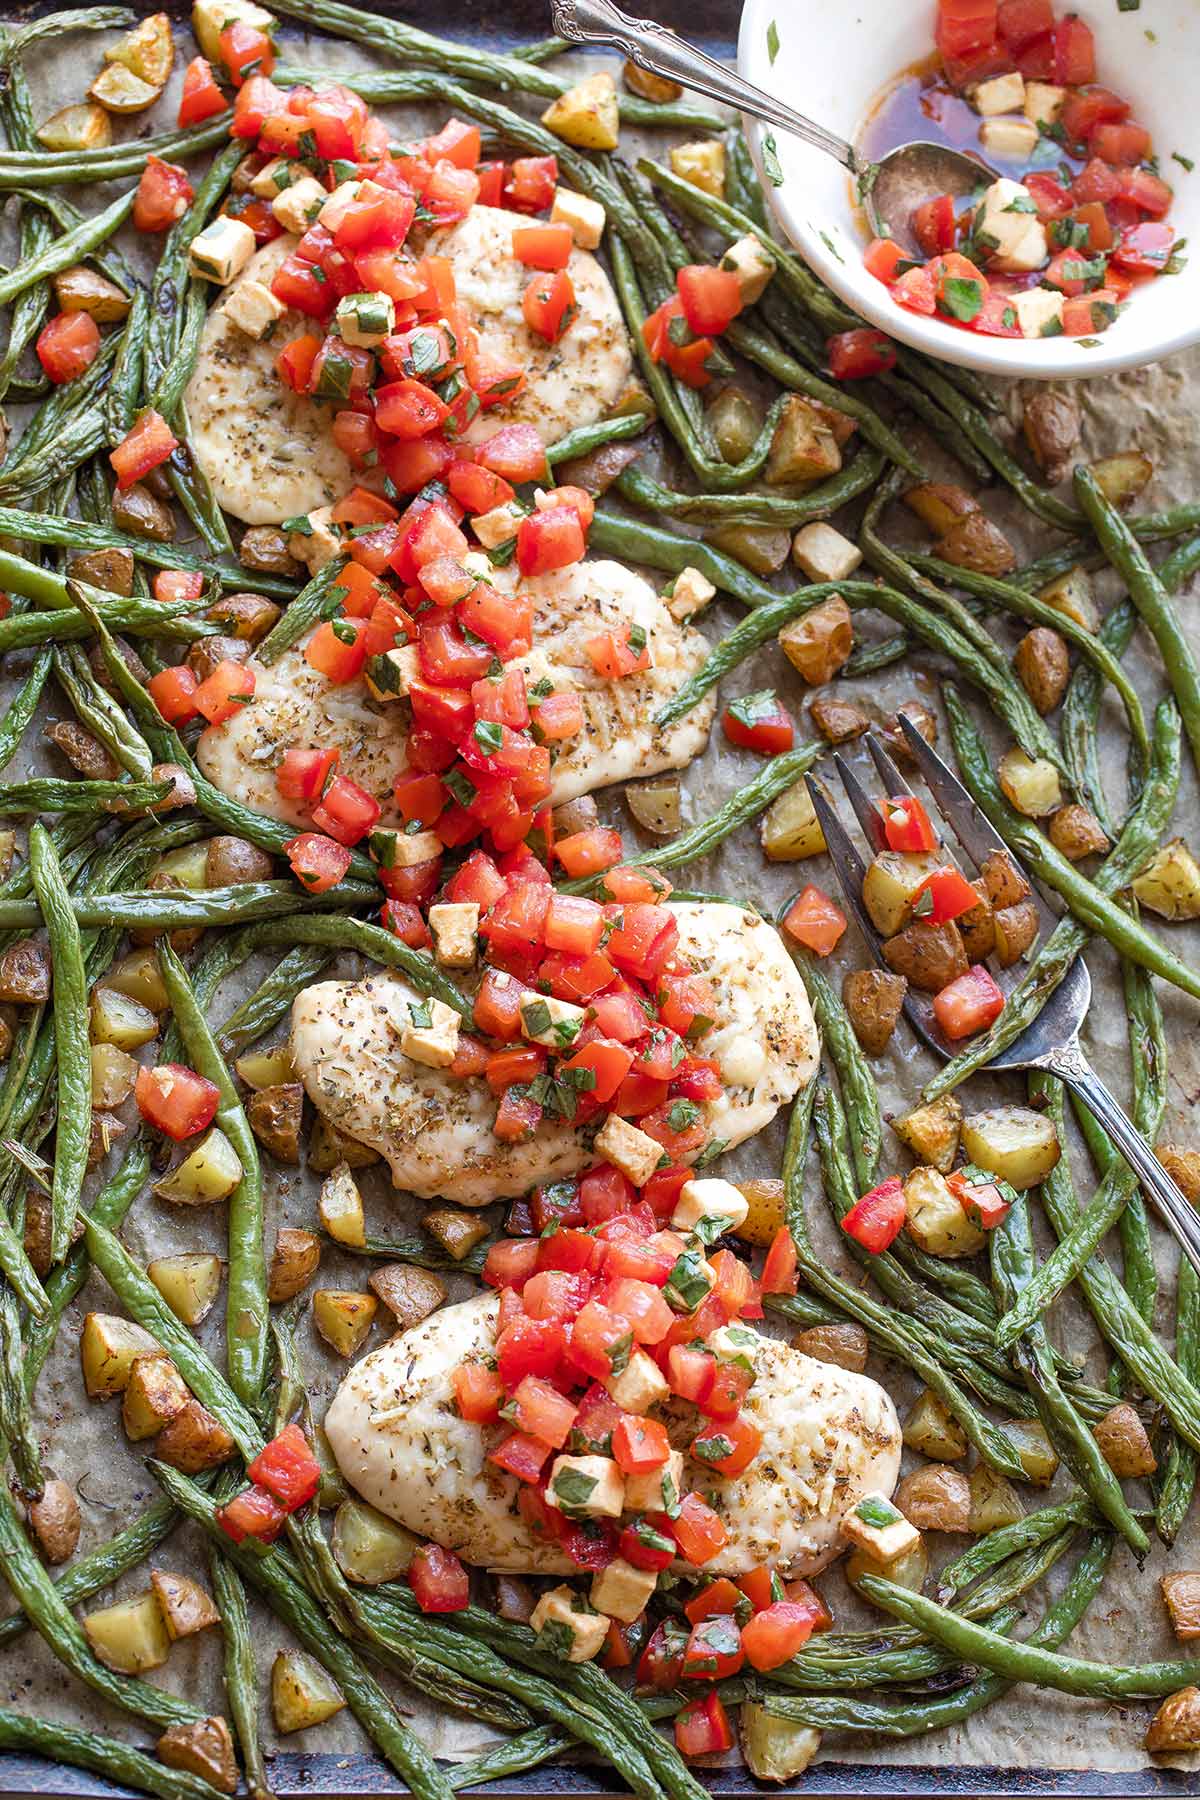
Once everything’s out of the oven, a couple final touches turn this humble, easy sheet pan recipe into a gorgeous, mouth-watering dinner presentation!
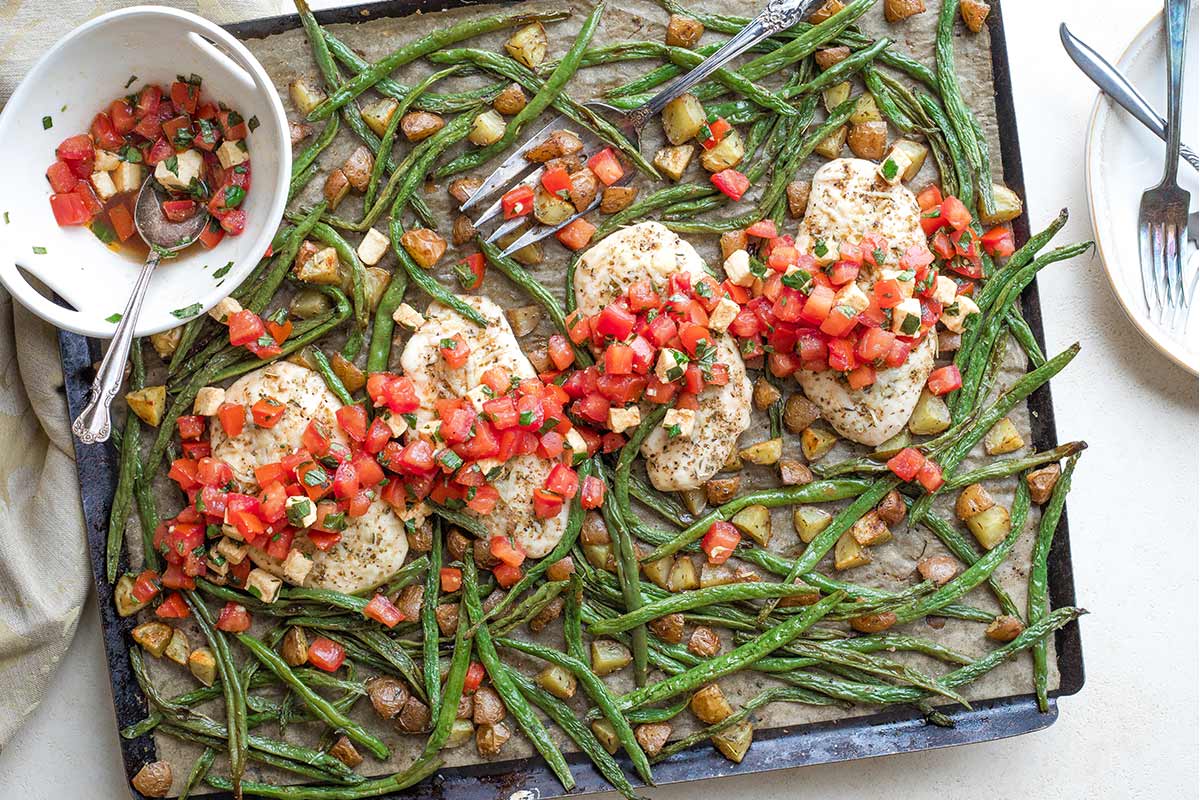
I like to nestle the chicken breasts in amongst the roasted vegetables, so everything’s now on one baking sheet. (Similar to our Sheet Pan Chicken and Potatoes with Sun-Dried Tomatoes.)
Then, I spoon the caprese topping over the chicken …
Unless ……
Tip: Picky Eaters
Got some picky kiddos at your table, who maybe aren’t so excited about the tomatoes and balsamic vinegar vibes in the caprese topping?
No worries!
Instead, you can pass the caprese topping ’round the table, so picky eaters can start by sampling a little on the side, or even choose to skip the topping altogether.
With the melty cheese on top of the chicken, and the enticing Italian vibes, the chicken and vegetables are delicious “plain” on their own, too.
Making It Feel Fancier
Honestly, for weeknight family dinners, I truly do just serve this up, straight off one of the sheet pans.
Because … you know … I don’t want to wash more dishes later!

But you could, of course, make it feel a little fancy-pants by transferring everything to a pretty serving platter. Great for impressing company or serving this dinner on an extra-special occasion.
FAQs At-a-Glance
I don’t recommend it for this recipe. Fresh mozzarella has that pleasing, soft texture that is one of the beloved hallmarks of caprese recipes. I think it’s worth using the real thing here.
I honestly can’t recommend that, either. The fresh basil is key to getting a really vibrant, summer-fresh flavor that truly feels like a caprese recipe. Dried basil doesn’t even come close.
Without a doubt, really great tomatoes will be much better in this recipe. But, I’ve made this baked dinner throughout the year (actually, most often when tomatoes aren’t at their peak). And I feel like there are enough other big flavors going on, so that you can sneak by with winter tomatoes, as long as they’re halfway decent. When regular tomatoes aren’t looking great, though, you might look to substitute an equivalent amount of Roma (plum) tomatoes, or even little grape or cherry tomatoes, which tend to be more reliably flavorful all year ’round in grocery stores these days. Just remember to remove the seeds, so your caprese topping has the best texture.
You’ll see on the recipe card below that I call for a salt-free Italian seasoning blend. Most brands don’t include salt in their formulations. But, if the one you’ve got in your pantry happens to include salt, then decrease the amount of salt called for in the recipe accordingly.
Sheet pan supper lovers … this will be your new heartthrob.
And if you haven’t fallen in love with the whole sheet pan dinner craze yet, well, I guess today’s your lucky day!

A delicious meal with layer upon layer of Italian flavors. Yet with all the super-easy prep, cooking and cleanup advantages that make us L-O-V-E sheet pan dinners.
It’s a family-pleaser, for sure. (And a busy-cook-pleaser, too!)
~ by Shelley
Love the Recipe? • Were My Tips Helpful?
__________
Please leave a 5-star rating by clicking on the stars in the recipe card below. I truly appreciate all your wonderful feedback!
Sheet Pan Chicken and Vegetables (with Caprese Topping)
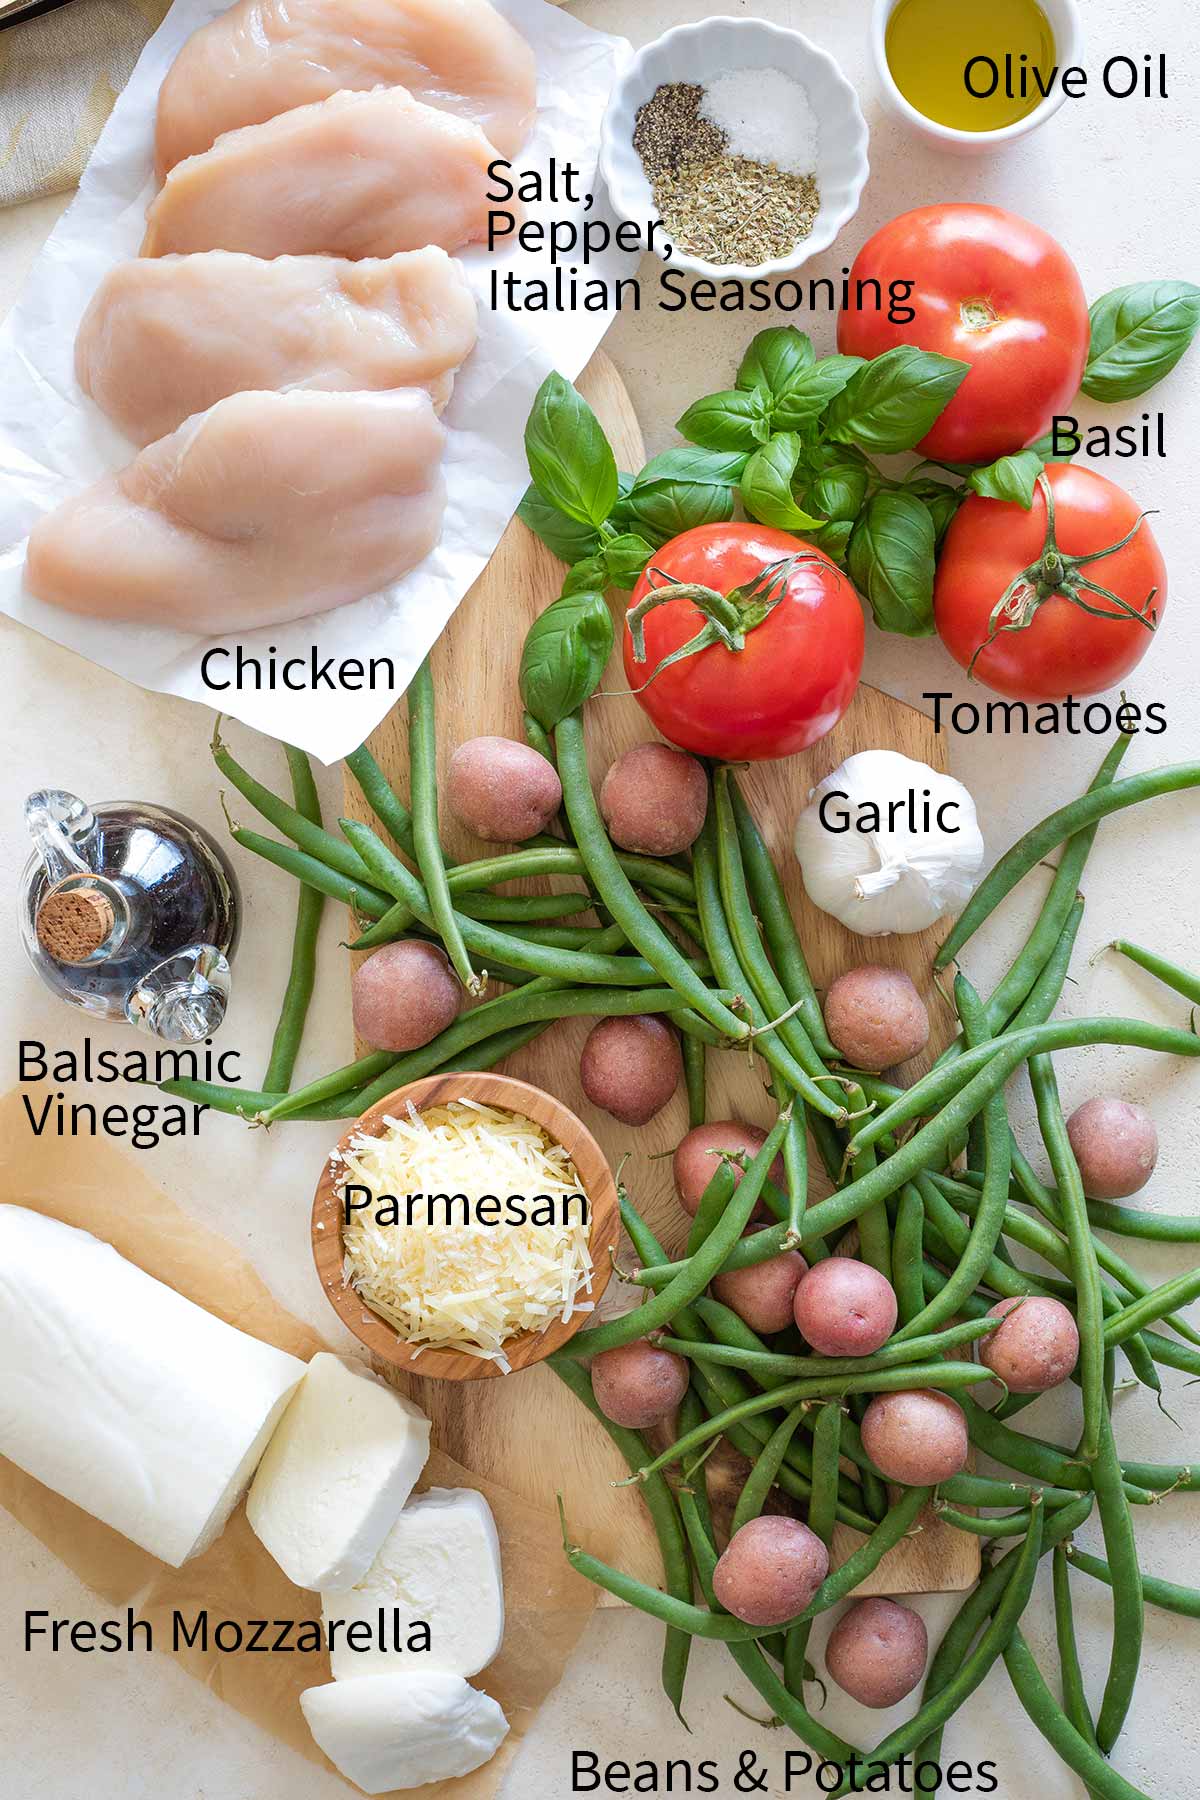
Ingredients
Caprese Topping
- 1½ cups seeded, diced tomatoes (about 2-3 medium tomatoes)
- 2 ounces cubed fresh mozzarella cheese (about a heaping ⅓ cup)
- ¼ cup finely chopped fresh basil
- 1½ tablespoons balsamic vinegar
- 1 tablespoon extra virgin olive oil
- ¼ teaspoon minced garlic
- ¼ teaspoon kosher salt
- ⅛ teaspoon black pepper
Chicken and Vegetables
- 1 pound green beans, trimmed and patted dry
- ½ pound red potatoes, cut into ½-inch pieces
- 3 teaspoons extra virgin olive oil, divided
- 4 teaspoons Italian seasoning (salt free blend), divided
- 1 teaspoon kosher salt, divided
- ¼ teaspoon black pepper, divided
- 1¼ pounds (½-inch thick) boneless, skinless chicken breasts (see note on flattening chicken vs. buying already-flattened, thin-cut breasts)
- 2 tablespoons shredded parmesan cheese
Instructions
For the Caprese Topping:
- In a medium bowl, combine tomatoes, mozzarella, basil, vinegar, 1 tablespoon olive oil, garlic, ¼ teaspoon salt, and ⅛ teaspoon black pepper. Set aside to let the flavors meld while you prepare the chicken and vegetables. (See note about tweaking the flavors to taste.)

For the Chicken and Vegetables:
- Preheat oven to 400 °F.
- On one parchment-lined sheet pan, toss green beans, potatoes, 2½ teaspoons oil, 2 teaspoons Italian seasoning, ½ teaspoon salt, and ⅛ teaspoon black pepper. Then, spread the vegetables out so they aren't piled on top of each other.
- On a second parchment-lined sheet pan, drizzle the remaining ½ teaspoon oil evenly over both sides of the chicken breasts (spreading with a pastry brush for even coverage if needed). Then sprinkle the remaining 2 teaspoons Italian seasoning, ½ teaspoon salt, and ⅛ teaspoon black pepper evenly over both sides of the breasts.
- Put both sheet pans in the oven for 12 minutes, with the vegetables nearer the heating element of your oven. After 12 minutes, stir the vegetables and sprinkle parmesan cheese on the chicken. Return both sheet pans to the oven.
- Continue baking for about 7-10 minutes more, until the chicken is done (see note). Remove the chicken from the oven, and allow it to rest while you continue cooking the vegetables about 3-10 minutes longer, until tender (this can vary depending on how thin and fresh your green beans are and how done you prefer them).
- Combine chicken and vegetables onto one sheet pan for serving, nestling chicken into the center of the veggies. Spoon Caprese Topping over chicken before serving, or pass it at the table.

Notes
Nutrition
* Nutrition information should be considered an estimate only, and may vary depending on your choice of ingredients or preparation. No guarantees are made regarding allergies or dietary needs. Always consult a physician or dietician for specific advice and questions.


